
This figure was made to accompany the 1:32 Tamiya F-4D Phantom II model that I made and is the subject of a separate post on here.
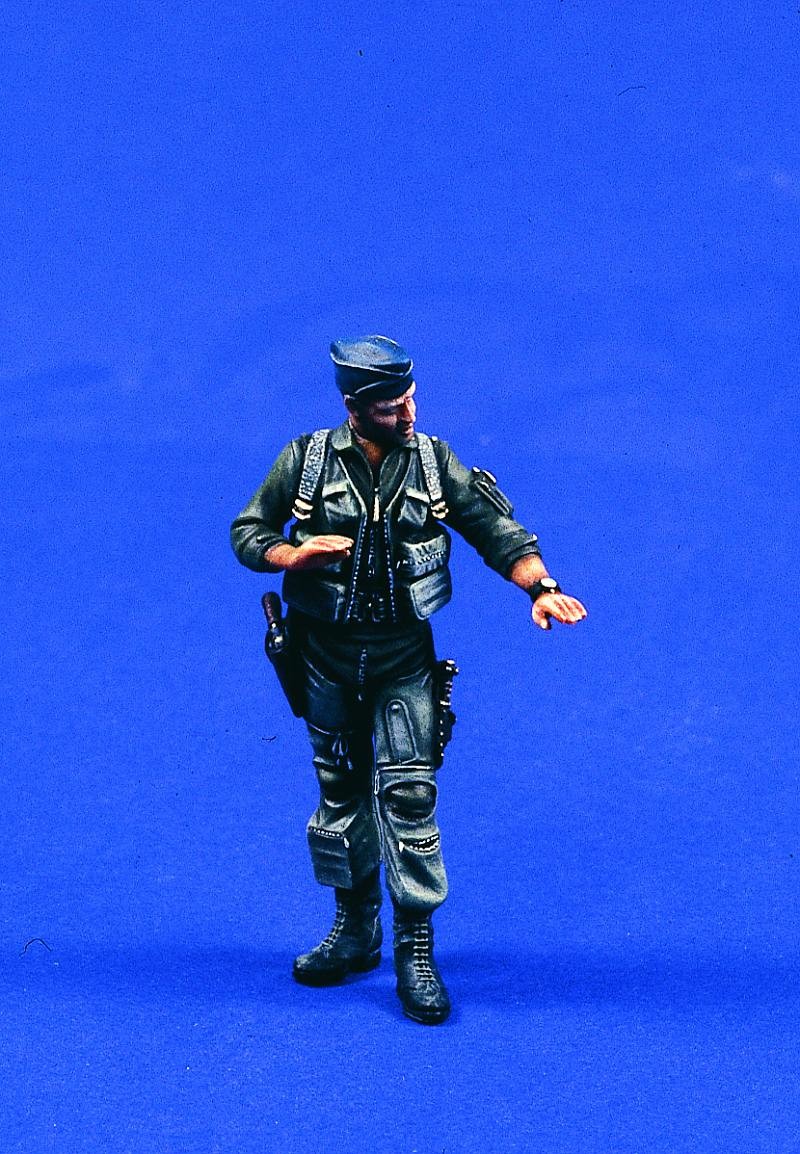
The figure came from Verlinden in the US and isn’t actually the one I ordered. The one I was expecting looked like this one with the pilot demonstrating some aerial manoeuvre in the time-honoured fashion.
Instead the chap I received was posed writing something down and I’ve never actually seen him for sale anywhere.
I wasn’t upset by the substitution though. In fact I think it was more apt than the one I ordered. The pilot demonstrating a manoeuvre really needs a second figure to be talking to. I dislike painting figures actually, so I only wanted one to support the model. They do add interest and personalise it. People’s eyes are drawn to them and the main subject has a bit of a story behind it. The aircraft becomes ‘his’ aircraft. So having just one who appears engrossed in a bit mission prep or planning fitted the bill nicely.
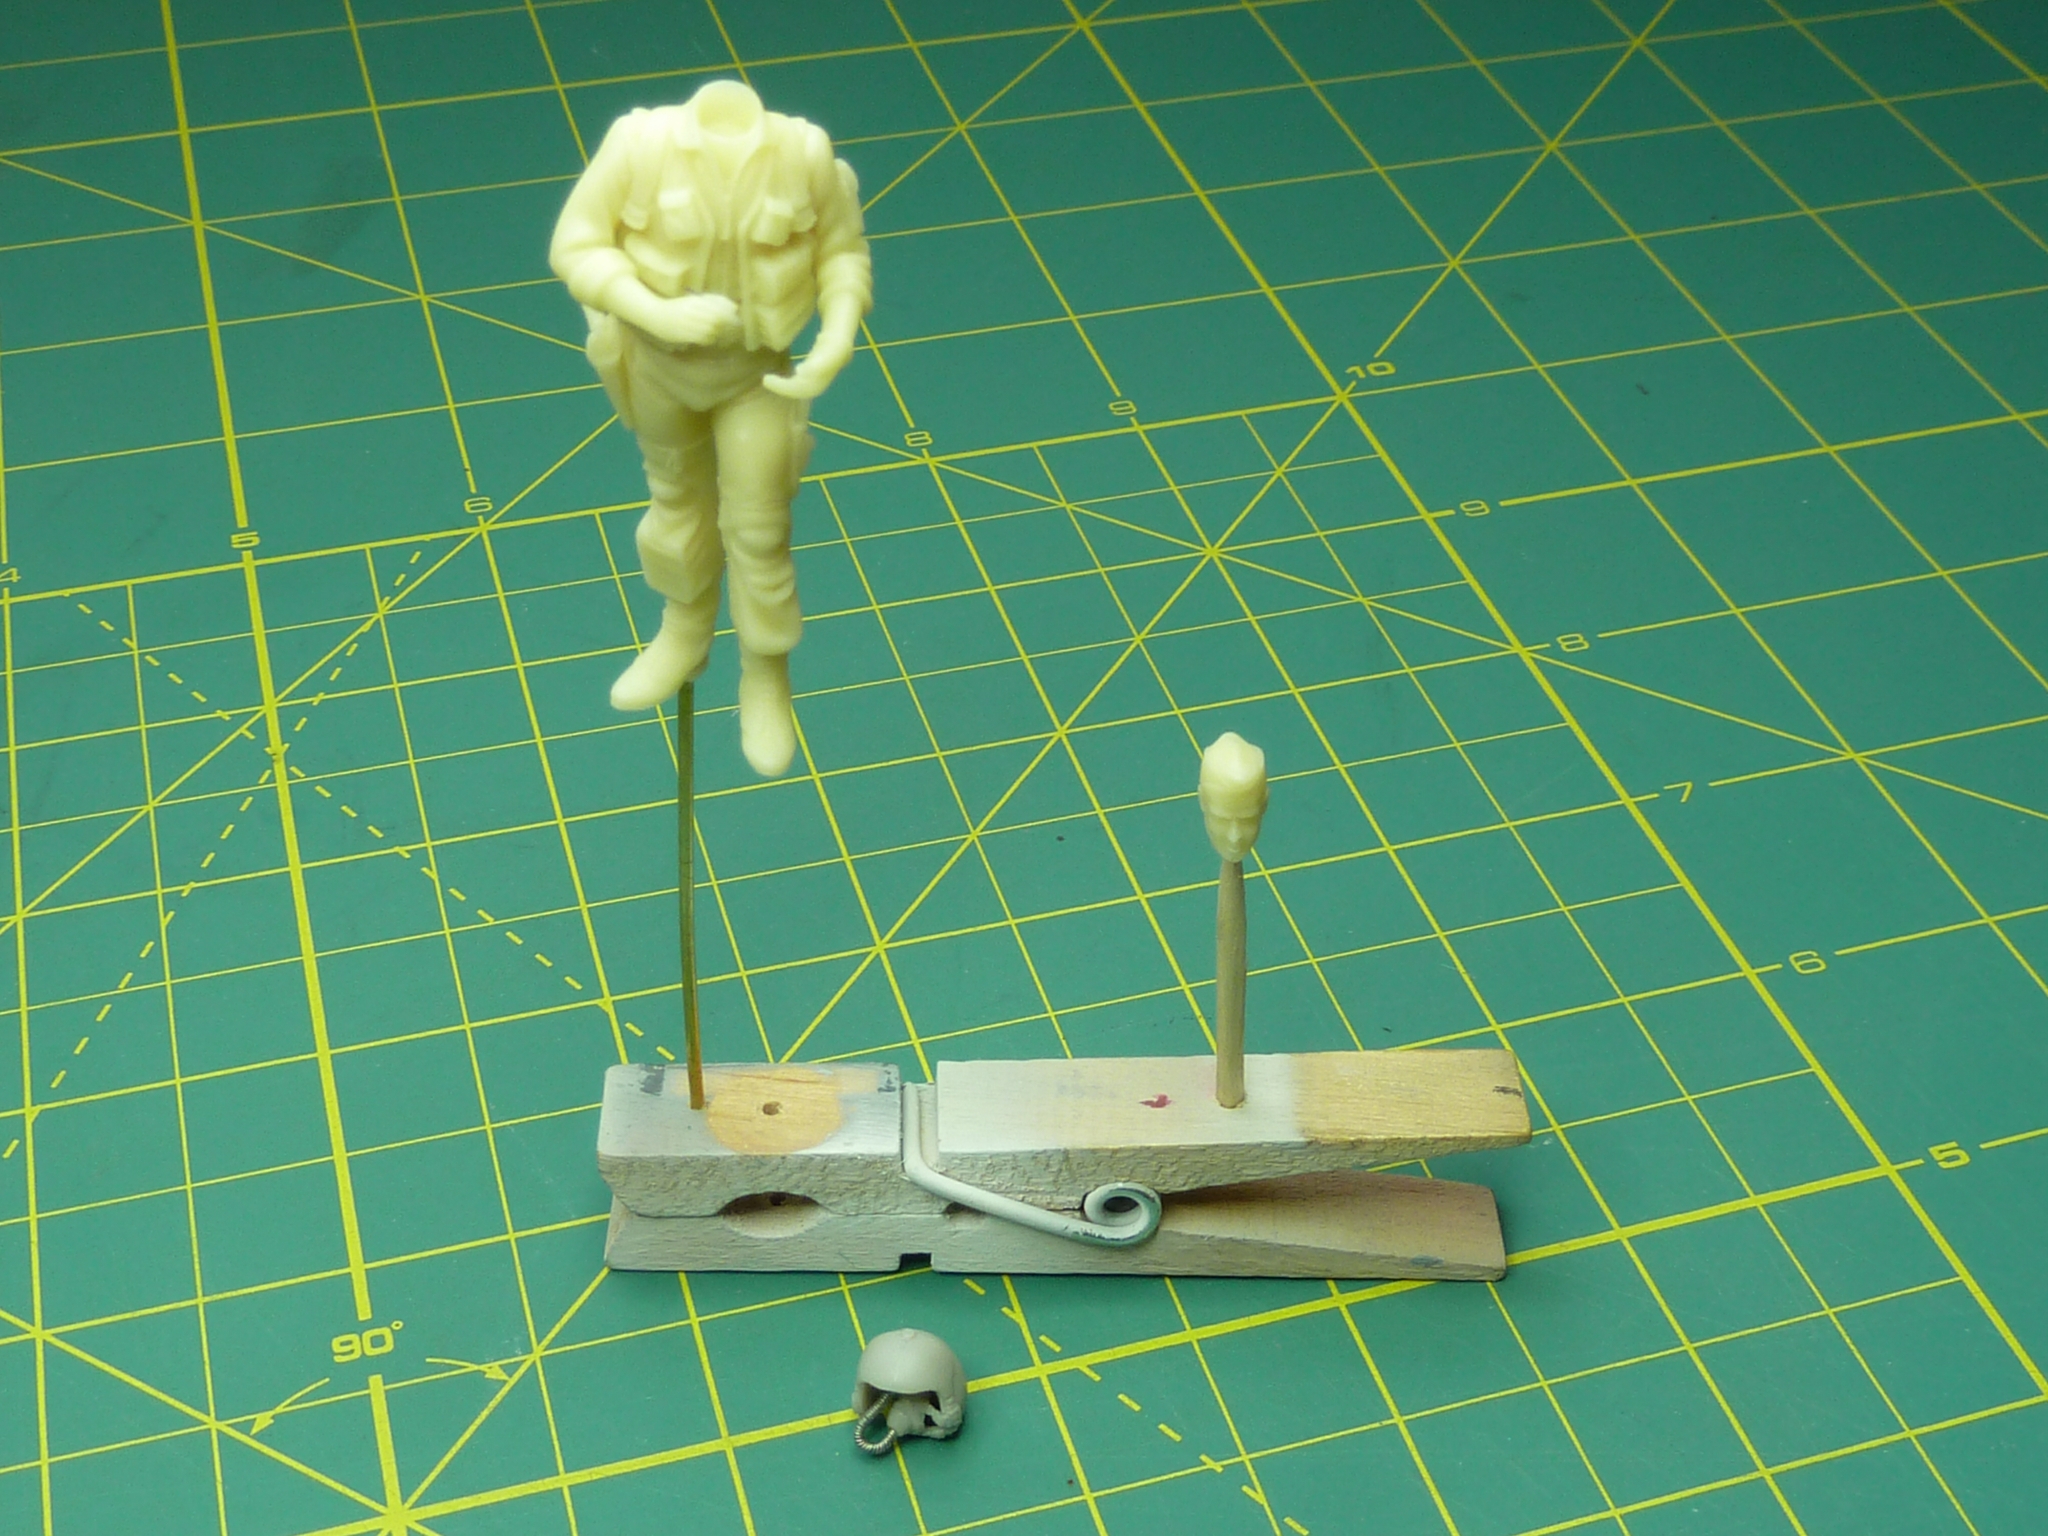
What you actually get for your money is the basic torso, head, arms and hands, legs, pistol and separate boots (of which more later). To this I added a helmet taken from the original model. This has two identical seated crew members included. I didn’t want to use them as I wanted to maximise the visibility and detail in the cockpit.
To use the helmet I had to cut the oxygen mask off the poor guy’s face and then hollow the shell out. Then I reattached the face mask and added a suitably curled up oxygen hose.
The hose is just a wire bent to shape with very thin fully annealed copper wire wrapped around it. The whole assembly then had a small amount of very thin superglue rubbed over it to hold it together and fill in the base of the troughs in the windings. Voilà c’est un ‘ose.

The figure itself is a resin one. There are strong smells of formaldehyde when you work it so I assume it is some sort of phenolic job. Whatever, there are continual warnings about breathing in the dust, so a face mask is needed when you are generating it.
The first step is to assemble the model, excluding the head. This means that all of the joins can be filled and sanded smooth so that they are invisible later. It is then given a quick airbrushing with grey primer. This shows up any remaining imperfections and provides a key for the main colours.
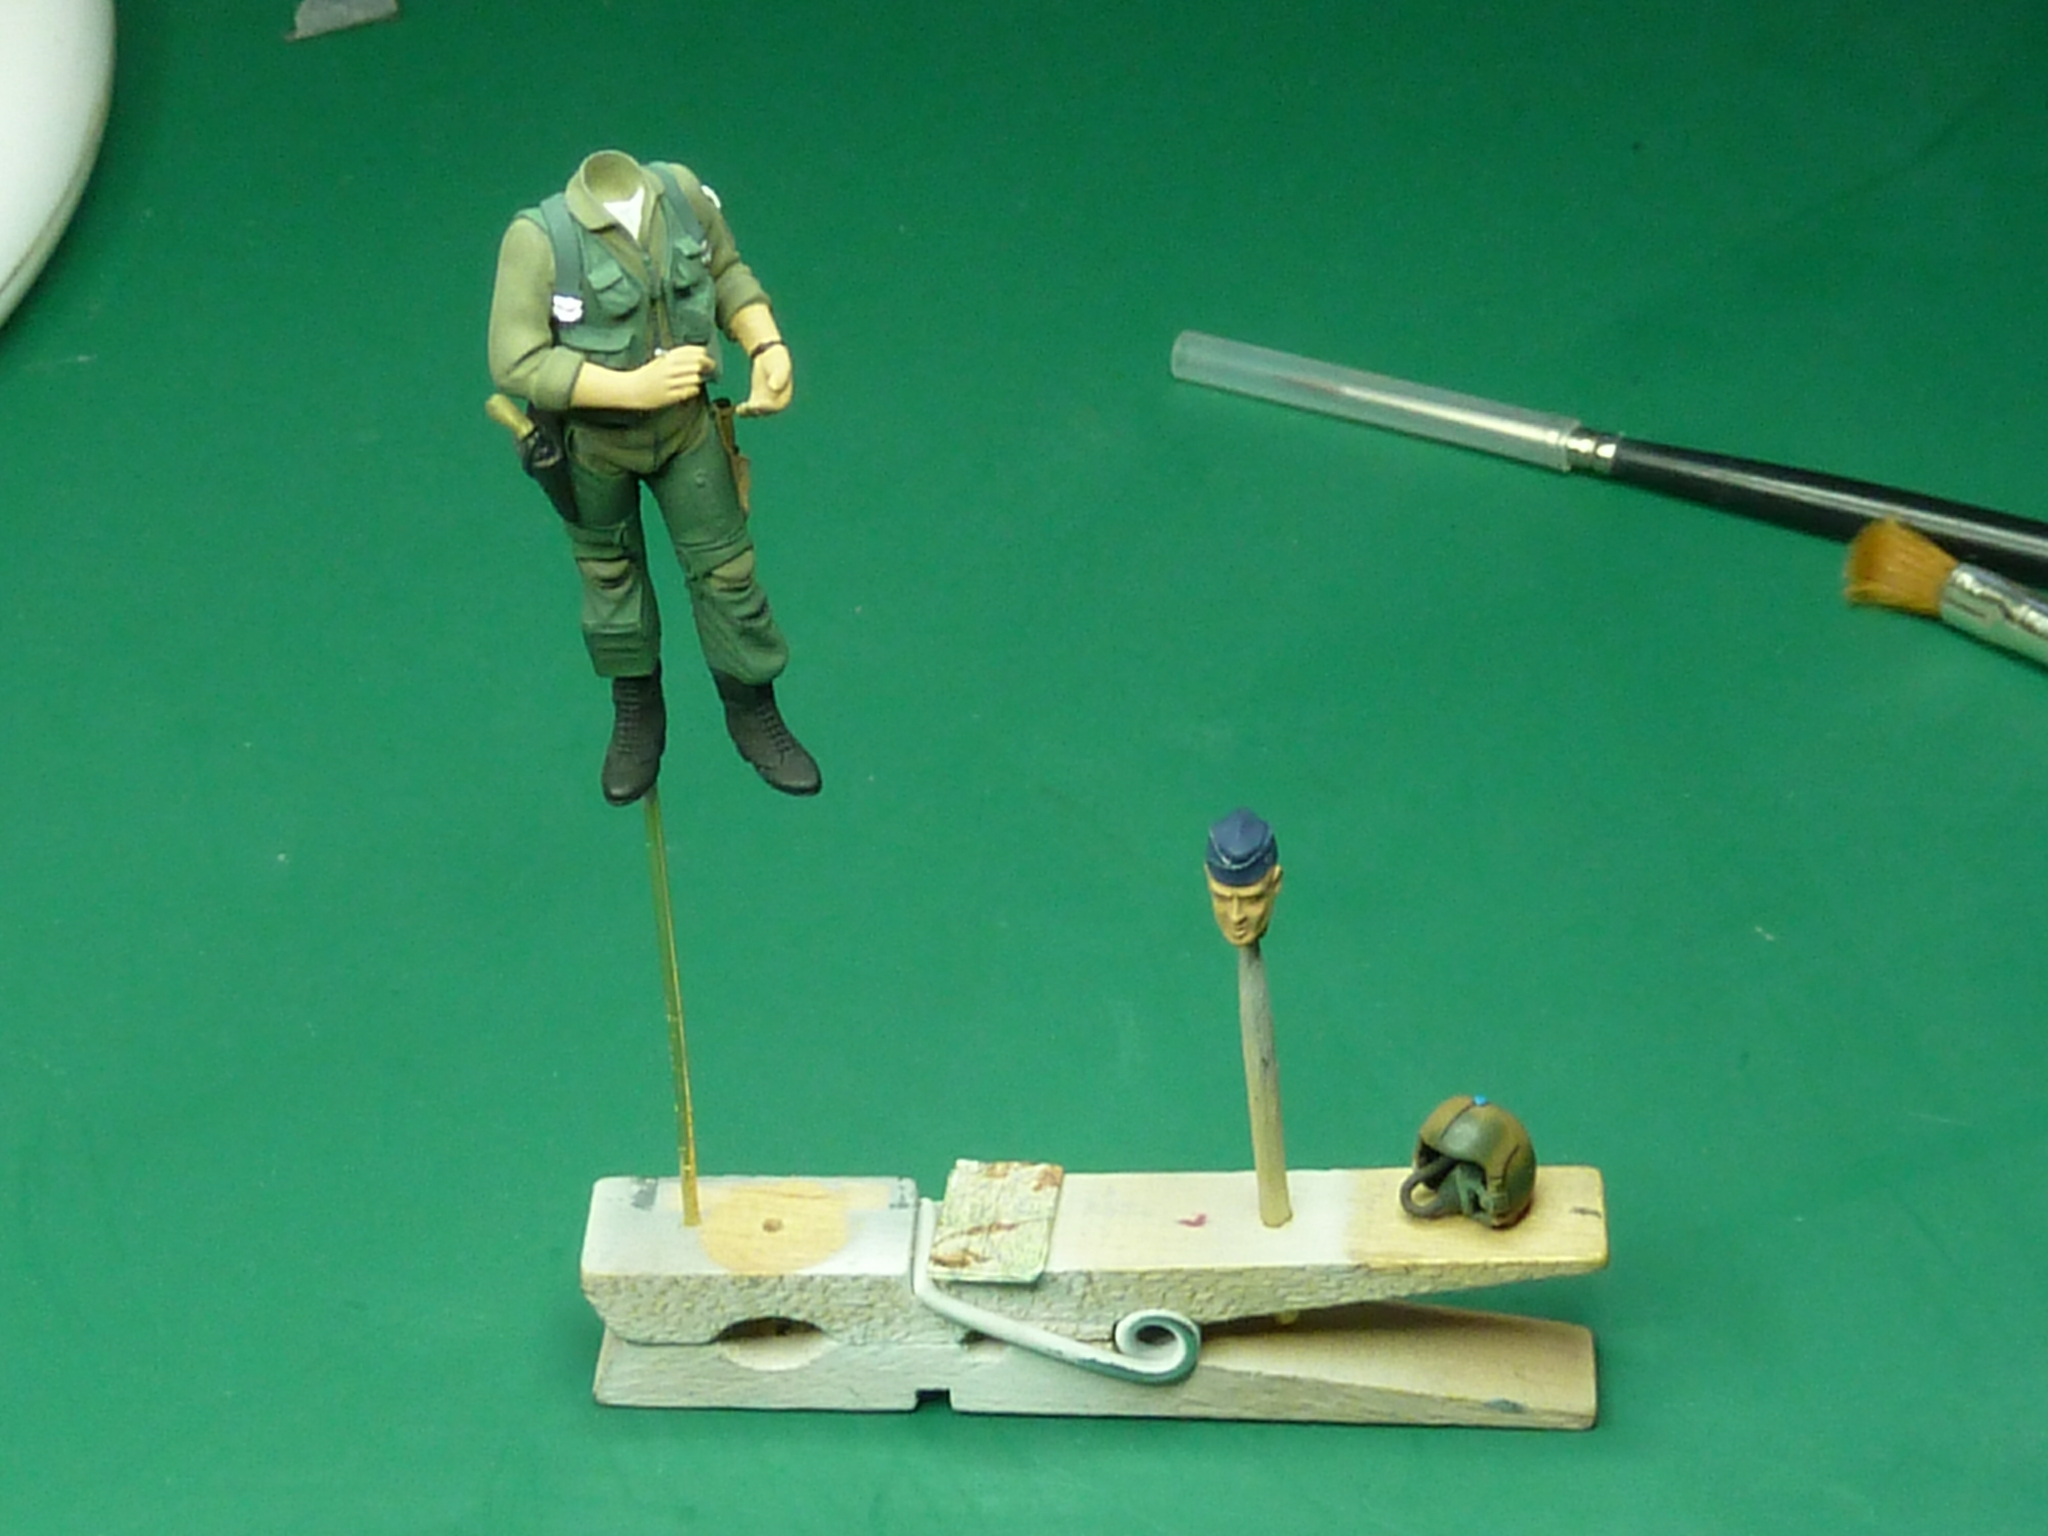
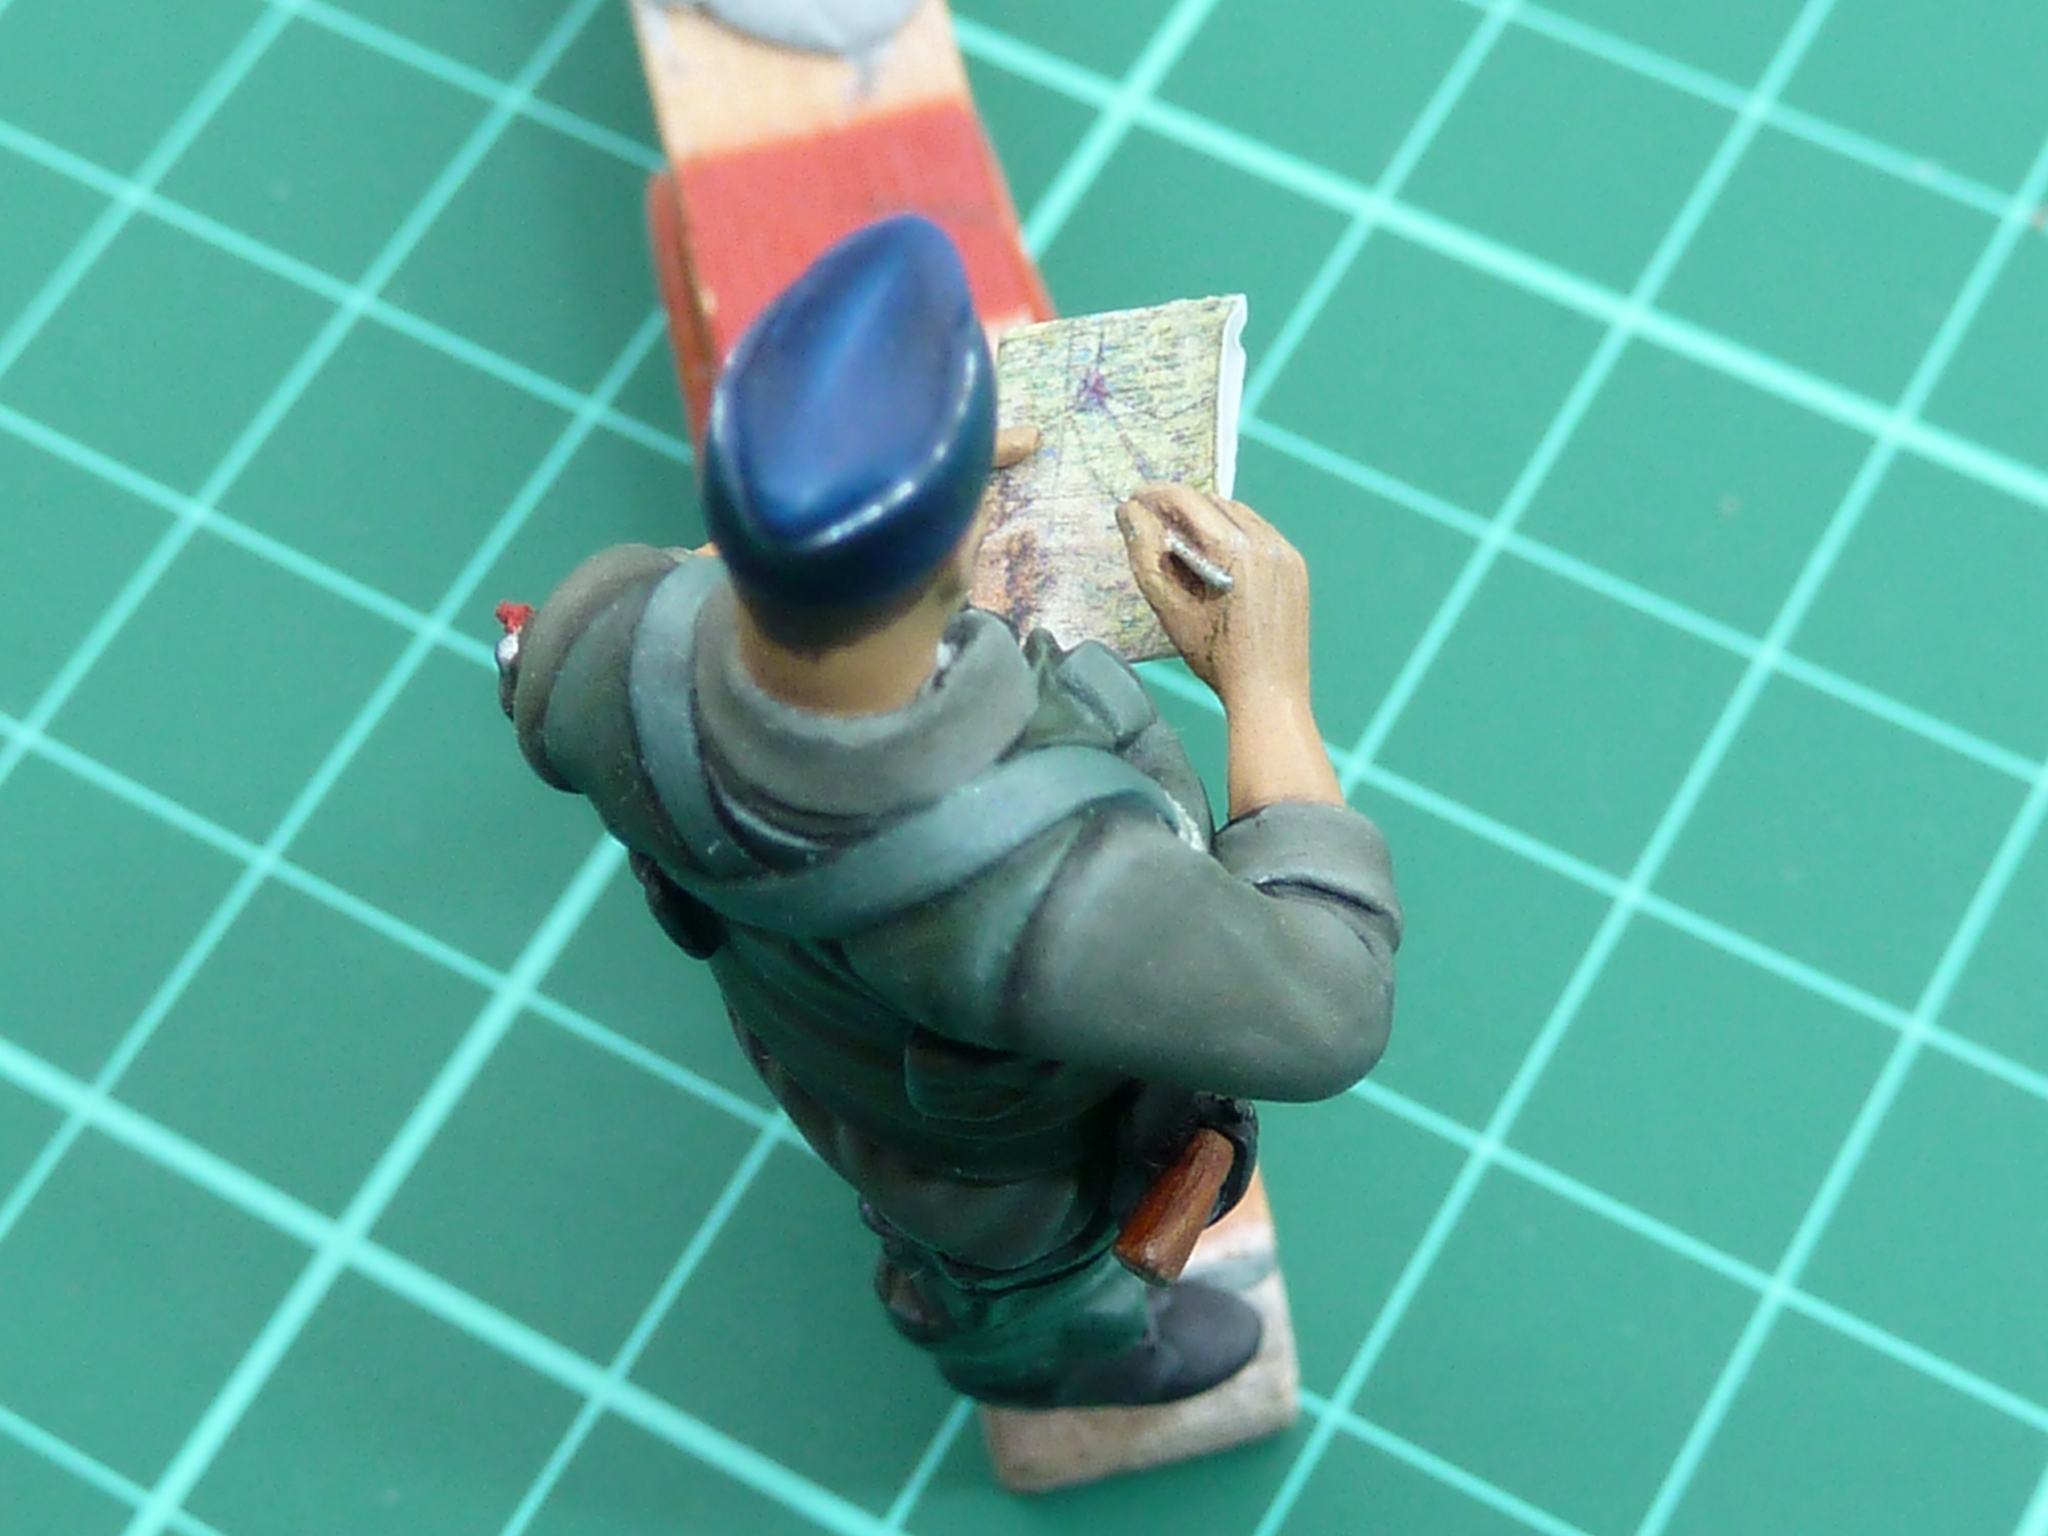
I also added a pen in the guy’s hand as one wasn’t included. It’s just a representative length of 0.3mm brass wire sharpened at one end.
Photo just before I added the pen, which can be seen in the helmet pic above.
Having smoothed all the joints and filled some tiny blowholes in the figure I airbrushed on the base green colour and then blocked out the others using a brush. All the kit is basically green, but in different shades. I used a couple of pictures of a well know Vietnam pilot, Col. Robin Olds, as a reference, plus my memory having seen some of the kit in service and mixed up the colours myself.


First coat of airbrushed ‘US Marine Green’ (apologies to all USAF, past and present).

Basic colours blocked out.
Once the enamel had had a few days on the radiator to harden I started the very tedious task of shading and detailing. I do this with artists oils as these take an age to dry and so remain workable for blending.
The basic steps are:
- Cover the entire area to be painted with a base layer to prep and wet the surface. The bare enamel surface sucks up the first application of oils and won’t shift, but once a base layer is on any other colours added can be blended and moved about on top.
- Remove as much of the wetting coat as possible with dry brushes so that the minimum is left to mix and alter the shade of the following colours.
- Mix up lighter and darker shades of the base coat by adding white and black respectively. I use about 5 shades going from almost pure white to pure black.
- Imagine the figure being lit from above and then paint the parts that are in direct light such as the tops of creases, shoulders etc. with the lightest shade and then the areas in shadow with the darkest and the gaps in between with the other shades.
- Blend all the colours together so that there are no sudden transitions.
- Finally, go back and put pin-pricks of pure white on the very tops of the creases, lapels, collar etc, and blend them, but not too much.
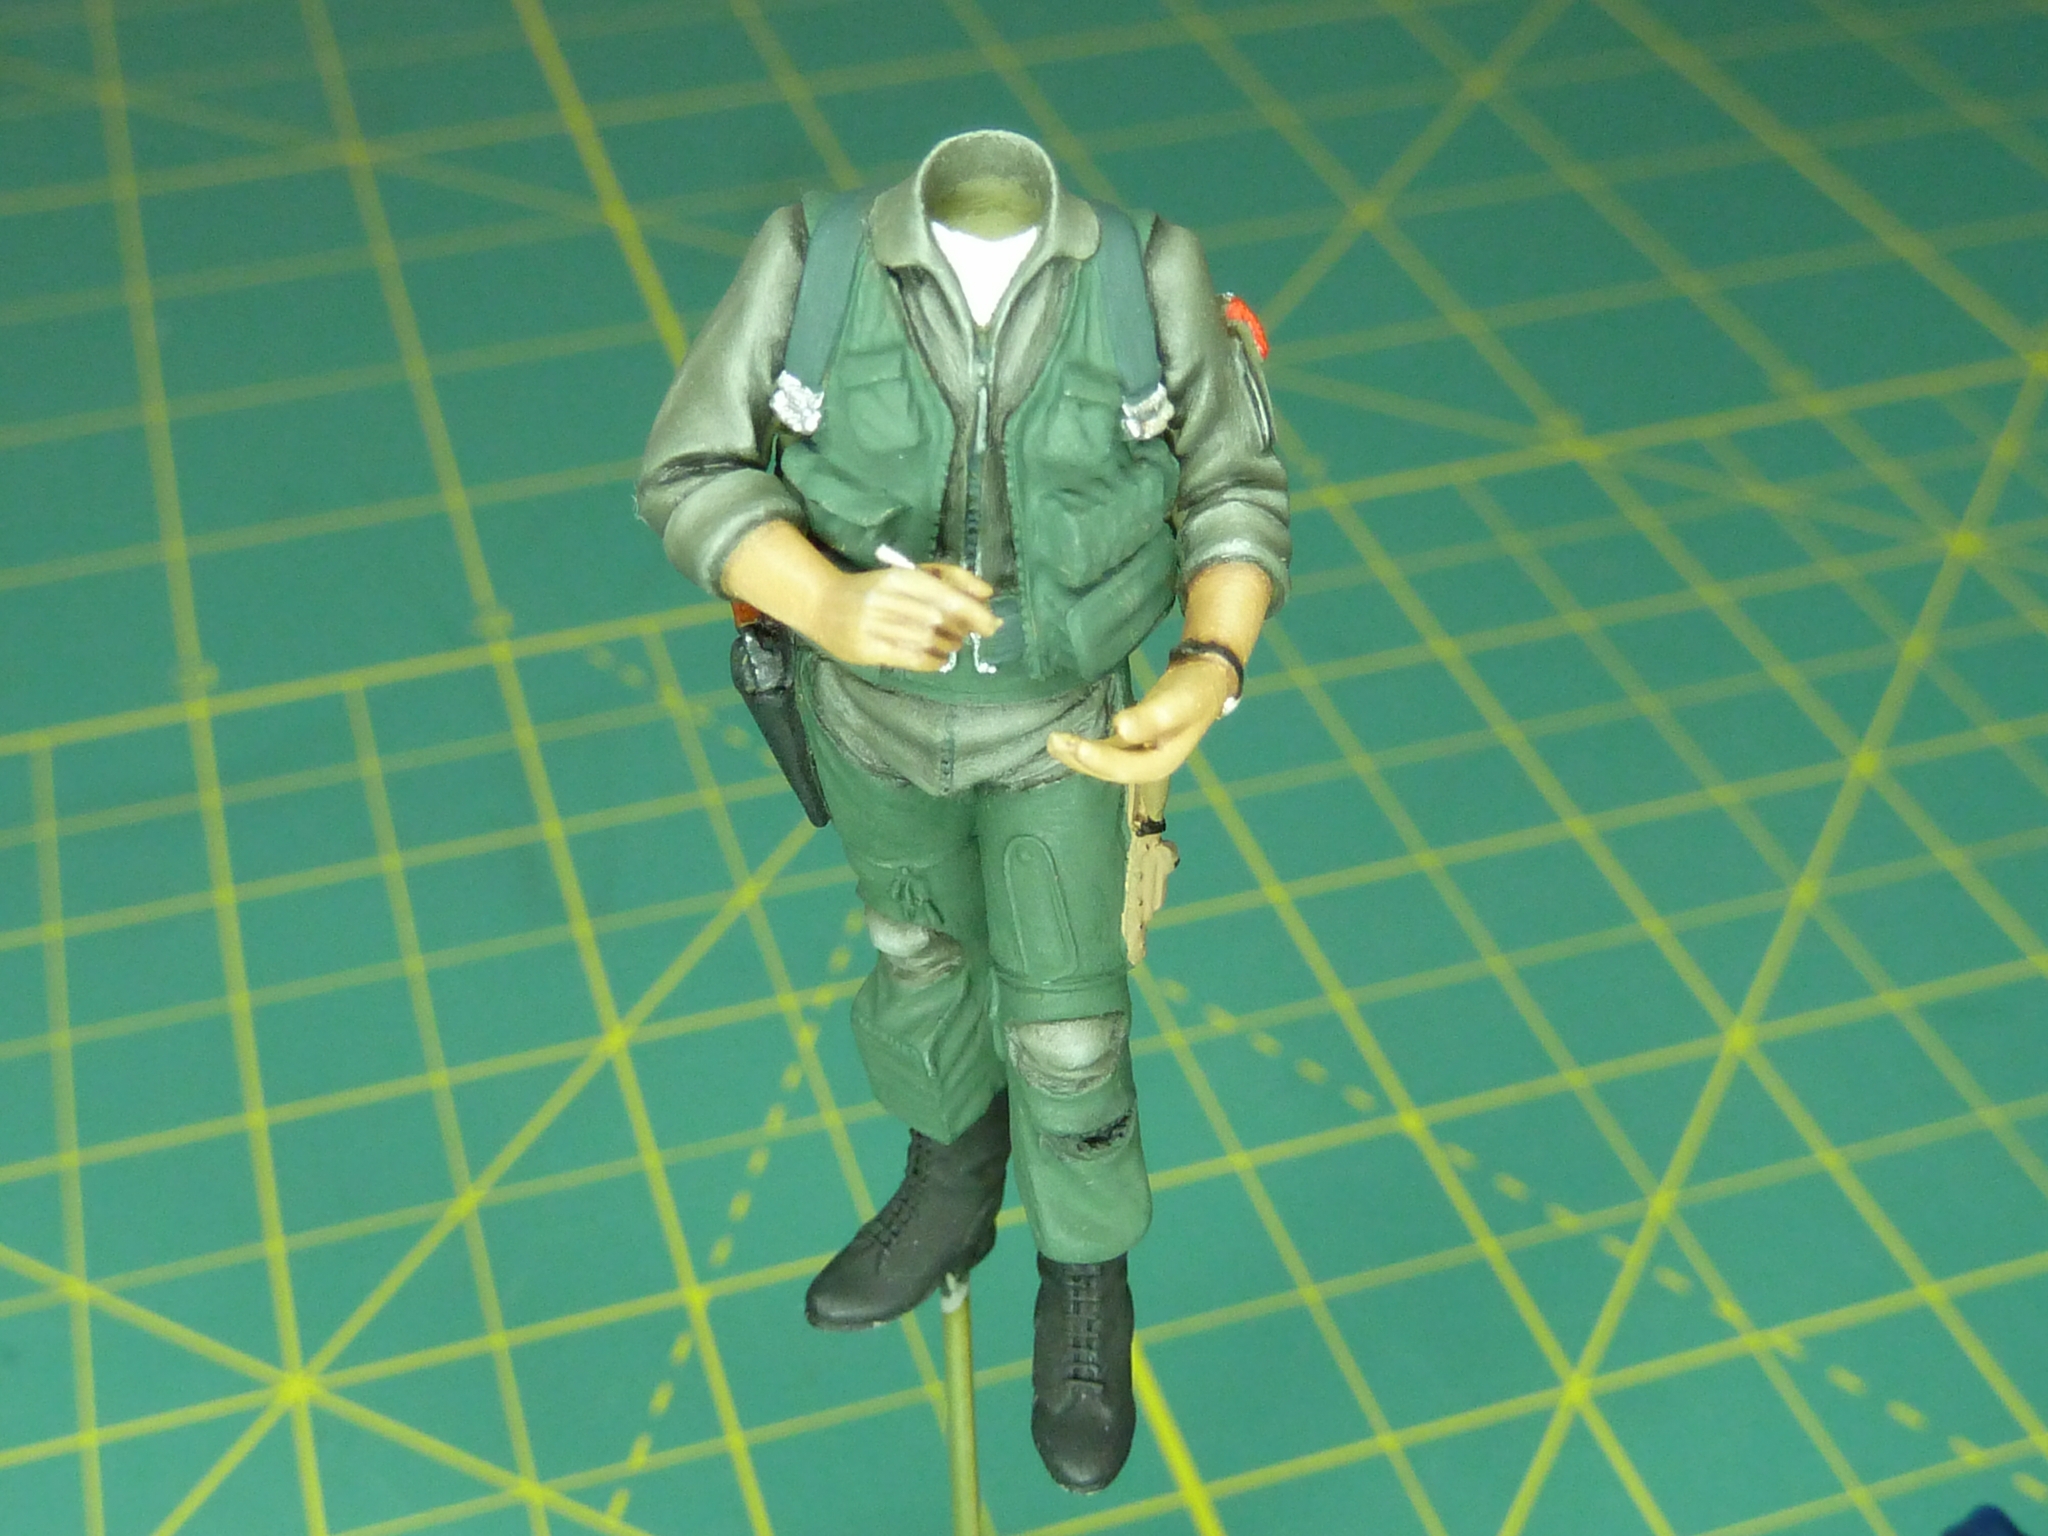
This is figure part way through. The arms and flight suit have been shaded, but the g-suit trousers and tactical waistcoat have yet to be done.
The face and hat were done in much the same way. When doing the eyes I don’t paint the whites at this scale as it looks odd. All I do is dab a pin-prick on for the iris. It usually takes a couple of goes to get it right as it so easy to end up with a boss-eyed look.
It was at this point, while I was checking the figure over, that I noticed that I had put the boots on the wrongly. The were reversed left to bloody right!
I’d been so intent on getting them on straight and a good join I’d missed the gross error. To be honest the difference wasn’t pronounced (have a look at the figure in the base colours above) but once you’d noticed it, it was obvious.
The air turned momentarily blue and the figure went on the shelf for 3 weeks while I worked up the enthusiasm to fix the balls-up.
So I broke the guy’s legs! Inevitably I damaged things as I did so. I reassembled him correctly and remedied the damage I’d done. In order to get some strength back in the joints I pegged them this time with a little brass rod. Then I repainted the boots and touched up the bottoms of the legs. I still think one of his legs is a fraction short but I’m not changing it.
The helmet was done by airbrush and was easier than I expected. Thin paint, low pressure and minimal flow!
The last thing required was something to put in the guy’s left hand that he was writing on. I decided to add a map rather than just blank paper. I scanned the net to try to find a representative USAF map of the Udorn area from that period. The only one I could find was a SAR (Search and Rescue) map so that’s what he got.
I scaled the image of the map to the right proportions in Photoshop then printed it out at the highest quality on photo paper. The next step was to peel off the paper backing of the print and then soak off any remaining paper until I was left with just the top plastic substrate. Then it was a simple case of folding the map up, dabbing some superglue on to hold it together.
This was the end result…

Then it was just pop the map in the pilot’s hand and glue the head in place.
A stub of the brass handling wire was left poking out of the guy’s foot as I plan to mount him on a base when I get one. That’s why the helmet is strategically placed in the aircraft shot…


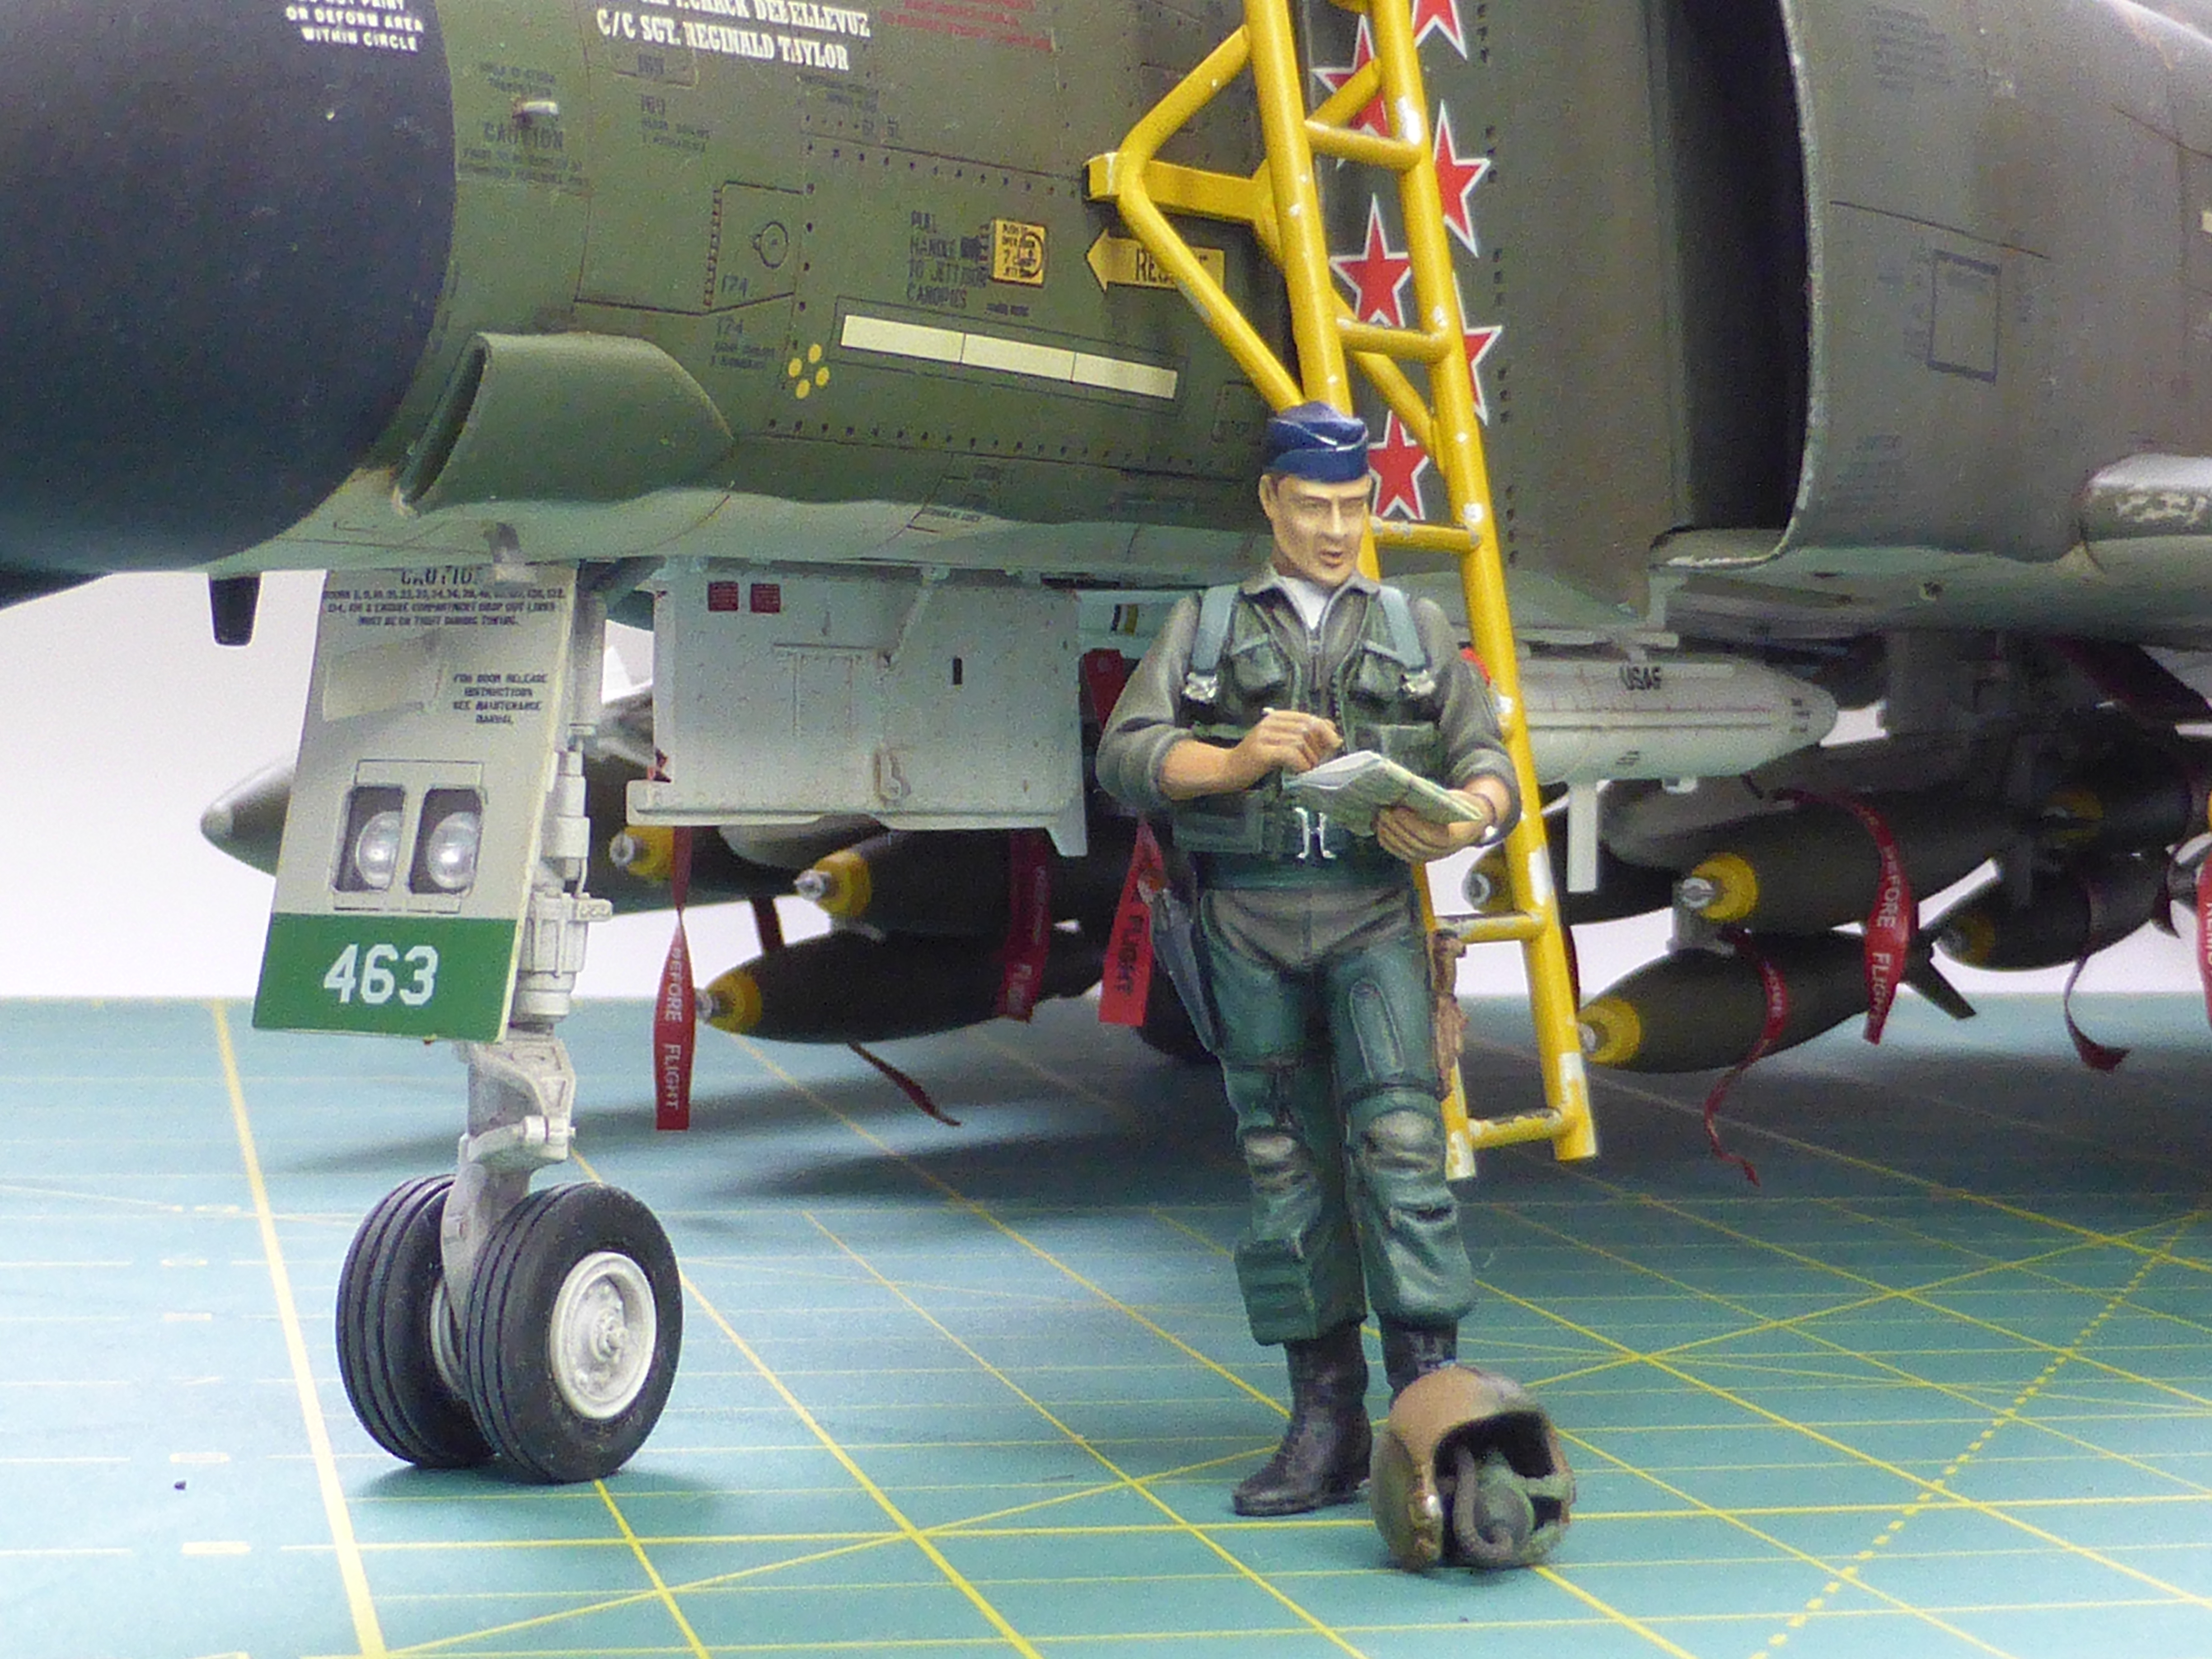
And that’s our man next to his aircraft.

That is stunning! So intricate! You are to be congratulated.
LikeLiked by 1 person
Reblogged this on Aviation Trails and commented:
The detail on this figure is amazing.
LikeLiked by 1 person
Thats amazing detail
LikeLiked by 1 person
Thank you for the comments. It’s good to know what others think as I often only see where I could have done things better. I find I don’t get a dispassionate view of the finished thing until it’s been in the loft a few years and I’ve forgotten it. Then when I do see it I get an “Actually, this one wasn’t that bad” feeling.
LikeLike
Hi great reading youur blog
LikeLike