
I had hoped to be able to write this post a bit earlier, but I’ve been waiting in vain for some good weather to take a series of photographs of the model in a decent setting out doors where there is the space to do so. However, it’s either been too dull, windy or just plain raining recently. I will get some better pictures as soon as I can, but in the meantime a few gash ones taken quickly will have to suffice.
Having spent so much time on all the sub-assemblies, the final assembly was actually a quick process. It only took a couple of days work in total. The first part to be fitted was the upper mainplane.
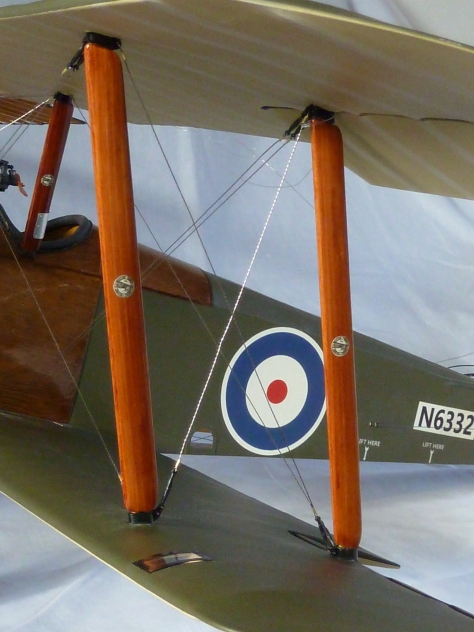
The instructions tell you to fit the centre section first to the cabane struts, then bolt on the outer sections. As I wasn’t using the supplied bolts because they looked unsightly, weren’t as per the original aircraft and weren’t compatible with some of my earlier wing mods, I had previously decided to assemble the wing (by gluing) off the main model. This also ensured I was able to leave the assembled wing clamped to a flat surface to ensure it was straight and true. It was a relatively simple task to then fix the complete wing to the cabane struts. All of the gluing was done with cyanoacrylate glue. With the top wing complete I then attached the interconnecting control line between the two upper ailerons, making sure that it was actually slightly short (both ailerons pulled upward a few degrees) so that it would put a small amount on tension in the cord when they were pulled flat.
With the top wing in place I then completed the rigging around the cabane struts as the access would be so much better without the lower mainplane in situ. This went well, the only snag being I broke one of the fixing tabs which necessitated a delicate resoldering job. Other than that it was straightforward.

Next up was the final job! Attaching the lower mainplanes.
In the kit these are also designed to be bolted on, but as with the top wing I chose to glue them in place using the bare (shortened) bolts as mounting spigots. To ensure I got the dihedral angle correct I mounted the interplane struts in the top wing first using a slower setting CA glue. This allowed me a little time to position everything to ensure all was square and true.
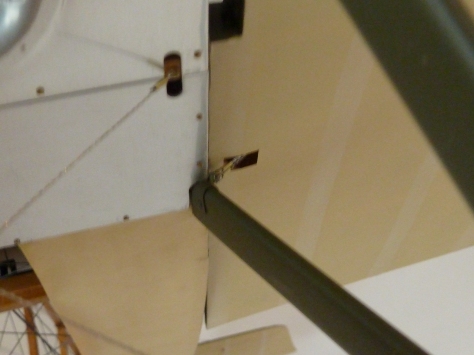
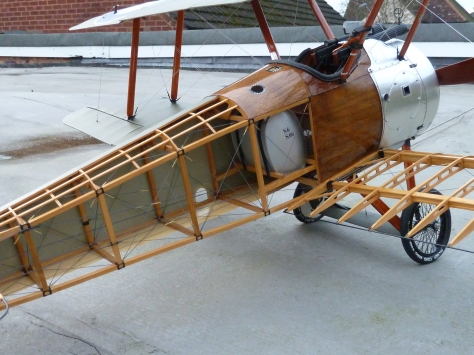
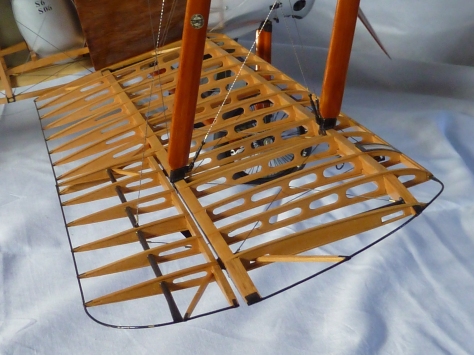
One complication with covering the port wing is that two of the rigging wires have to pass through a hole in it which I’d need to cut prior to fixing the mainplane in position. To accurately determine where to cut the hole I first fitted and rigged the starboard, uncovered, wing and used that to take measurements of where the hole needed to be. Then I nervously cut into the pristine covering of the port. Obviously holes are needed in both the top and the bottom of the wing, though due to the angle of the wires they are in entirely different positions. A shot of the underside hole is shown below.
With that completed I was then able to fit the port wing.
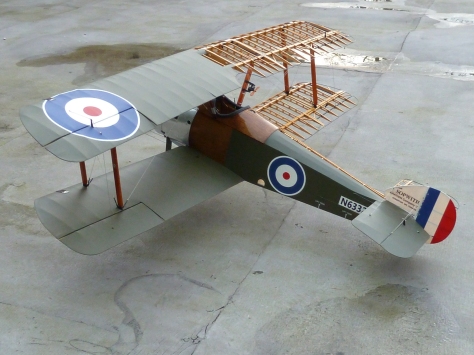
The penultimate job was to then rig the wings. This was actually trickier than I expected. It is a very fine balance between having enough tension in the wires to ensure they are straight and taut, but not so much that you cause the airframe and wings to start bending. The difficulty arises mainly because the wire has no give in it, so the only way to tension them is against each other via the structure itself. After a degree of messing about I got it to a state I was sort of happy with. However if you look closely some of the wires aren’t as tight as they could be, but the top wing is starting to bow a little anyway.
The last job of all was to connect the control column to the ailerons.
The kit has the upper and lower ailerons connected by thin brass rod. However, for realism and because I had enough spare, I connected them with rigging wire. Feeding the line from the cockpit to the lower ailerons along the leading edge of the wing is easy on the uncovered side, however access is limited on the port side. In anticipation of this I’d built the wing with some cotten thread in place which I was now able to use to pull through the control line from the cockpit and connect it to the lower port aileron. It’s another balancing act to get the tension right so that all of the control surfaces lie flat at the same time.
After more fiddling and trial and error I got to a stage I was happy with, though I strongly suspect that things will stretch over time and go out of sync anyway. Moving the control column about does elicit the appropriate movements in the control surfaces, but it’s not what you’d call polished or refined. ‘Vague’ would be a kind description of the feedback. The last act was to glue on the clear inspection covers on the port wings now the control lines were in place.
So! That was it. Done, completato, finito.
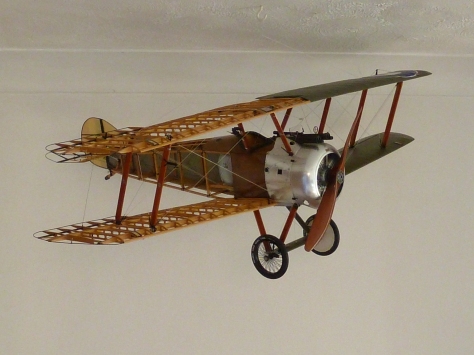
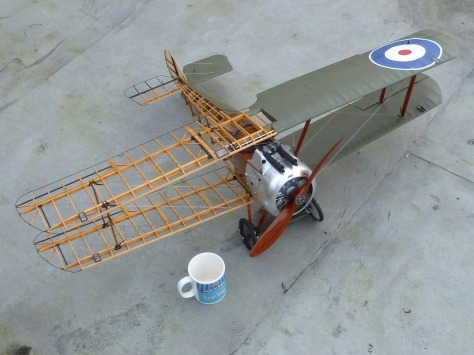
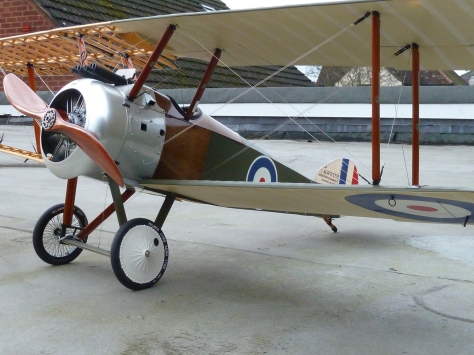
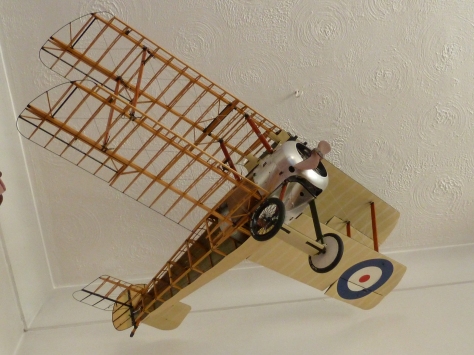
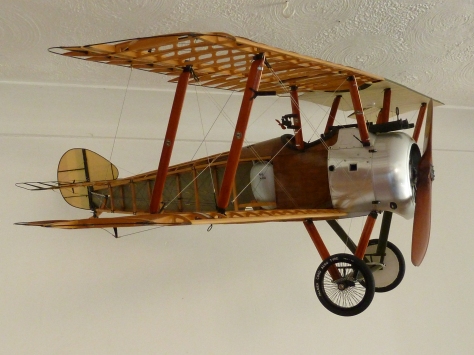
The finished model is, I must admit, quite impressive. Here’s a rough scale shot to give you an idea of the size. The finished wingspan is 42″.
The model is now hanging up in our lounge as that is the only practical way of displaying it unless your house has a lot of space. I’m pleased with the outcome and really enjoyed building the model. It was a labour of love anyway as the Camel is one of my favourite aircraft, but the challenge of the model was good too. Hasegawa have made some surprisingly large compromises in the model, but they can be overcome without any great angst. There are also a considerable number of detailed deviations which would be much more time consuming to correct. Myriad little brackets are missing, the wing ribs are too heavy in all respects and most of the woodwork in the fuselage should have sculpted lightening holes in them. That was going to far for me, though maybe one day…
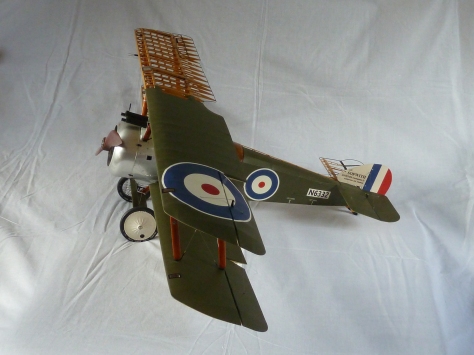
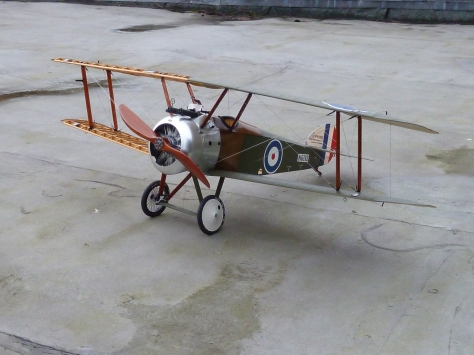
Here are a few rough pictures of the model taken on our garage roof and some of it suspended from the ceiling. There are also some other pictures in the gallery section. The gallery ones will be updated at some point when I am able to arrange better ones.


I’m without words…
LikeLiked by 1 person
Fantastic job !
Xelente !
LikeLiked by 1 person
That is stunning. Thank you for sharing.
I particularly appreciate being able to show my wife that others are more nuts than me…
LikeLiked by 1 person
LOL. Oh thanks 🙂
LikeLiked by 1 person
Your dedication to this model has been outstanding, the Detail is incredible and all that shows. It’s a beautiful model and you are to be congratulated on achieving such a high quality build. Absolutely stunning! Andy.
LikeLiked by 1 person
Looking forward (still with some trepidation) to getting started on mine. I stumbled across one on Ebay – still in the original, factory-sealed box – for 650 bucks, so I got it!
Wouldn’t have had the nerve or confidence to attempt it if not for this blog. Thanks!!
LikeLiked by 1 person