
Well it’s been considerably longer since the last post than I intended, but I’ve been busy doing the ill thing again.
Progress on the Camel hasn’t been static for all that time though and it is now practically complete and I’m looking towards my next project which is of a more nautical nature.
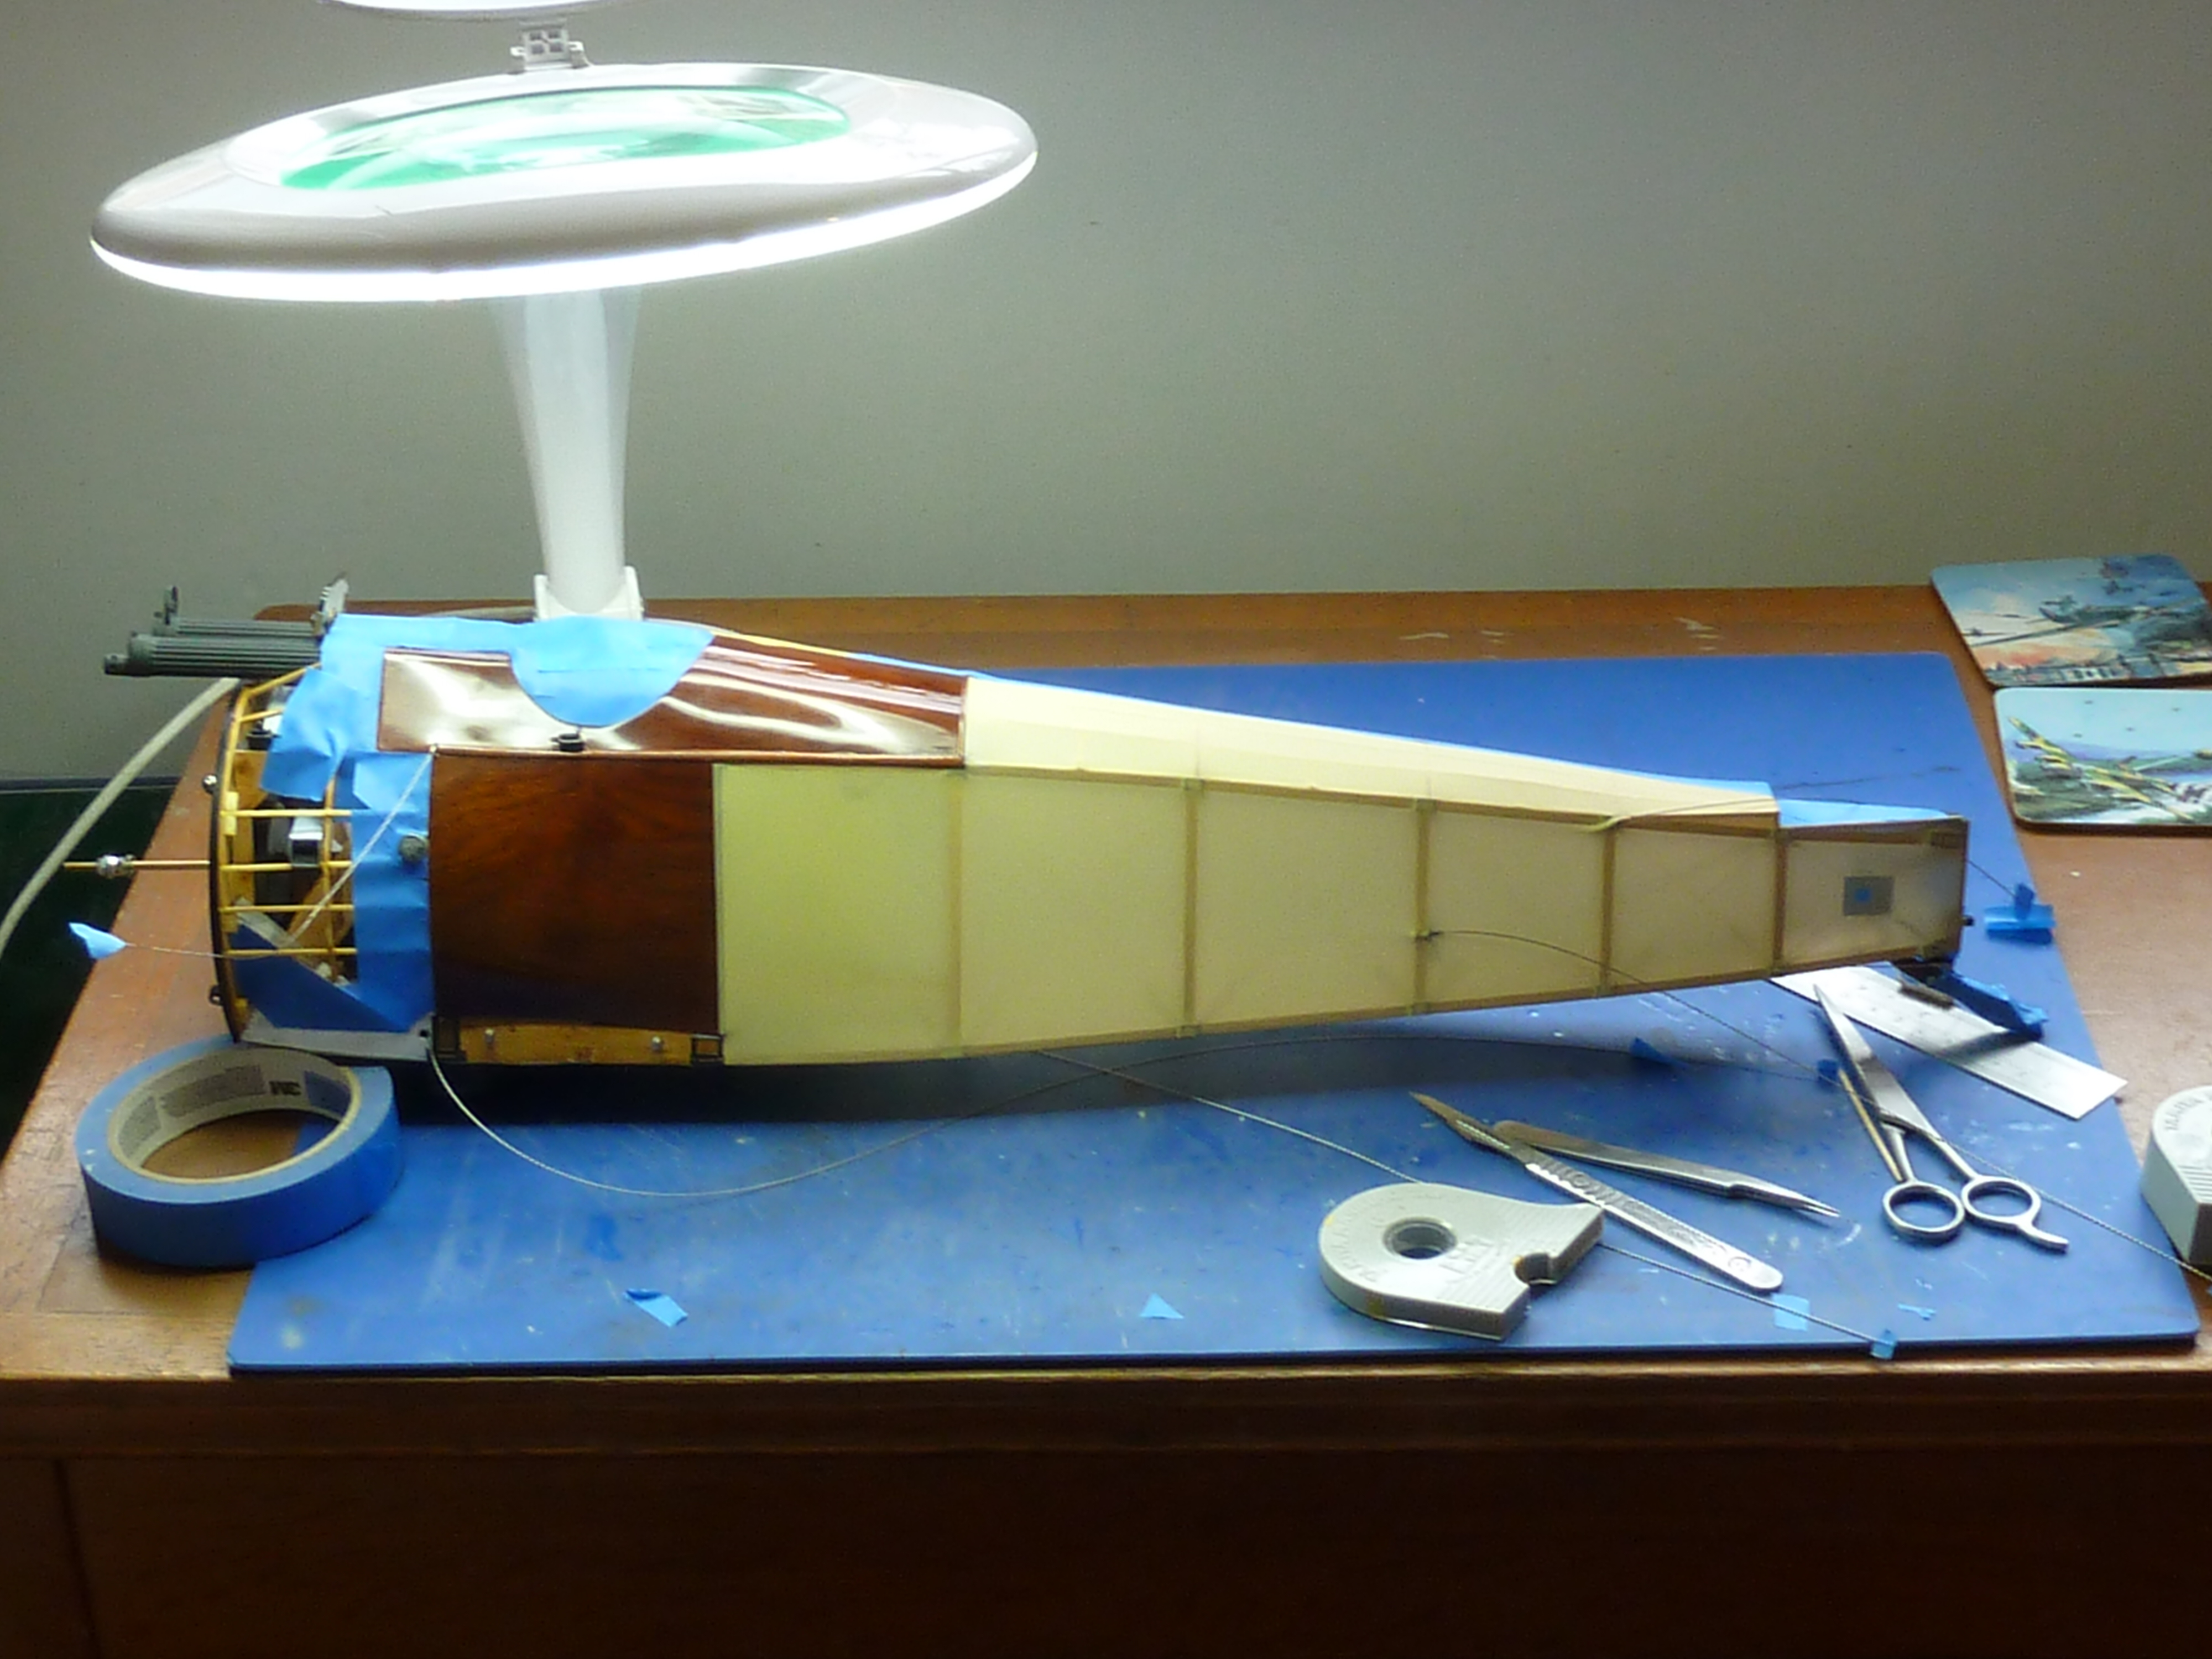
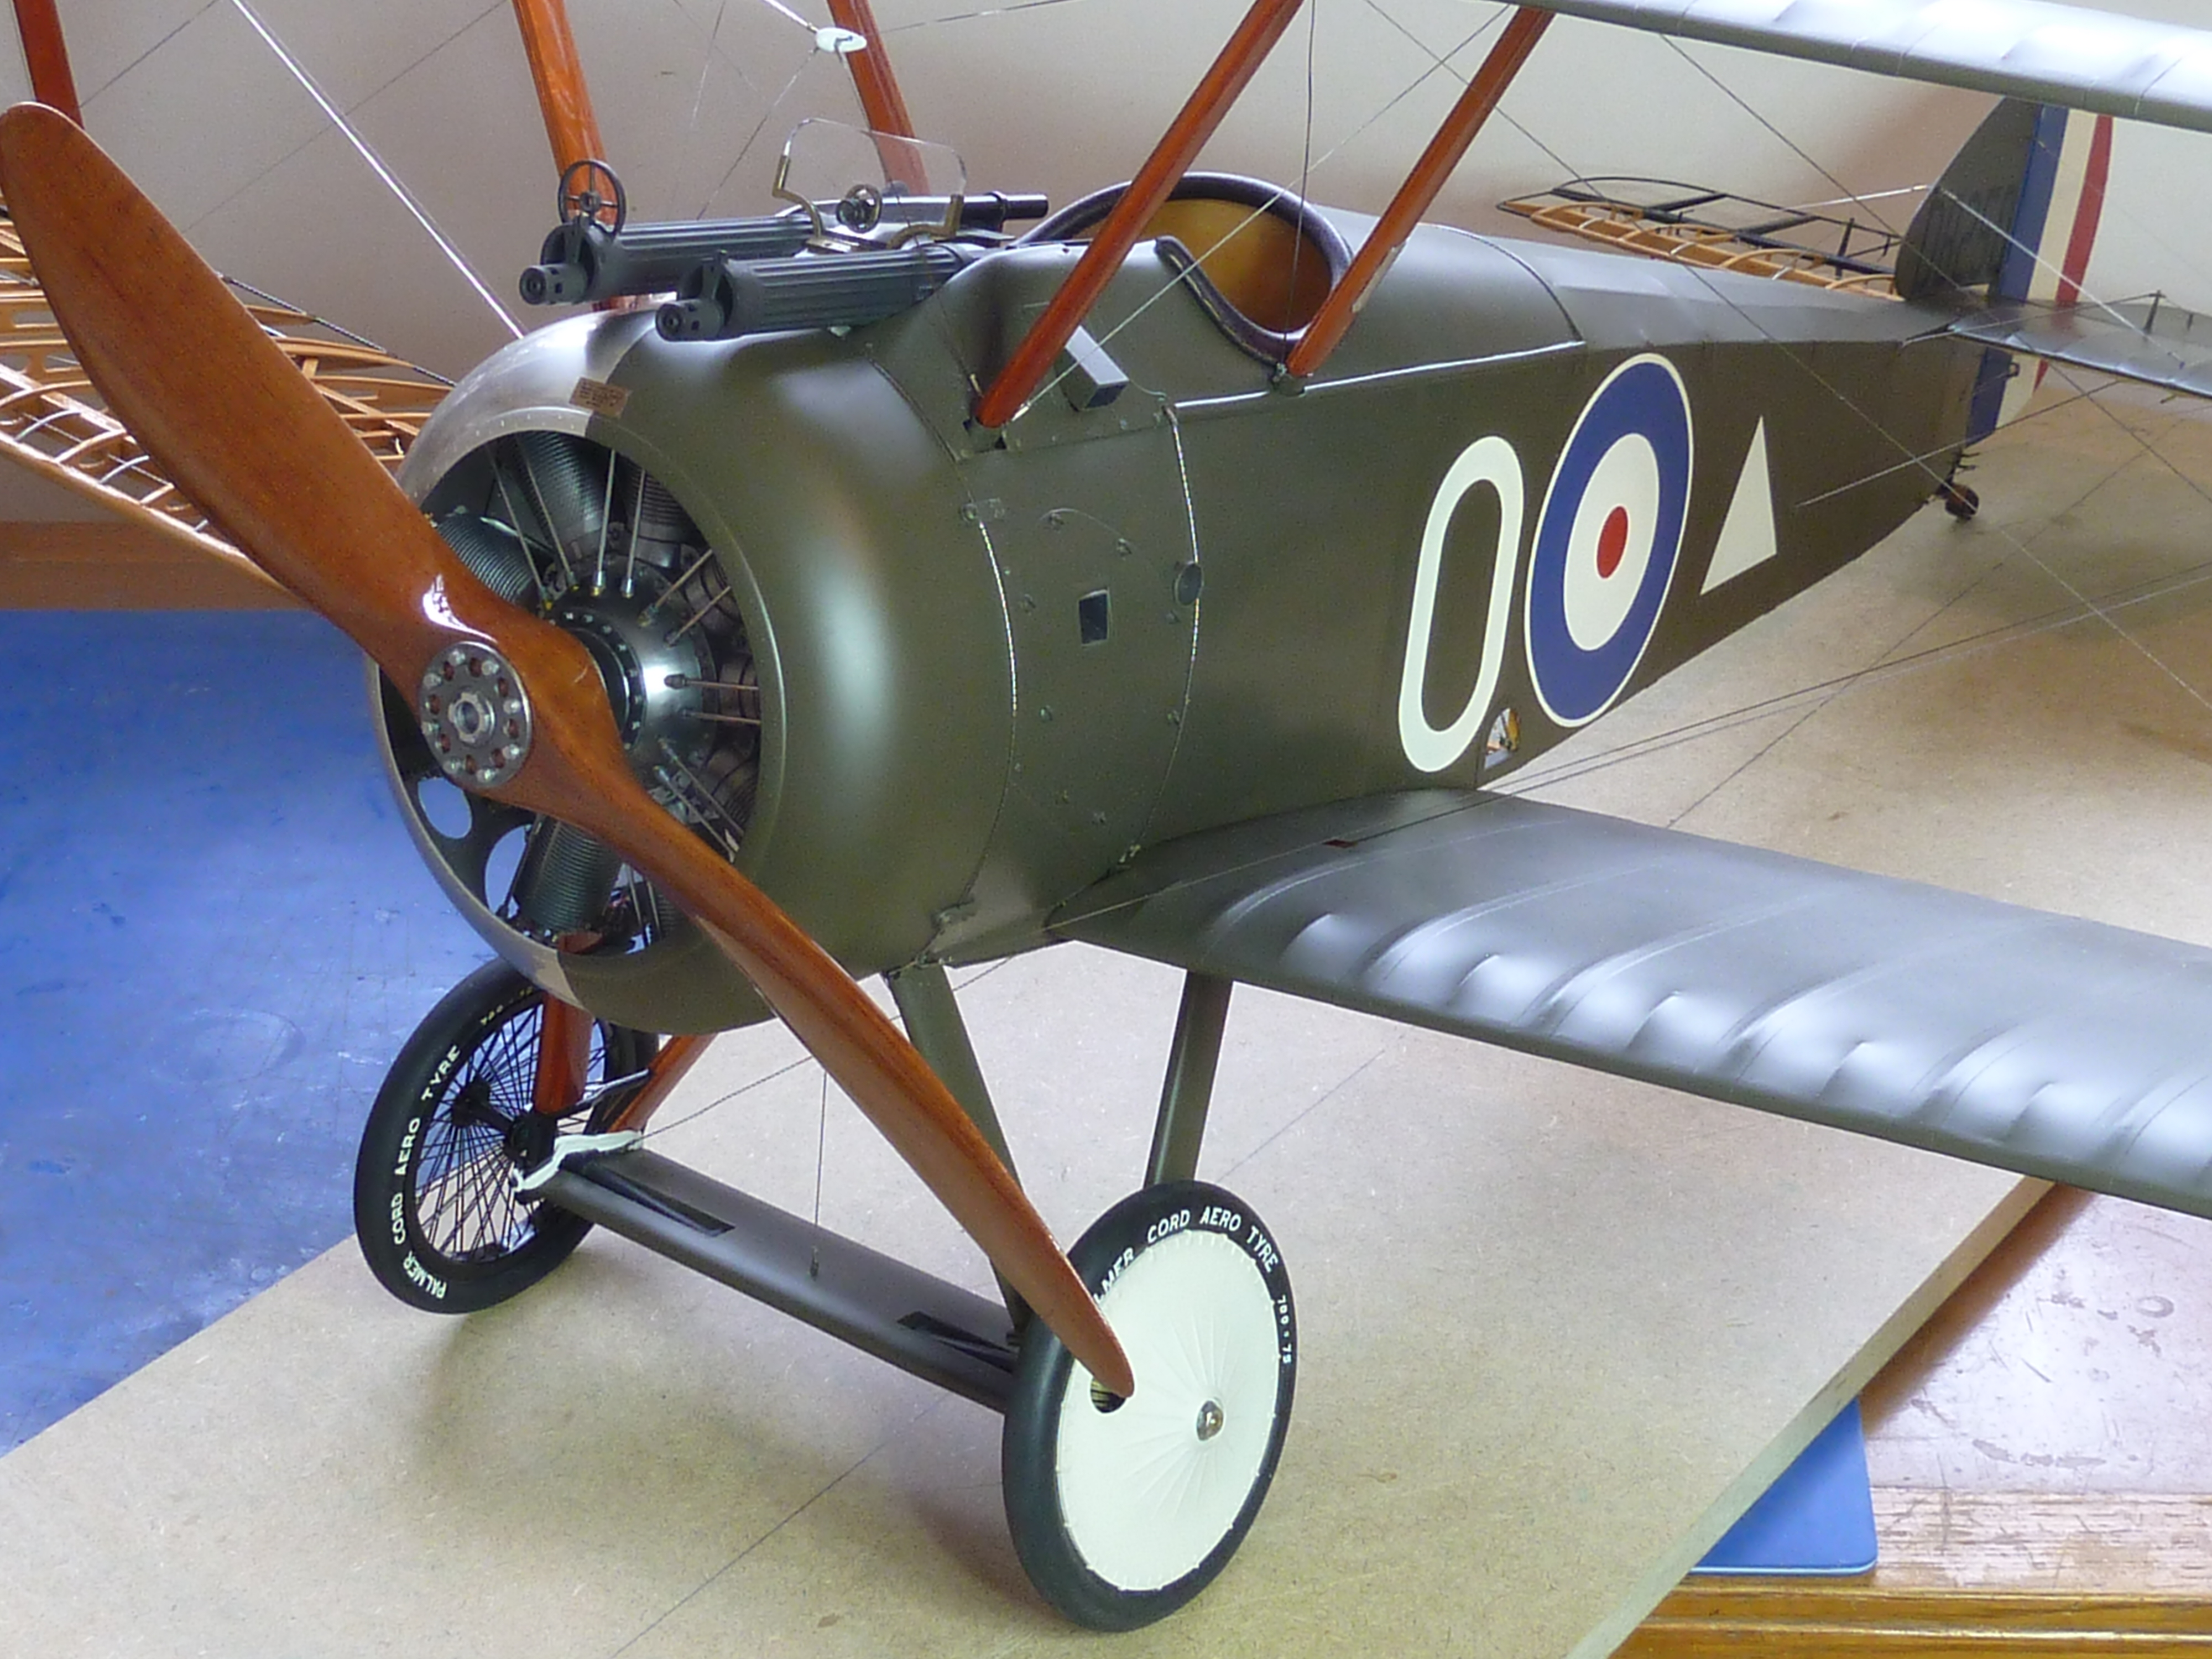
Having completed the rigging on the fuselage the next step was fitting the guns. As on the previous model they were a very tight fit and I had to fettle some of the panelling to get them in. The starboard panel was especially tight this time around.

One other change I did incorporate at this time involved the Aldis gunsight mount. The last time I had difficulty in getting this aligned with the guns, which it obviously would be in reality. So this time I built in some adjustment. I cut off the vertical support on the mount and replaced it with some tube into which a rod could be fitted holding the rear of the sight. this allowed the rear to be adjusted vertically until it aligned with the guns.

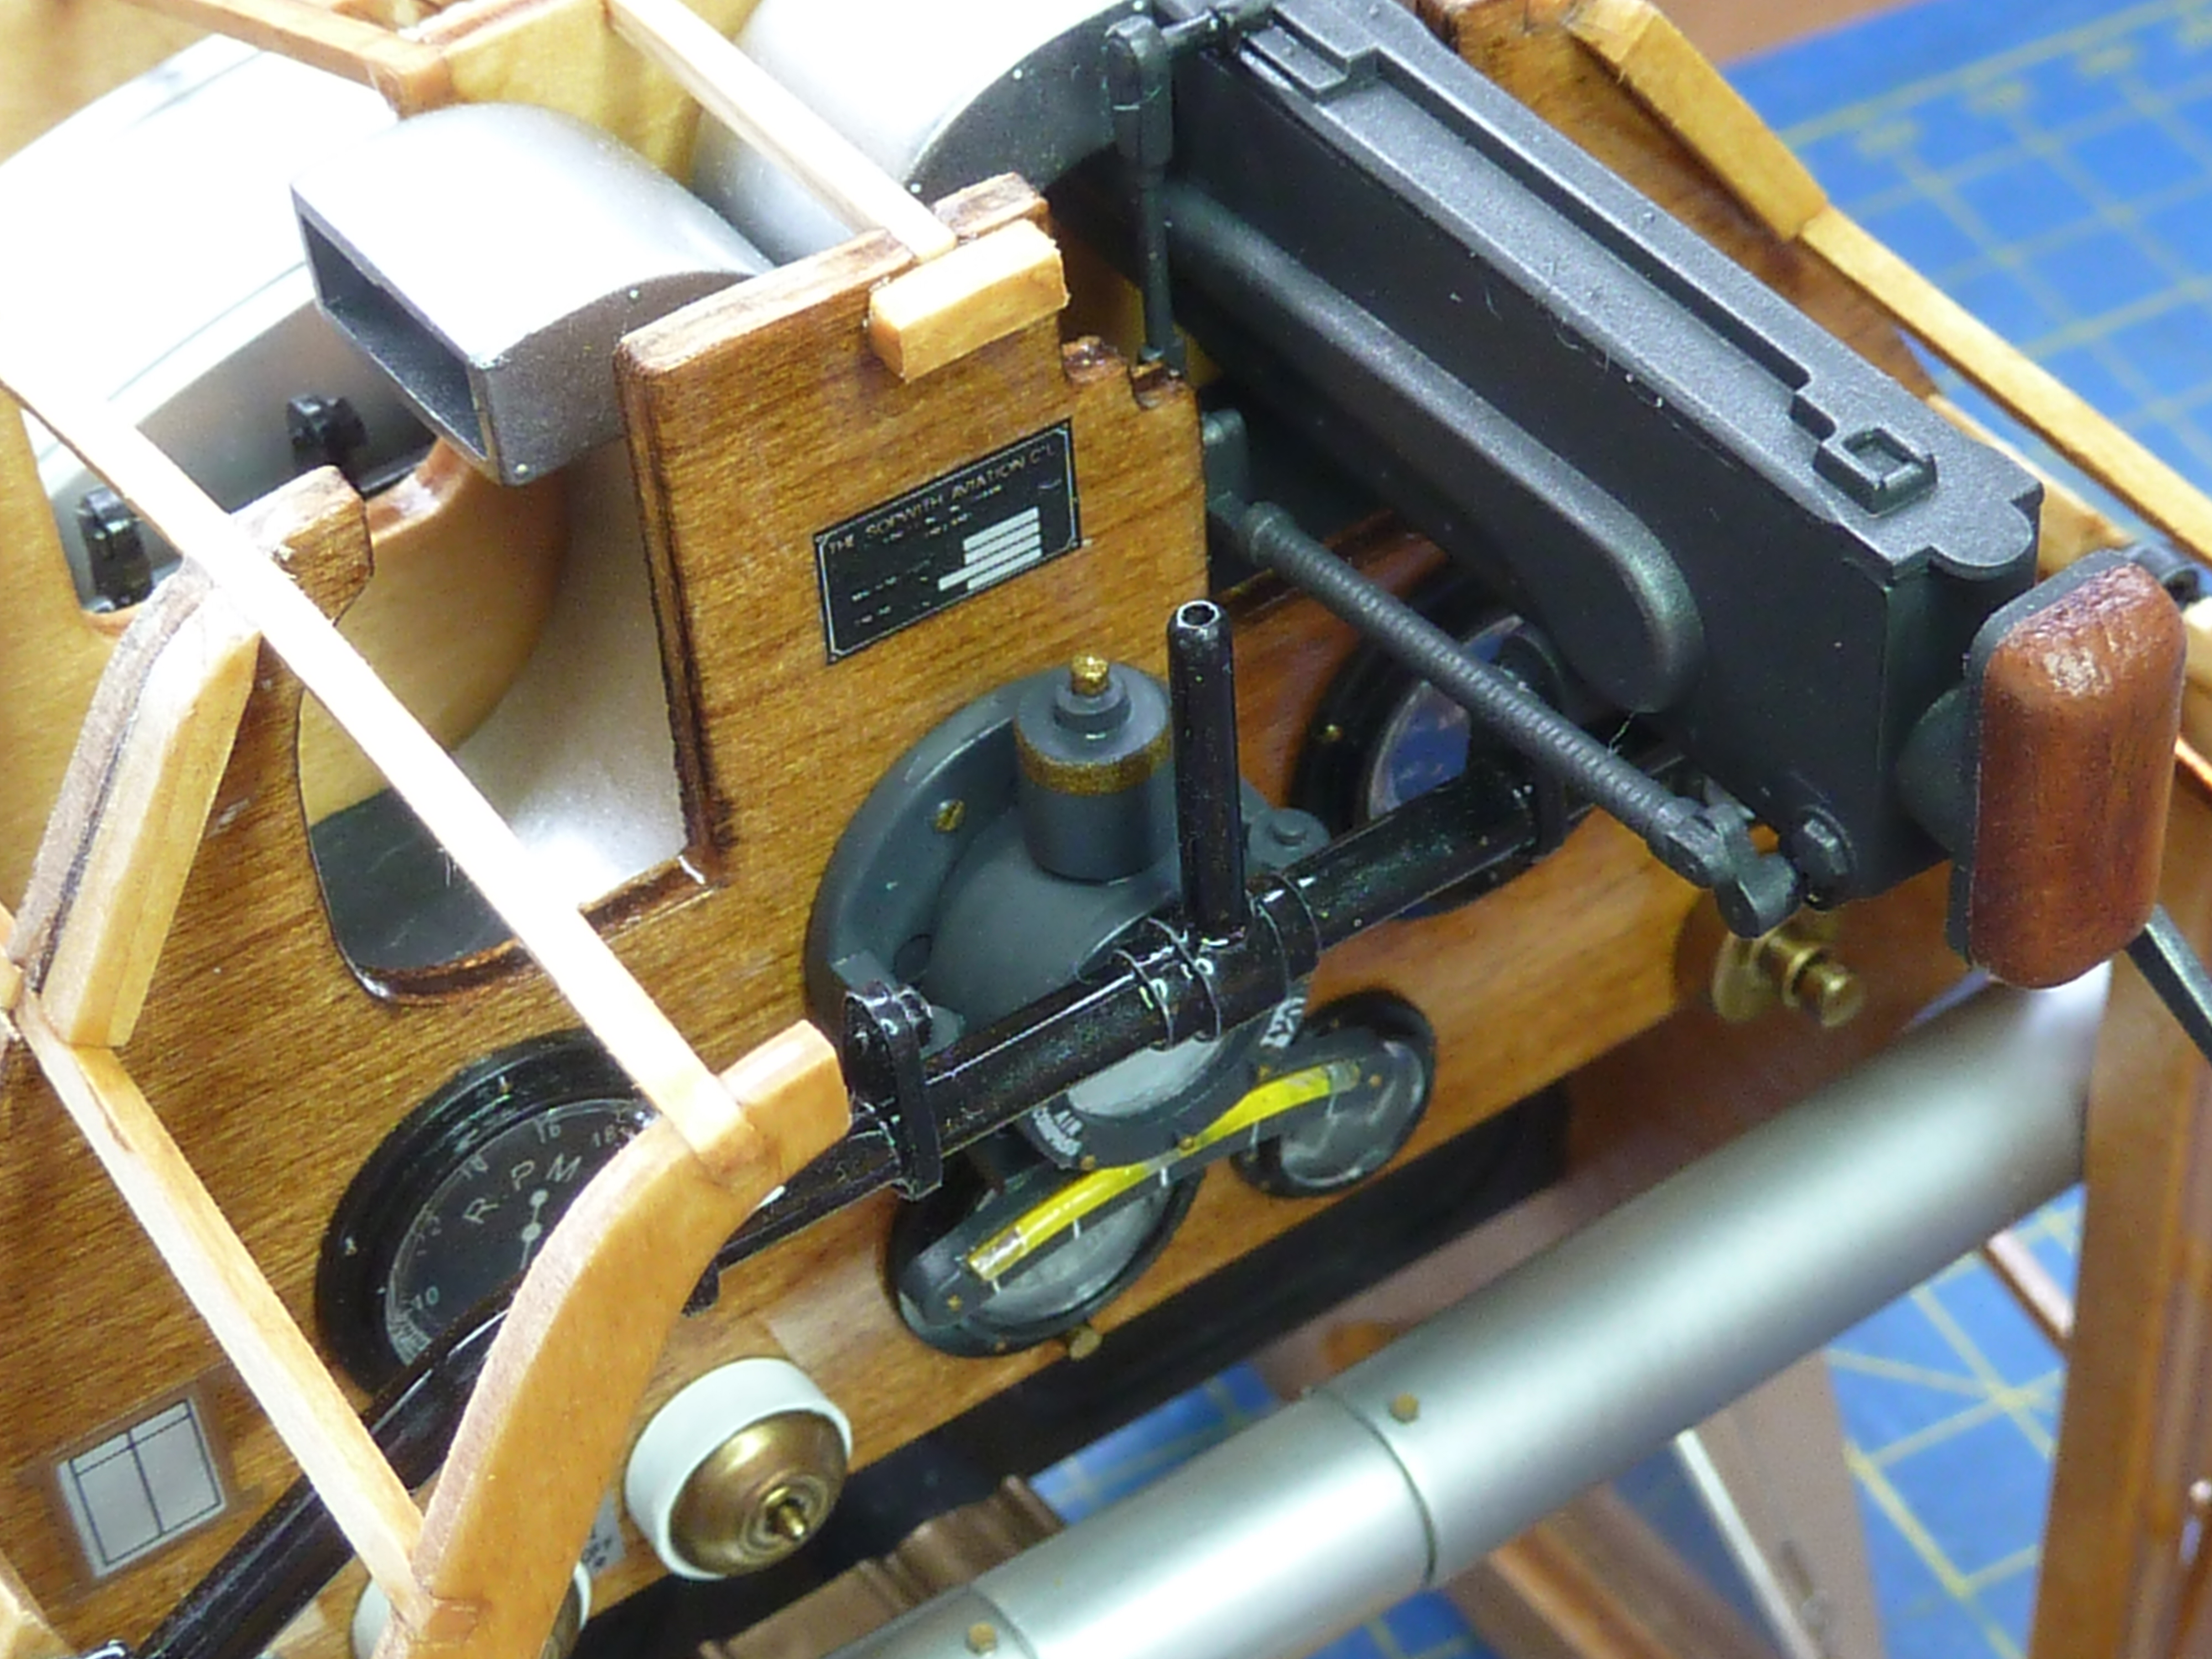

Here’s a shot of the Aldis sight finally installed.
Next up was the undercarriage. Not a huge amount to say about this as it was built pretty much out of the box except for staining and painting. Still a messy job getting it all shaped correctly though, but at least this time I had my new nifty miniature plane from Veritas Tools. Not cheap, but very good.
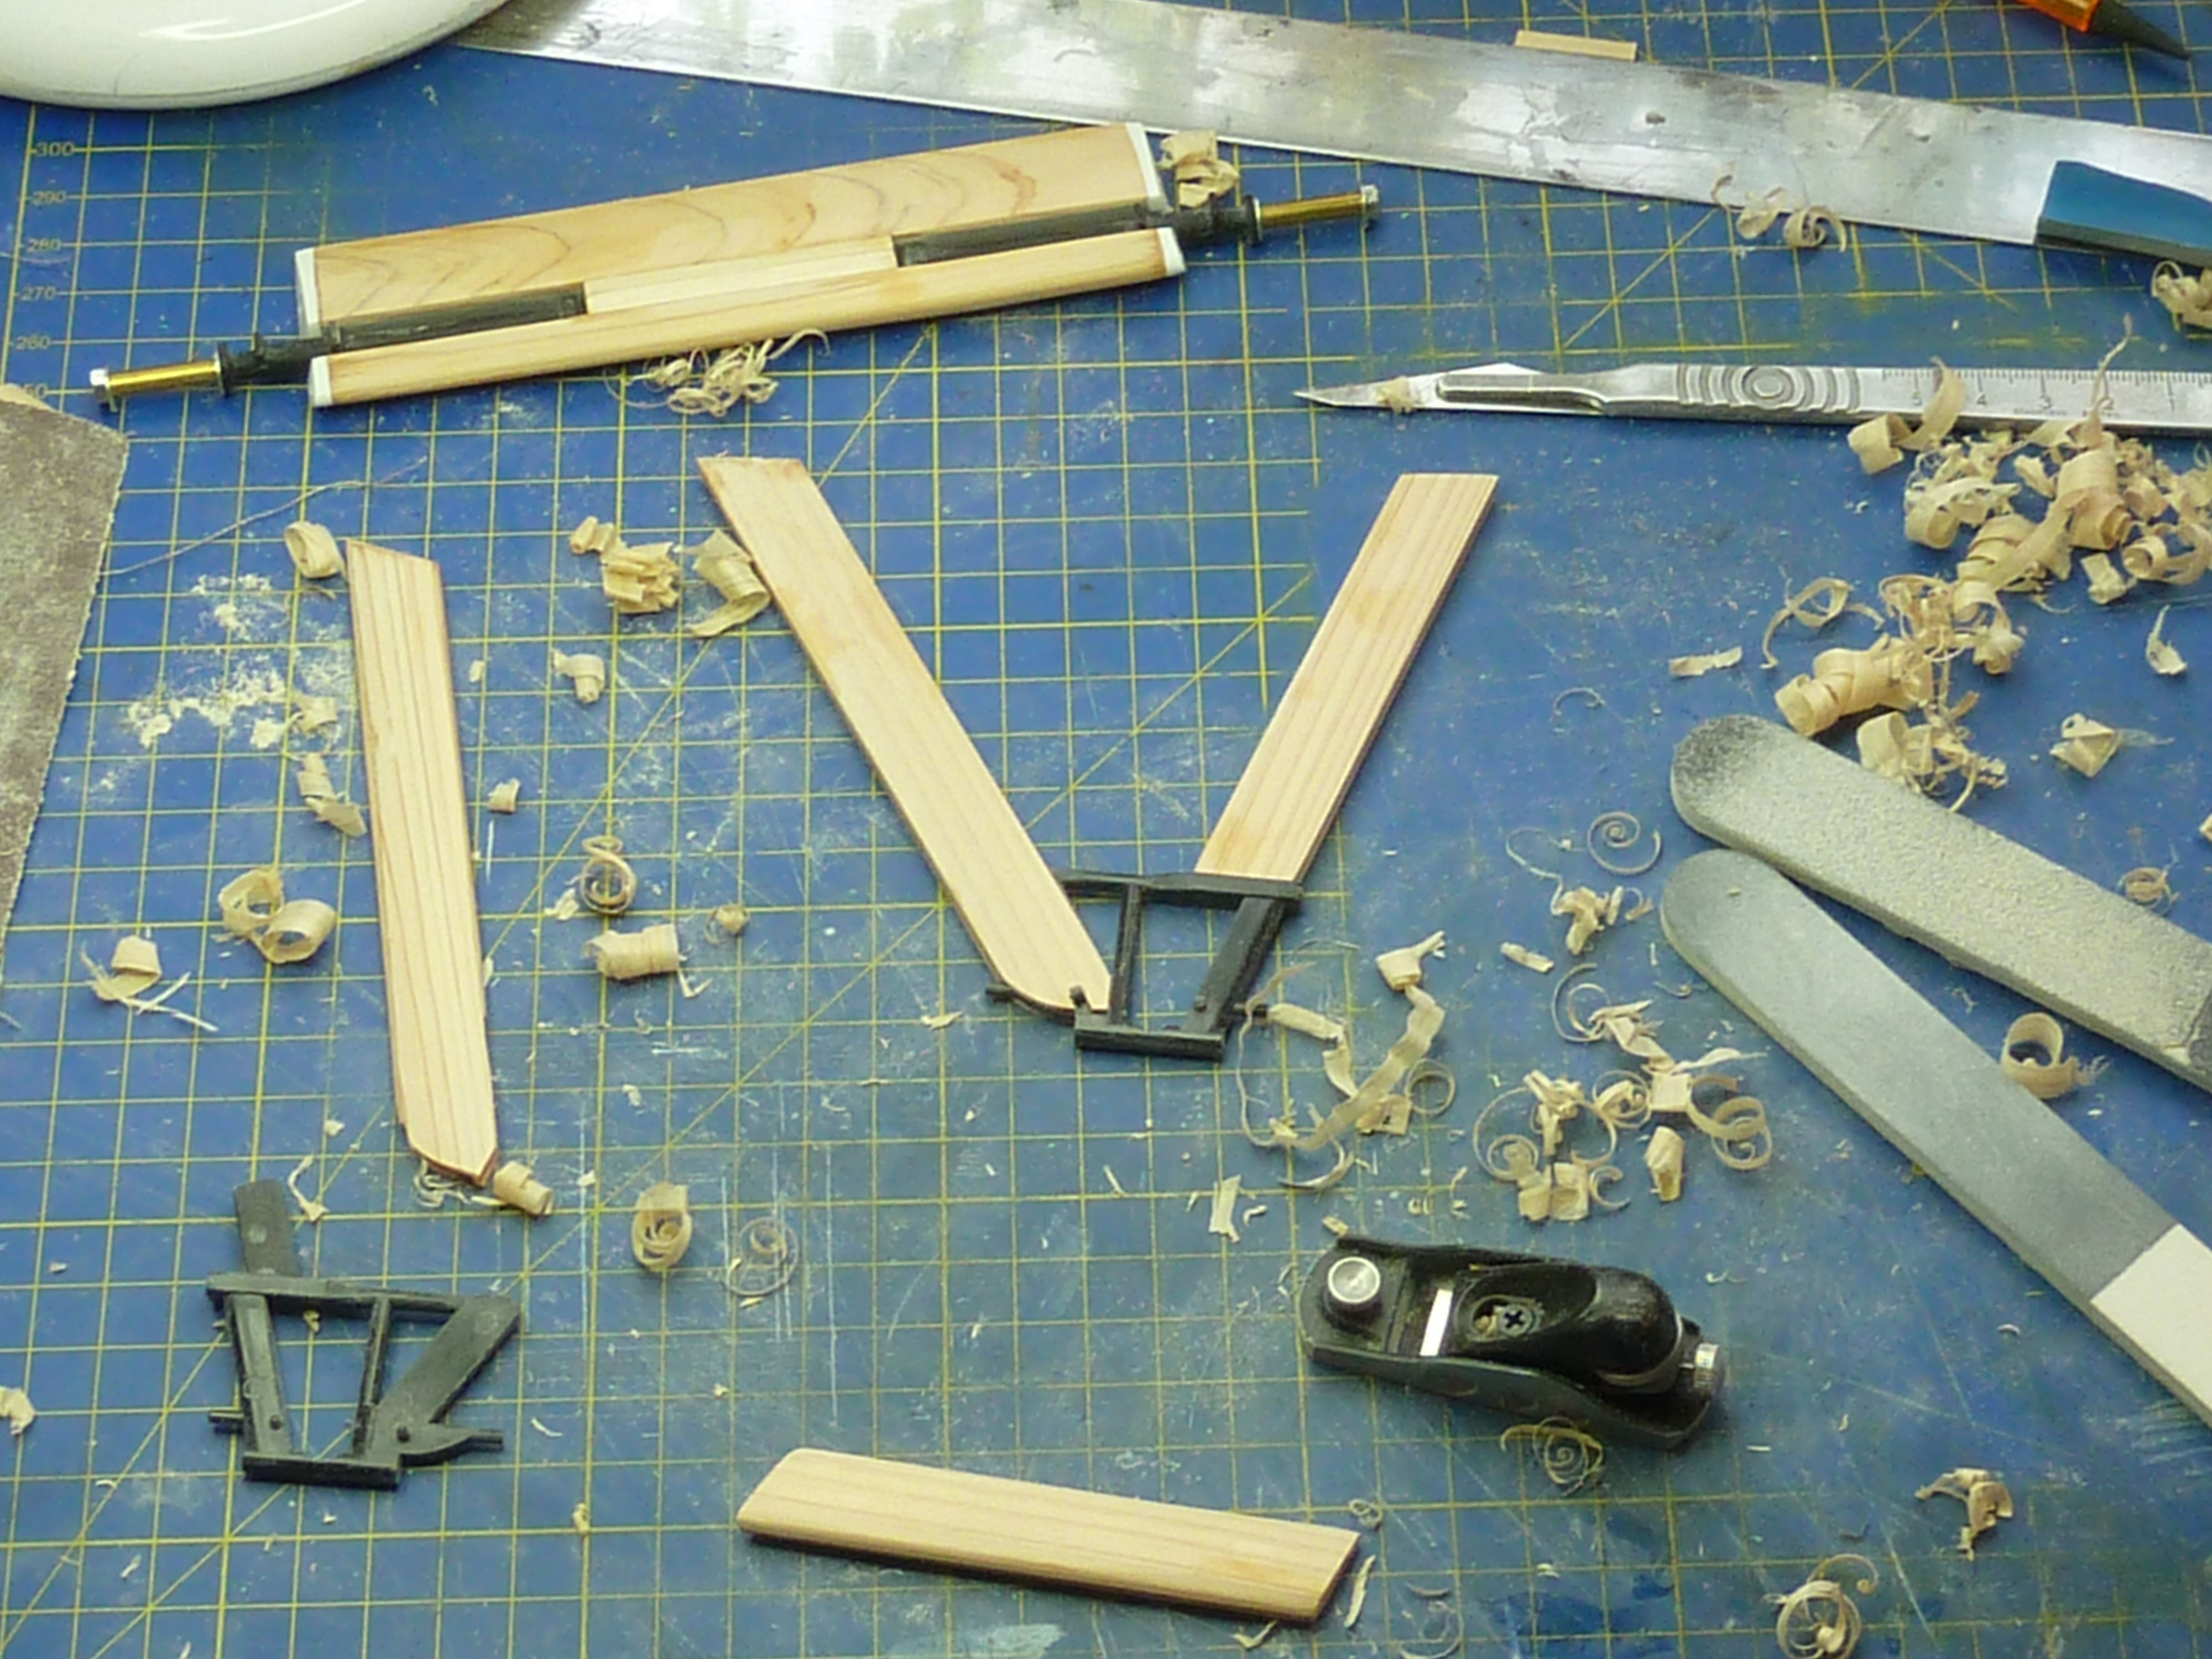


As I am painting the aircraft in the colours of one flown by Elliott White Springs, the Rotherham pump has been mounted on the undercarriage frame rather than the cabane struts for this model. Later aircraft sometimes had this mod. as the vibrations from the pump during a dive could be quite severe and had been known to damage the cabane struts, hence the move to the stronger undercarriage ones.
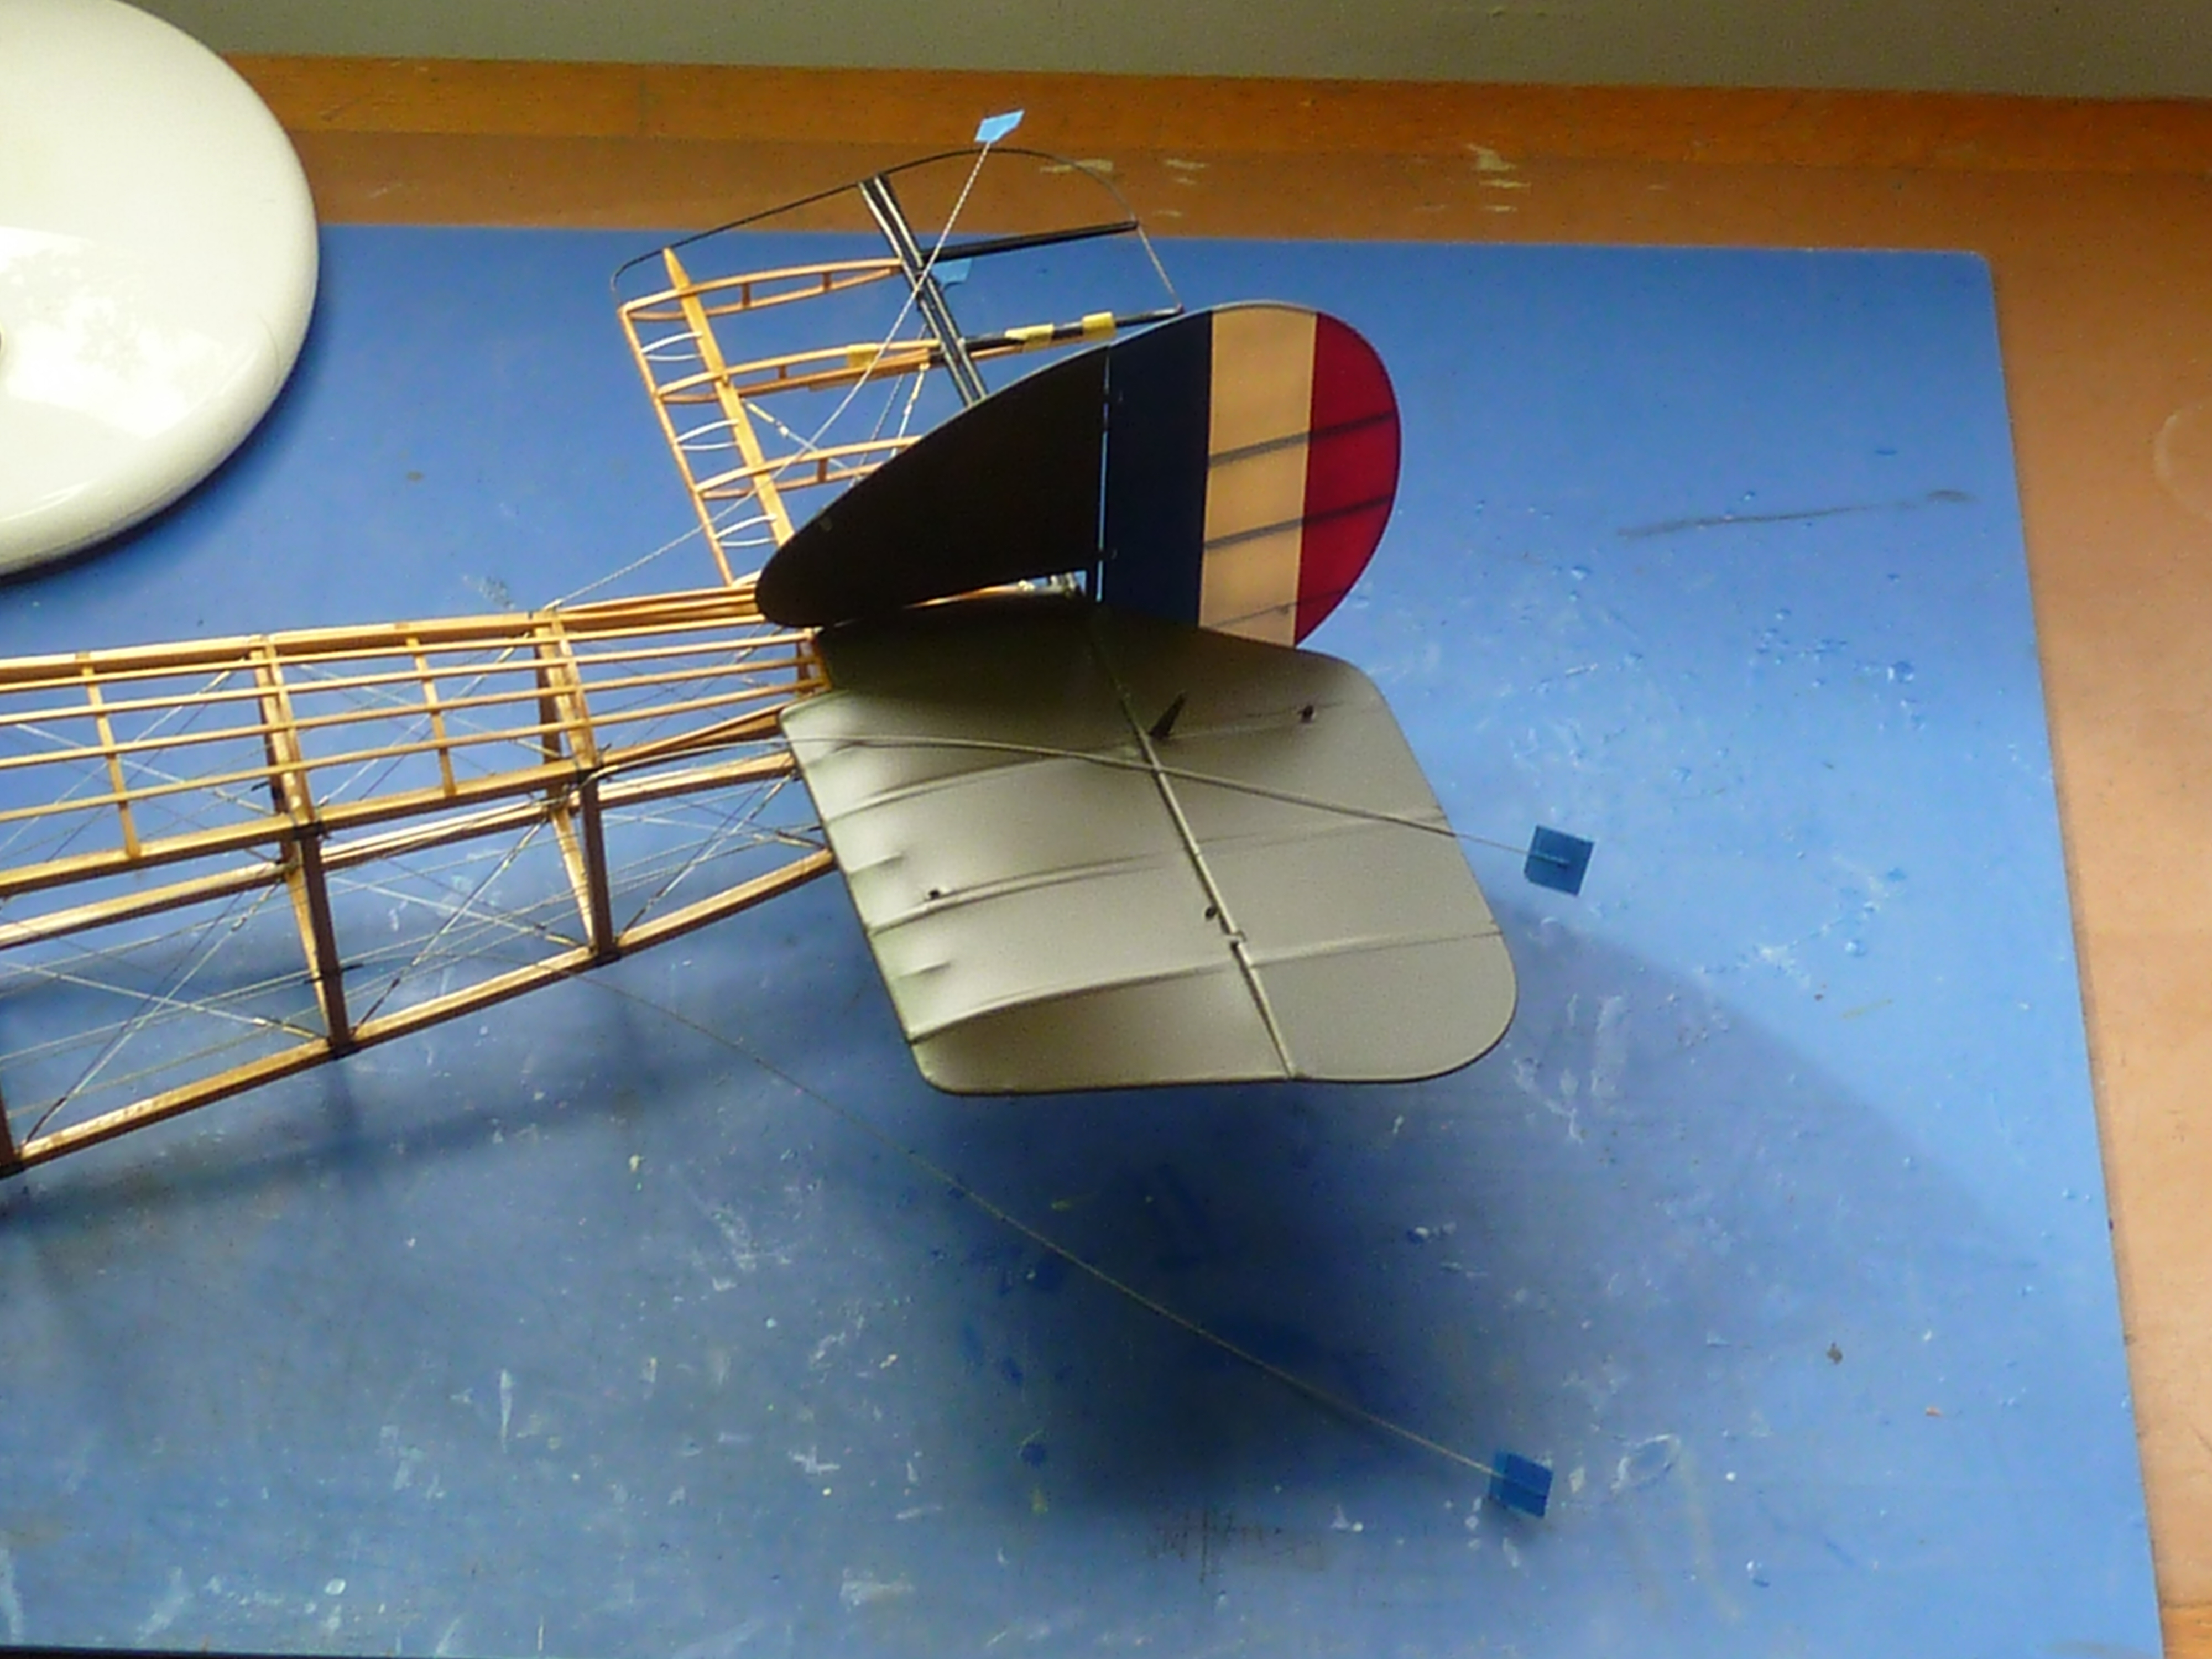
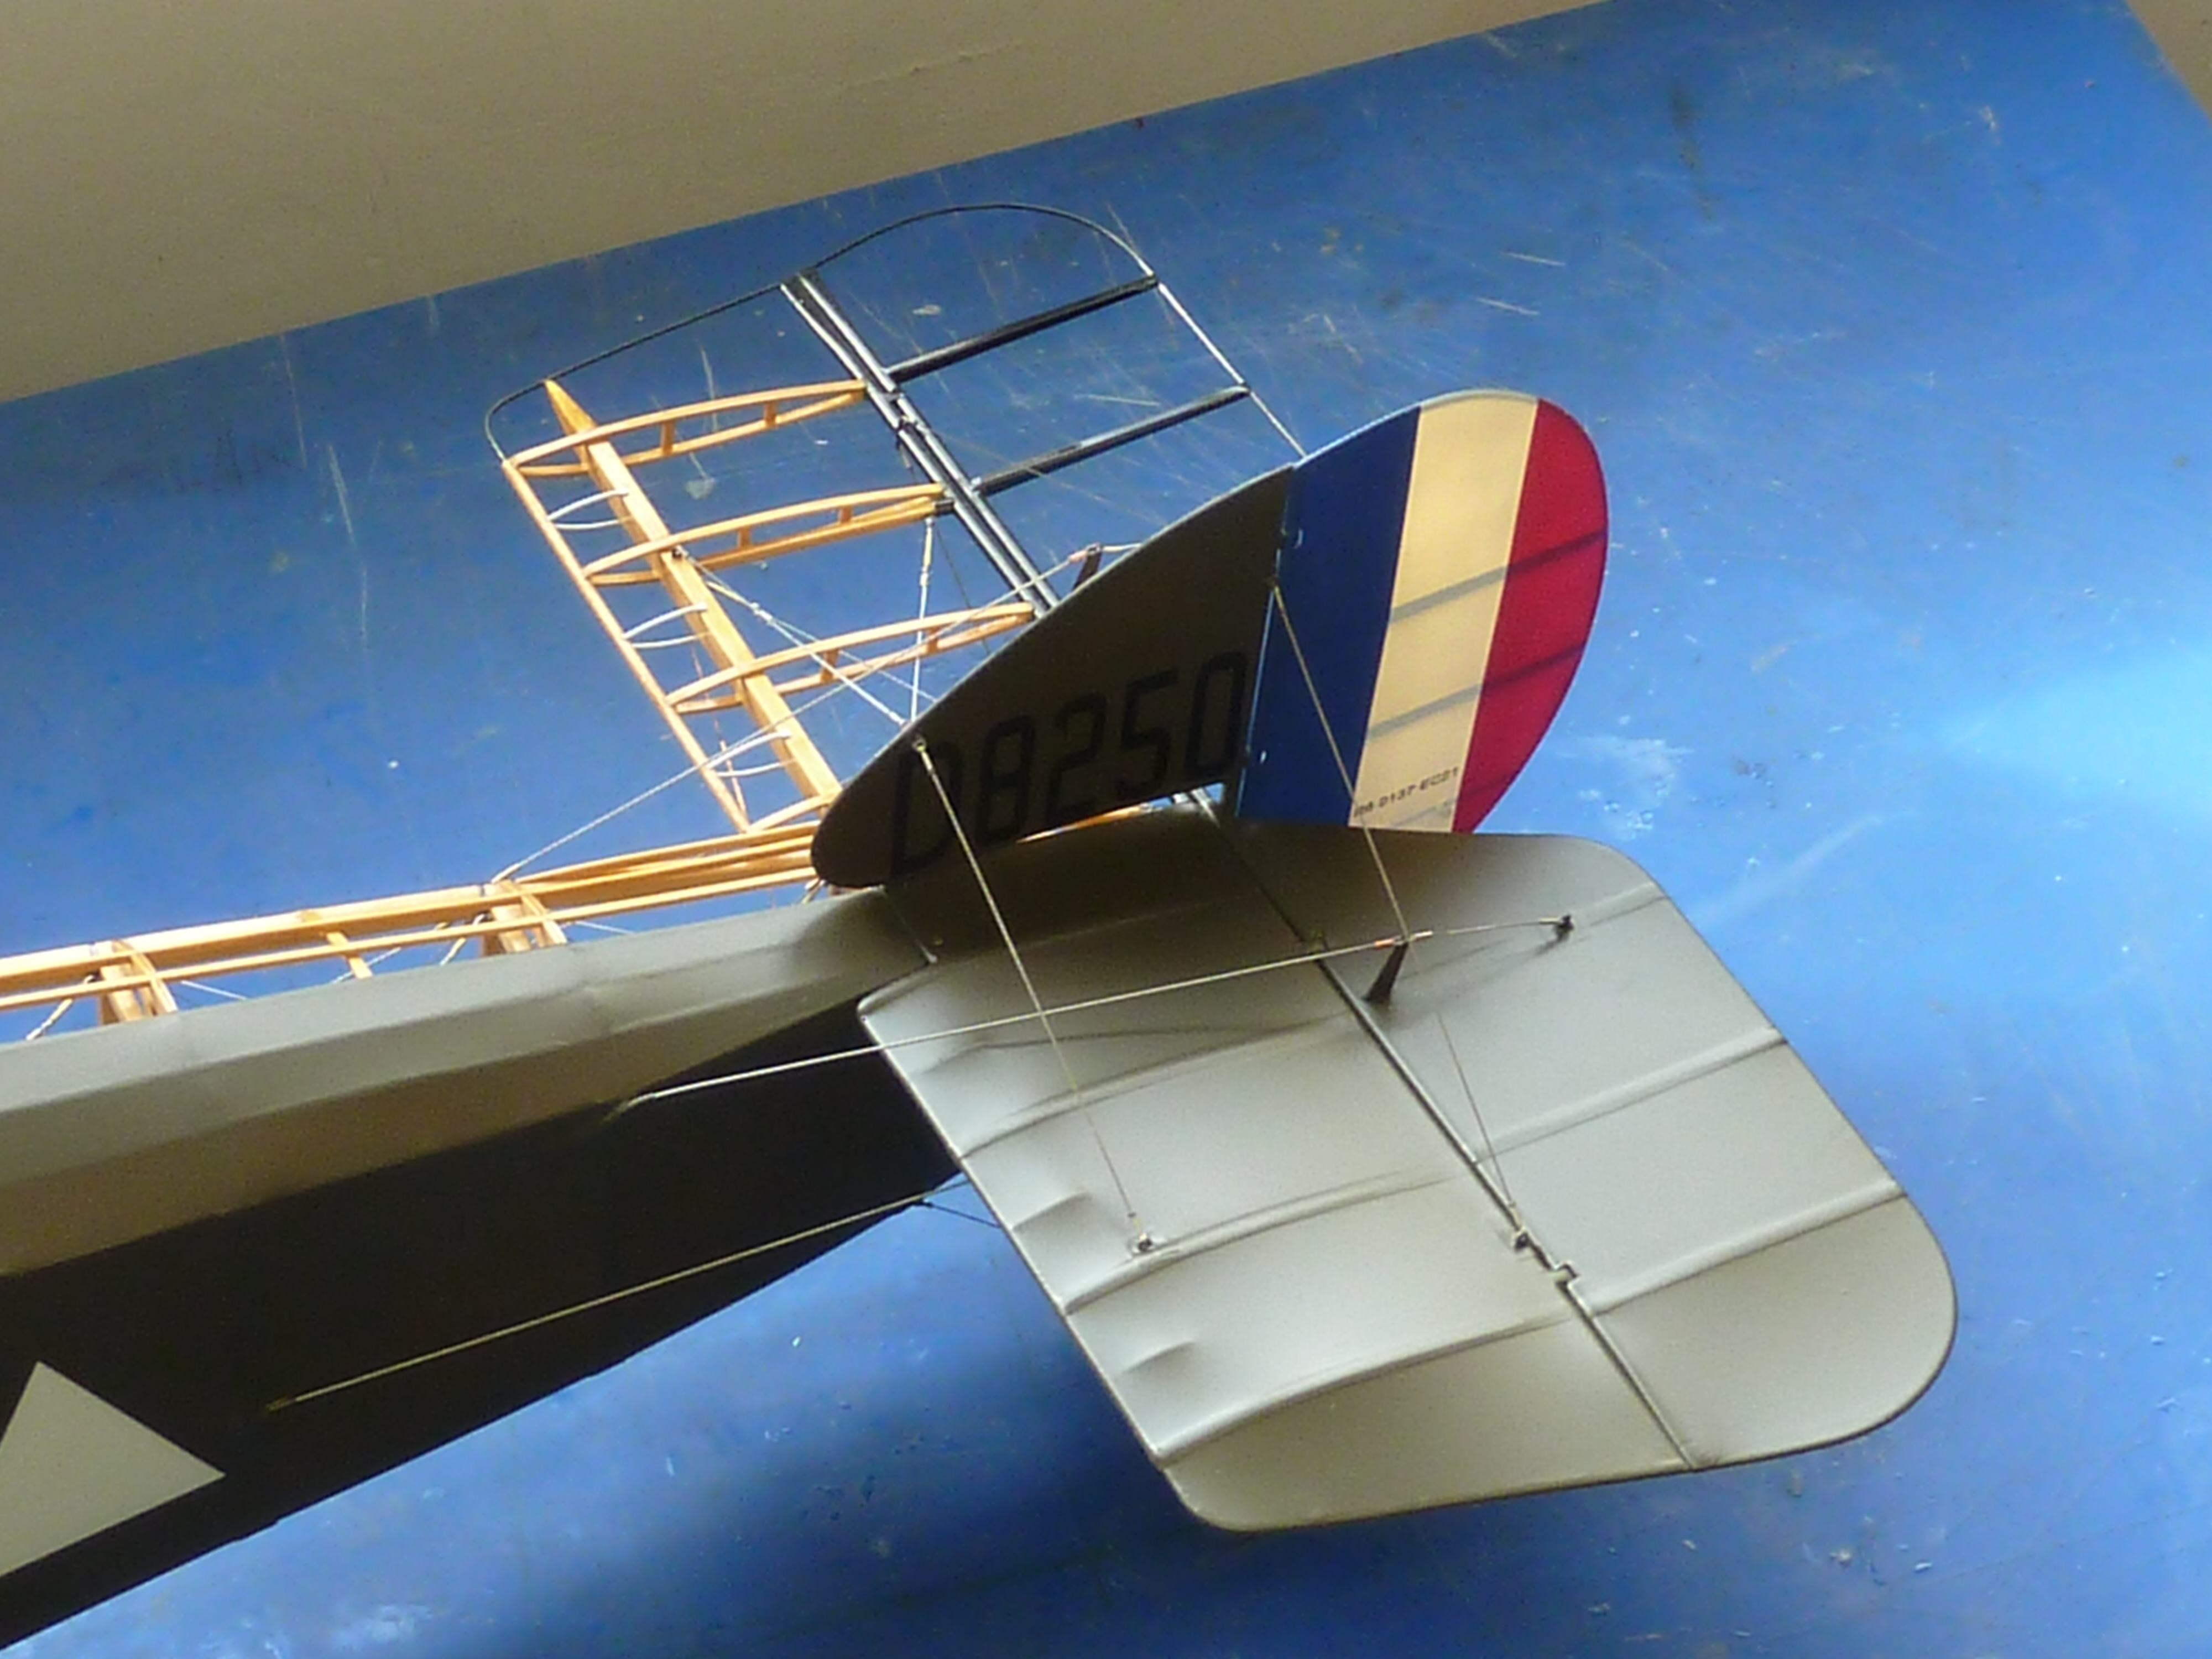
Next up was the tailplane. As before this was pretty much scratch built, using only the wood from the kit. I think the aerofoil section has come out a little deep and I should’ve bent the rib strips a little less in retrospect. The use of stainless steel for the outer perimeter has resulted in a much stronger structure than on the first model though.
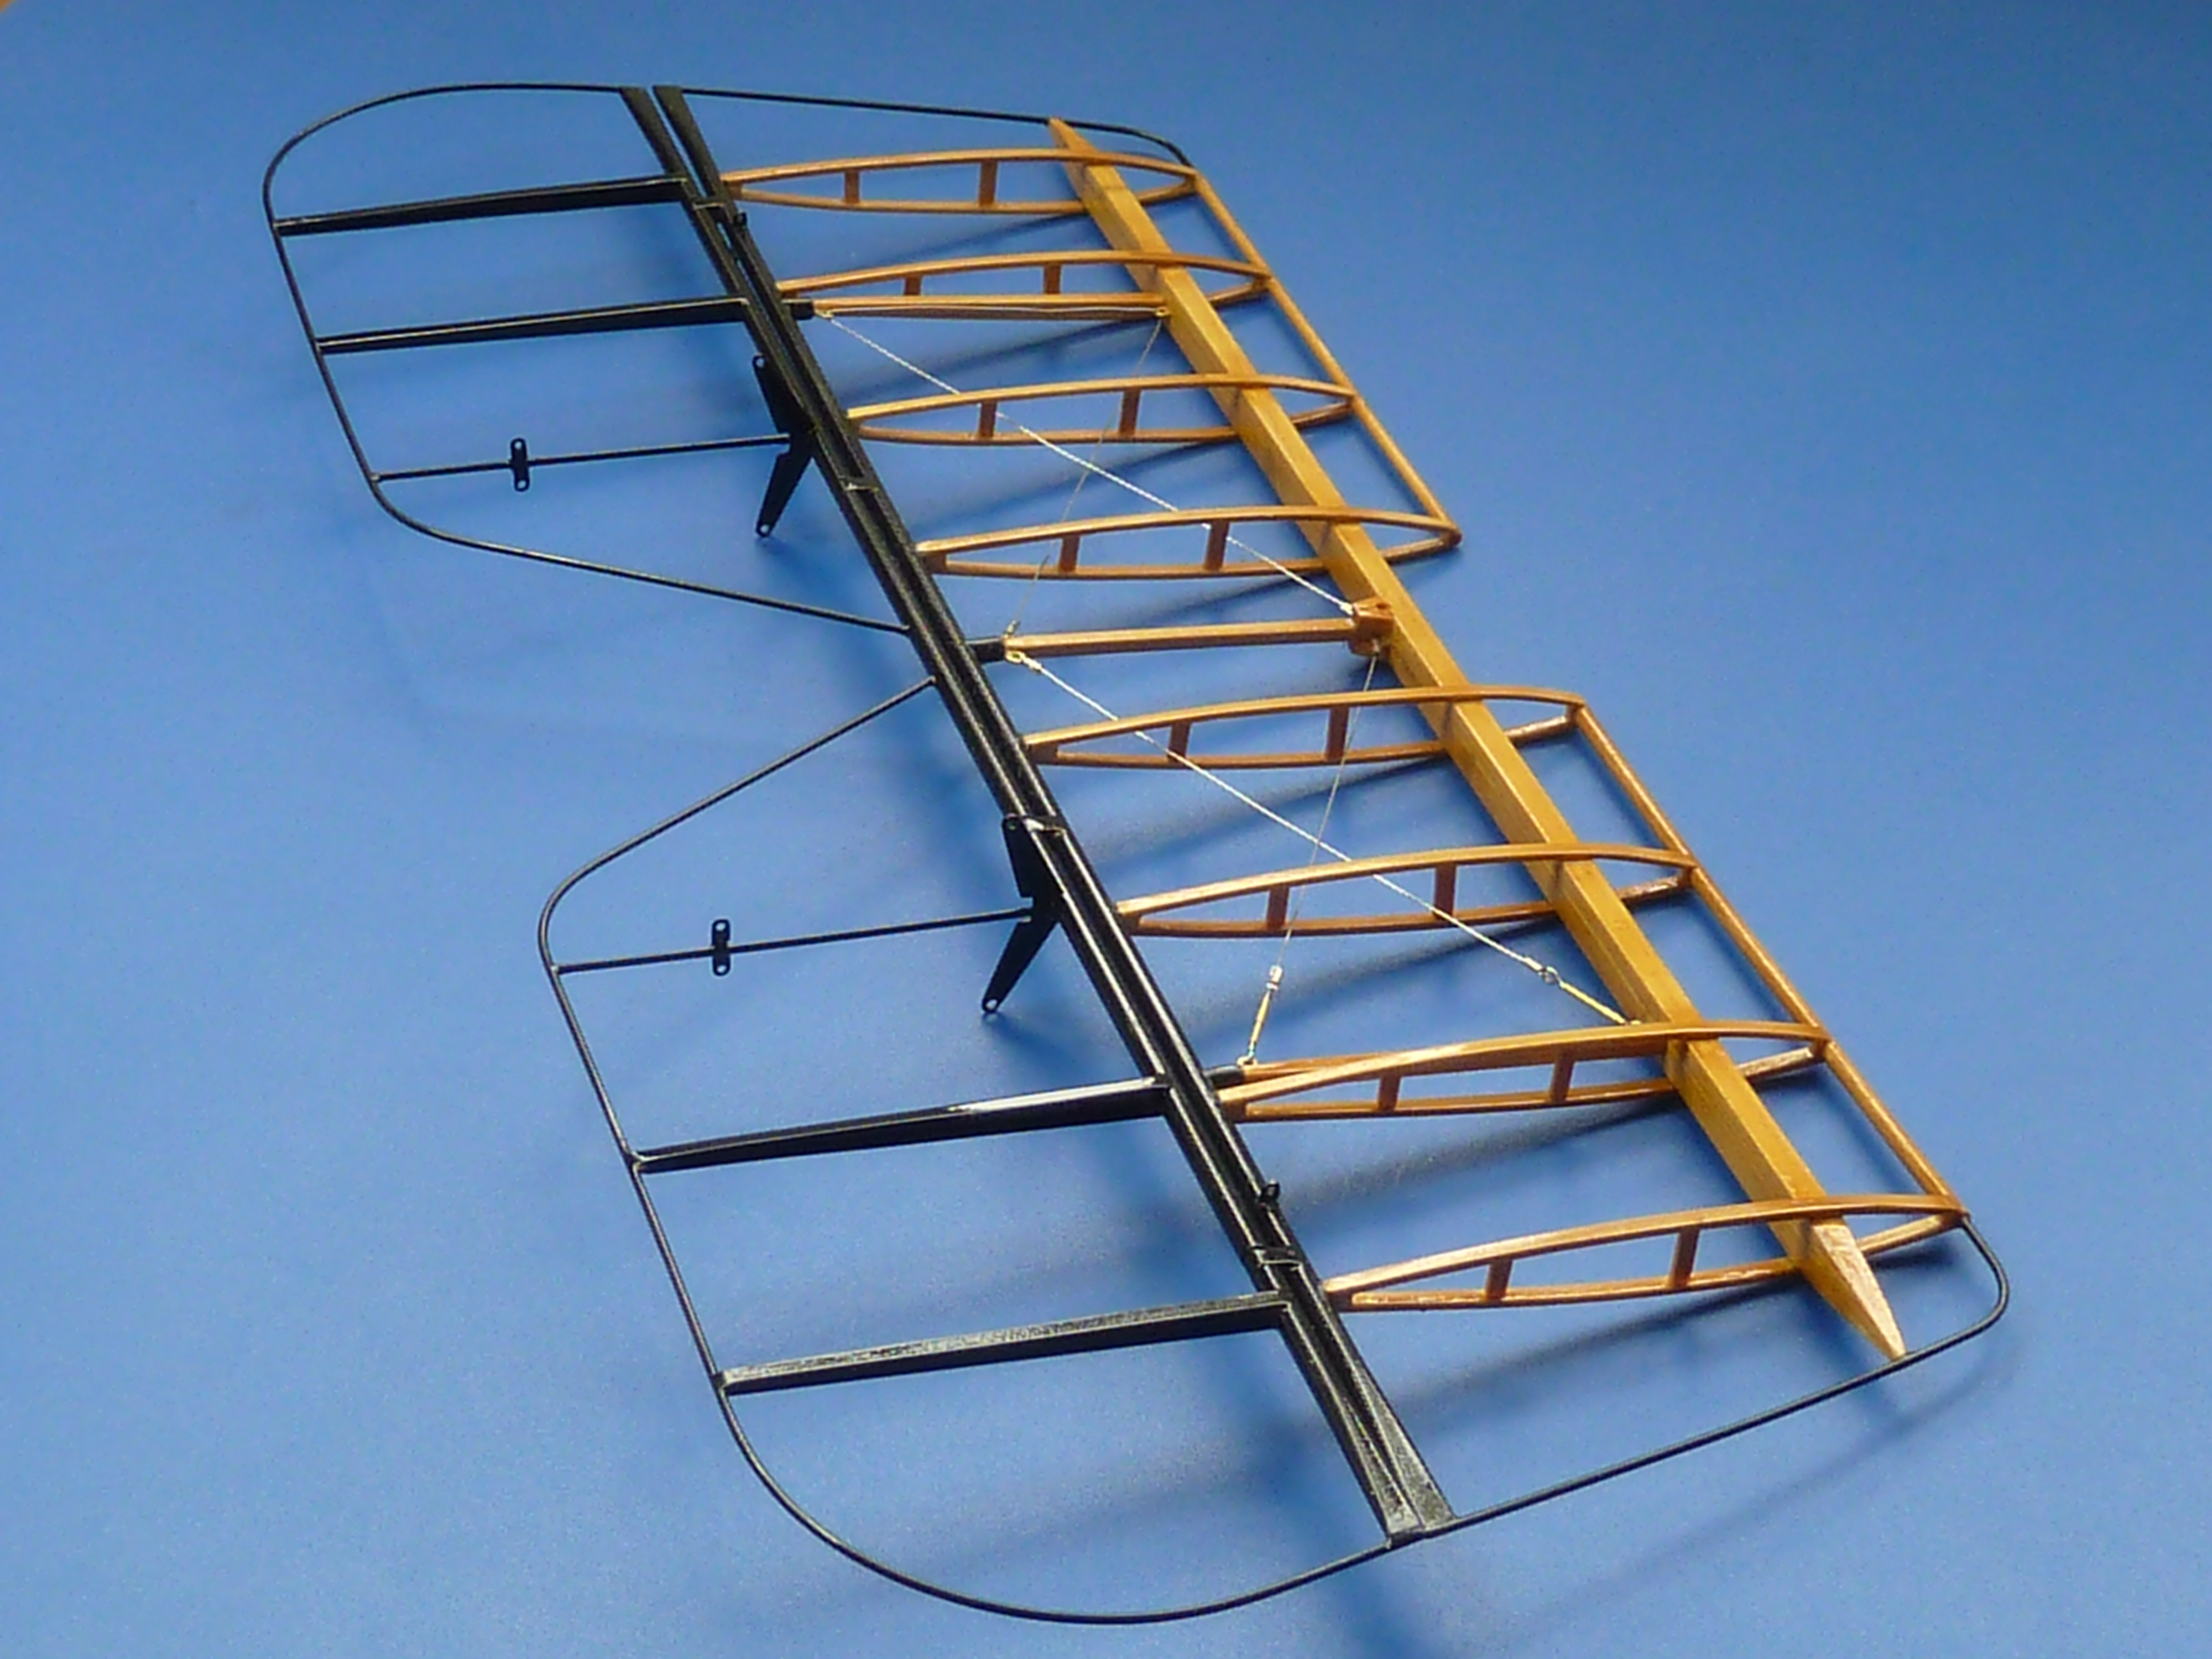
The scratchbuilt ribs with one of those supplied in the kit. Hasegawa’s bear no relation on reality and totally preclude incorporating any rigging detail.
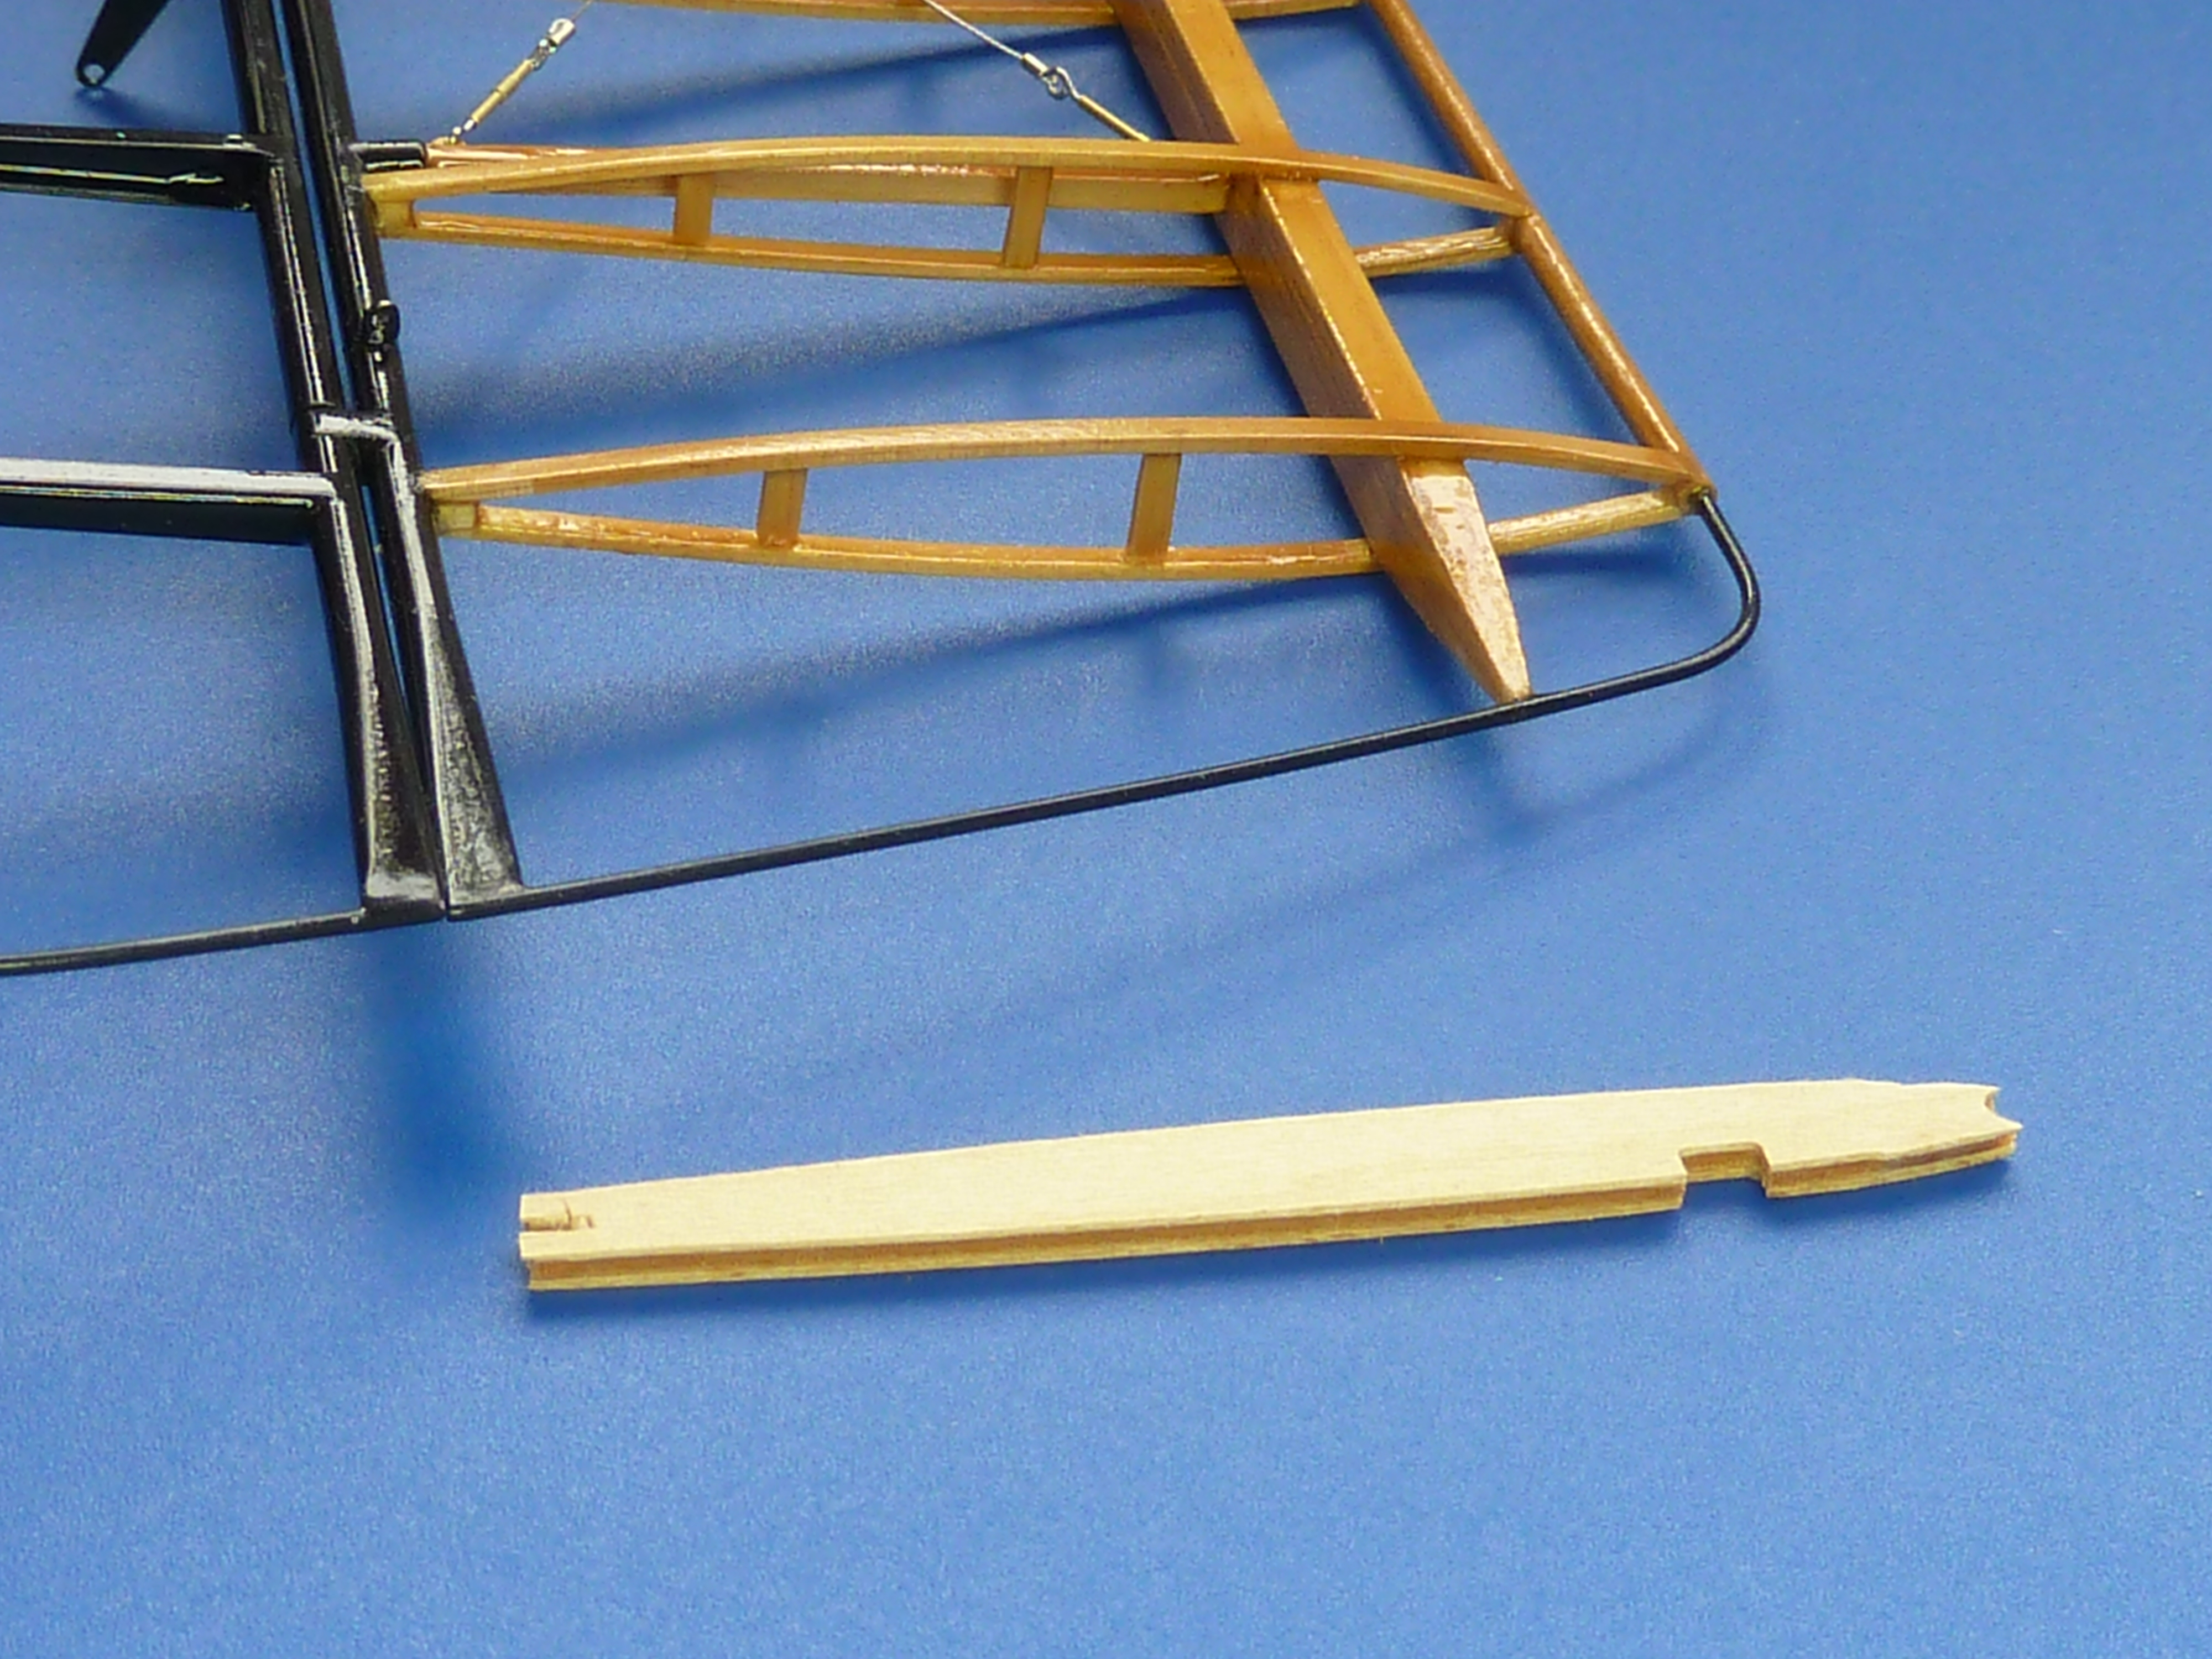
The final structure offered up in place with the fin prior to covering.

One new thing that I have done this time is make some nice etched brass surrounds for the filler caps. The kit supplies, and my previous model used, stickers, but I felt that a nice feature could be made of them. I used the ‘Edinburgh Etch’ system which is based on Ferric Chloride with a citric acid catalyst. You can either create masks using permanent markers (as with the ‘TEST A’ text below or by printing them out on a laser jet or similar). As a first attempt I was quite pleased with the results.

The cleaned and polished items next to the kit’s stickers.

Against the plywood covering of the fuselage.

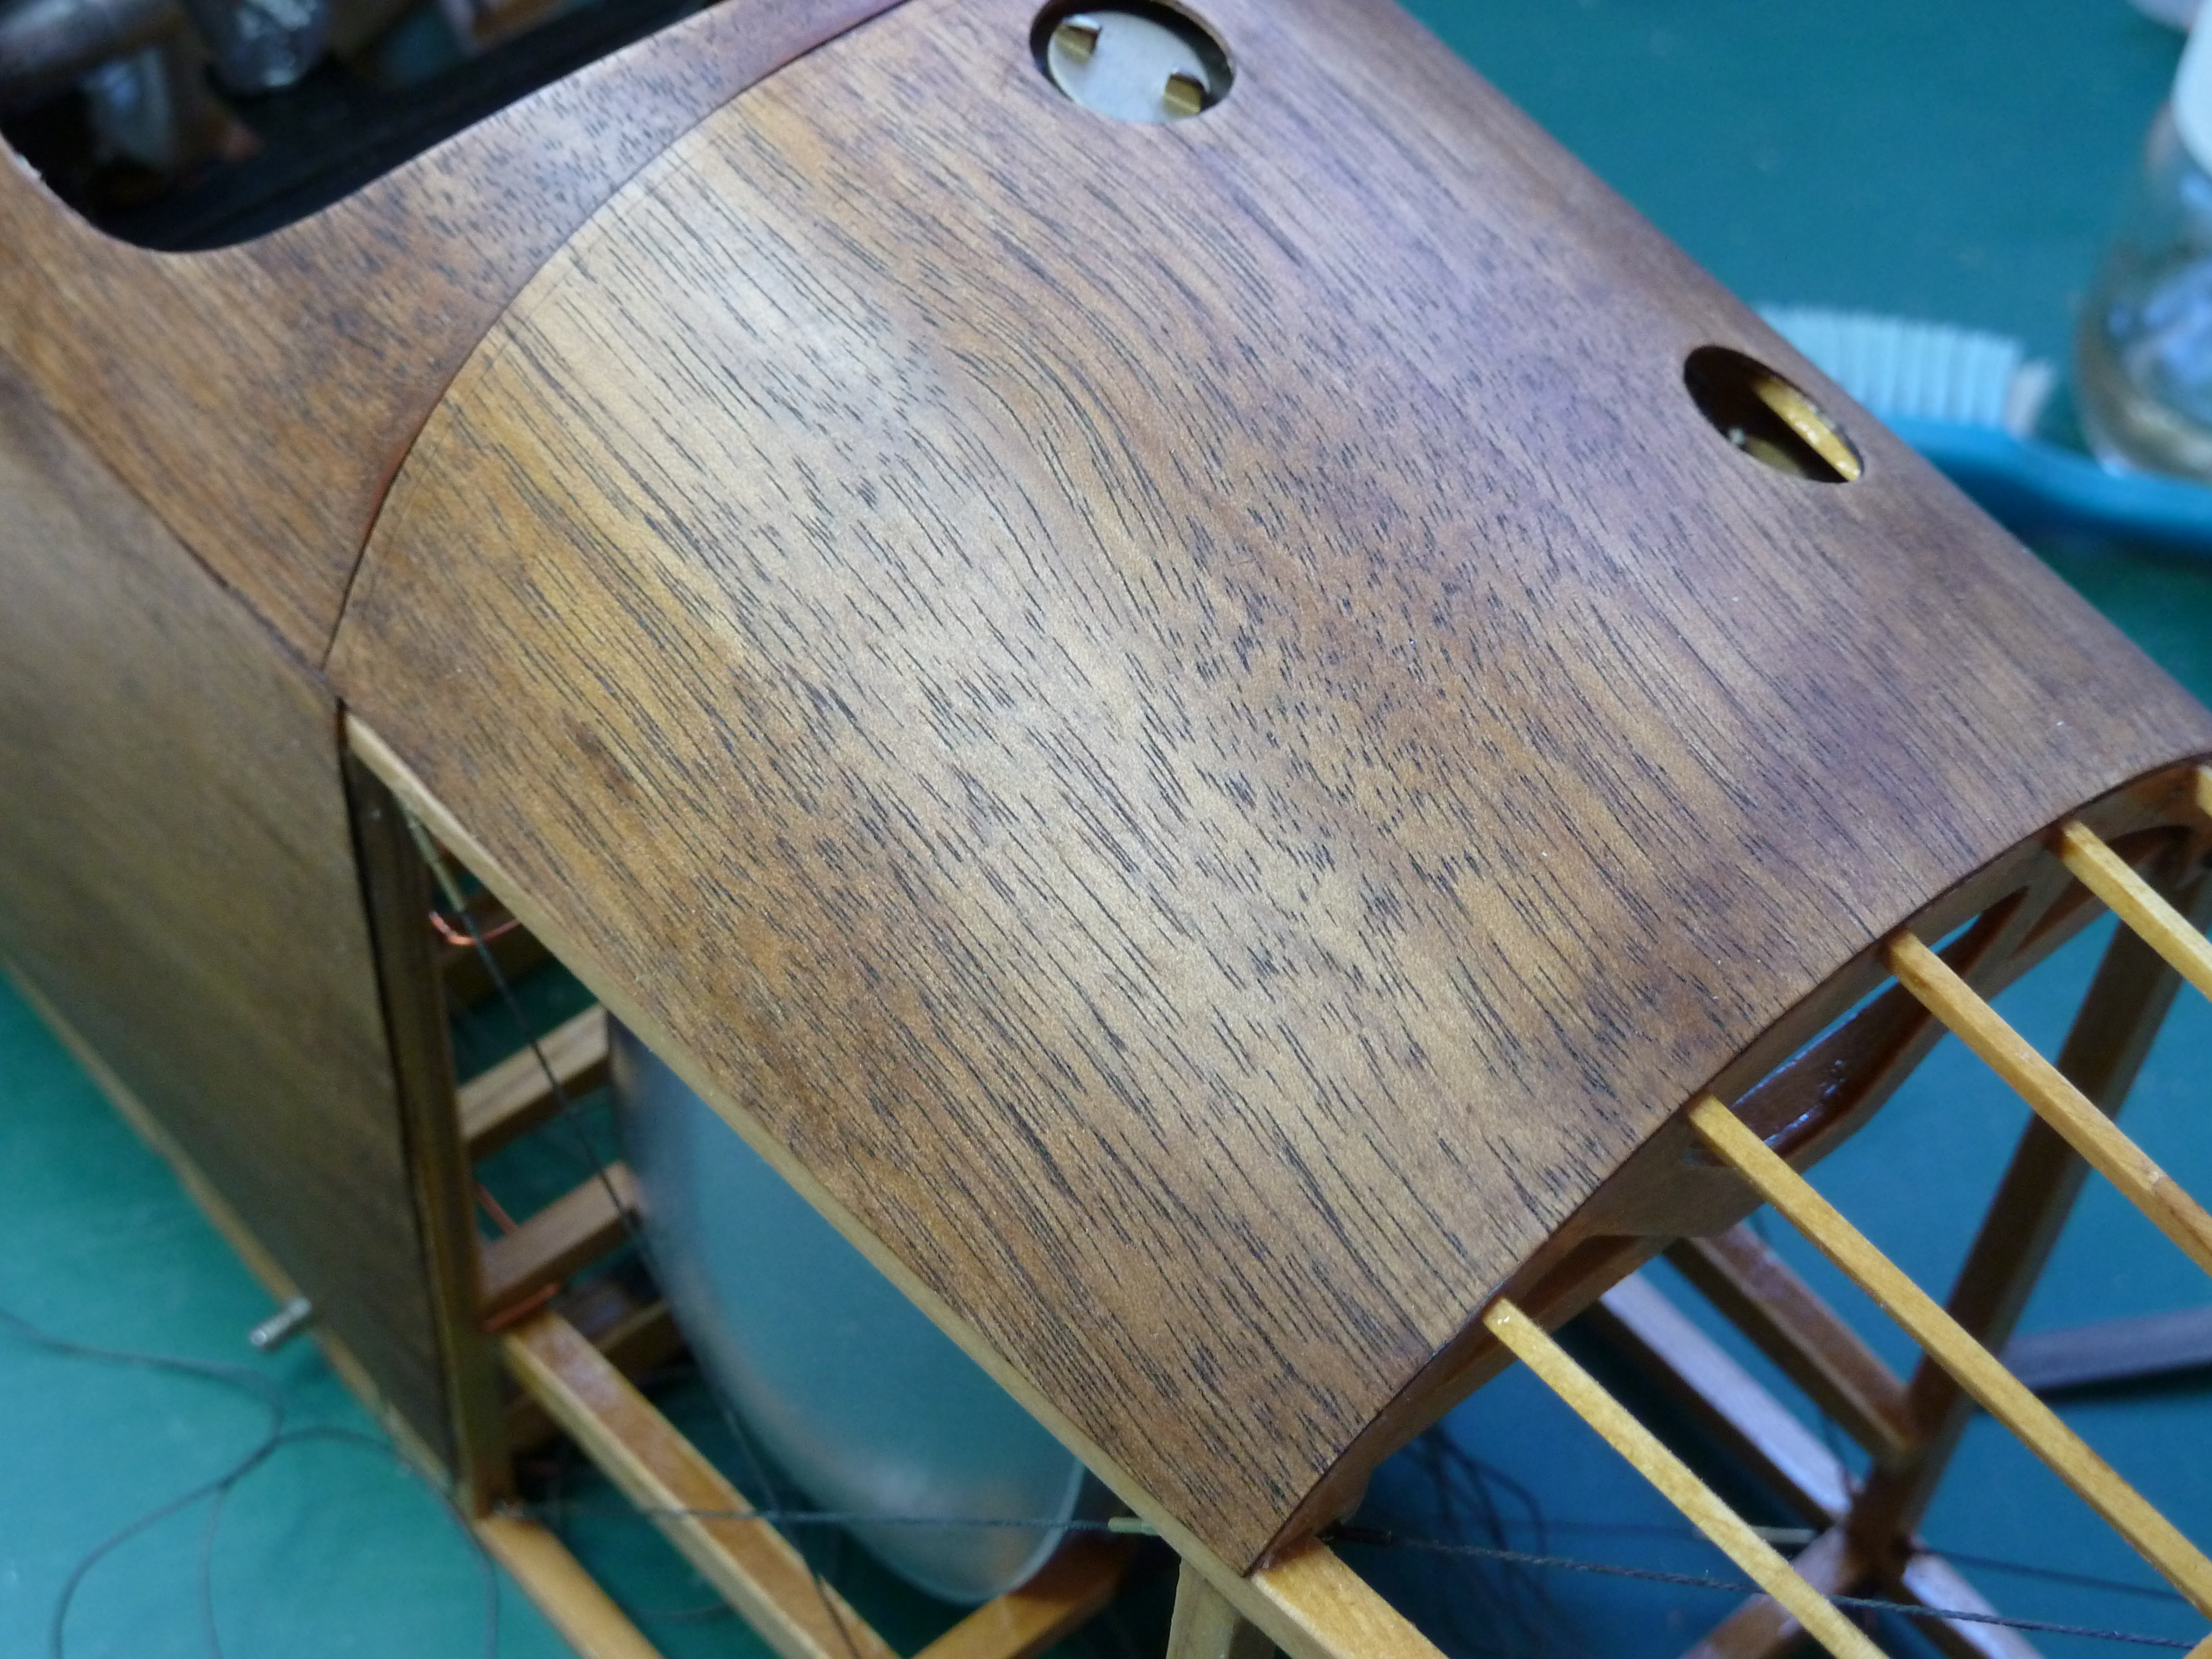
And finally in situ. The birch ply was stained with a mix of Liberon’s Georgian Mahogany and Antique Pine spirit stains. They were applied with an airbrush for greater control as there comes a point with a brush or cloth where you are removing as much as you are applying. With an airbrush you can build up deeper layers. Once stained a number of coats of yacht varnish were airbrushed on and the surface finally polished.

That does bring me to one other change I’ve made this time. The kit splits the plywood around the cockpit into two parts for ease of assembly I suppose. You can see what I mean on one of the photos from my first build.
This leaves you with a prominent join line which didn’t exist on the real aircraft as the join was actually around the cabane strut mountings as you can see from the picture of the Shuttleworth Trust’s Camel during its restoration.
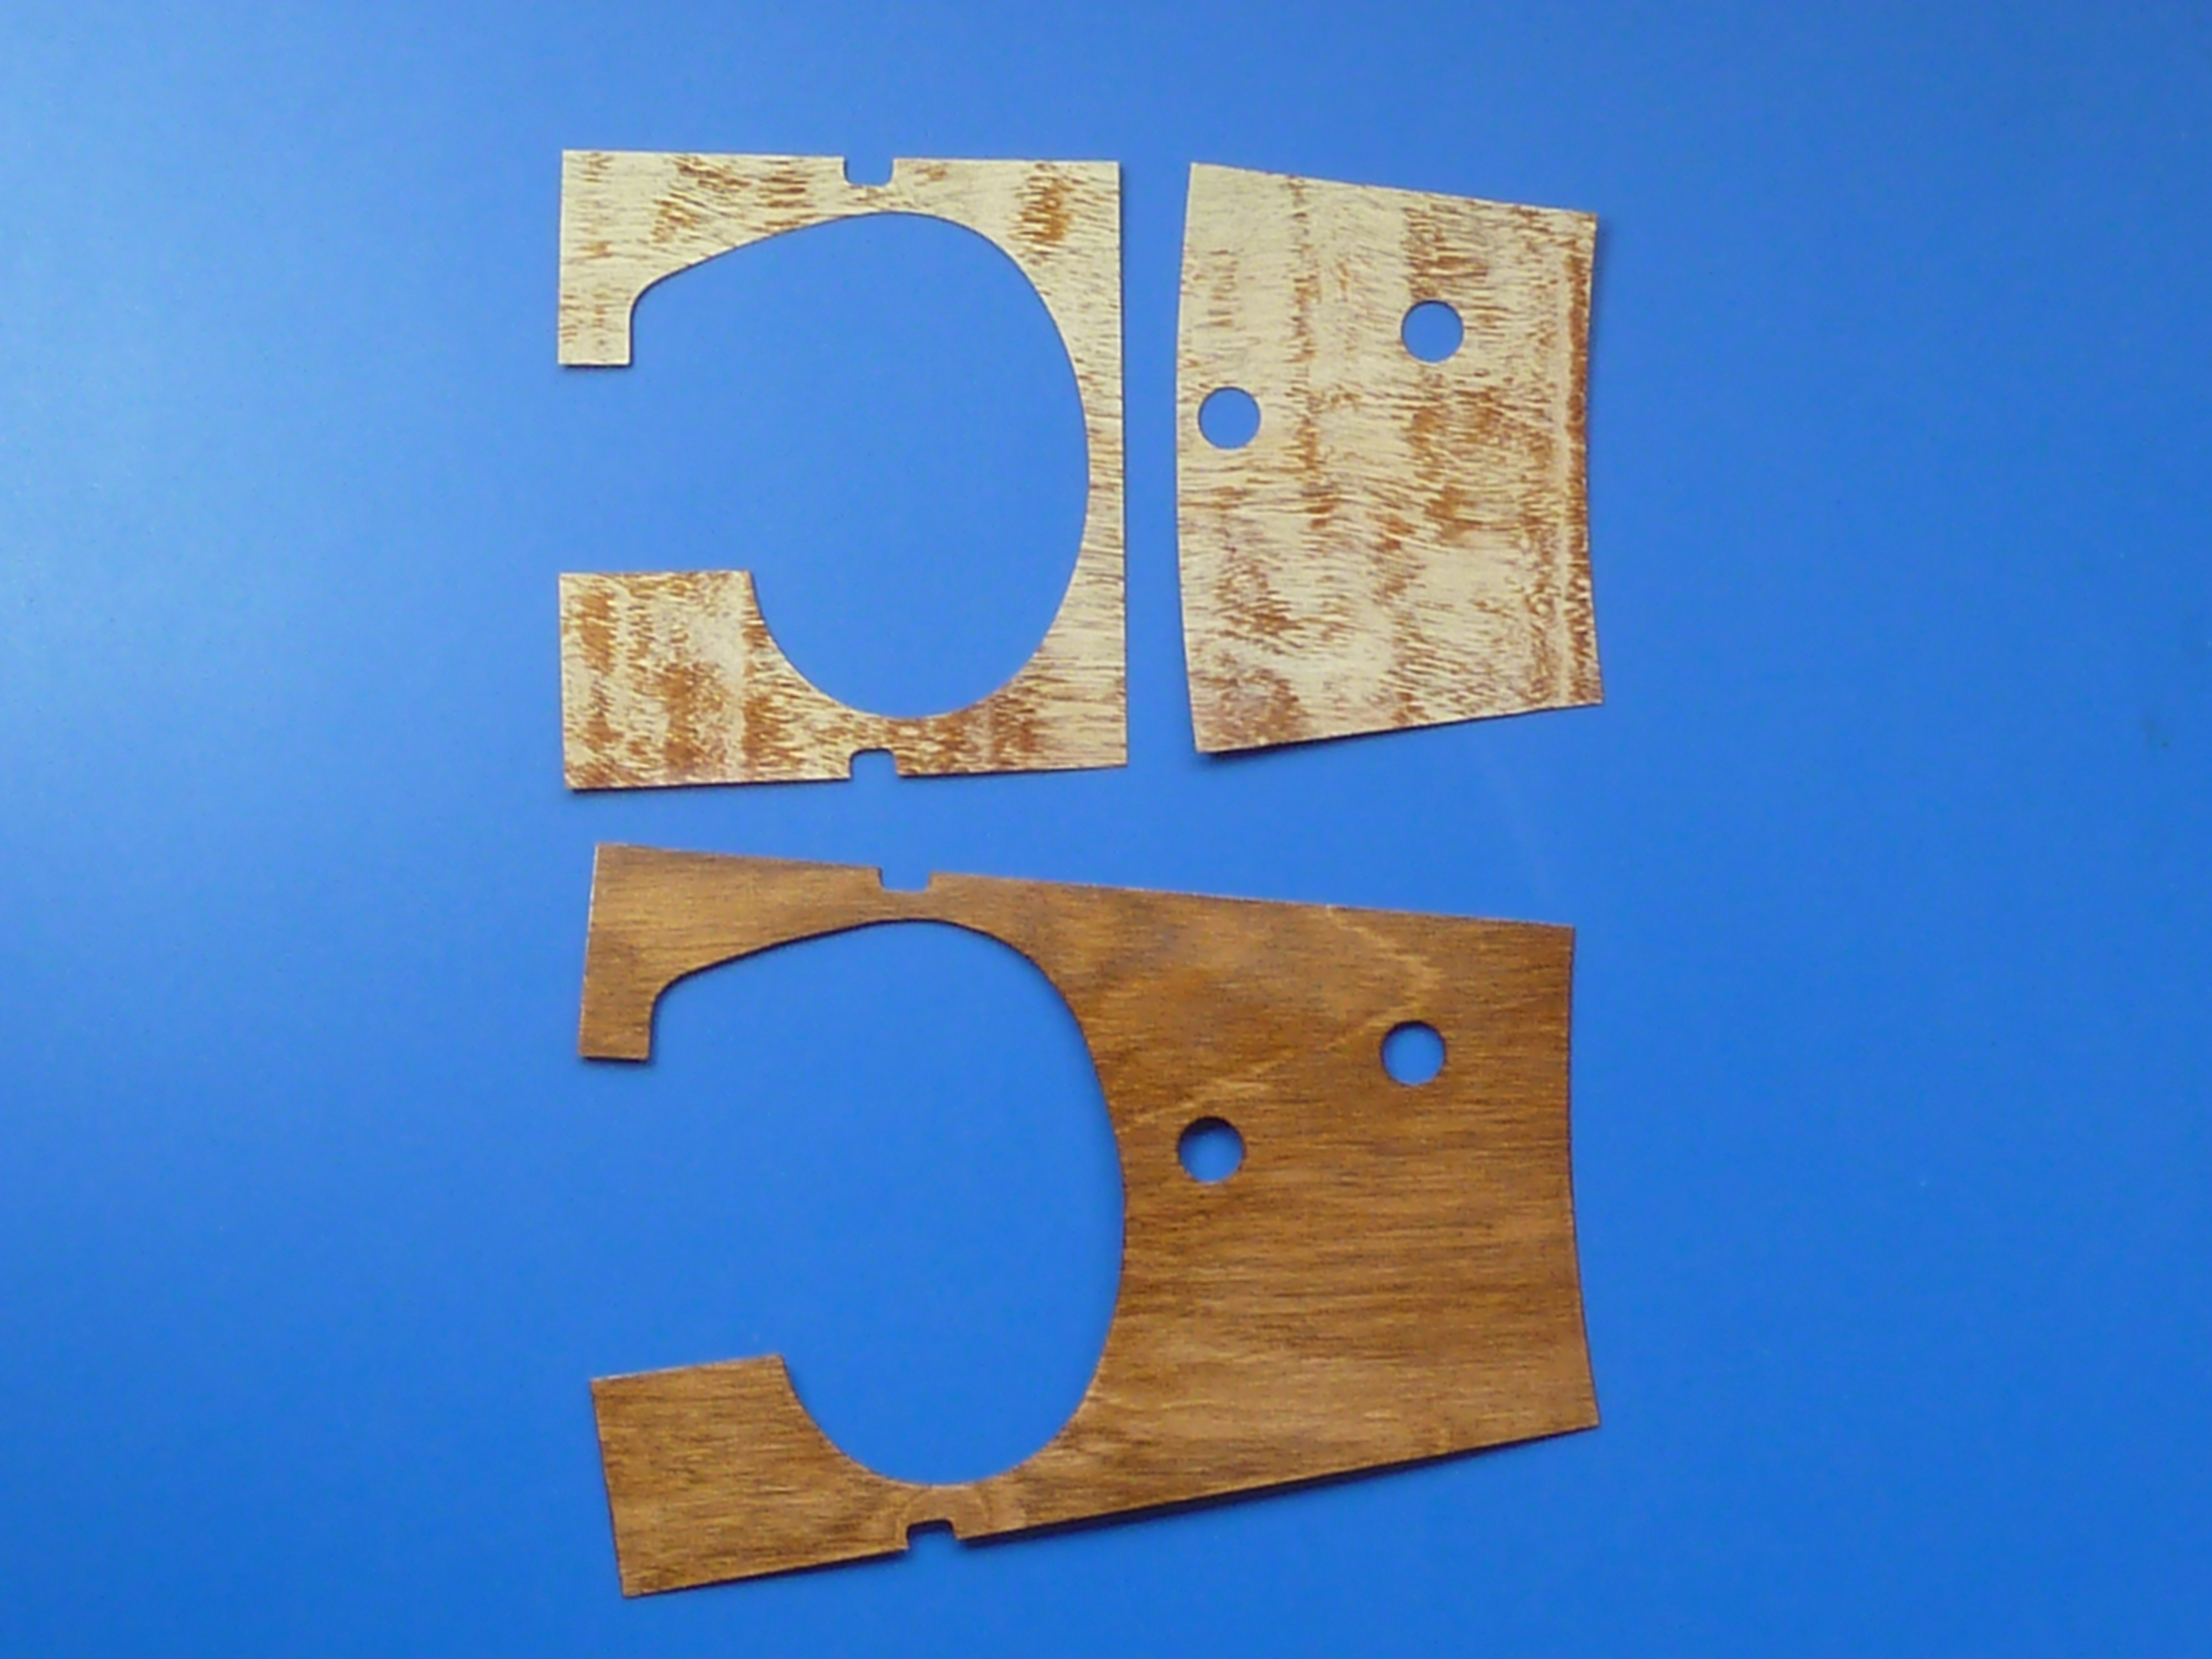
The Hasegawa solution also means that the plywood at the rear of the cockpit opening is at the wrong incident angle too. As the parts supplied in this kit were really quite poor (the first kit’s were fine) and were covered in some very odd grain markings I decided to bin them and make new corrected parts from 1/64″ birch plywood. I chose to make the whole plywood covering in one single piece with no break at the cabane struts and, after appropriate staining and varnishing off the model, glued it in place. It’s a bit hit and miss to get the right shape and fitting it is definitely not as easy as the kit’s solution, but the end result is much better in my opinion. And that erroneous join line has gone too. It really grates on me when I look at my first model now.
Here are the rather odd kit parts next to the Mk.1 version of my solution. (I eventually moved the cabane cut-outs slightly for a better fit and made the forward section longer for greater overlap with the aluminium panels).
Here’s the Mk.II (or was it III?) version in place.

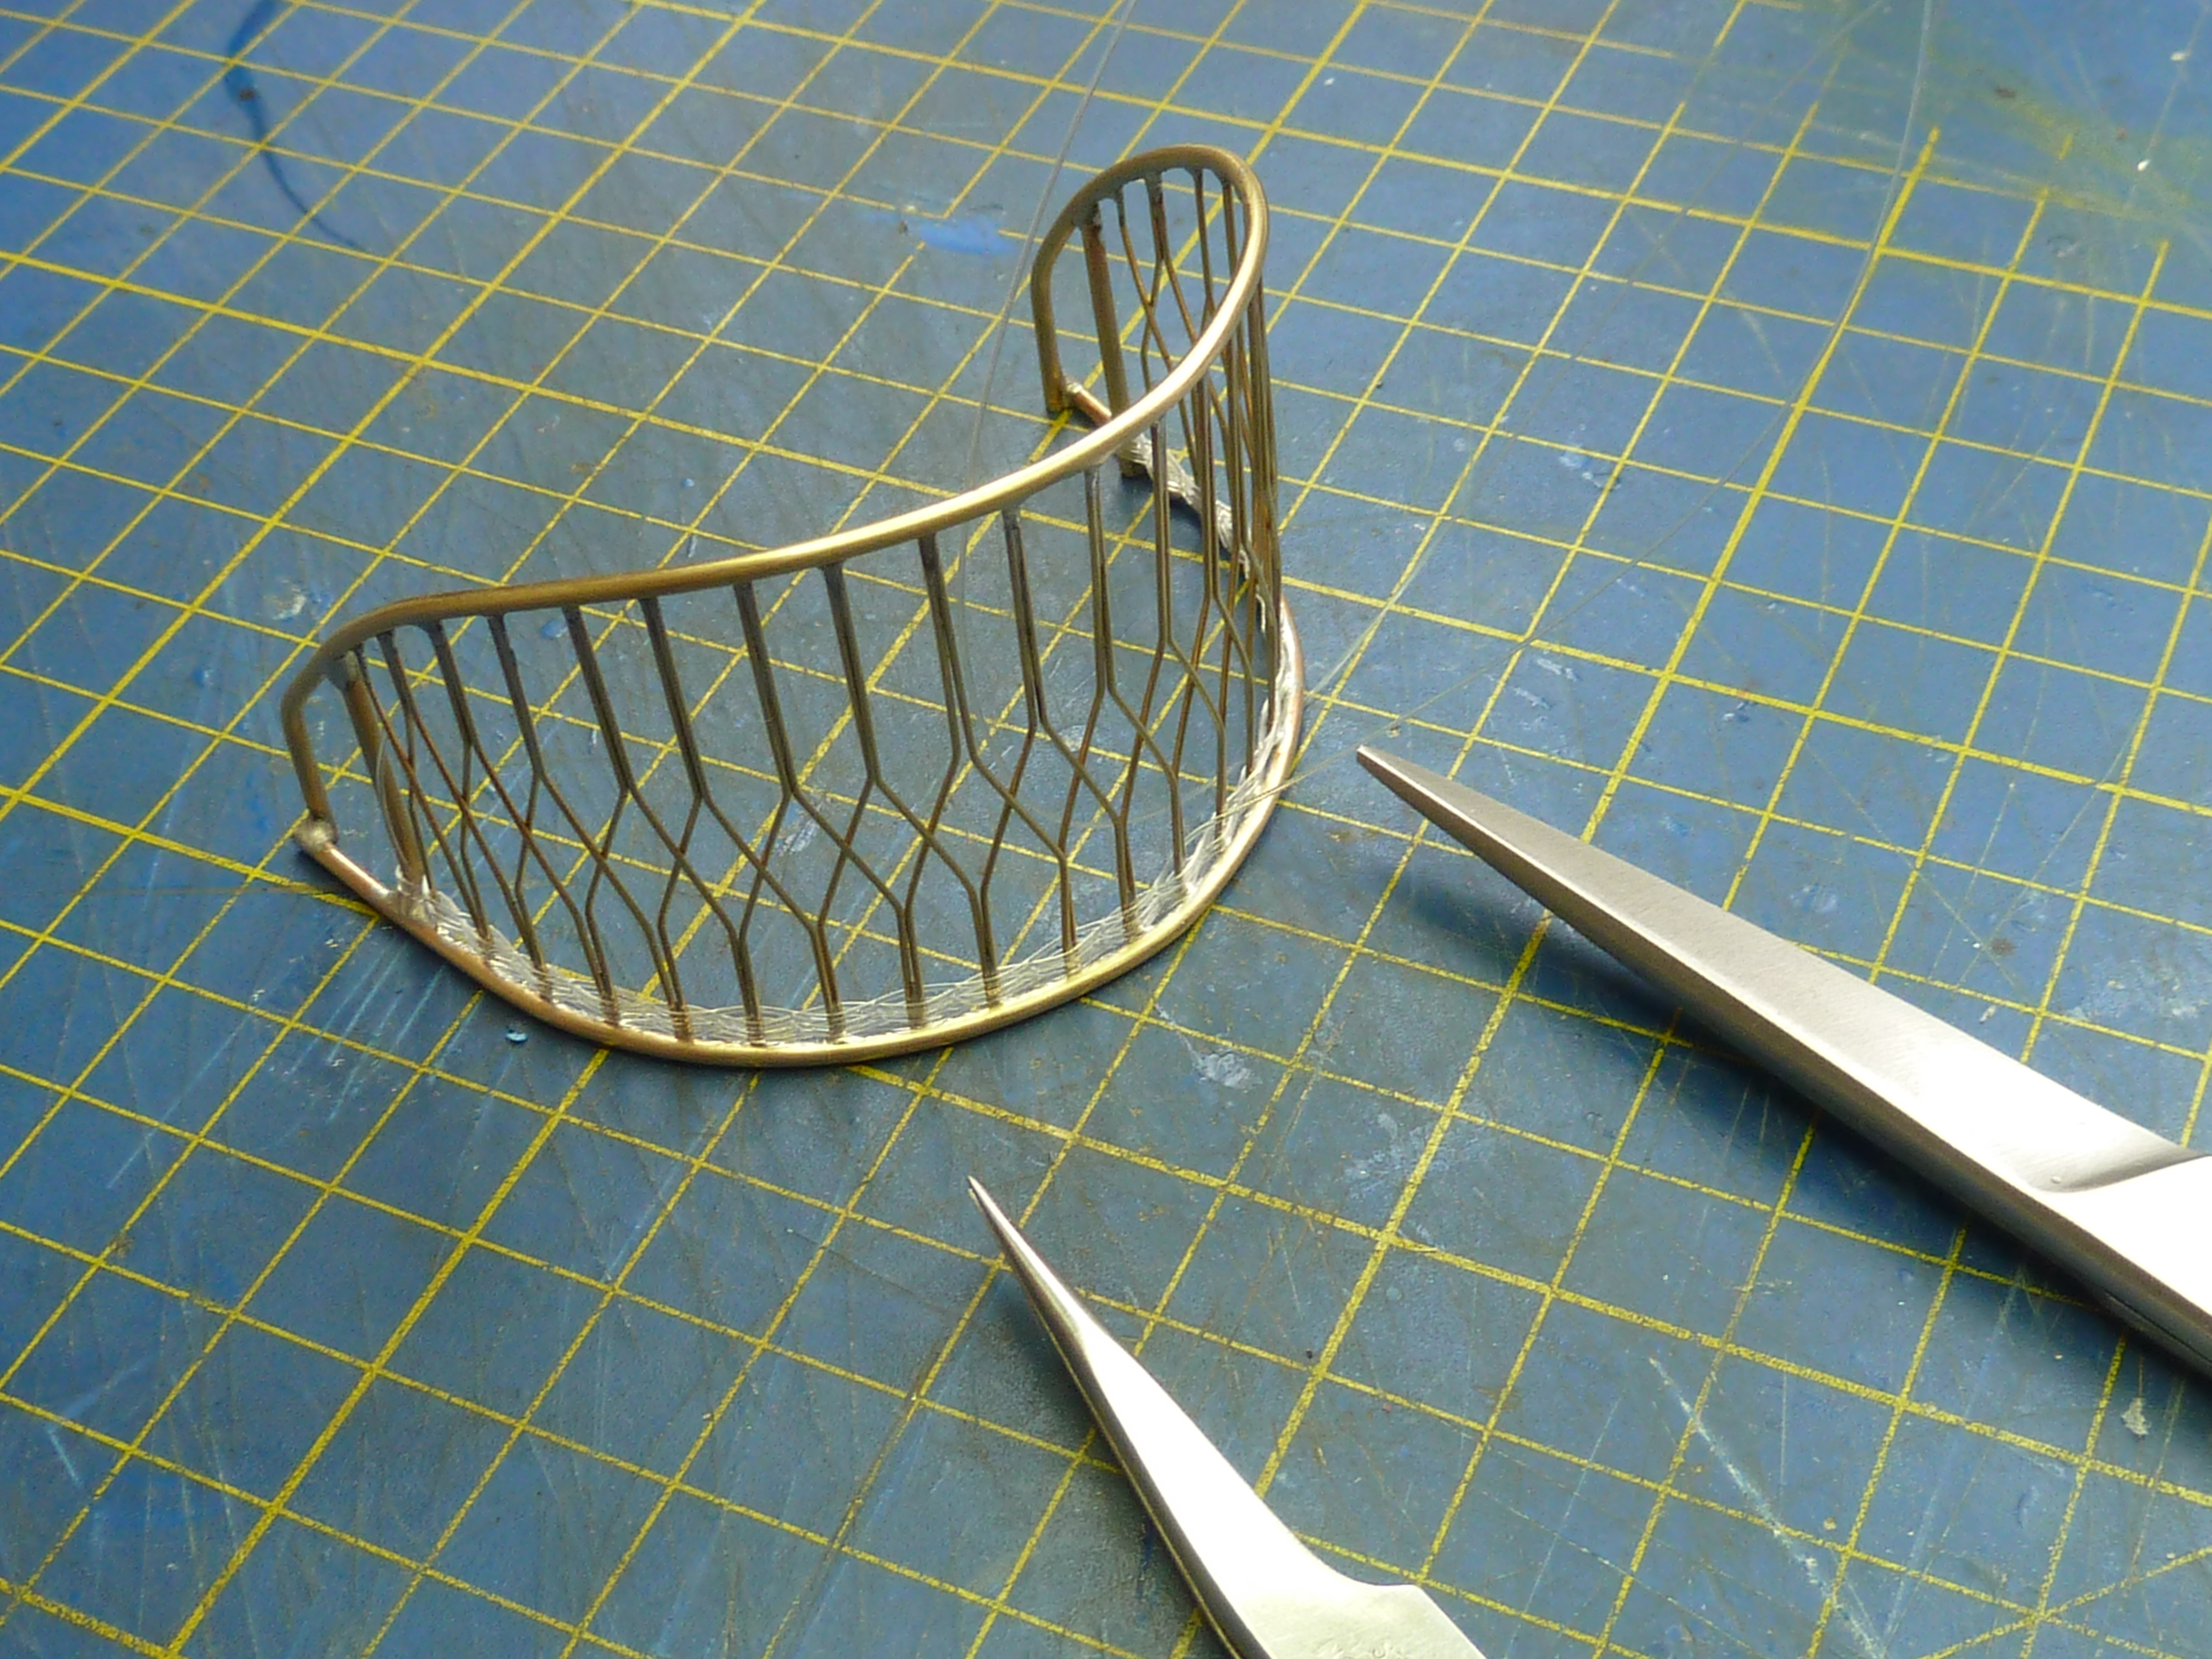
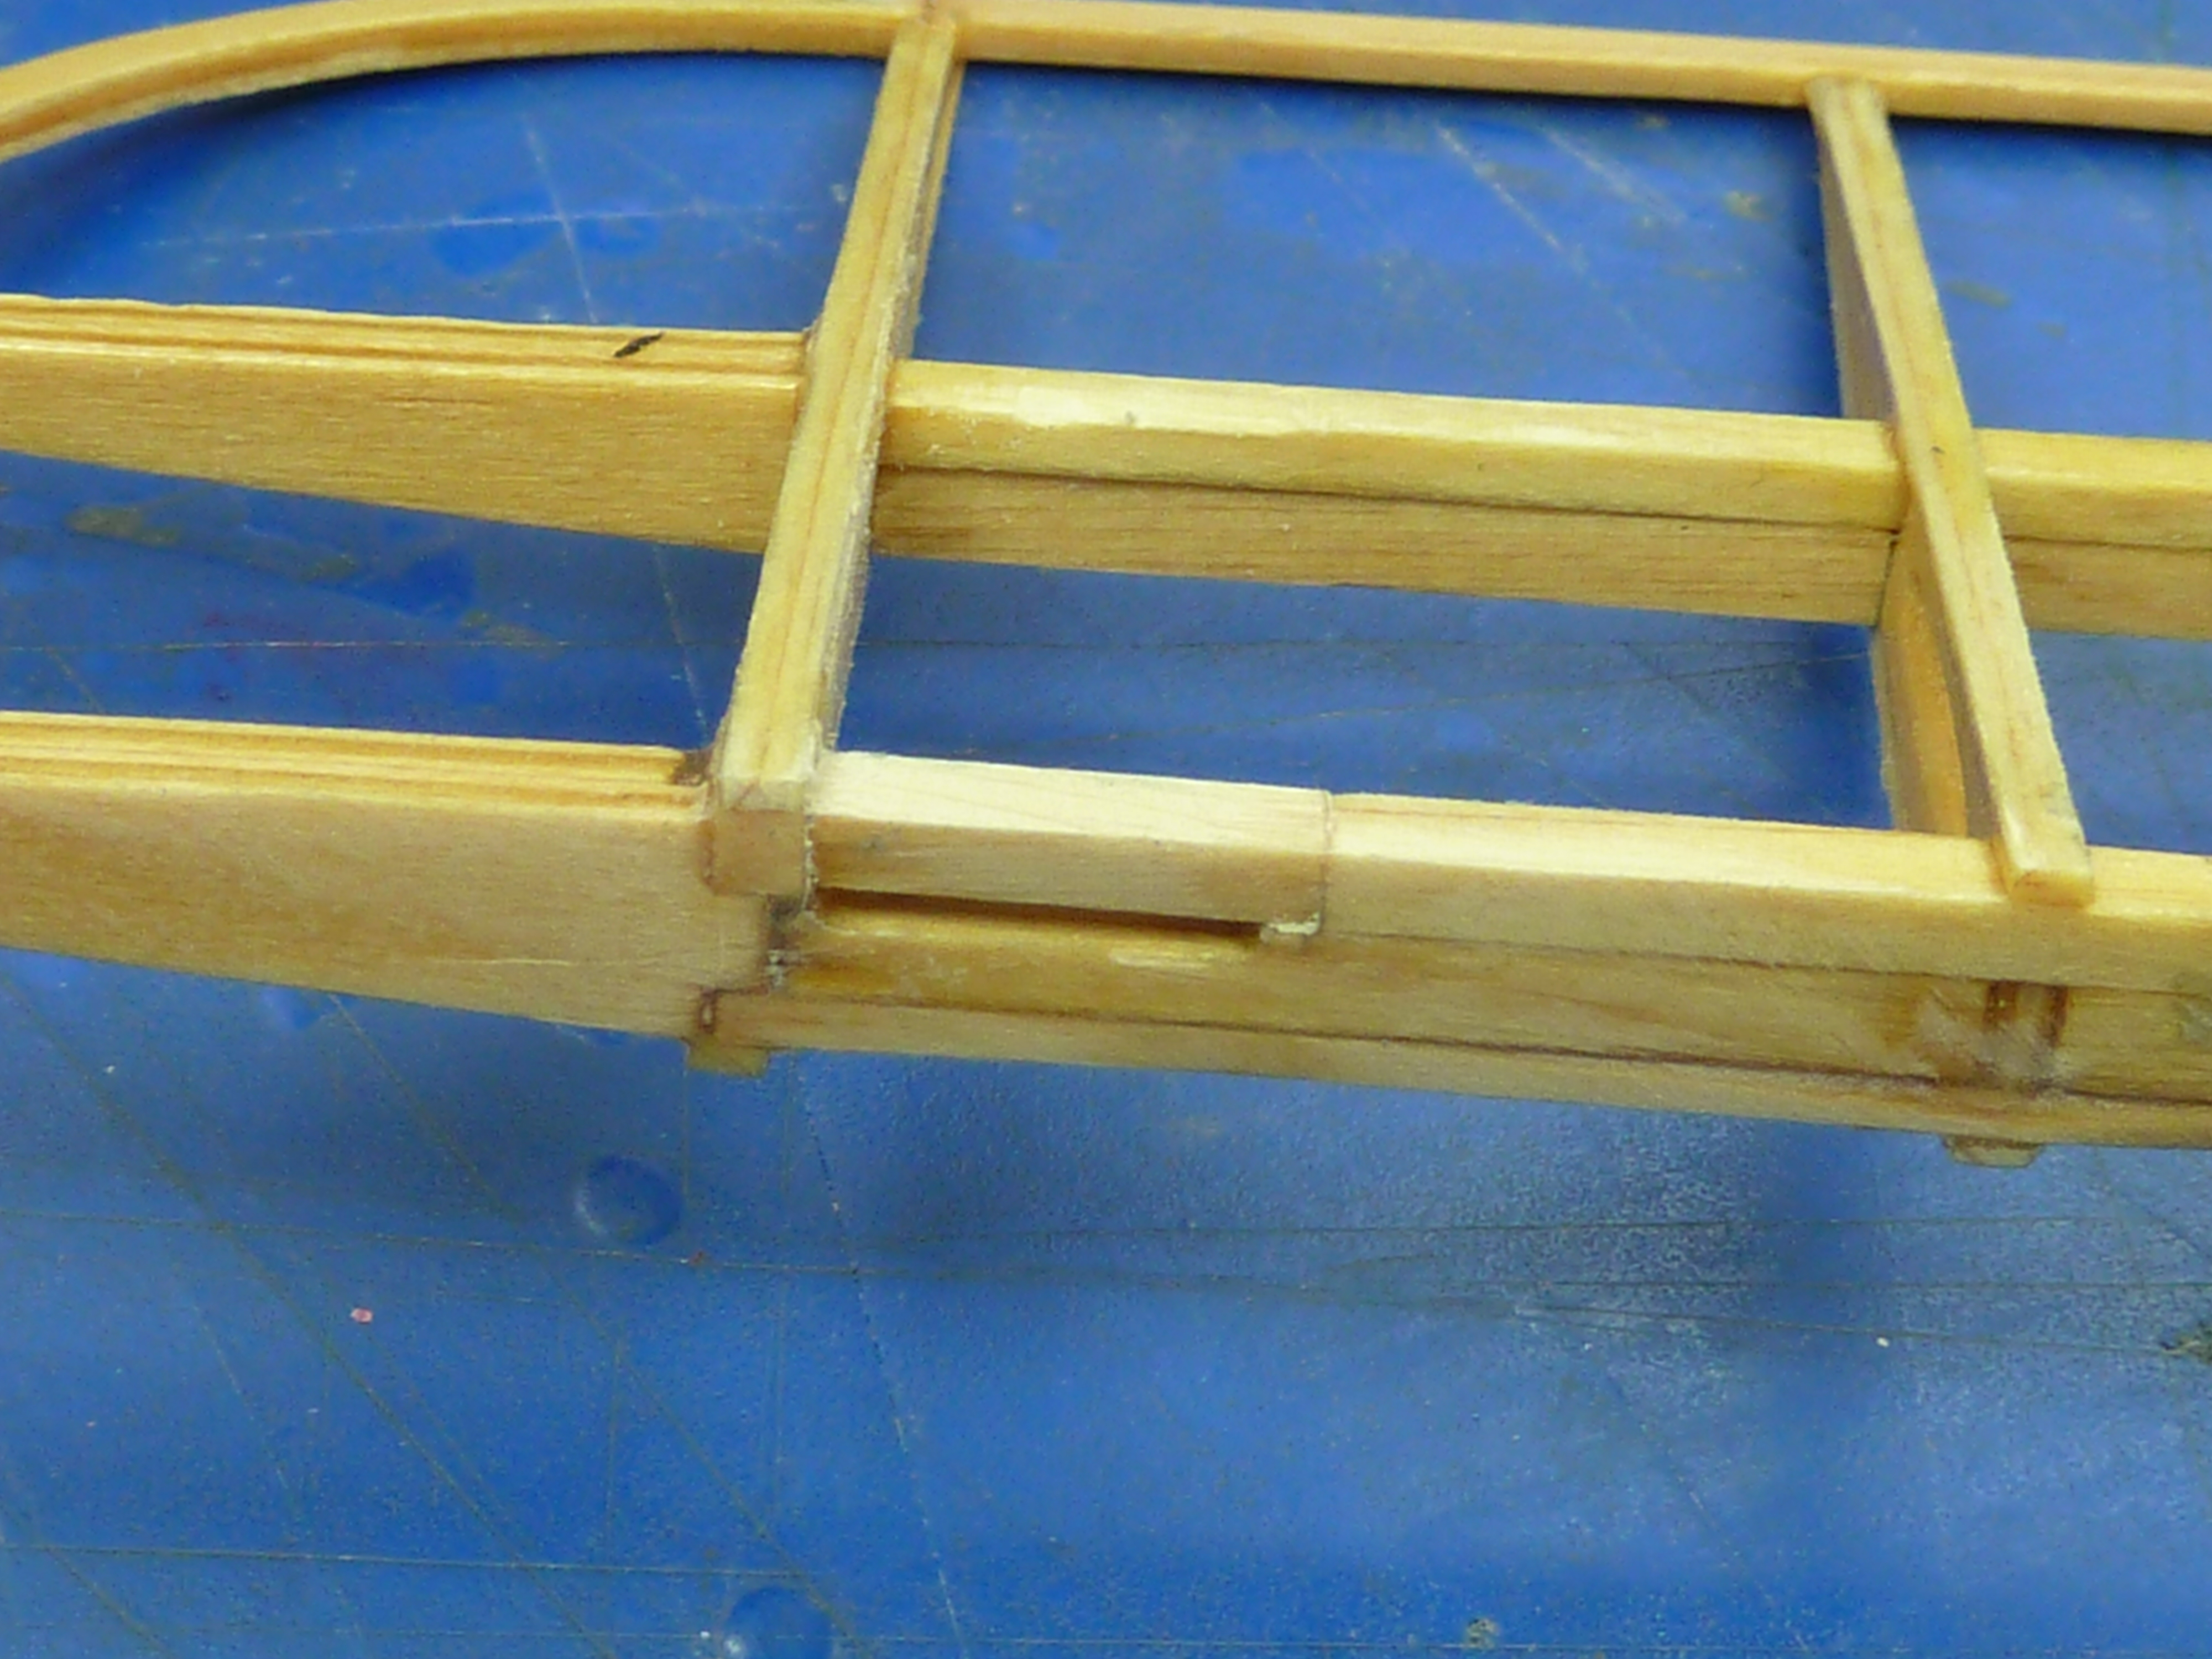
The seat was made next. As before I kept the base but made my own back from brass wire and fishing line. The various stages are shown below, but are explained fully in the blog on my first model.


The difference shading with artist’s oils makes never ceases to surprise me.

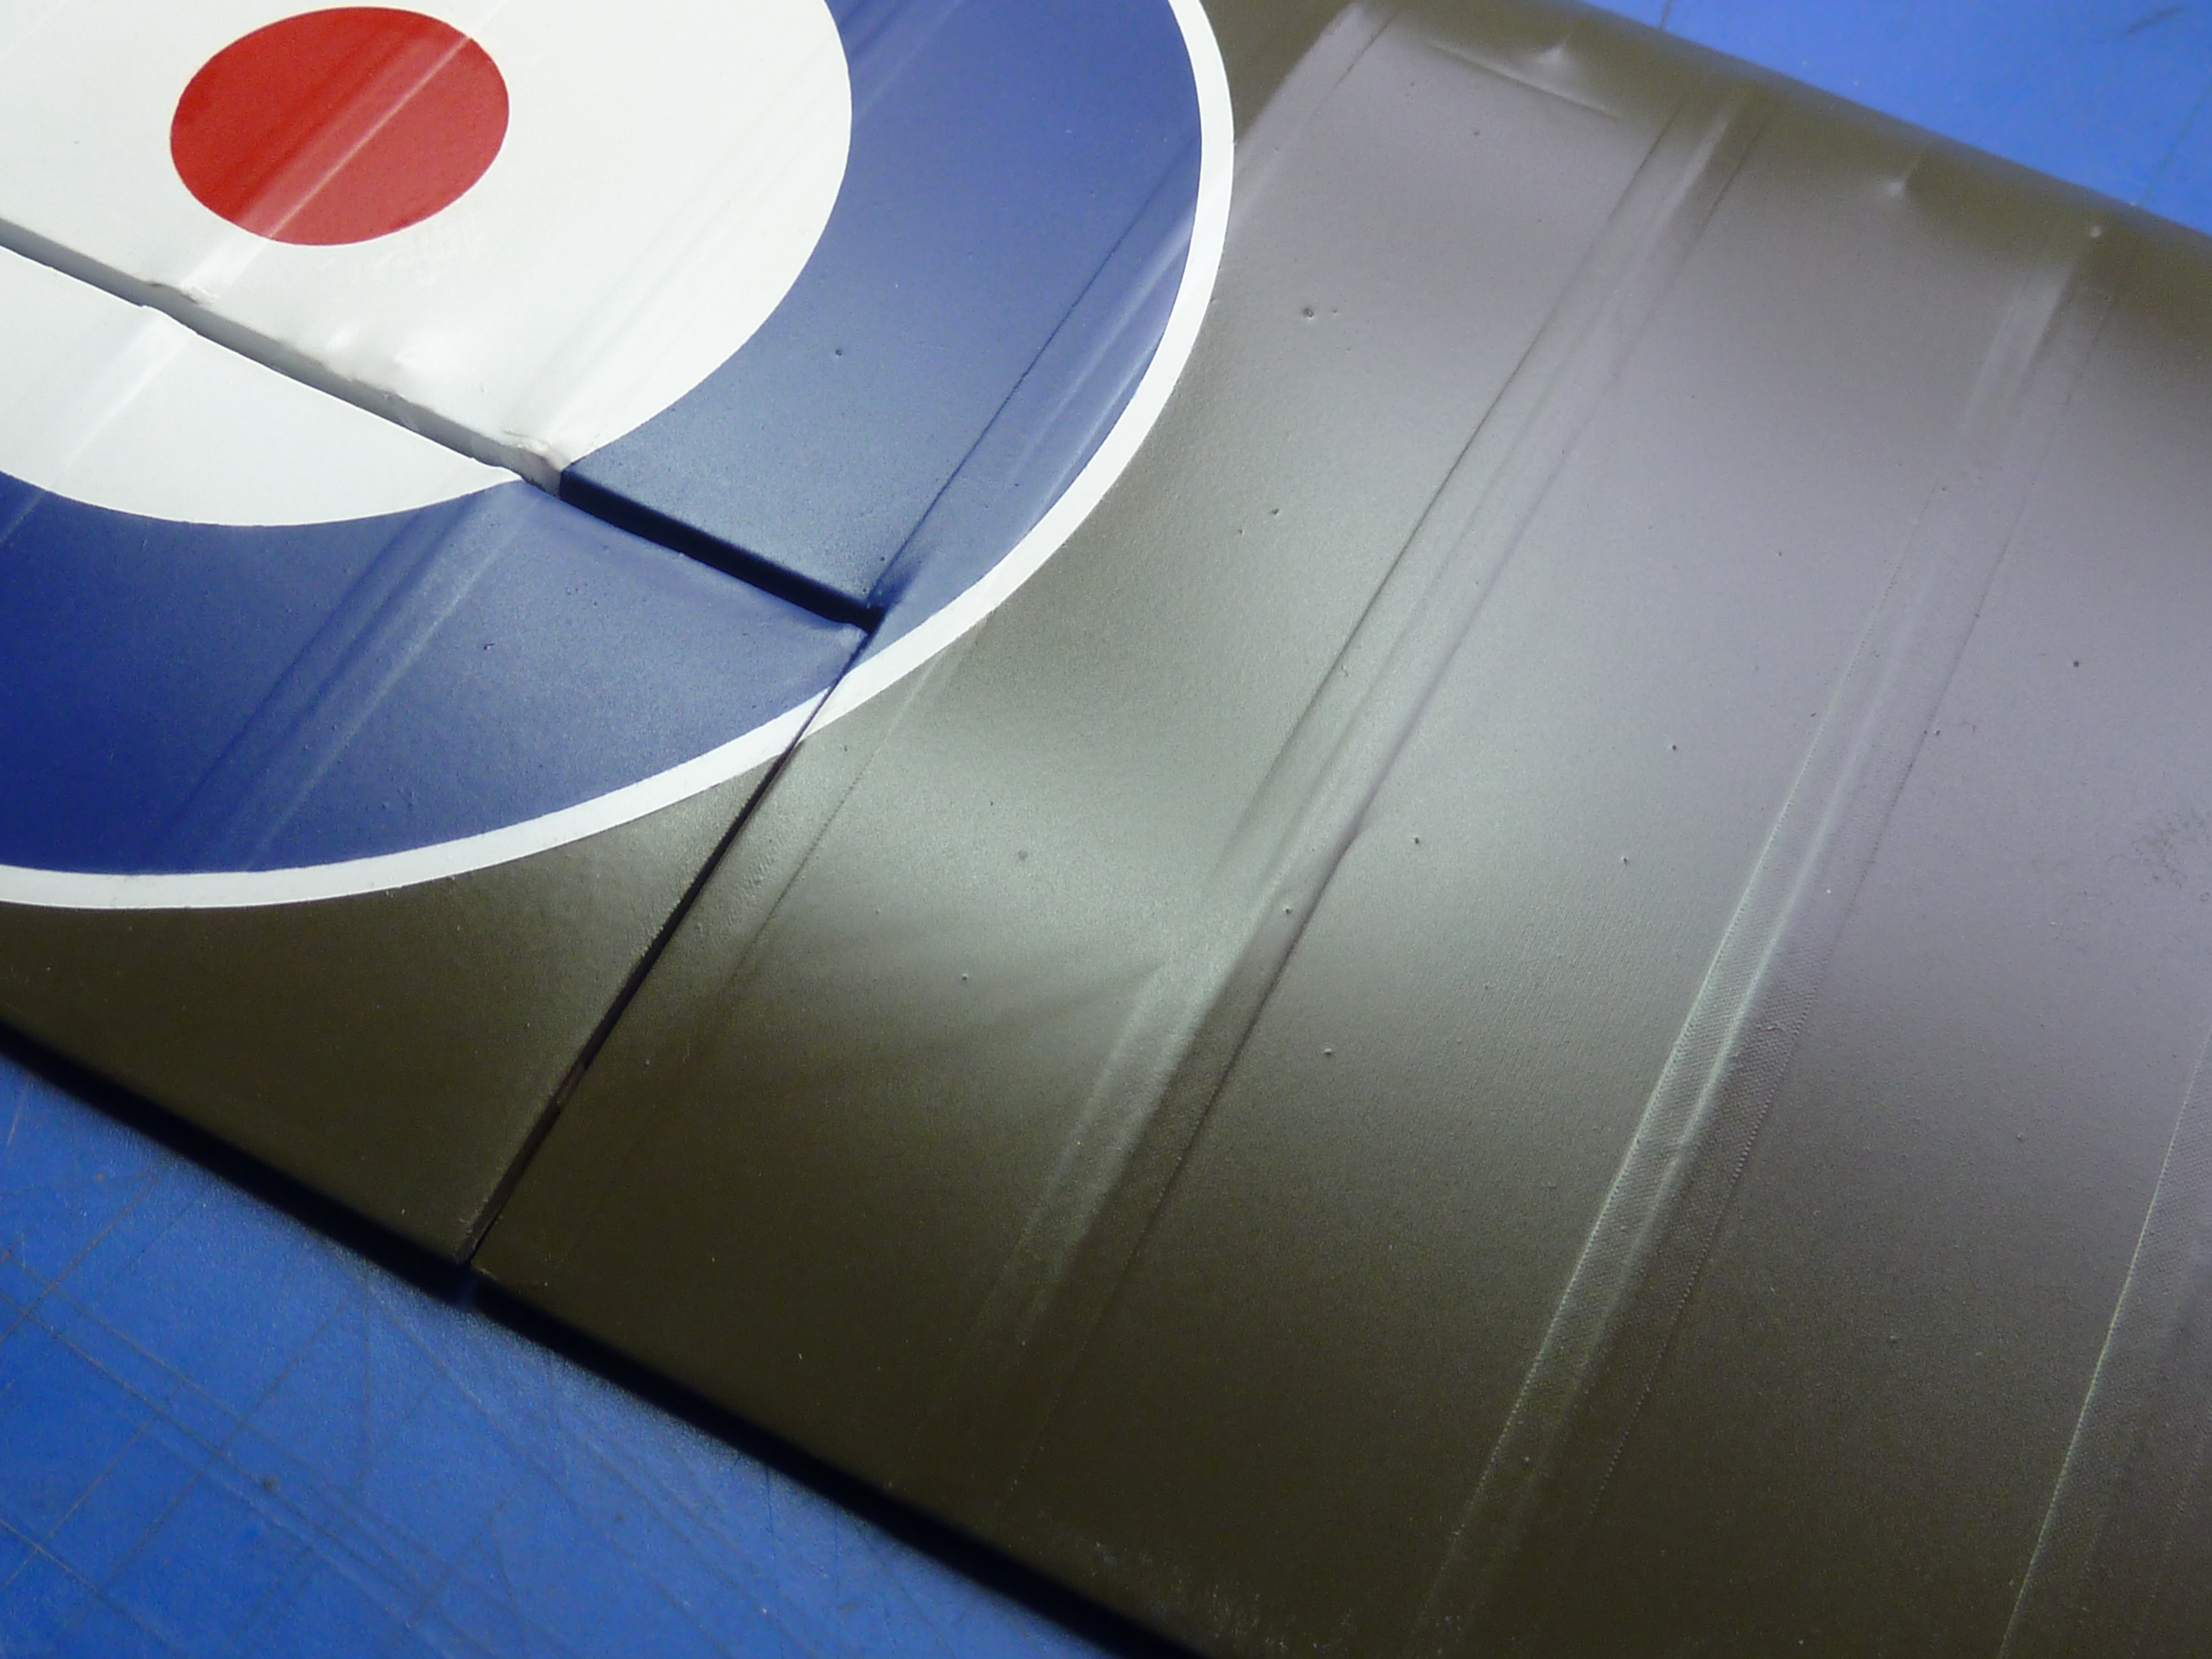
Around this time I also painted and covered the tailfin and tailplane structures. These were done in the same way as the first model so I won’t elaborate on the process here.

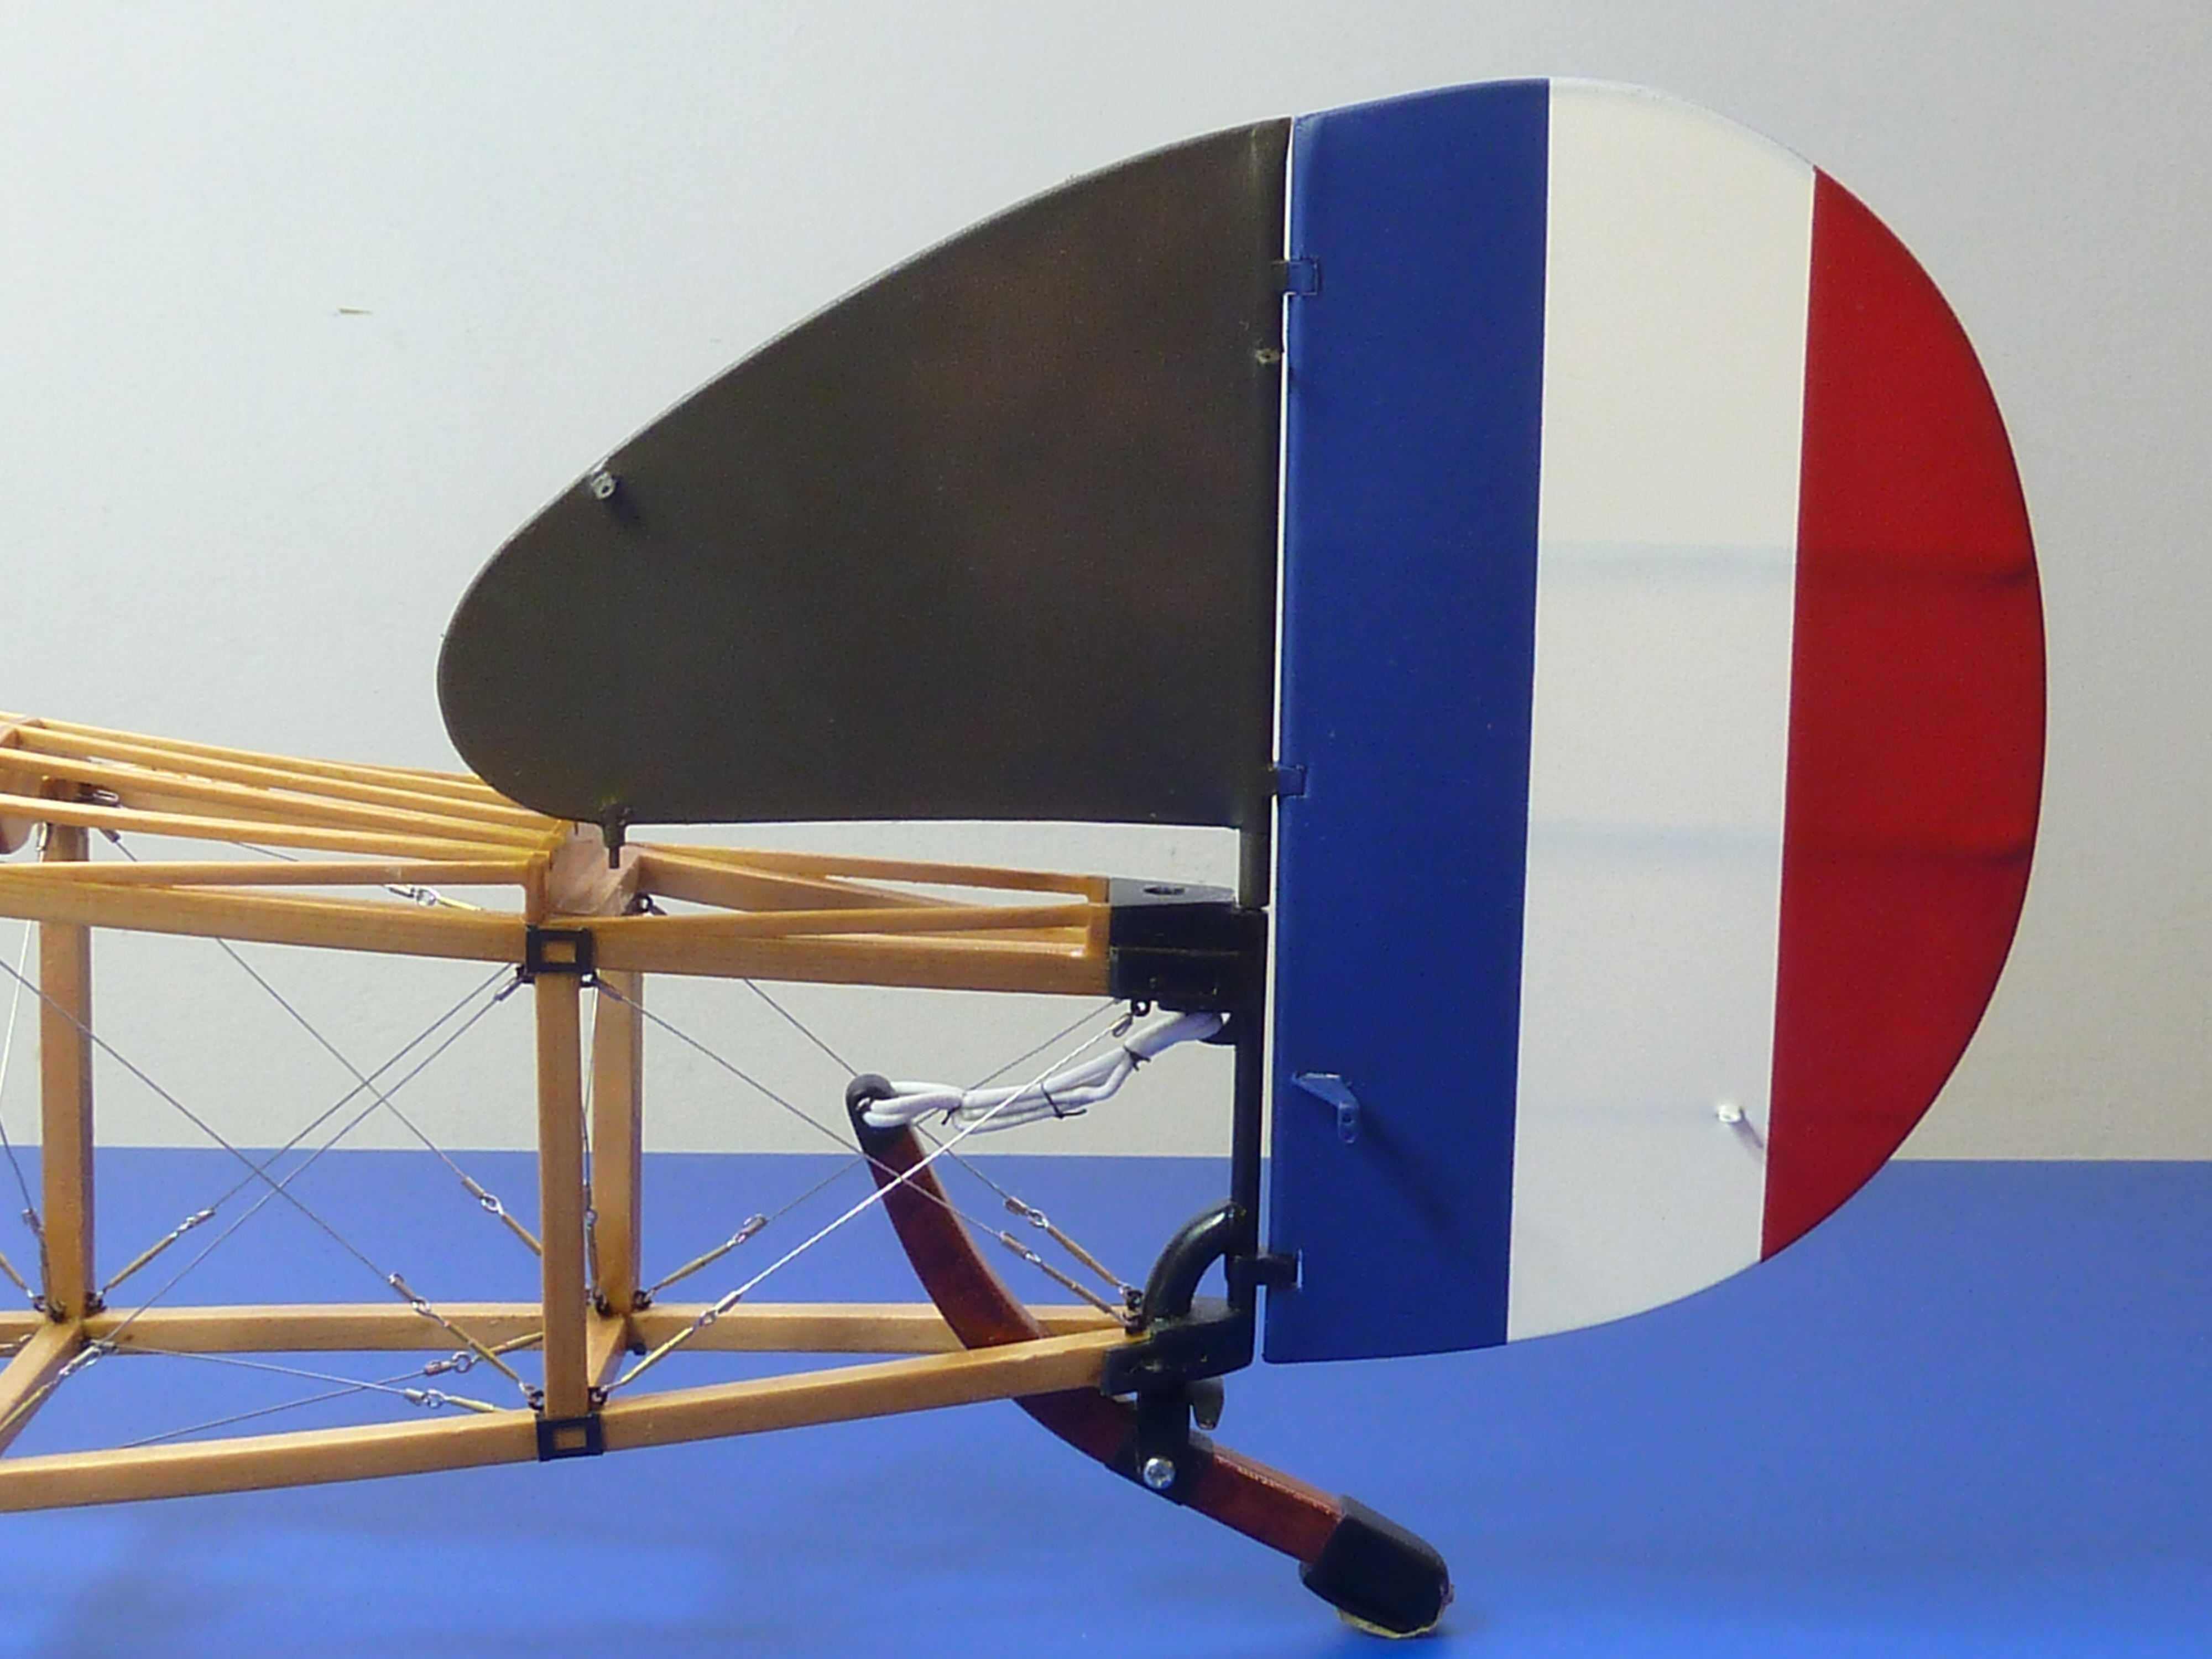
And finally with the markings of Elliott White Spring’s aircraft.

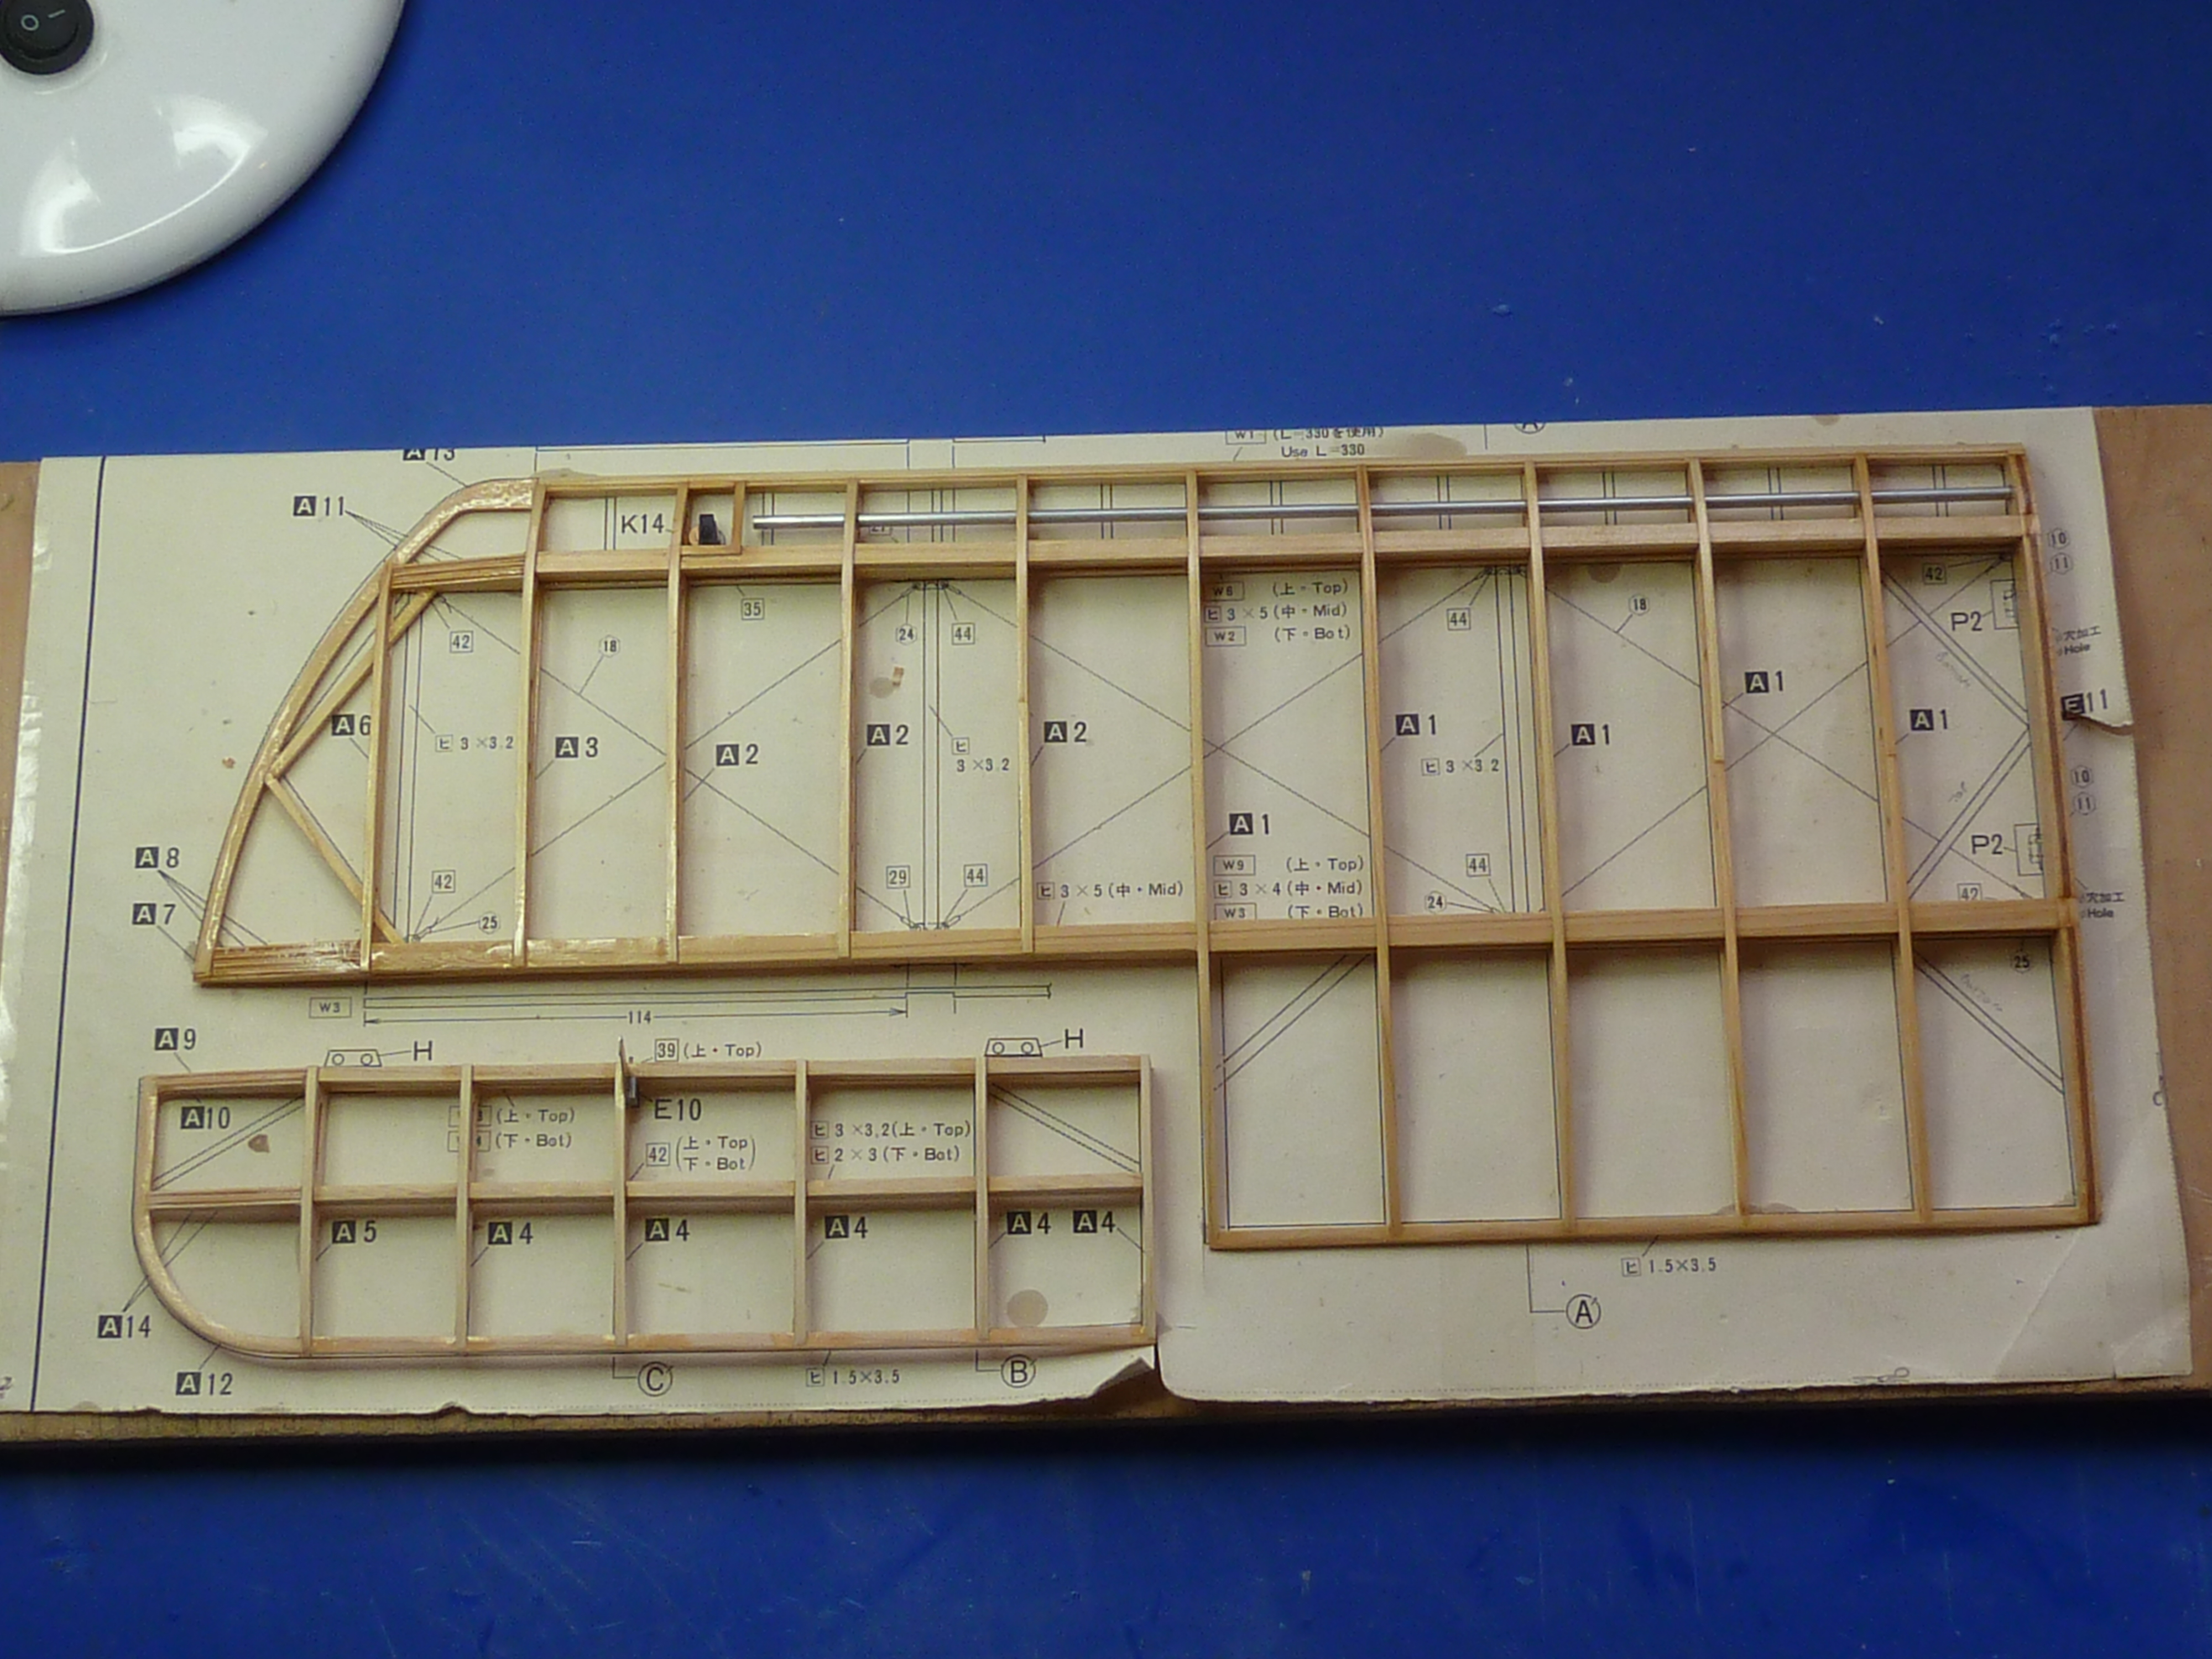
The mainplanes were then constructed based on the kit’s components. This time 1mm dia stainless steel rod was used for the tips and trailing edges and is a great improvement on the annealed brass in the first model. It gives a much more robust result.


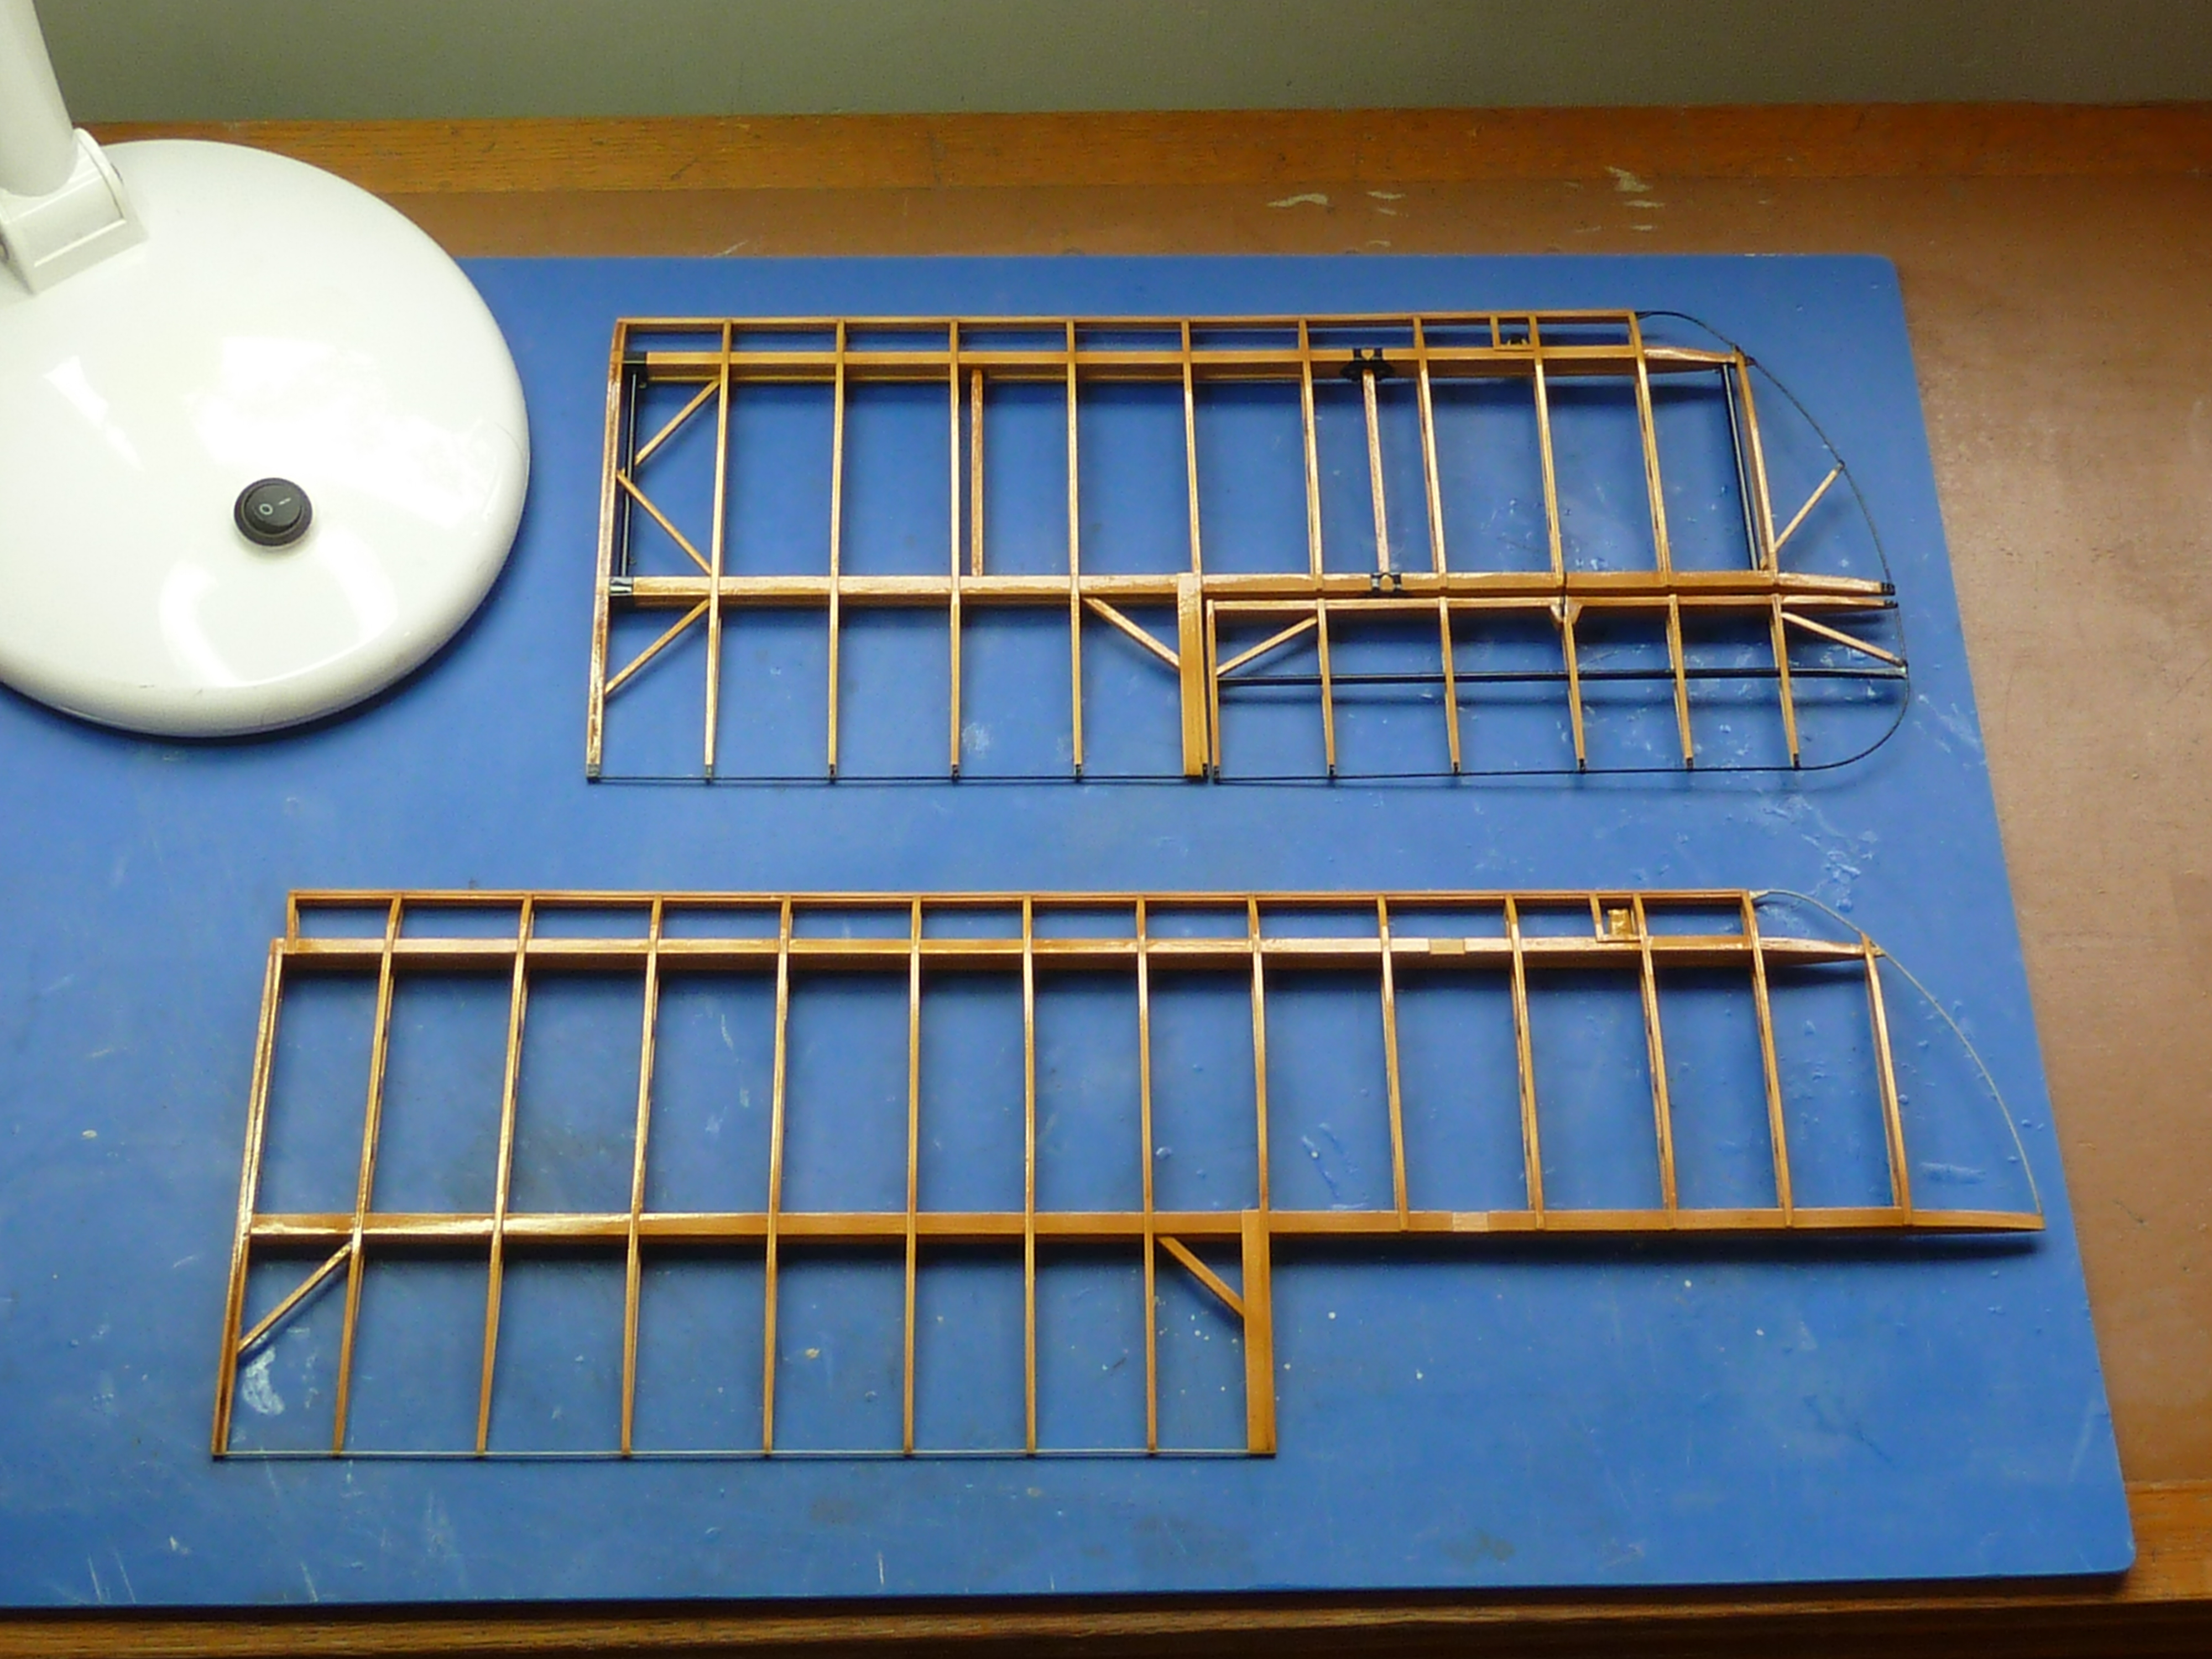
The starboard wings, which were to be covered, were made using all the kit’s wooden components as it was easier, and the Solartex covering adheres to it better.

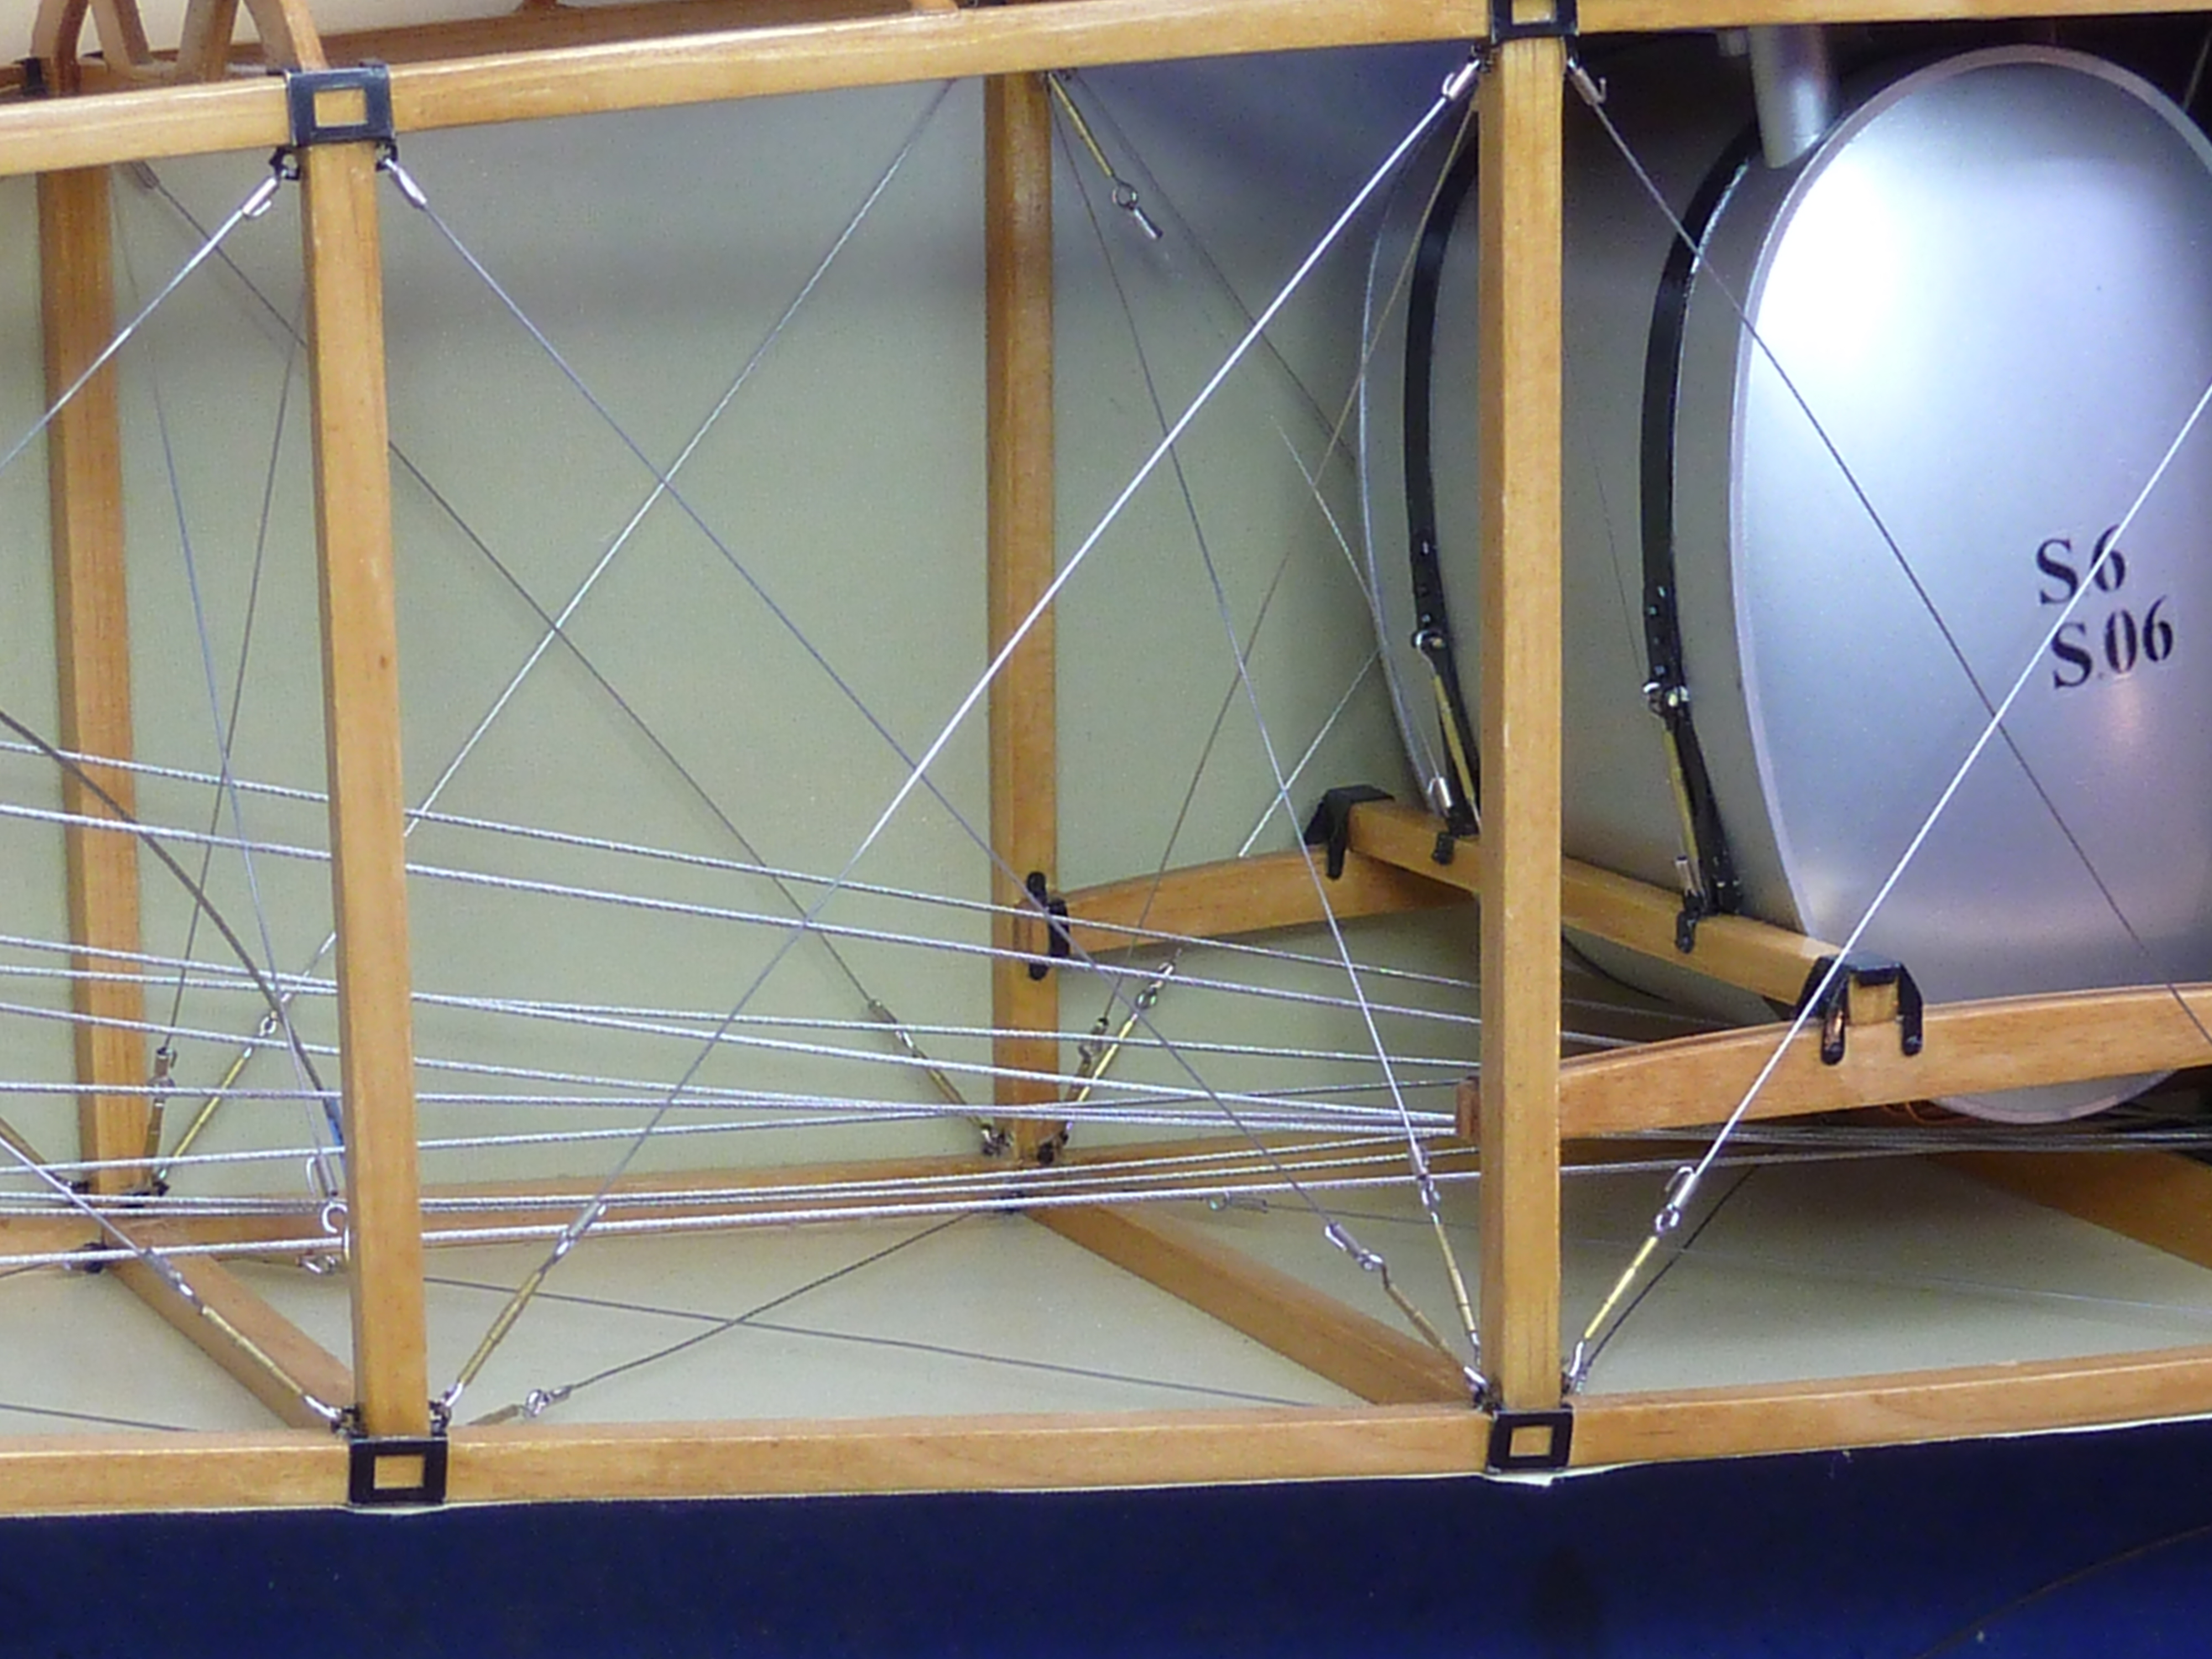
As with the fuselage, the rigging was done in 0.3mm SS316L stainless steel wire and the overall structure was stained with Liberon’s ‘Golden Pine’ stain prior to being varnished with yacht varnish. Both were applied with an airbrush to get an improved finish. It’s a lot less hassle than brush application.


If you’d like more info on the detailed assembly of the wings please refer to my first build log.
Having completed the build of the main structure the next thing was to run the control lines and cover it.
I should have put the control lines in much earlier but had struggled to find a satisfactory material to replace the thread supplied in the kit. Eventually I managed to track down some 0.5mm Bowden cable here in the UK and used that. It is slightly over scale but looks the part. One big disadvantage of it is that the tension required to get it to lie straight is on the limit of what the kit’s structure will take. So if you go down this route take care. It isn’t the easiest job in the world to get all the wires taut at the same time and not deform the structure.

It does look quite nice though.

With the control lines in the fuselage could be covered. Solartex was used as per the first build.

I do think the proper cables look much better than the thread in my first model.

2nd build.
With the fuselage and wings covered, the final paint and markings could be applied.
Masking off…

I slightly modified the ‘PC10’ tone I used this time as I felt my first model was a bit green. The point is moot though as the colours of these aircraft varied widely and it is difficult to be certain of the exact tone on any particular aircraft. This time I used a 1:1 mix of Humbrol’s 116 and 98 (US dark green and chocolate).
Applying the markings for White Springs aircraft.

The final result. The green has a distinct brown tone to it which is what I was looking for.
The coaming padding around the cockpit was stained with some black leather dye and the stitching added before it was glued in place. The black combined with red rubber moulding has resulted in a fortuitous, but nice dark brown finish.

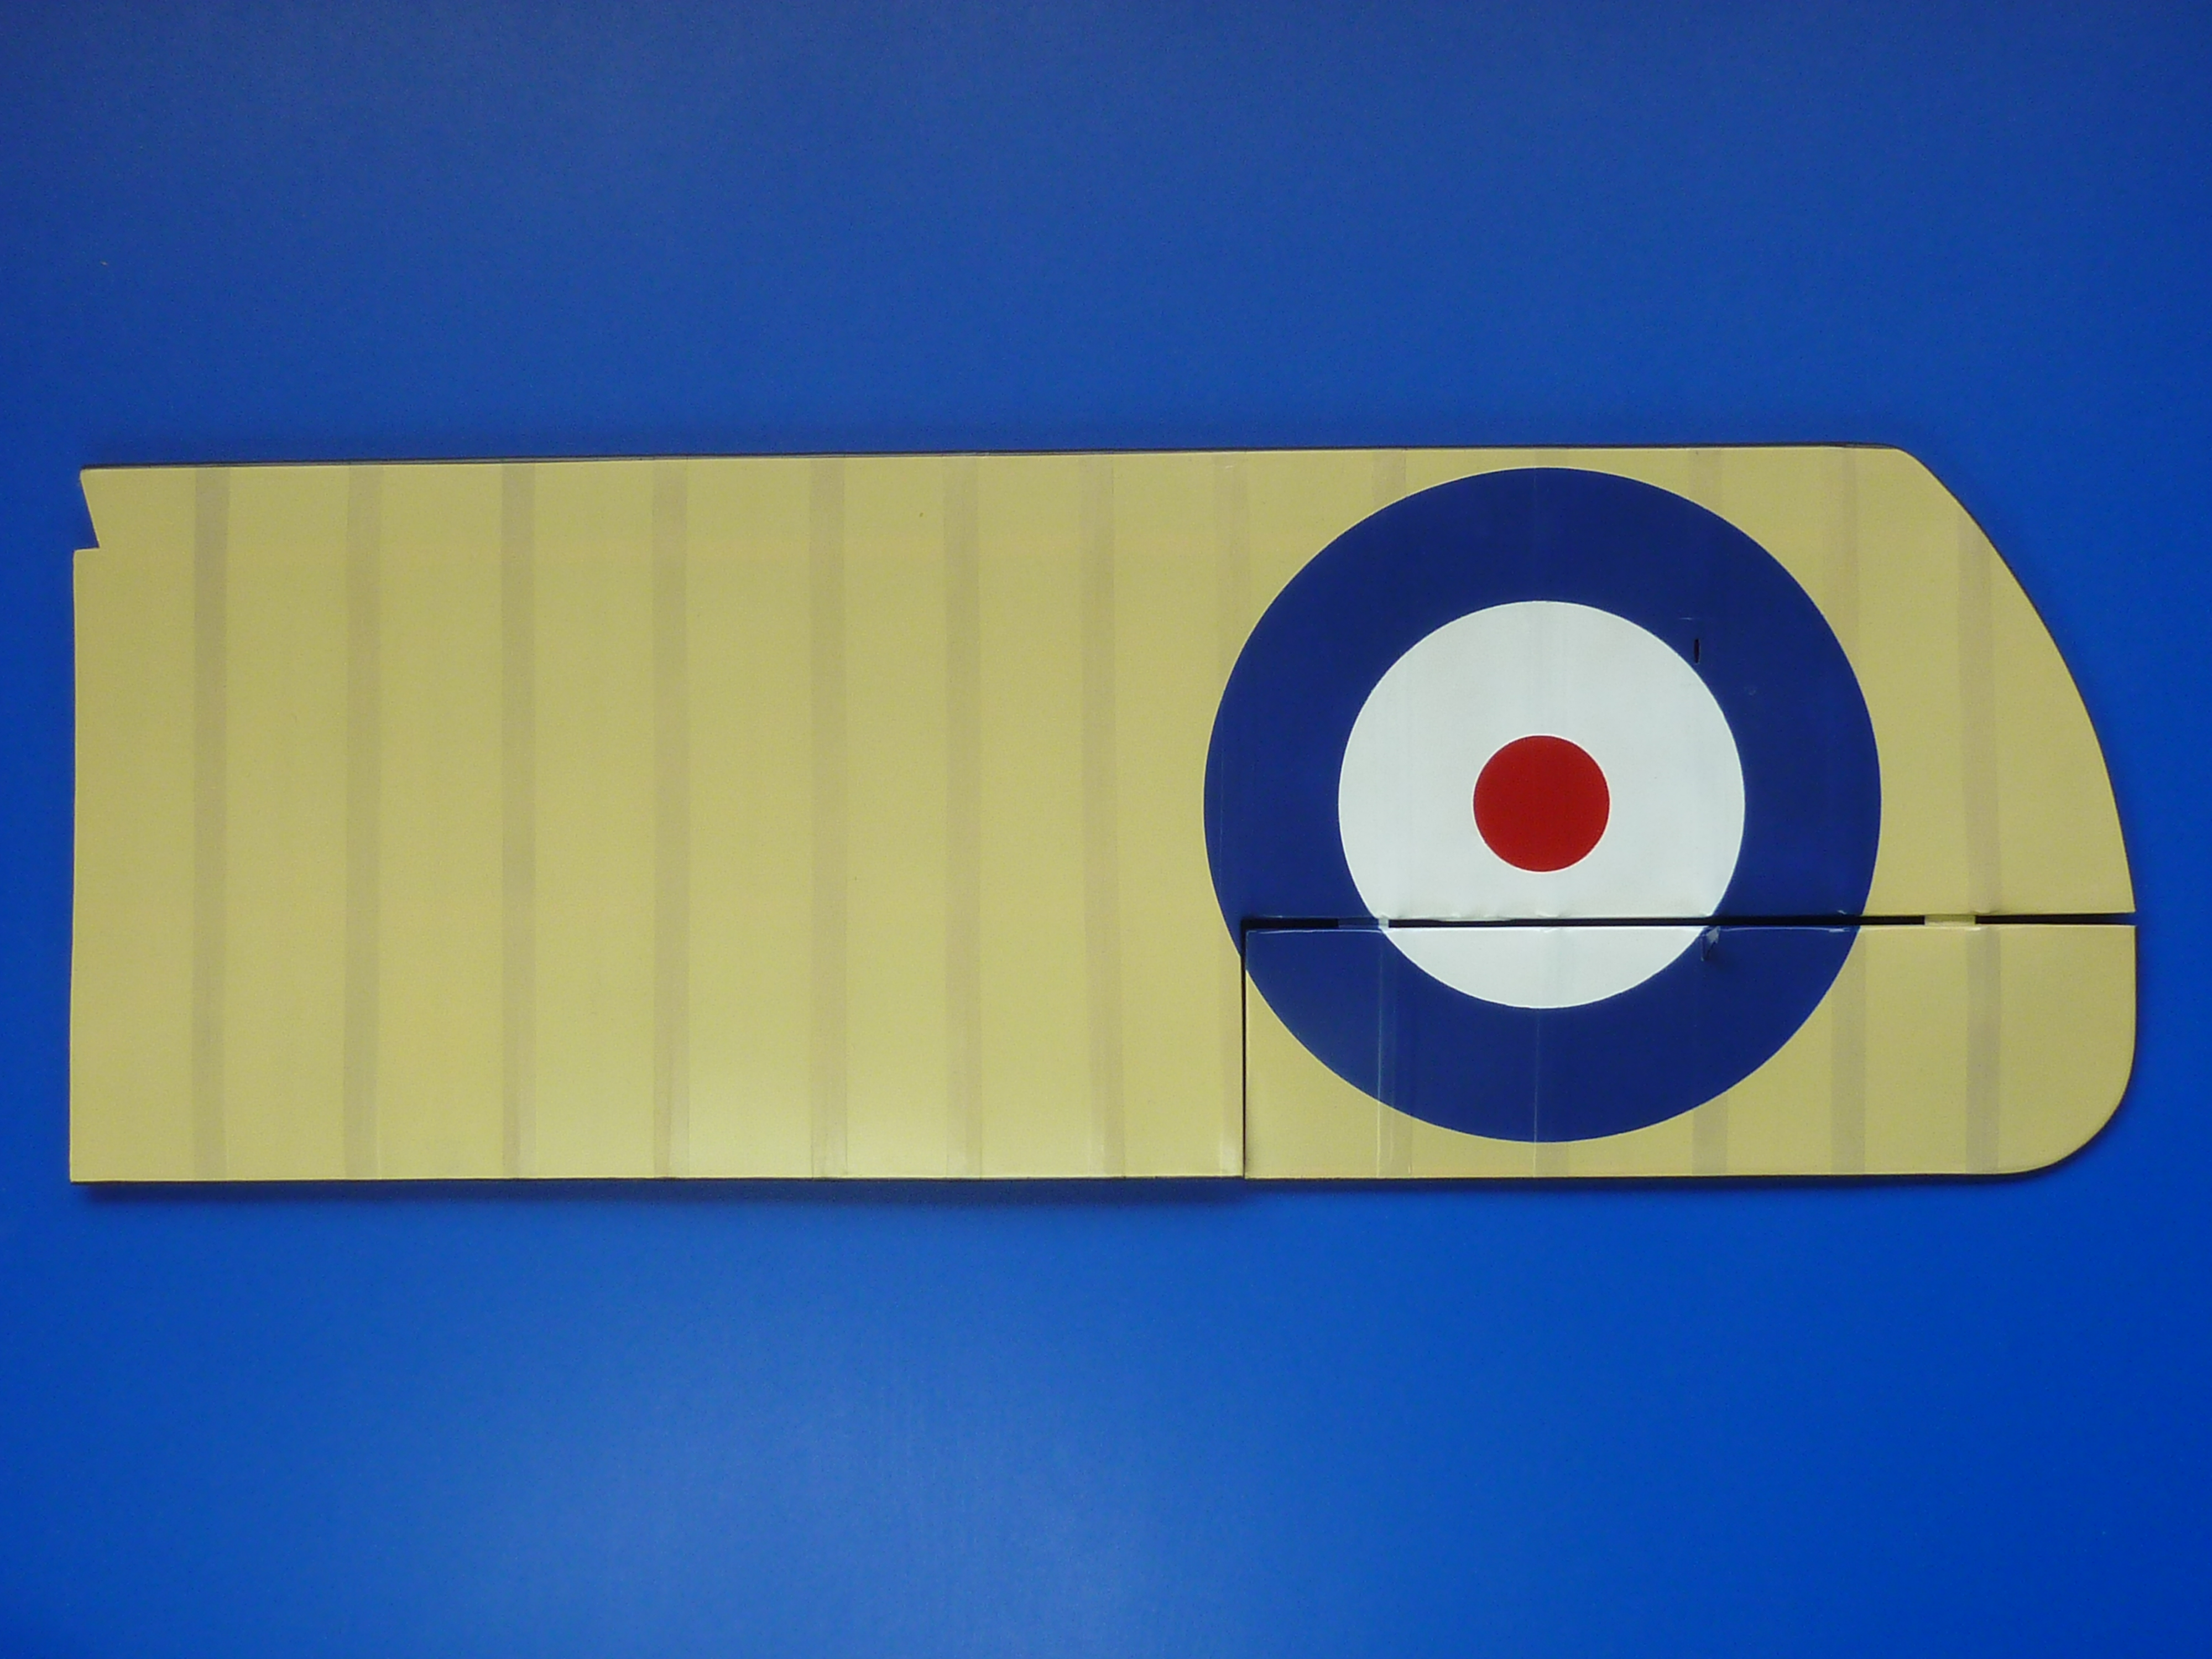
The undersides of the wings were again painted with a lightened version of Humbrol’s Linen. However, I excentuated the ribs with Tamiya’s Deck Tan rather than white as I did originally. The result is actually less like the real aircraft, but looks more convincing.
The other change I made was to use strips of Solartex for the rib tapes rather than the thick paint of the previous model. The end result is a little too prominent for my liking, but the paint method wasn’t prominent enough!
Having covered the fuselage I was able to install and rig the empennage.
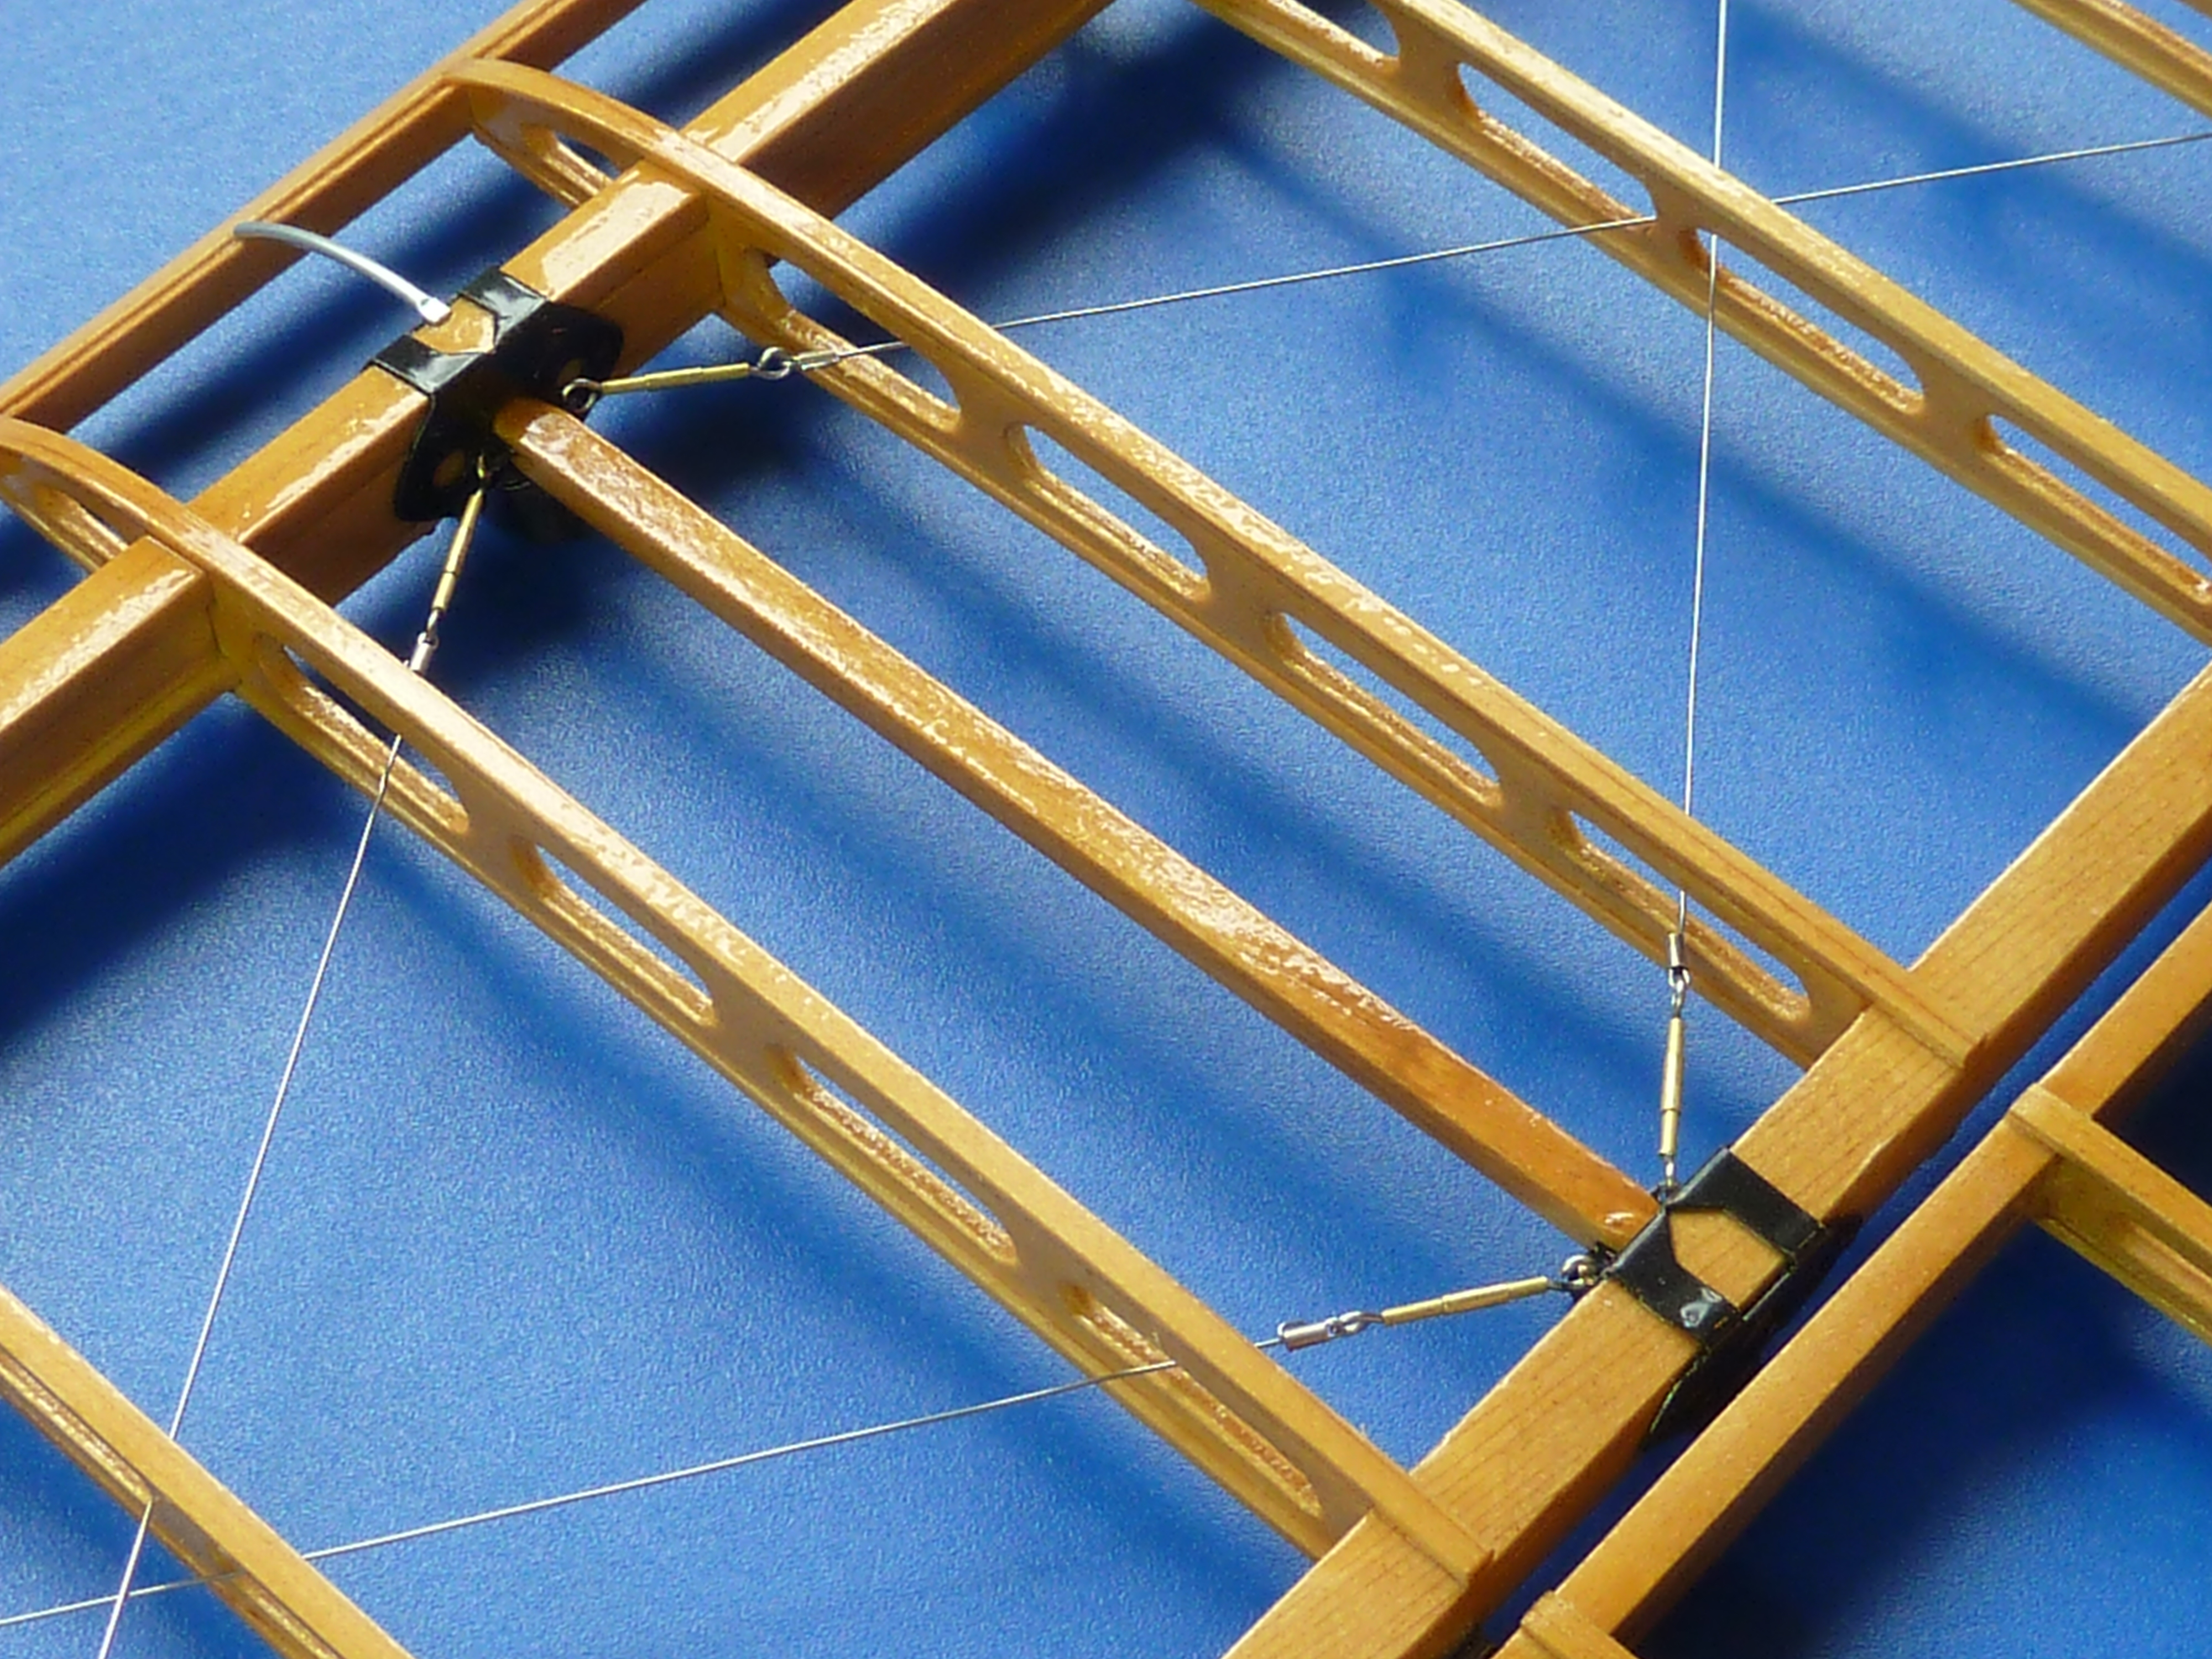
I’ve modified the materials used for the rigging.
As the aircraft actually had aerodynamically shaped wires I thought I’d attempt to replicate that. I used 0.5 x 0.1mm 316L stainless steel flatwire from The Crazy Wire Company who supply the vaping fraternity. I simulated the ends of the wires with 0.8mm nickel-silver tube cut into 2.5mm lengths. The locknut was a 0.6mm tin plated brass micro nut from Prime Miniatures.

There was one small disaster along the way though. Having covered the upper mainplane I joined it to the centre section for final painting. Which went well… I thought.

I was only when I was looking at it after all the masks had been removed that I realised that I had painted the centre of the roundel one rib too far in from the wing tip. I was quite vexed at this point. Really quite, quite vexed.
I attempted to expunge the incorrect marking and repaint…

but the outline of the old marking was still visible and the extra coats of varnish meant that the texture of the wing no longer matched that of the lower mainplane.
To add insult to injury some of the white paint lifted when I removed the masks the 2nd time.

So it was breathe deeply and strip off all of the solartex covering and start afresh. Removing the aileron was awkward too. It was well fixed in there and I had to destroy part of the structure to get it off without trashing the hinges (of which I had no spares). It was a relatively simple repair though.
The recovered wing.

Masking up for the 3rd time.

The final result. In the right place this time.


I also remembered to put the picket rings on the underside of the wings in the right place too. They are one rib out on my first model, though I didn’t notice for ages.

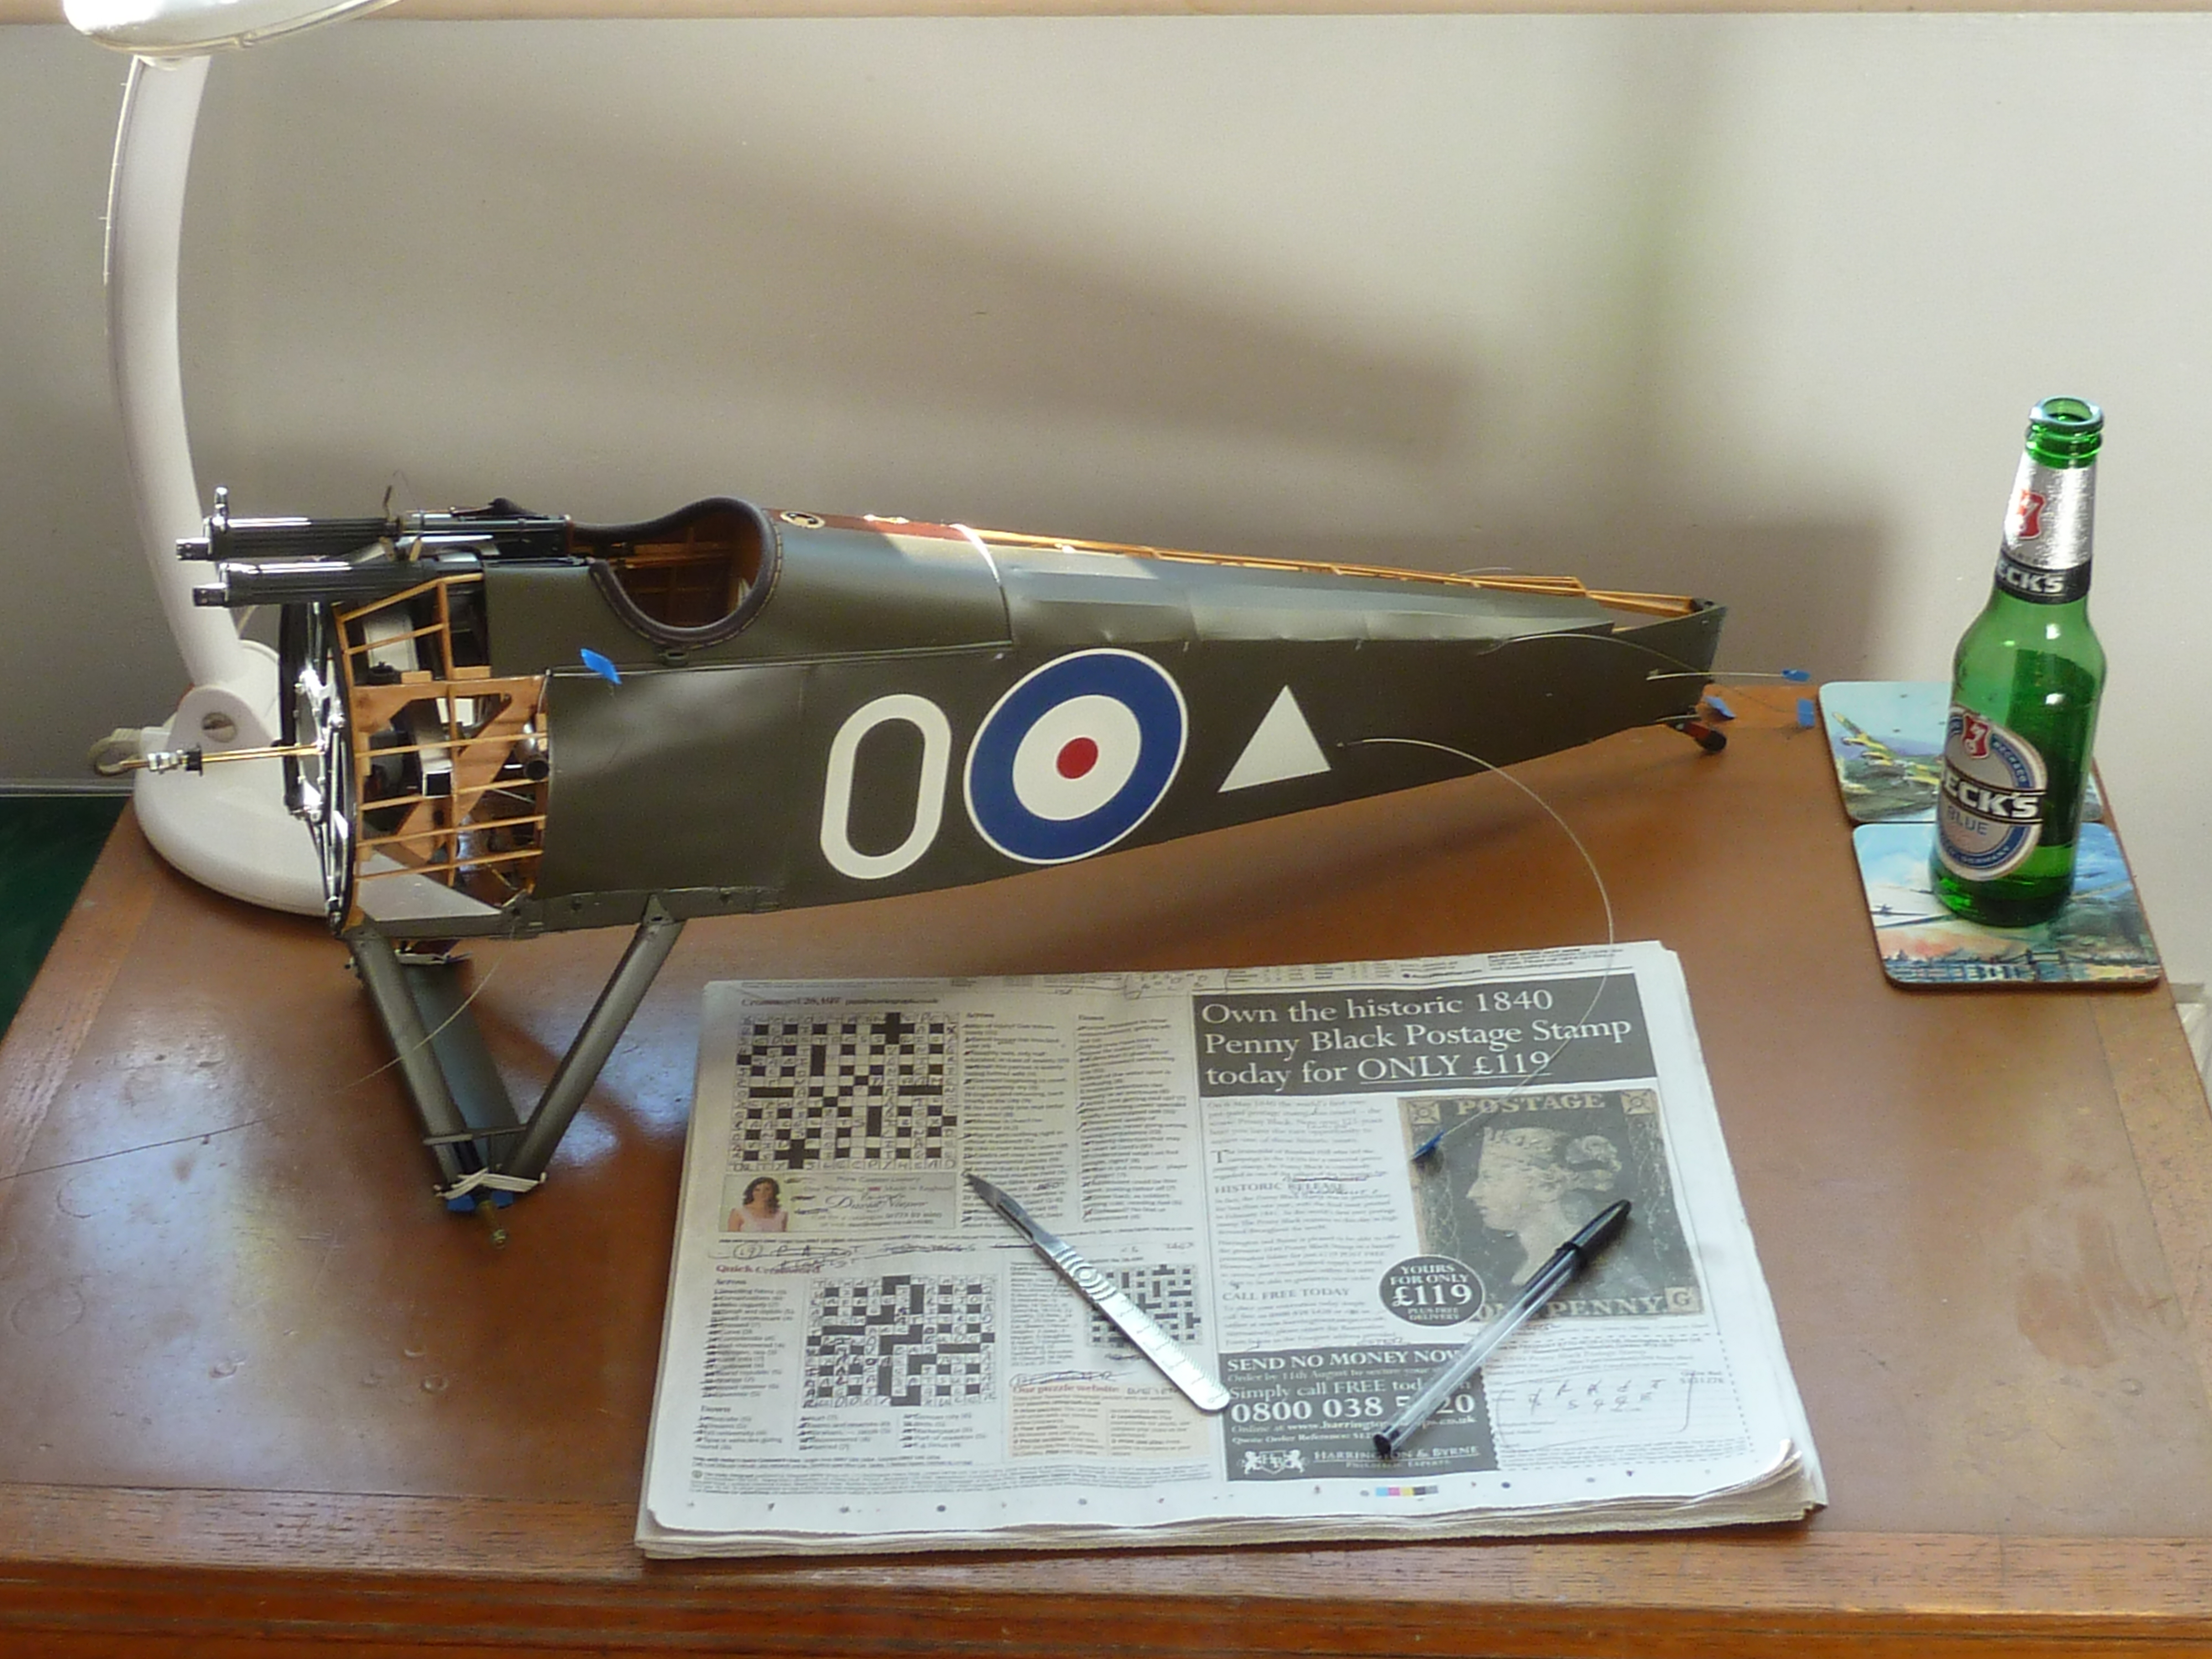
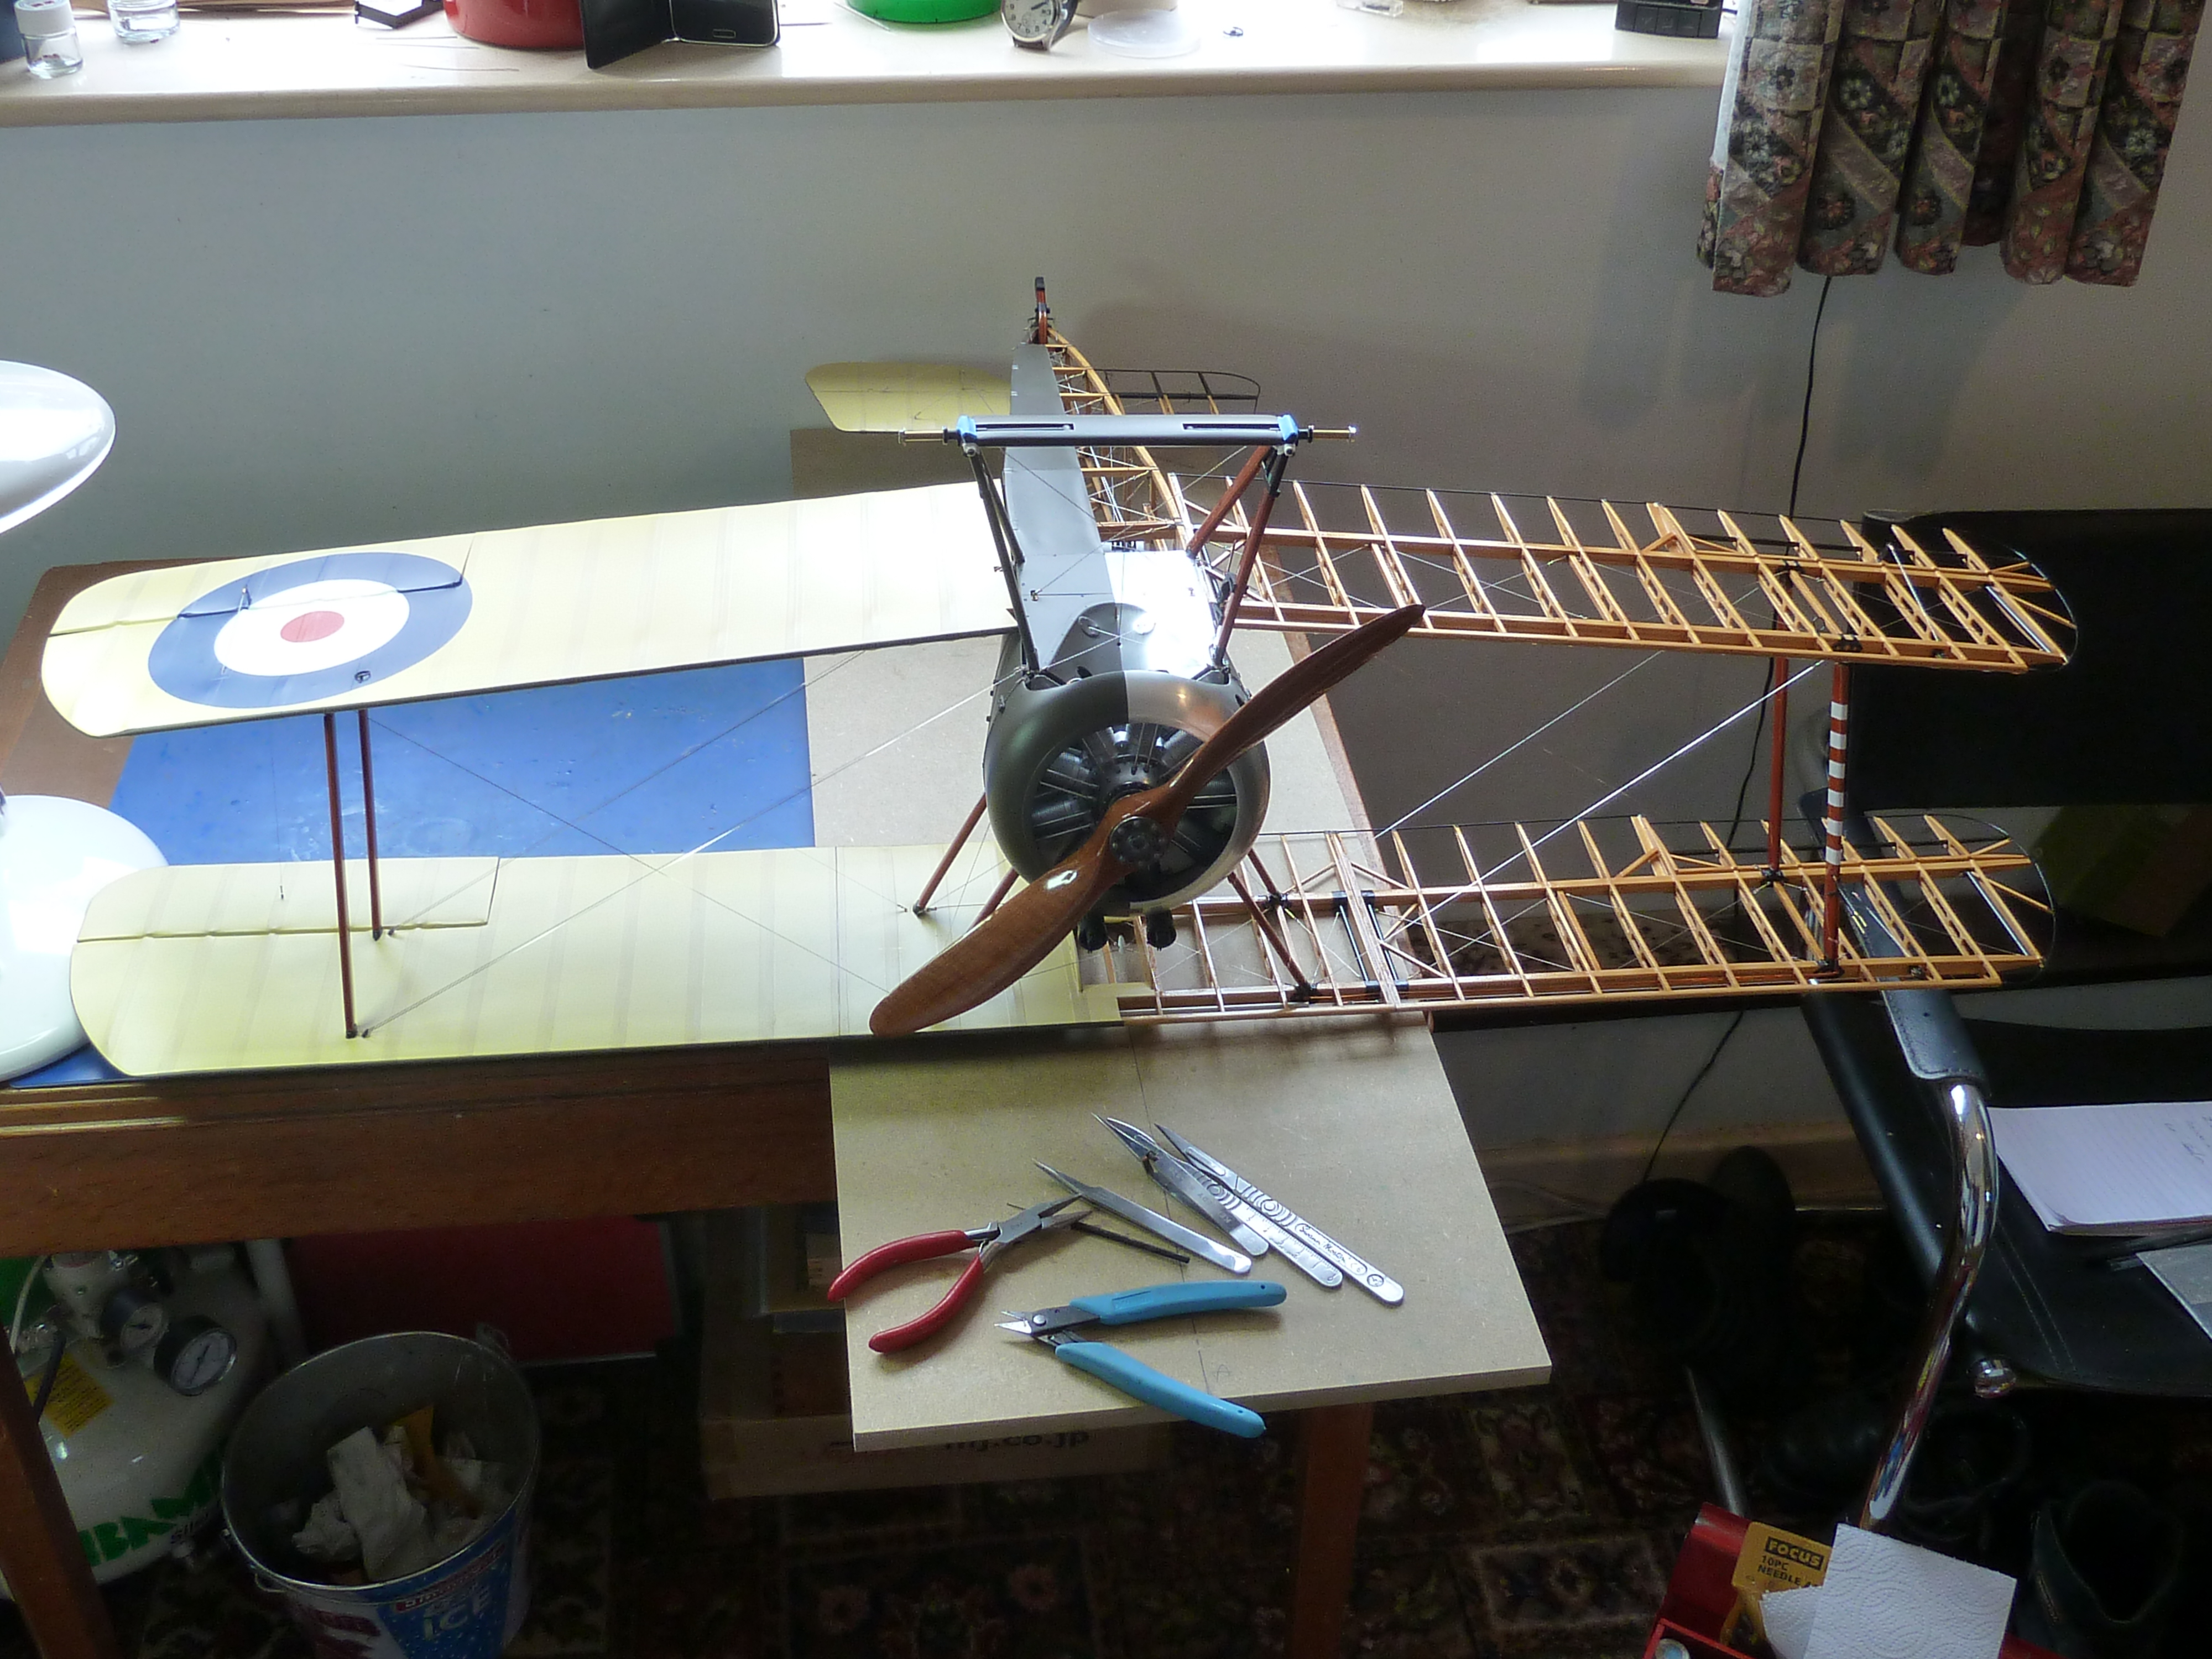
The model is now 99% complete with just the rigging to finish.

Ruston Procter manufacturing stickers on the interplane struts as this was a licence built aircraft.

Pitot probe and tubes are in.

I had hoped to use some heavier gauge flatwire for the main flying and landing wires, but it required that much tension to get it looking straight it was deforming the structure, so I defaulted back to the wire used elsewhere.

Here’s the model mocked up with the wheels on. I’ve put some additional piping inside the tyres as this model will be in a cabinet not hanging up. The kit’s tyres are barely up to supporting the weight of it and crush down too much. Over time I think it would end up on a pair of flats.
The usual problems with bench space.

That about finishes it for this model. Hopefully in the next couple of weeks I’ll be able to put a final post showing the completed thing in all it’s glory.
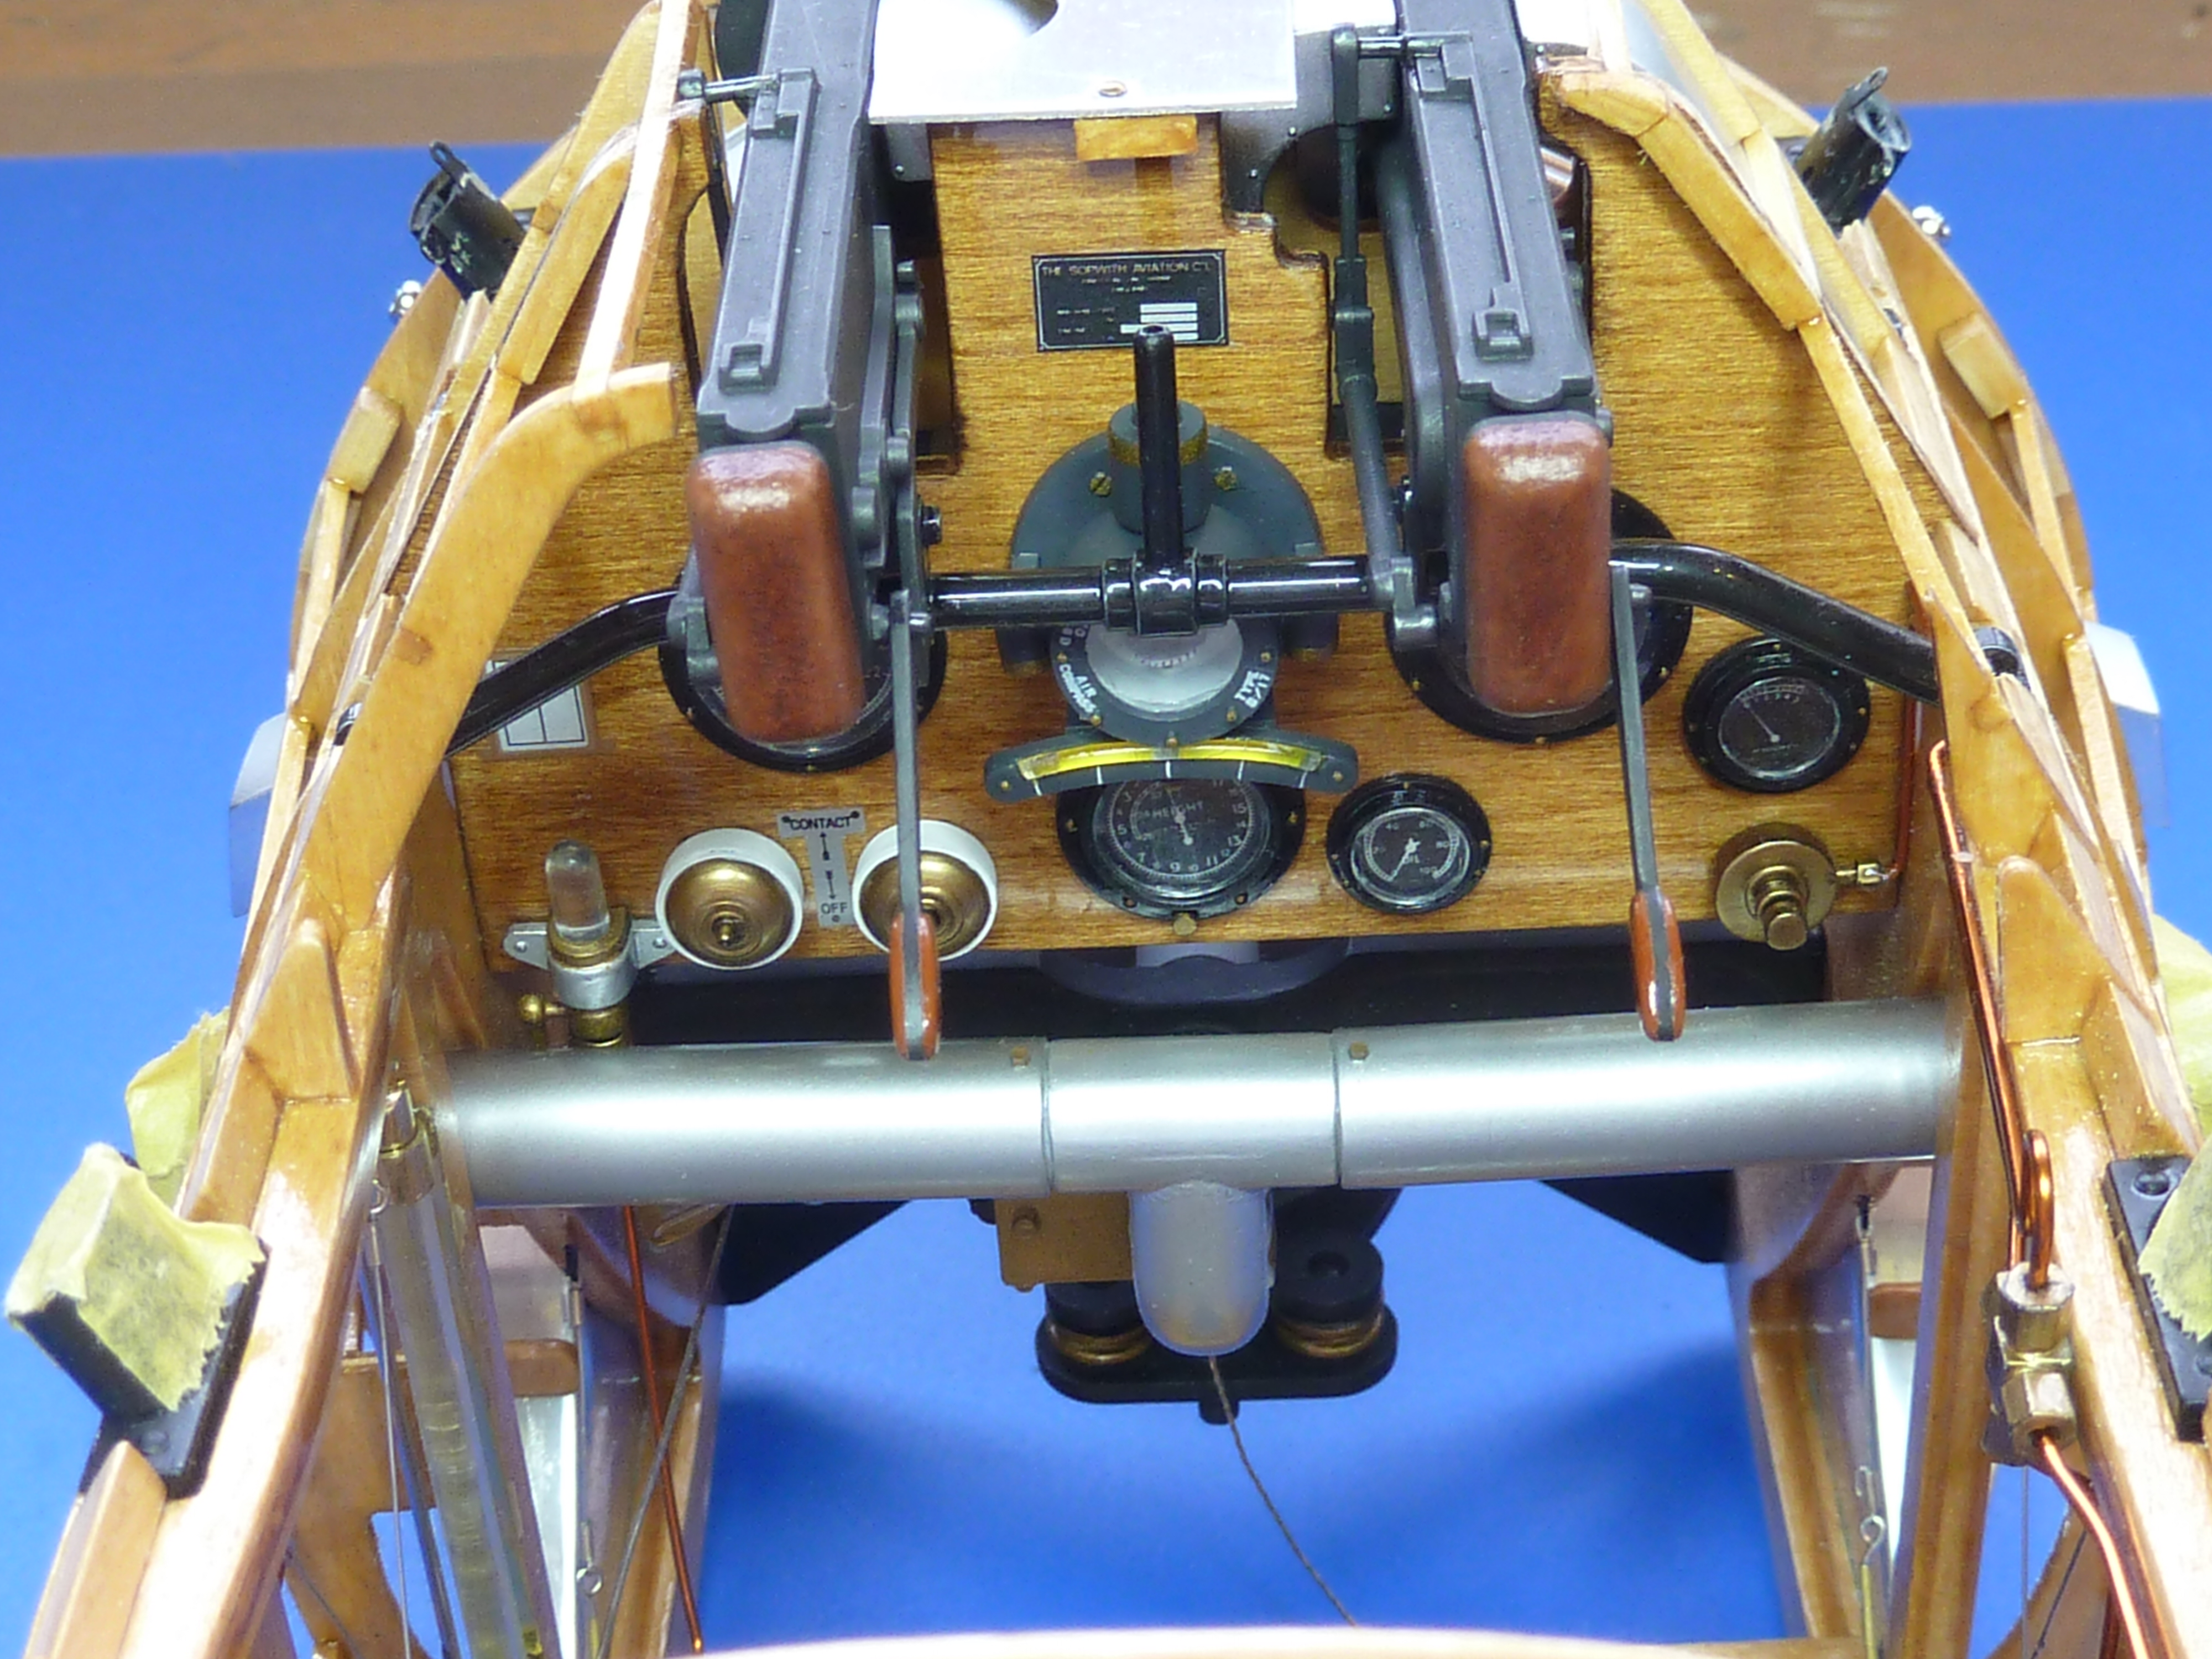
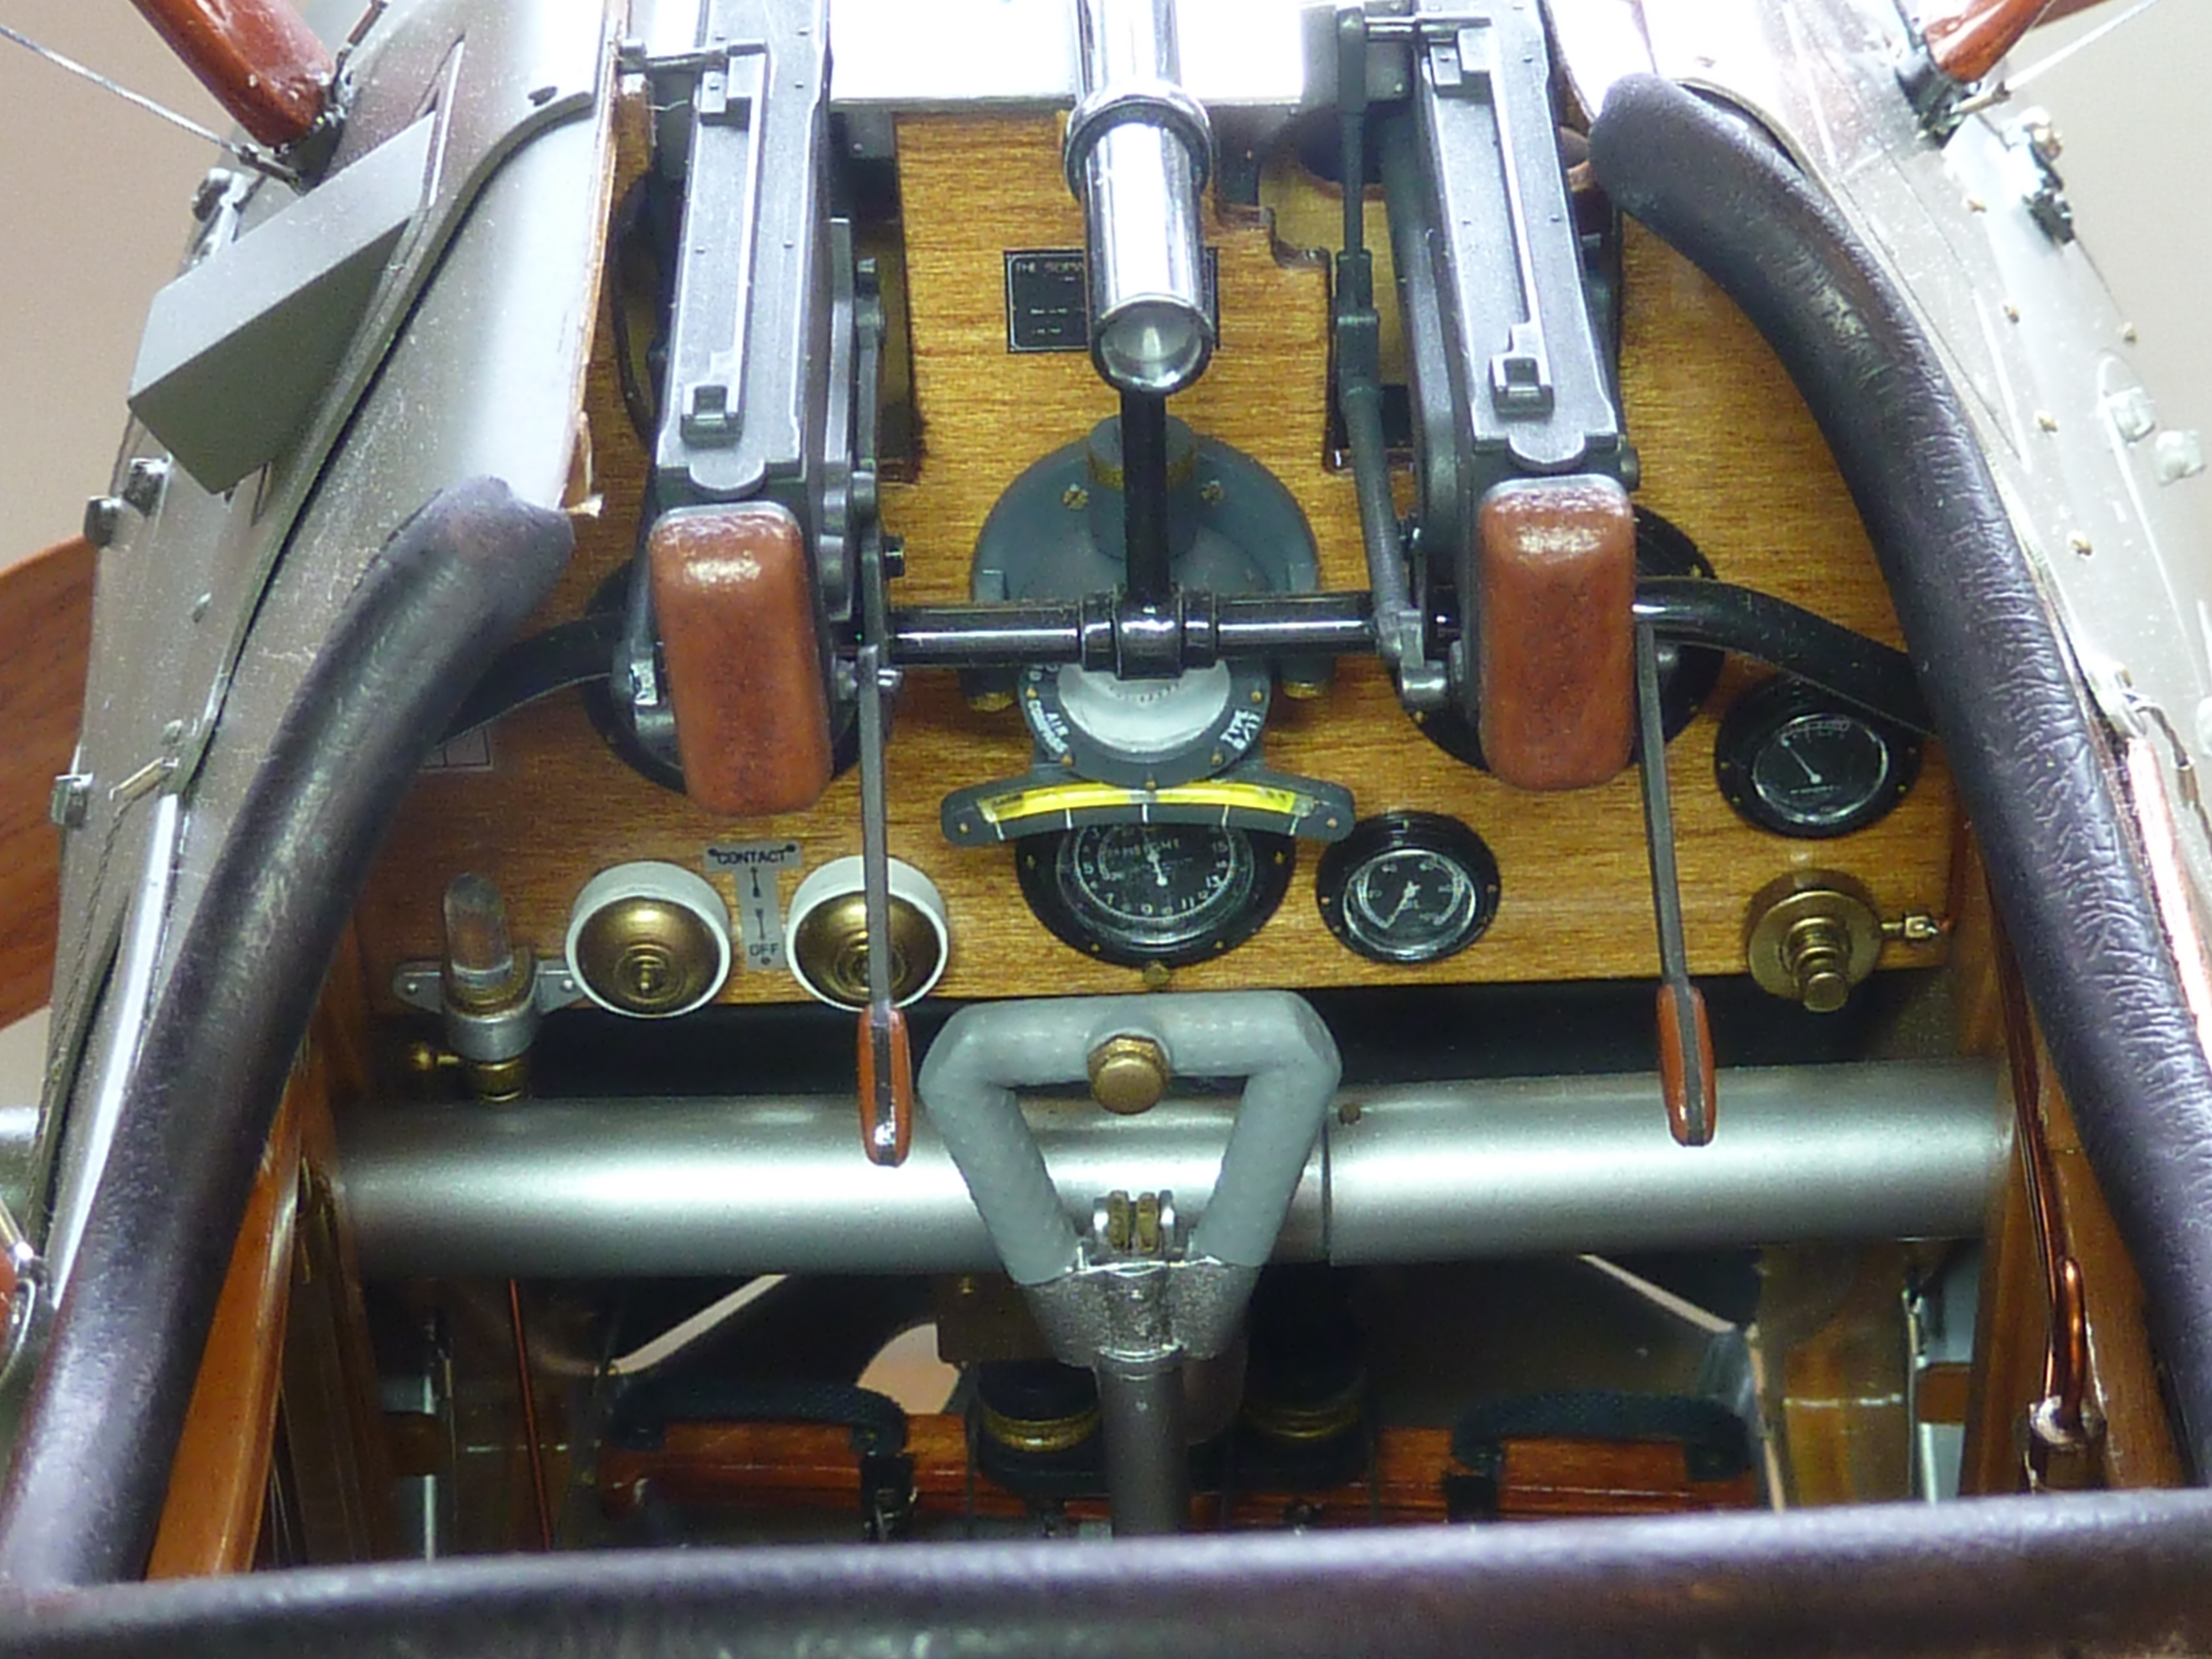
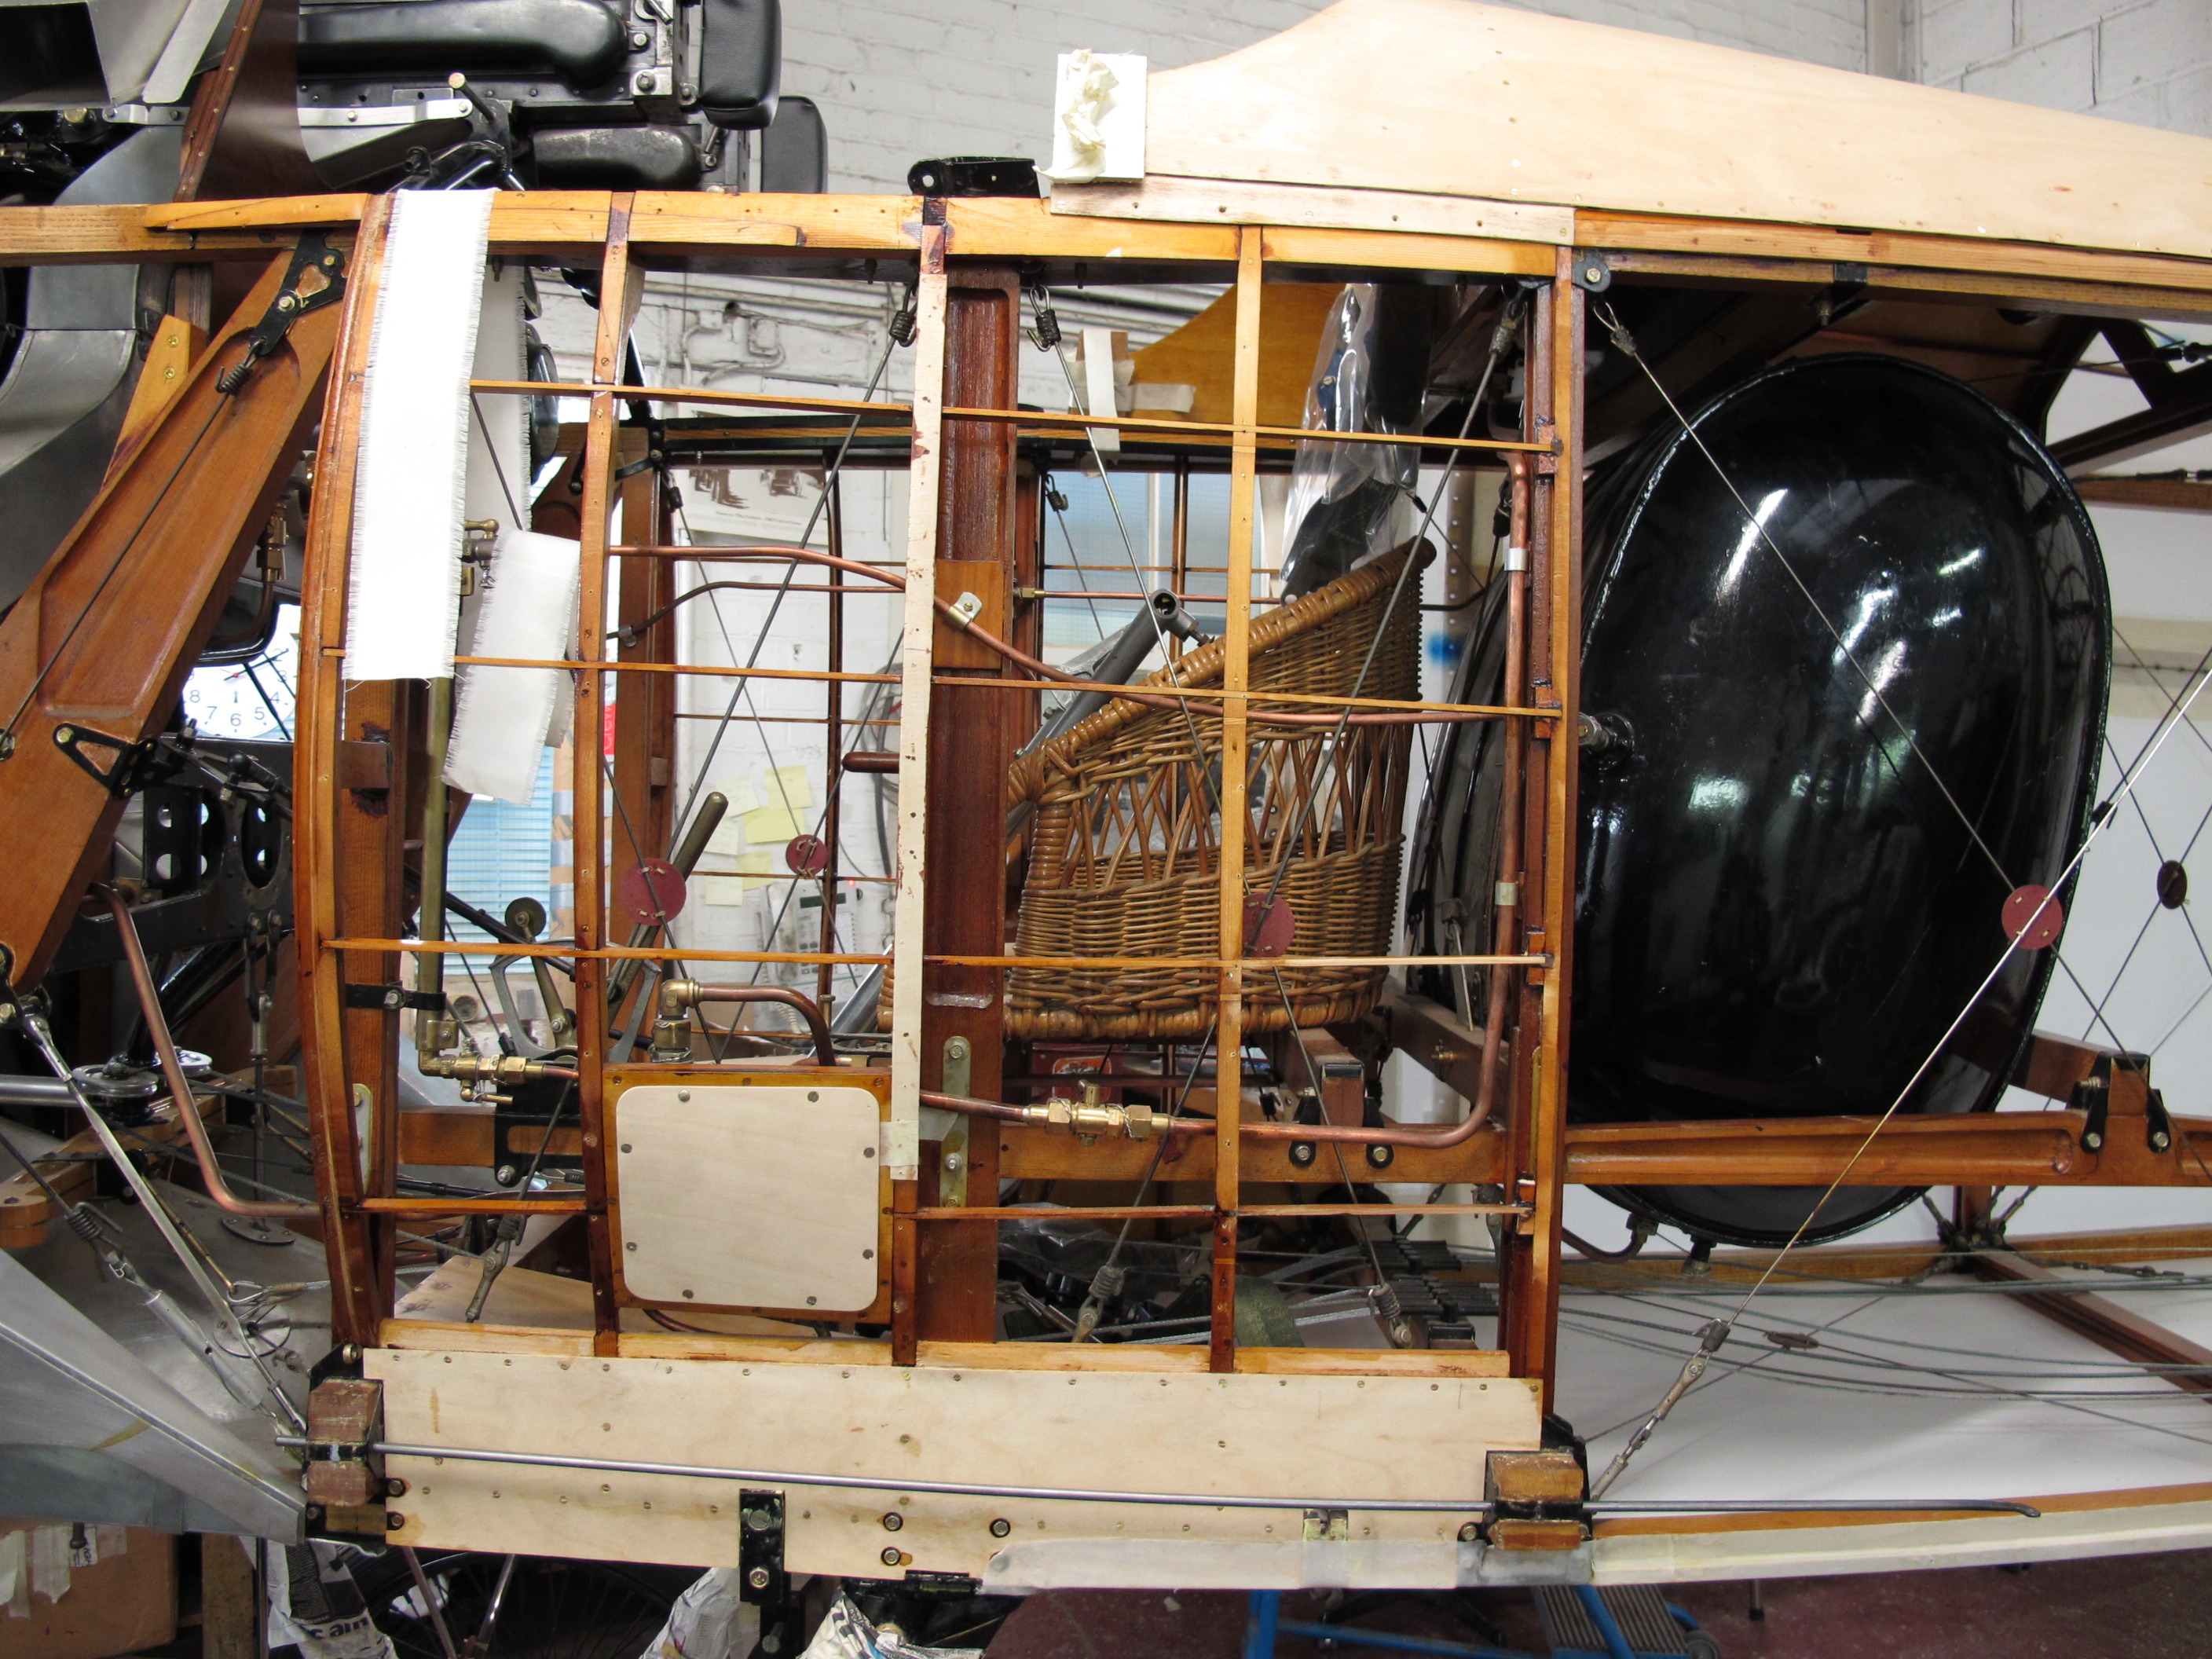
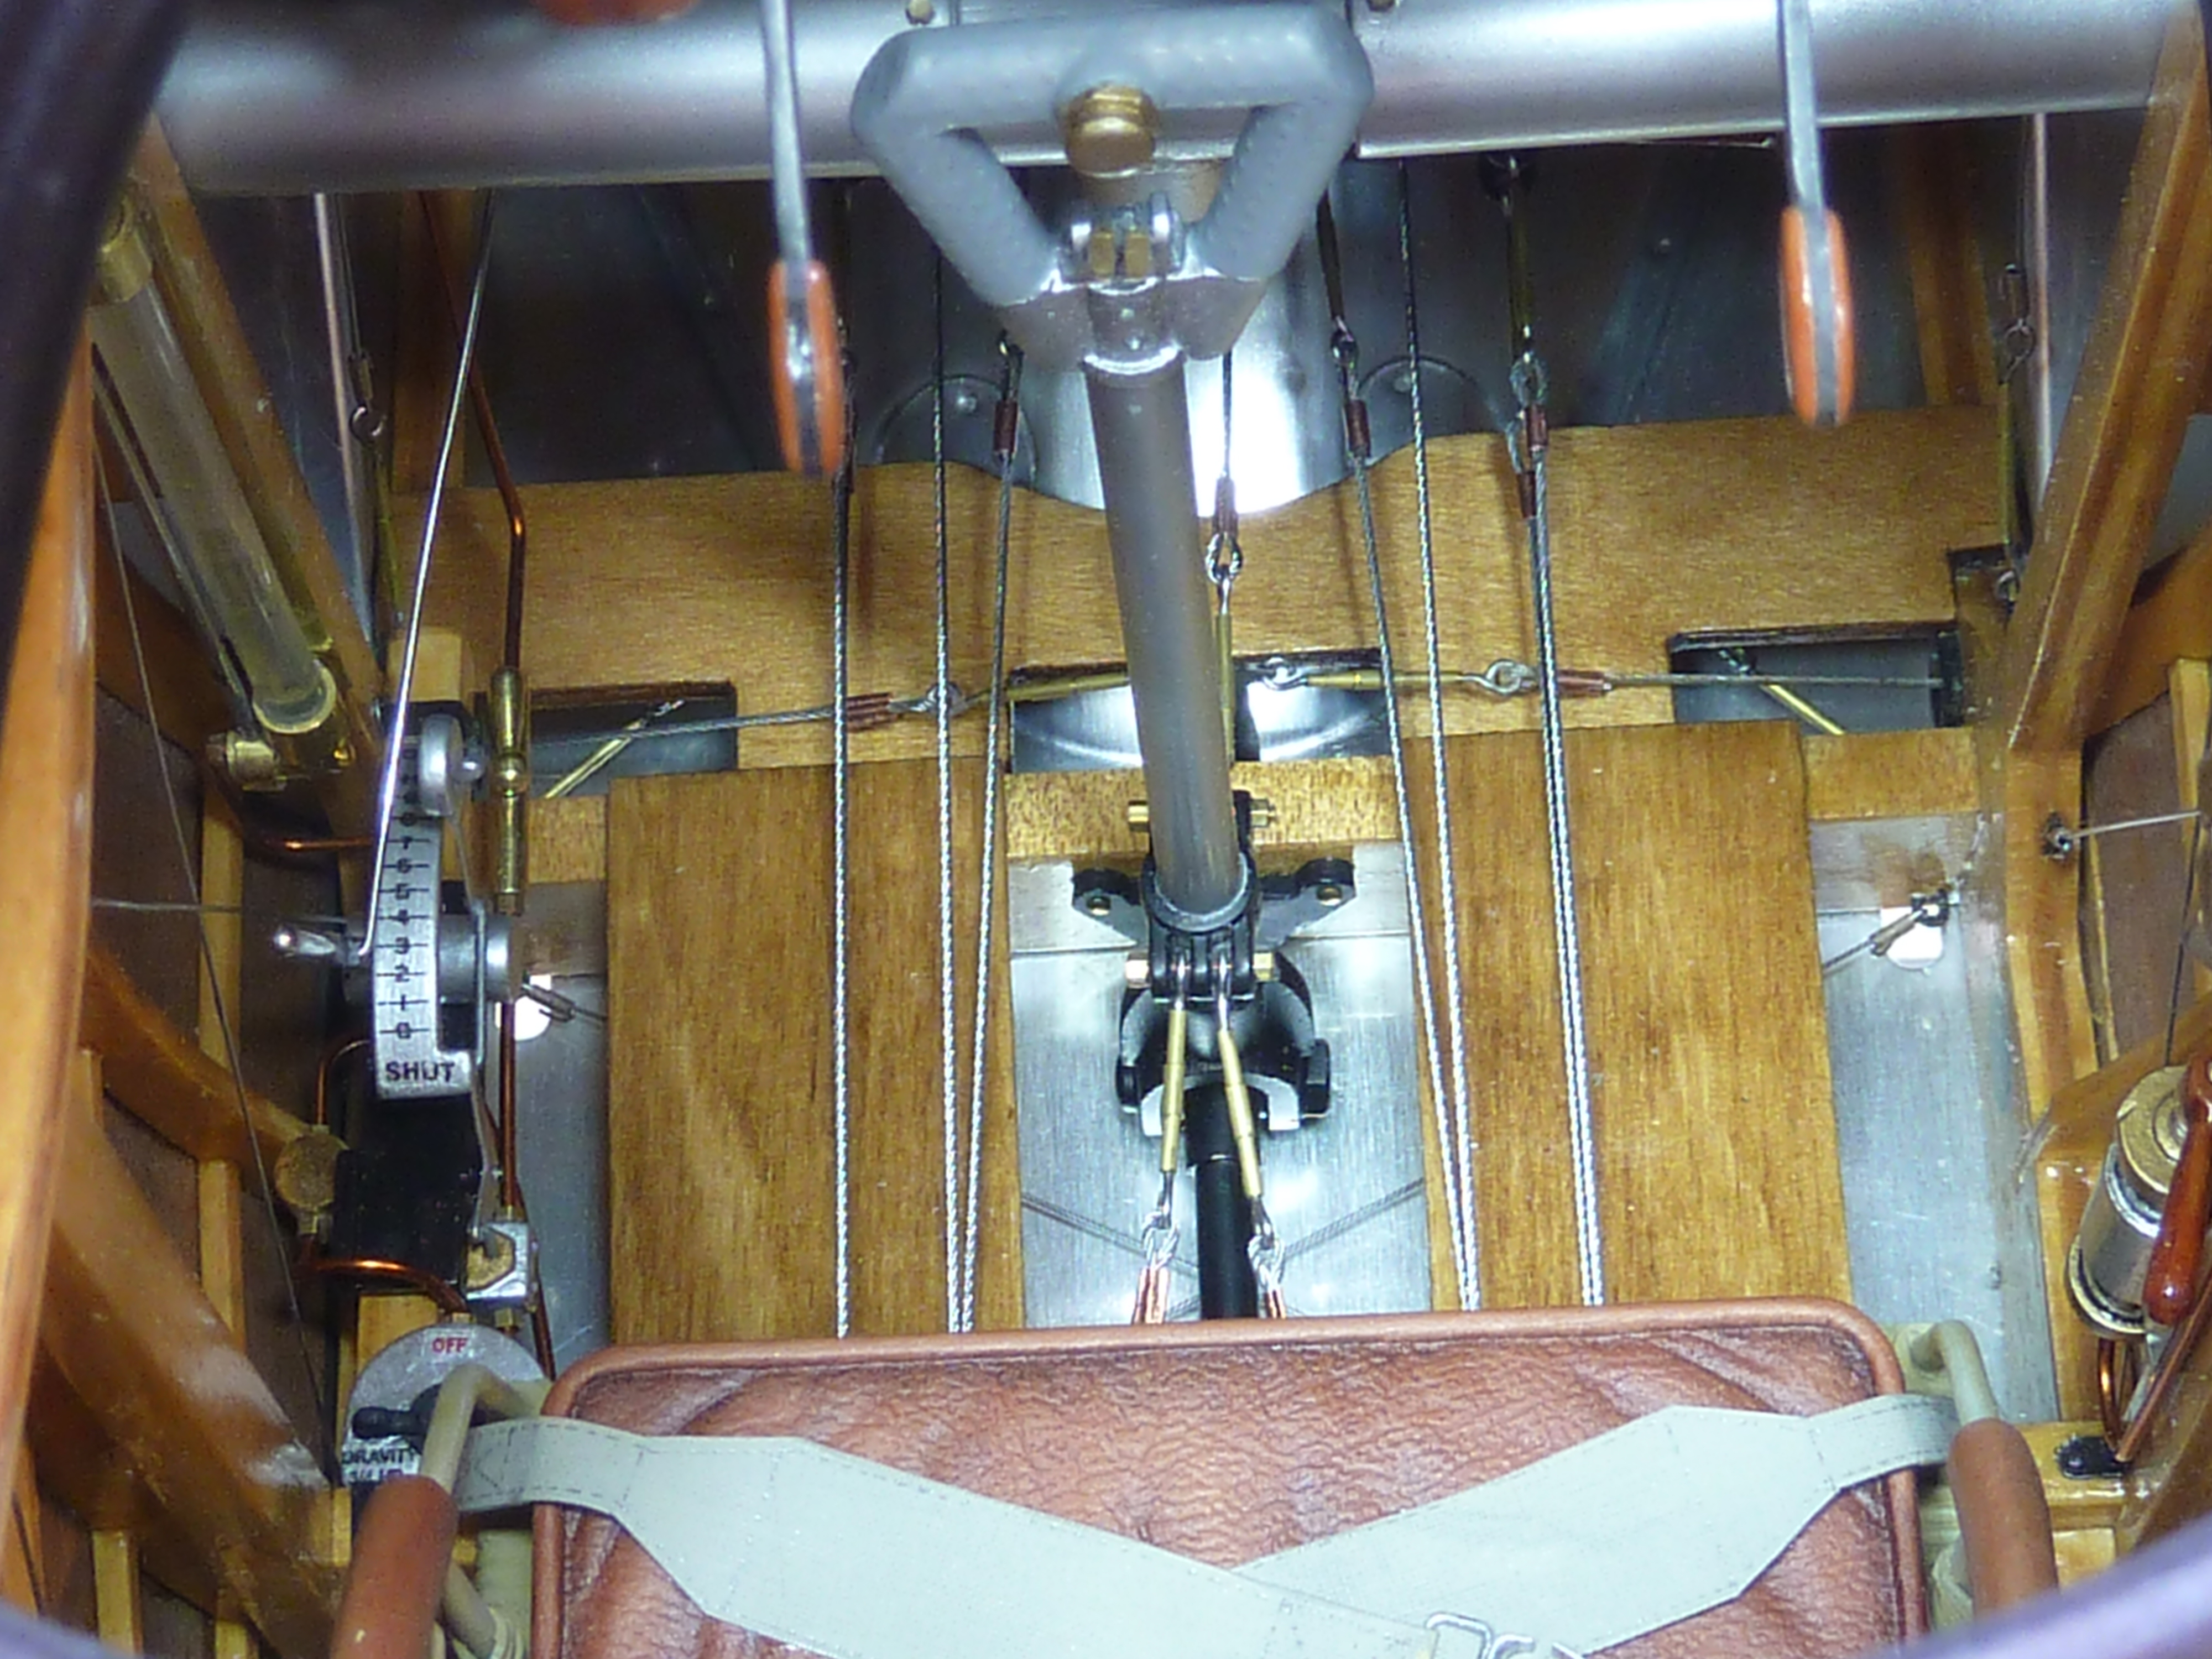
At least now that the controls are connected up I have been able to remove the control column stay so you can at last see the cockpit properly.


Great to see your new post, Ever since I discovered this site I have looked forward to every new entry, it is a real inspiration for my own builds of the Museum Series from Hasegawa. Stay well and Thanks Again from California, USA.
LikeLiked by 1 person
Fantastic !
LikeLike
Just Incredible detail and finish. I’ll never pretend to be able to do work like that, but it’s great to know that at least SOMEBODY can!!
Respect and best wishes,
JP
LikeLiked by 1 person
Part of the reason I run this blog is because anyone can achieve the finishes I do.
It has taken me a while to get here, and the right kit. But anyone can do this with a decent airbrush and some polishing kit.
Loads of varnish or lacquer. Sand between coats with 400 grit on a sandimg block until you get a uniform flat surface. Let it dry throughly. Then 2000, 4000, 8000 and finally 12,000 grit wet and dry. When that’s done and it’s a silky smooth milky finish ‘T-Cut’ compound or similar and finally a resin car polish such as Autoglym.
LikeLike
Simply stunning! How you manage to achieve such great models is beyond me. They are impressive to say the least
LikeLiked by 1 person
This has been a remarkable set of build reports. Your level of detail and your painstaking approach are admirable, and as was said before, your diligence and generosity in documenting your work, mistakes and all, to all of us very thoughtful. I’ve not yet begun my 1/8 kits, but will certainly be constantly referring to your blog when I do. Your “after’ photos appear to be of an actual plane. It’s also very kind of you to post your sources of wire, cable, fasteners for us. You have a dedicated following out here, who send congratulations, best wishes for your health, and eagerly look forward to your future projects.
All best,
Tony
LikeLiked by 1 person
I know how long it took me to find many of my materials sources, and if it saves others the time I’m happy. I’m not into competition and being smug whilst hiding how I got there.
I document the mistakes because I read a lot of blogs where you get the impression the builder is omnipotent and never messes up, which I simply don’t believe. All builders make mistakes and learn how to fix them and I’d like to get across the idea that your model can look awful during the build, but is capable of being brought back.
LikeLike
That is just an amazing piece of work. Museum quality and brilliant craftsmanship.
LikeLiked by 1 person
So glad to see you back! And thanks for sharing more of your beautiful Camel. I sure look forward to the final build shots, thanks!
LikeLiked by 1 person
Well this series of blogs on this and your first build has over the past 12 months inspired me to have a go. I am not sure I have the skills to complete the build or do it justice, but I am having a bash.
So I have the kit, arrived yesterday. 1 part missing, and so for the same problems you had with old parts. Thanks for the heads up. I over came the seat rear being brittle and breaking by dropping it quickly in boiled water and then taking it out with tweezers and quickly forming it around the seat and then cello-taping it before a final dip in the boiled water. Now resting for a few days wrapped up to hopefully keep most of that new shape.
The leather trim for the cockpit, not quite so lucky. I managed to get it pretty straight after, again putting it in boiling water and slowly straightening it out. It has cracked in a couple of places but it is straight, but still brittle when cool. Not usable, so at a loss what to do to rectify this. I don’t have a spare DR1 to use as a mould. 🙂
The missing art I’ll just have to try and fabricate.
Otherwise, I am going to have a go at most of your corrections, not all, I know my limits.
Turnbuckles: Gaspatch do really good TBs BUT in smaller scale and whilst Costas does the late WW1 RAF he does not do the double (as used at the base/top of the struts and tail plane), even though I asked him and sent him pics of. But it/they are very different to the kit and the ones you made. I don’t have the skill to make them myself.
So thank you for making my pockets lighter and I hope I can do your teachings some justice…….
LikeLiked by 1 person
I looked all over for decent turnbuckles but gave up in the end and made my own. If you hsve a look at my second Camel build the turnbuckles I made there were much better than the ones in the first build. In fact all the rigging is better.
The turnbuckles aren’t that hard to make, Just boring because of how many there are.
The kit turnbuckles aren’t actually correct where they are used. Have a close look at period pictures and you will see what I mean.
As far as the cockpit padding goes, you might be able yo do something with the insulation off a cable…
Good luck with build.
LikeLiked by 1 person
Sorry I missed your reply. I wondered why you had not got back to me… 😦 Clearly I need to get notified.
Thanks for the tips. This has been the hardest kit I have had to build yet the most rewarding. I have built the fuselage now, though not as well finished as yours, I am pleased. I still need to decide on wheels, whether to make them or use the kit. I am just not confident enough in my ability but I have an idea how to do them, not like you have, I managed to get plans, and as the kit ones will always be there, I am just contemplating having a go.
I also have still to add the seat and seat belt, which I am doing now.
I will then start the tail plane, like you, scratch build almost…..
You build and the mods are the basis and inspiration of my build and whilst I have not followed religiously it’s still the core and aspiration.
PS I hadn’t seen your reply so put something up on your general page…. whoops.
Best
Jon
LikeLiked by 1 person
Is there a place to download your entire blog for build 1 and 2 ? We just “inherited” a kit that was purchased in 1984 and was barely started. My husband is going to attempt to finish it and your blog looks very useful.
LikeLike
Sorry, not that I know of.
LikeLike
Wow! Impressive work. I am building Hasigawa SC. Not even close to your expertise!
LikeLiked by 1 person
I am obsessed with Sopwith Camels. I built many models as a boy and did many drawings. I am the known American artist and writer Eric Green from Belfast Maine. My father was Marshall S. Green who was 3 times Canadian National model airplane champion during the 1940s. My point. I would love to purchase a finished large scale Sopwith Camel model. At the moment I am building a 1/48th scale model railroad, so simply cannot build another Camel. Cheers and great modeling. I am easy to find through Google. “Eric Green Artist.” Or my modeling alias Kelly Harris. Cheers and thank you. Jonathan Harrison, just saw your Camel. I’m in love. My favorite colors!
LikeLiked by 1 person
Eric,
What’s the best email address to contact you on? Can you let me know via:
MBIQModels@btinternet.com.
LikeLike
Thank you…. I only decided to do Billy Barker’s mount after I’d finished the fuselage, otherwise, I’d have done a better job of it. His little devil was fun to make.
LikeLike
Well, every Camel I’ve seen here is simply wonderful. Kelly Harris is my modeling name one FB. Cheers! Eric Green
LikeLike
I owe it to MBIQ because if I hadn’t seen his blog and how to I would never have attempted this, but thank you.
LikeLiked by 1 person
Kelly is that with the Beatle and cowboy…. ?
LikeLike
Beatle? Cowboy? I do wear a cowboy hat.
LikeLike