
Yet again, it has been much longer since my last post on here than I intended. Unfortunately, not long after I made the previous post I ended up doing the ill thing again. I’ve still a fair way to go before I’ll be back at the modelling table.
However, in the interim, I thought I’d put a post on here about the etching process that I use to create patterns in brass and copper. Whilst I don’t use it to create photoetch parts yet, many of the techniques are identical and can be read across.
Since typing the above, I have moved on to creating photoetch parts. In fact that has become the main use for the techniques described.
I’ve read a few threads on various model making sites where people have embarked on the etching process to create photoetched parts. The writers have documented their various trials and tribulations and, as I’ve found, it can be a bit trial and error. Reading the others’ posts left me thinking “I could’ve told you that”, or “No… what you need to do is…” which isn’t especially helpful on a thread written a year or more ago.
So, the aim of this post is to describe the process and materials that I use, and the drawbacks of some of the options I’ve tried and discarded.
As before it isn’t intended to be a definitive ‘How to’, rather how I do it at the moment. If anyone has any recommendations that improve on my method I’d be pleased to hear them.
I started etching to make some improved parts for the second Sopwith Camel that I built. The kit provided stickers for the fuel filler ferrules which I wasn’t bowled over by, so I decided to etch some in brass as they were on the real aircraft.


Given it was a first attempt, they came out quite well.
I used a method whereby you laser print the etch pattern onto a special carrier sheet, then iron it onto the metal to be etched. The process works and is… OK, but I couldn’t get the sharpness to the images I wanted and I found it very difficult to get fault free masks on large areas. The bigger the etching, the less likely the ironed on pattern would be usable. Much frustration was engendered proving this.
Ultimately I abandoned the iron-on option and went for the process used in the commercial production of printed circuit boards etc. In this a UV sensitive etch resist film is laminated onto the metal to be etched, an image exposed onto the film, then developed. During developing the exposed resist hardens, and the unexposed is washed away.
Aside from the fact that it is much easier to generate fault free large etchings using this process, the sharpness of the final mask is also much improved.
In the picture below the top nameplate was made with an iron-on etch resist, and the bottom with laminated UV sensitive film.
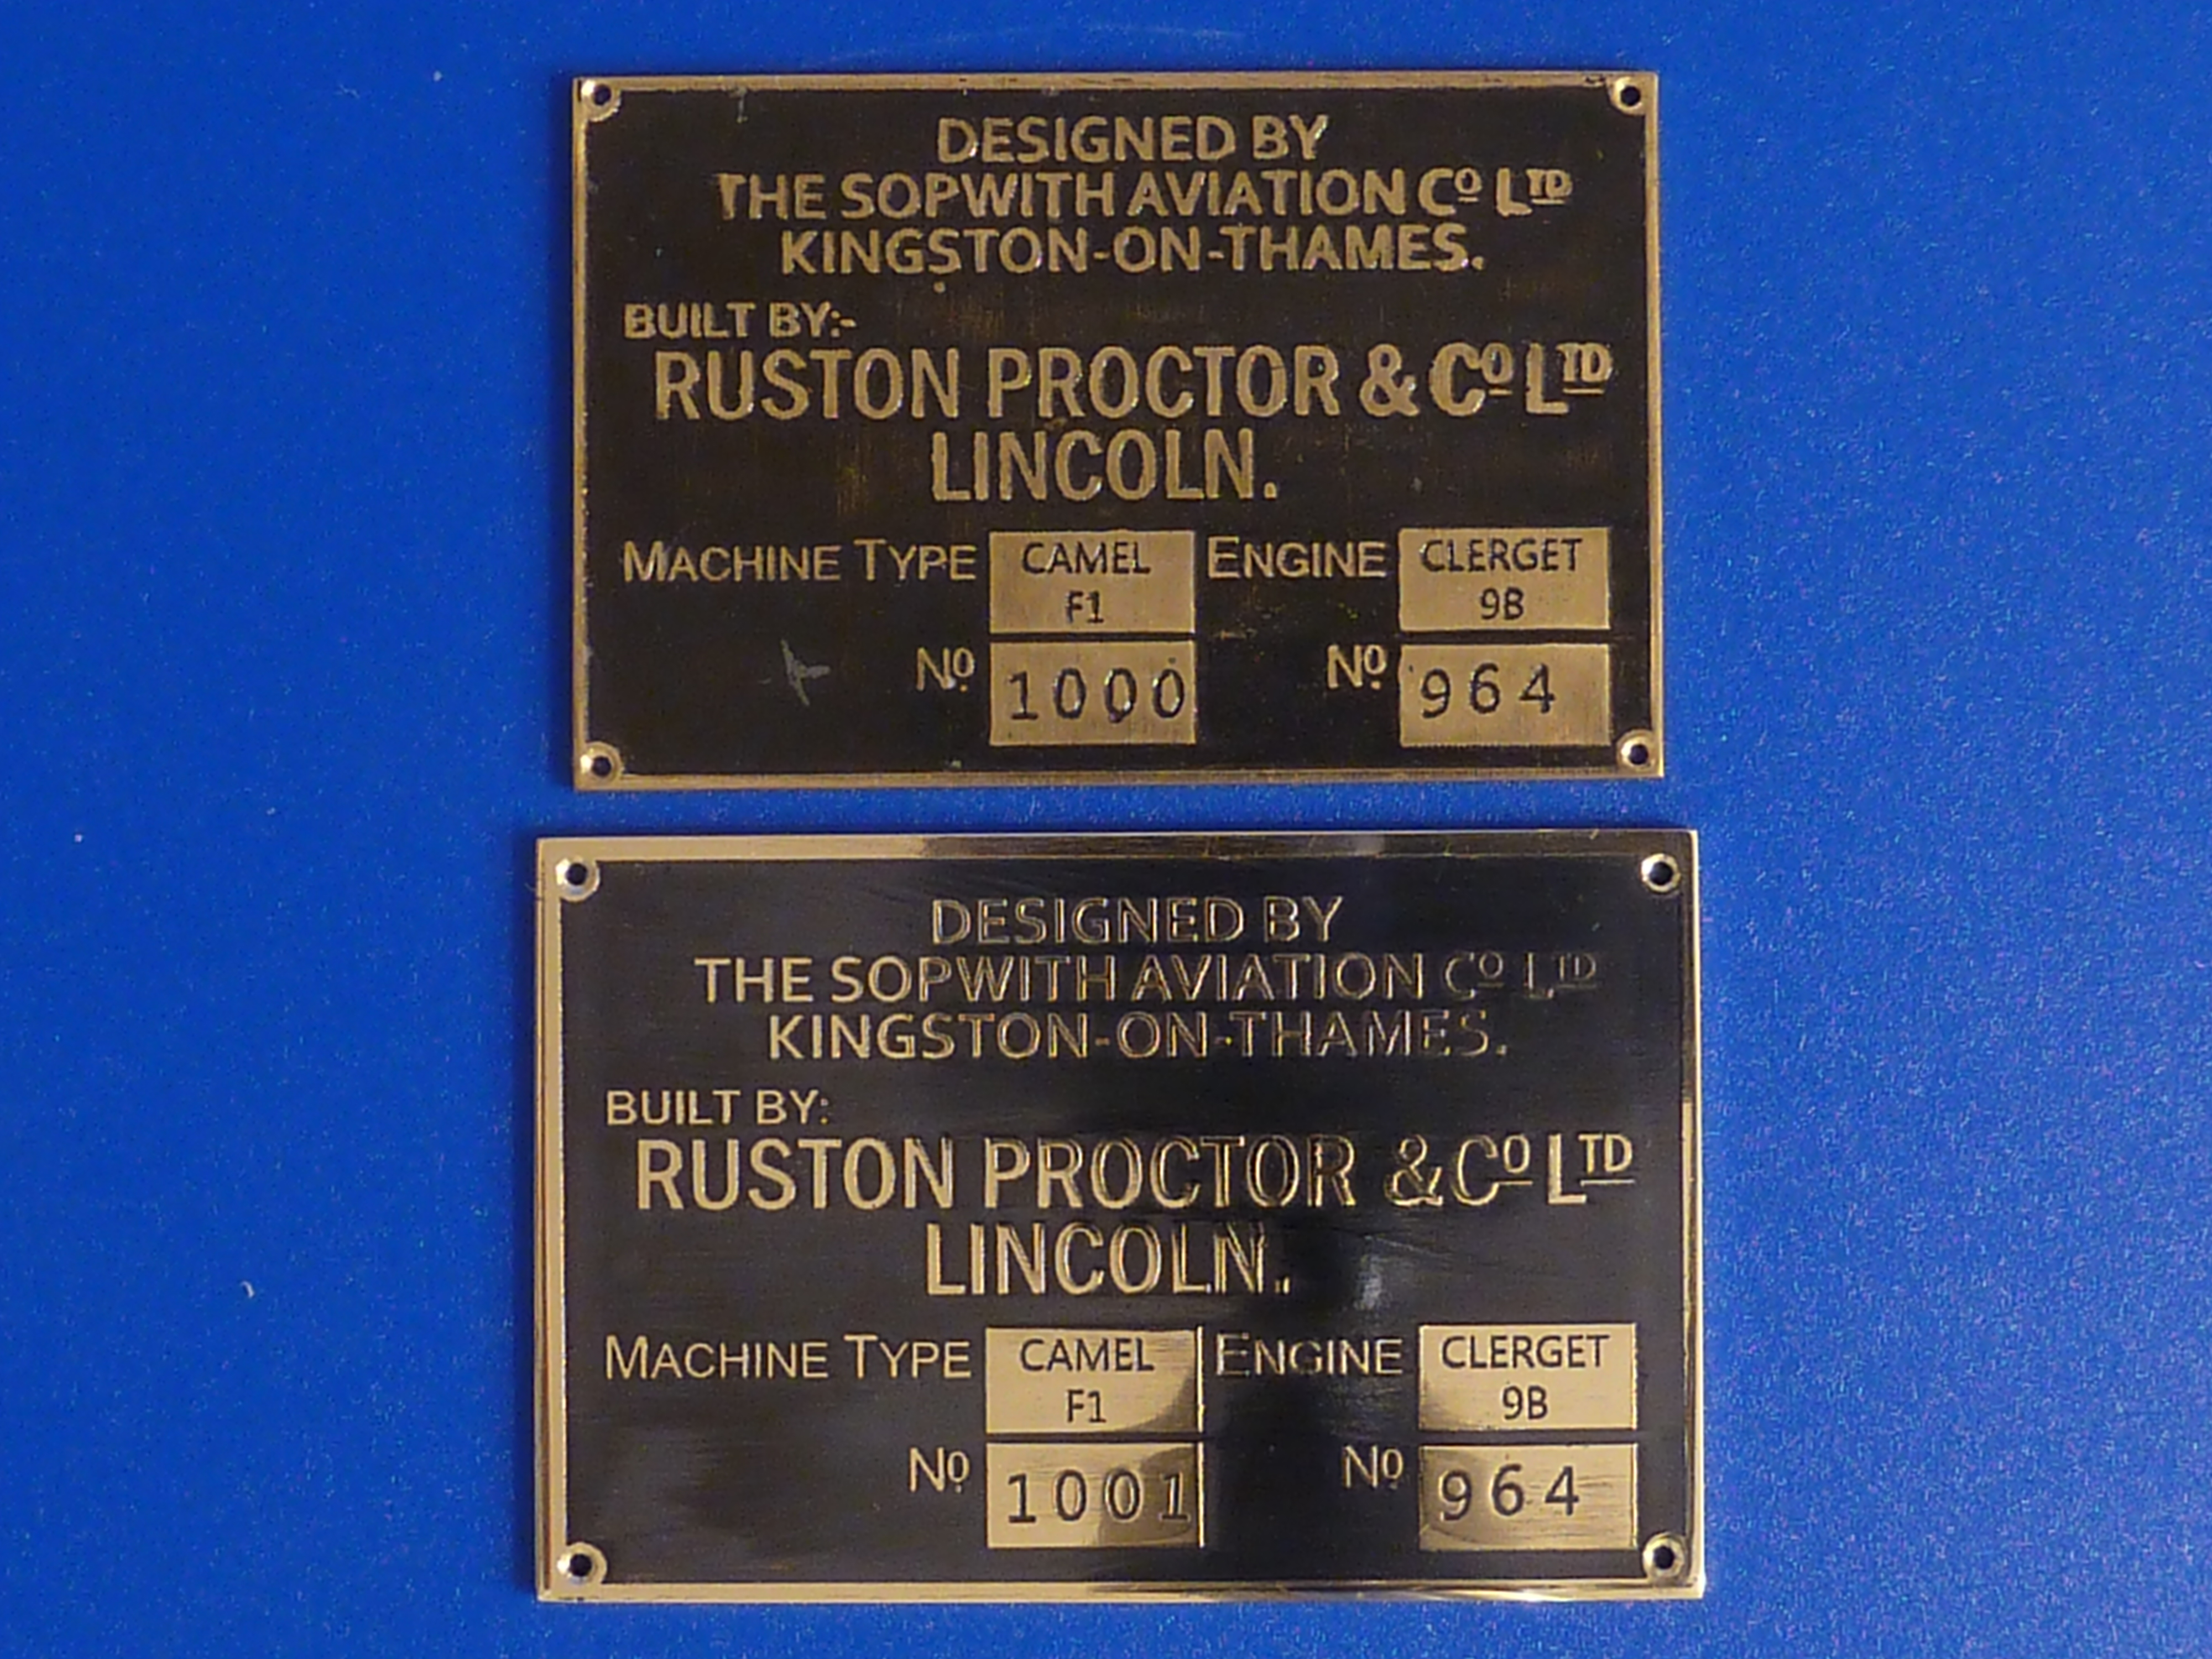
The improved quality and crispness of the second plate is very noticable.
Materials
The main materials used in the process are:
- UV sensitive film: Fortex DF500 Dry Film
- Artwork Film: Fortex, Jetstar Premium.
- Developer:
Mega Electronics Seno 4006Fortex Mircrotrak Developer - Edinburgh etch: kit
- Acetone.
UPDATE: I understand that Mega Electronics have gone into liquidation recently. At the time of writing (Sept.2019) you can still pick up some old stock, but I doubt it’ll be around much longer. I’ll update this post when I’ve found new sources.
Other items used are:
- Adobe Photoshop software
- Epson Injet Printer: XP-405
- Amazon Basics: laminator
- Scotchbright: Scouring pads (fine)
- Homemade UV lightbox.
- Tamiya acrylic paint: Clear Red
- Sundry Chinese takeaway food tubs!
This is a link to my cribsheet detailing the salient points and settings of the process: Cribsheet.
So, what is the actual process?
The first and foremost thing to bear in mind during everything that follows is,
CLEANLINESS.
Be a bit paranoid about it, especially grease from your skin. Don’t touch the surface to be etched with bare fingers, don’t even give it an oily glance once you have prepared it. Wear disposable gloves at all times, and make sure the surface of them is dust and grease free too.
I have discovered certain truisms during my experiments. The two main ones being:
- Any contamination of the metal’s surface will stop it etching properly.
- Any dust or imperfections present during UV exposure will carry through and be etched on the final product.
Artwork
The first step in the etching process is to create your artwork. How you actually generate the initial image is up to you, however it must be monochromatic black and white, with no grey shades. The process either etches or it doesn’t. There is no in between.
Resolution is key to obtaining a crisp final result. Use the finest settings on your printer. I use 600dpi, simply because that’s the practical limit of mine and I print as ‘Best Photo’ in Photoshop. See my cribsheet above for full details of the Photoshop settings used.
I use a specialist artwork film because I’ve found it provides the best quality. Ordinary acetates didn’t quite cut it. The Jetstar (Premium) listed above is a faint milky white colour, with one side obviously glossy, and the other matt. The pattern has to be printed on the matt surface.

As the image is printed on the matt surface, and this is then reversed so that in ink mask is pressed up as close to the UV film as possible during exposure (to stop UV light leaking in at the edges and blurring them), you will need to print the actual image reversed left to right.

Make sure you keep the artwork in a dust free place and be very careful handling it to ensure it doesn’t get contaminated with grease from your fingers.
Etch Sample
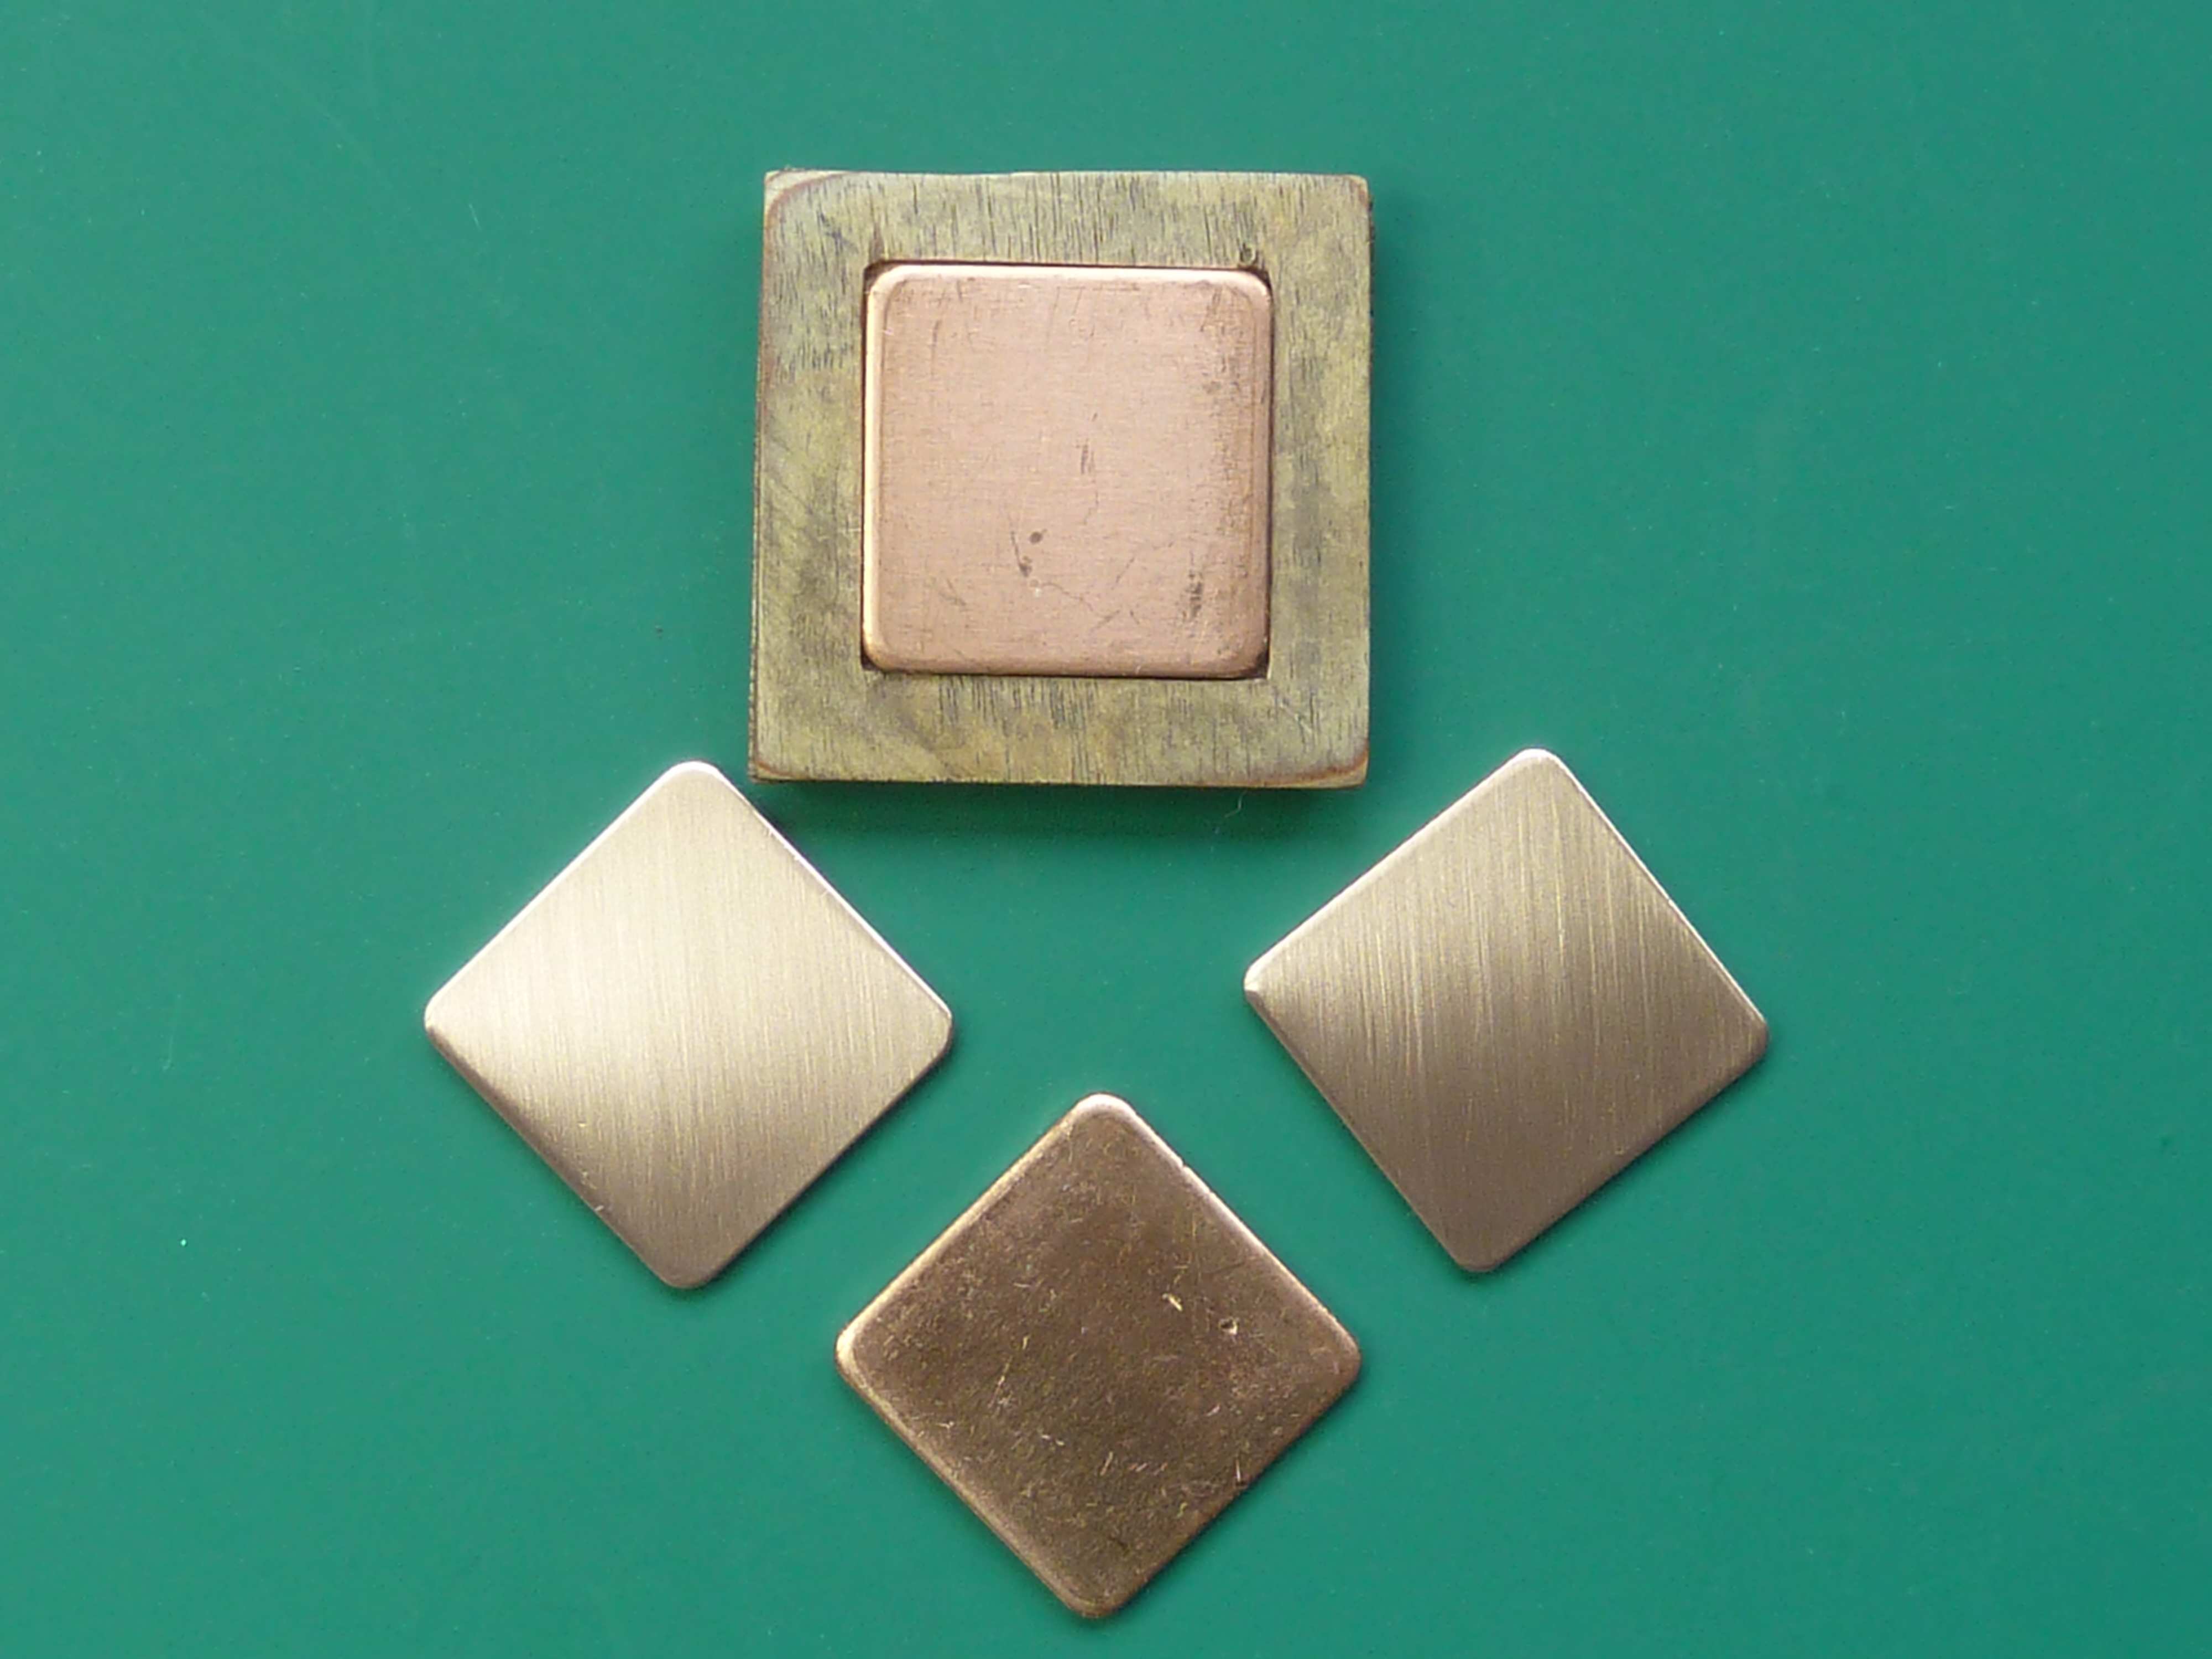
Once you have your artwork, you need to prepare the blanks you want to etch so they are ready for the UV film to be laminated on. I’m using copper here, but the process is identical for brass.
Again, cleanliness is king. In fact it is Galactic Emperor.
Make sure that the surface to be etched is clean, bright, smooth and free from any grease or dust.
I achieve this by rubbing it down with Scotchbrite pads until I have a uniform finish, with no missed spots. Make sure the pad itself is free from any grease contamination and that your sample, once cleaned, is free from dust. I wipe the blanks down with acetone to make sure the surface is grease free and then go over them with a puffer brush just prior to laminating the dry film on.
Once the blanks are clean place them somewhere safe so that they remain so.
Laminating The UV Dry Film Resist
The dry film photo resist comes as a three layer laminate: Two outer layers of protective plastic with the UV sensitive film in the middle.
I’m not certain exactly how sensitive the film is to ambient light. However, when I am using it I close the curtains and turn off any lights, especially fluorescent ones. The twilight conditions are enough for me to operate in.
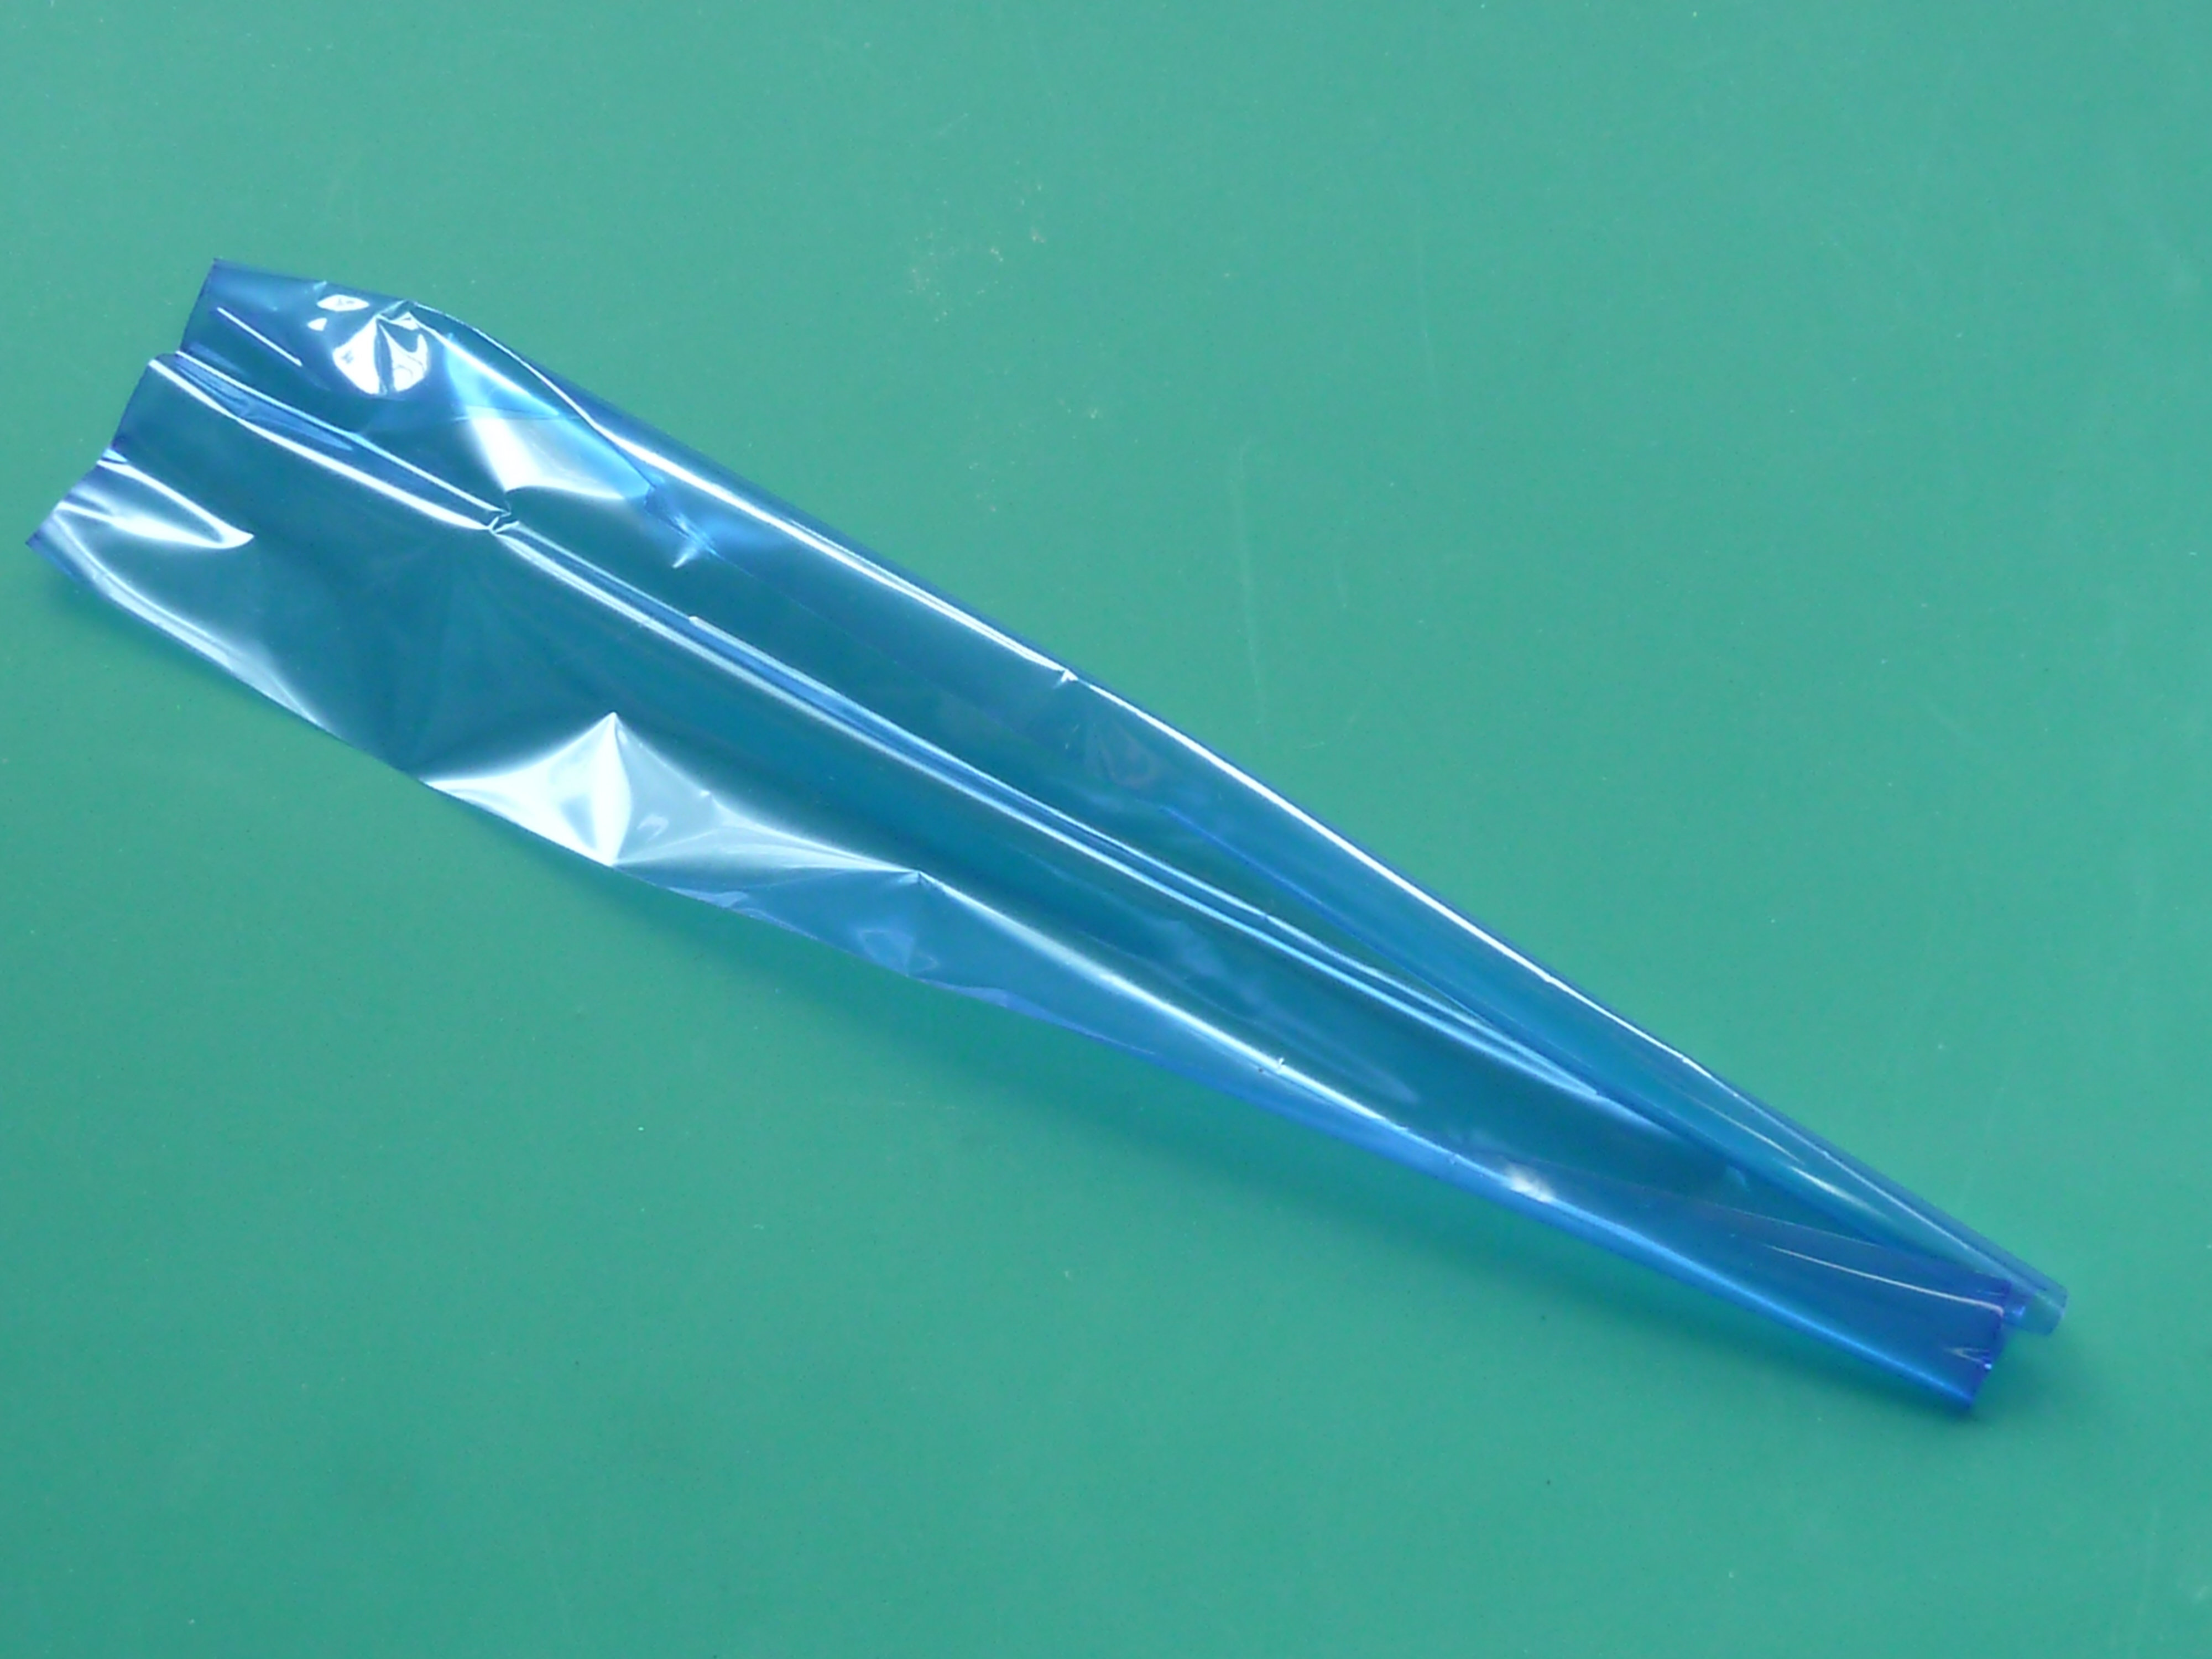
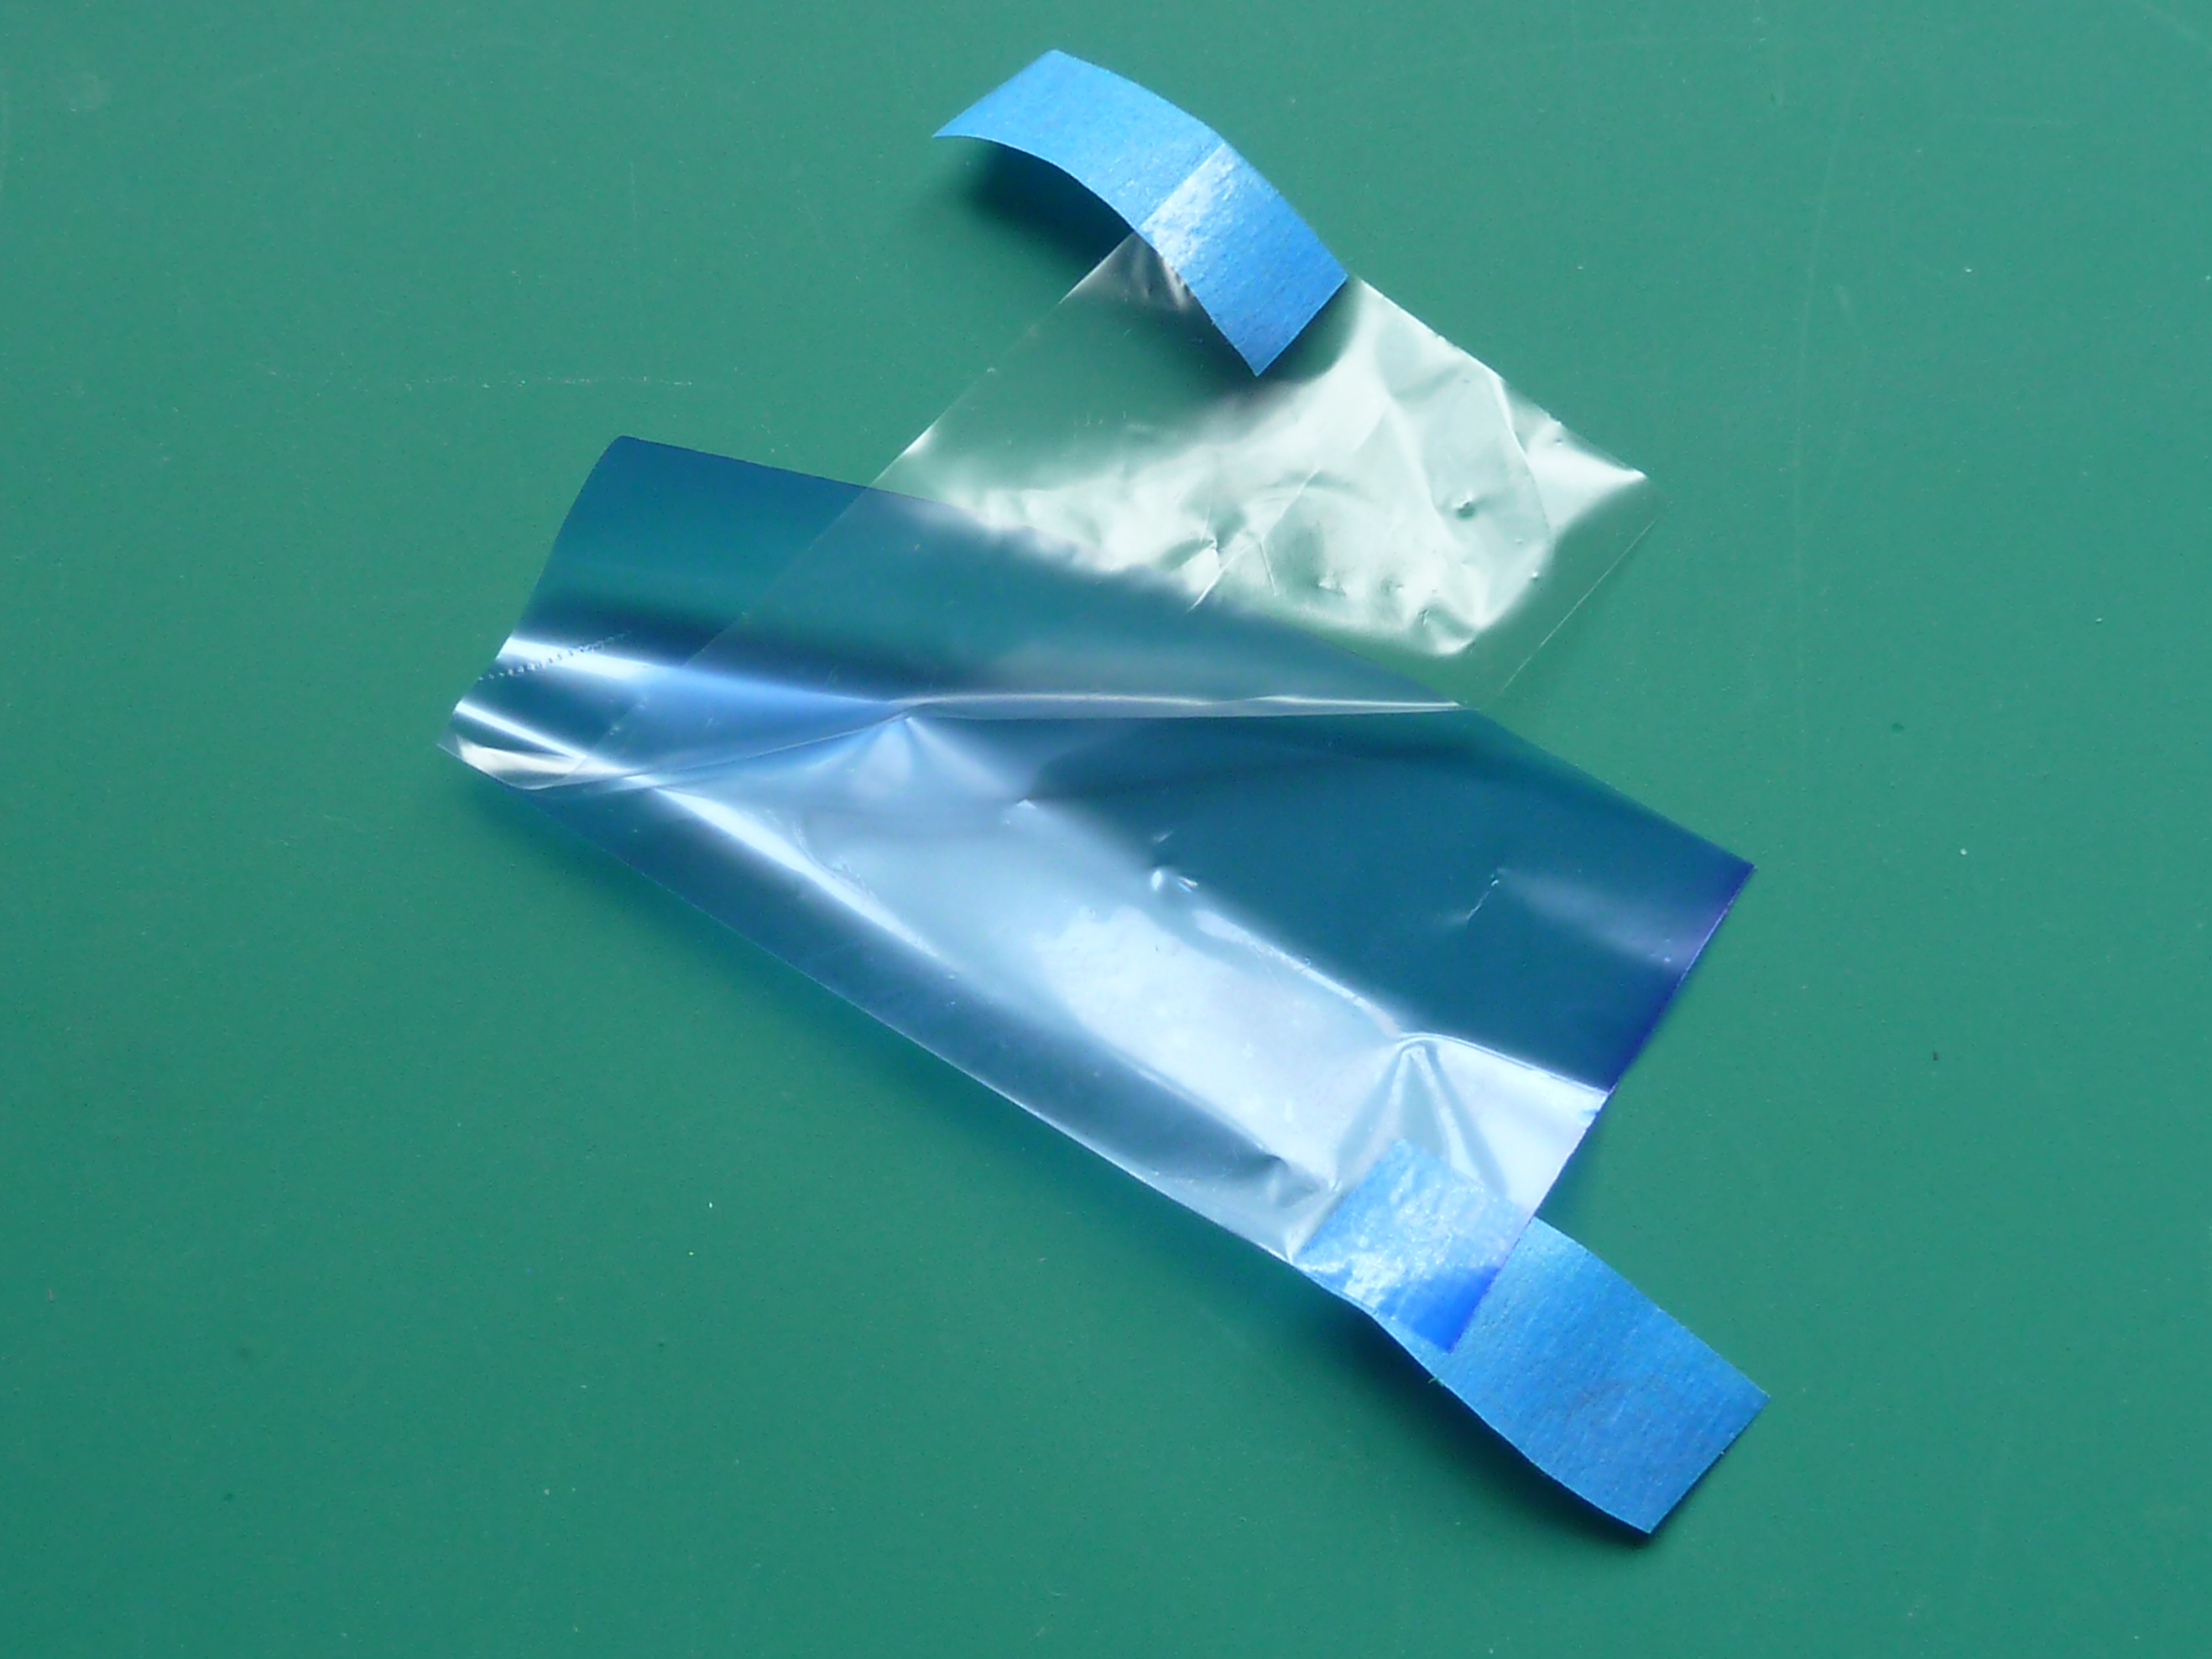
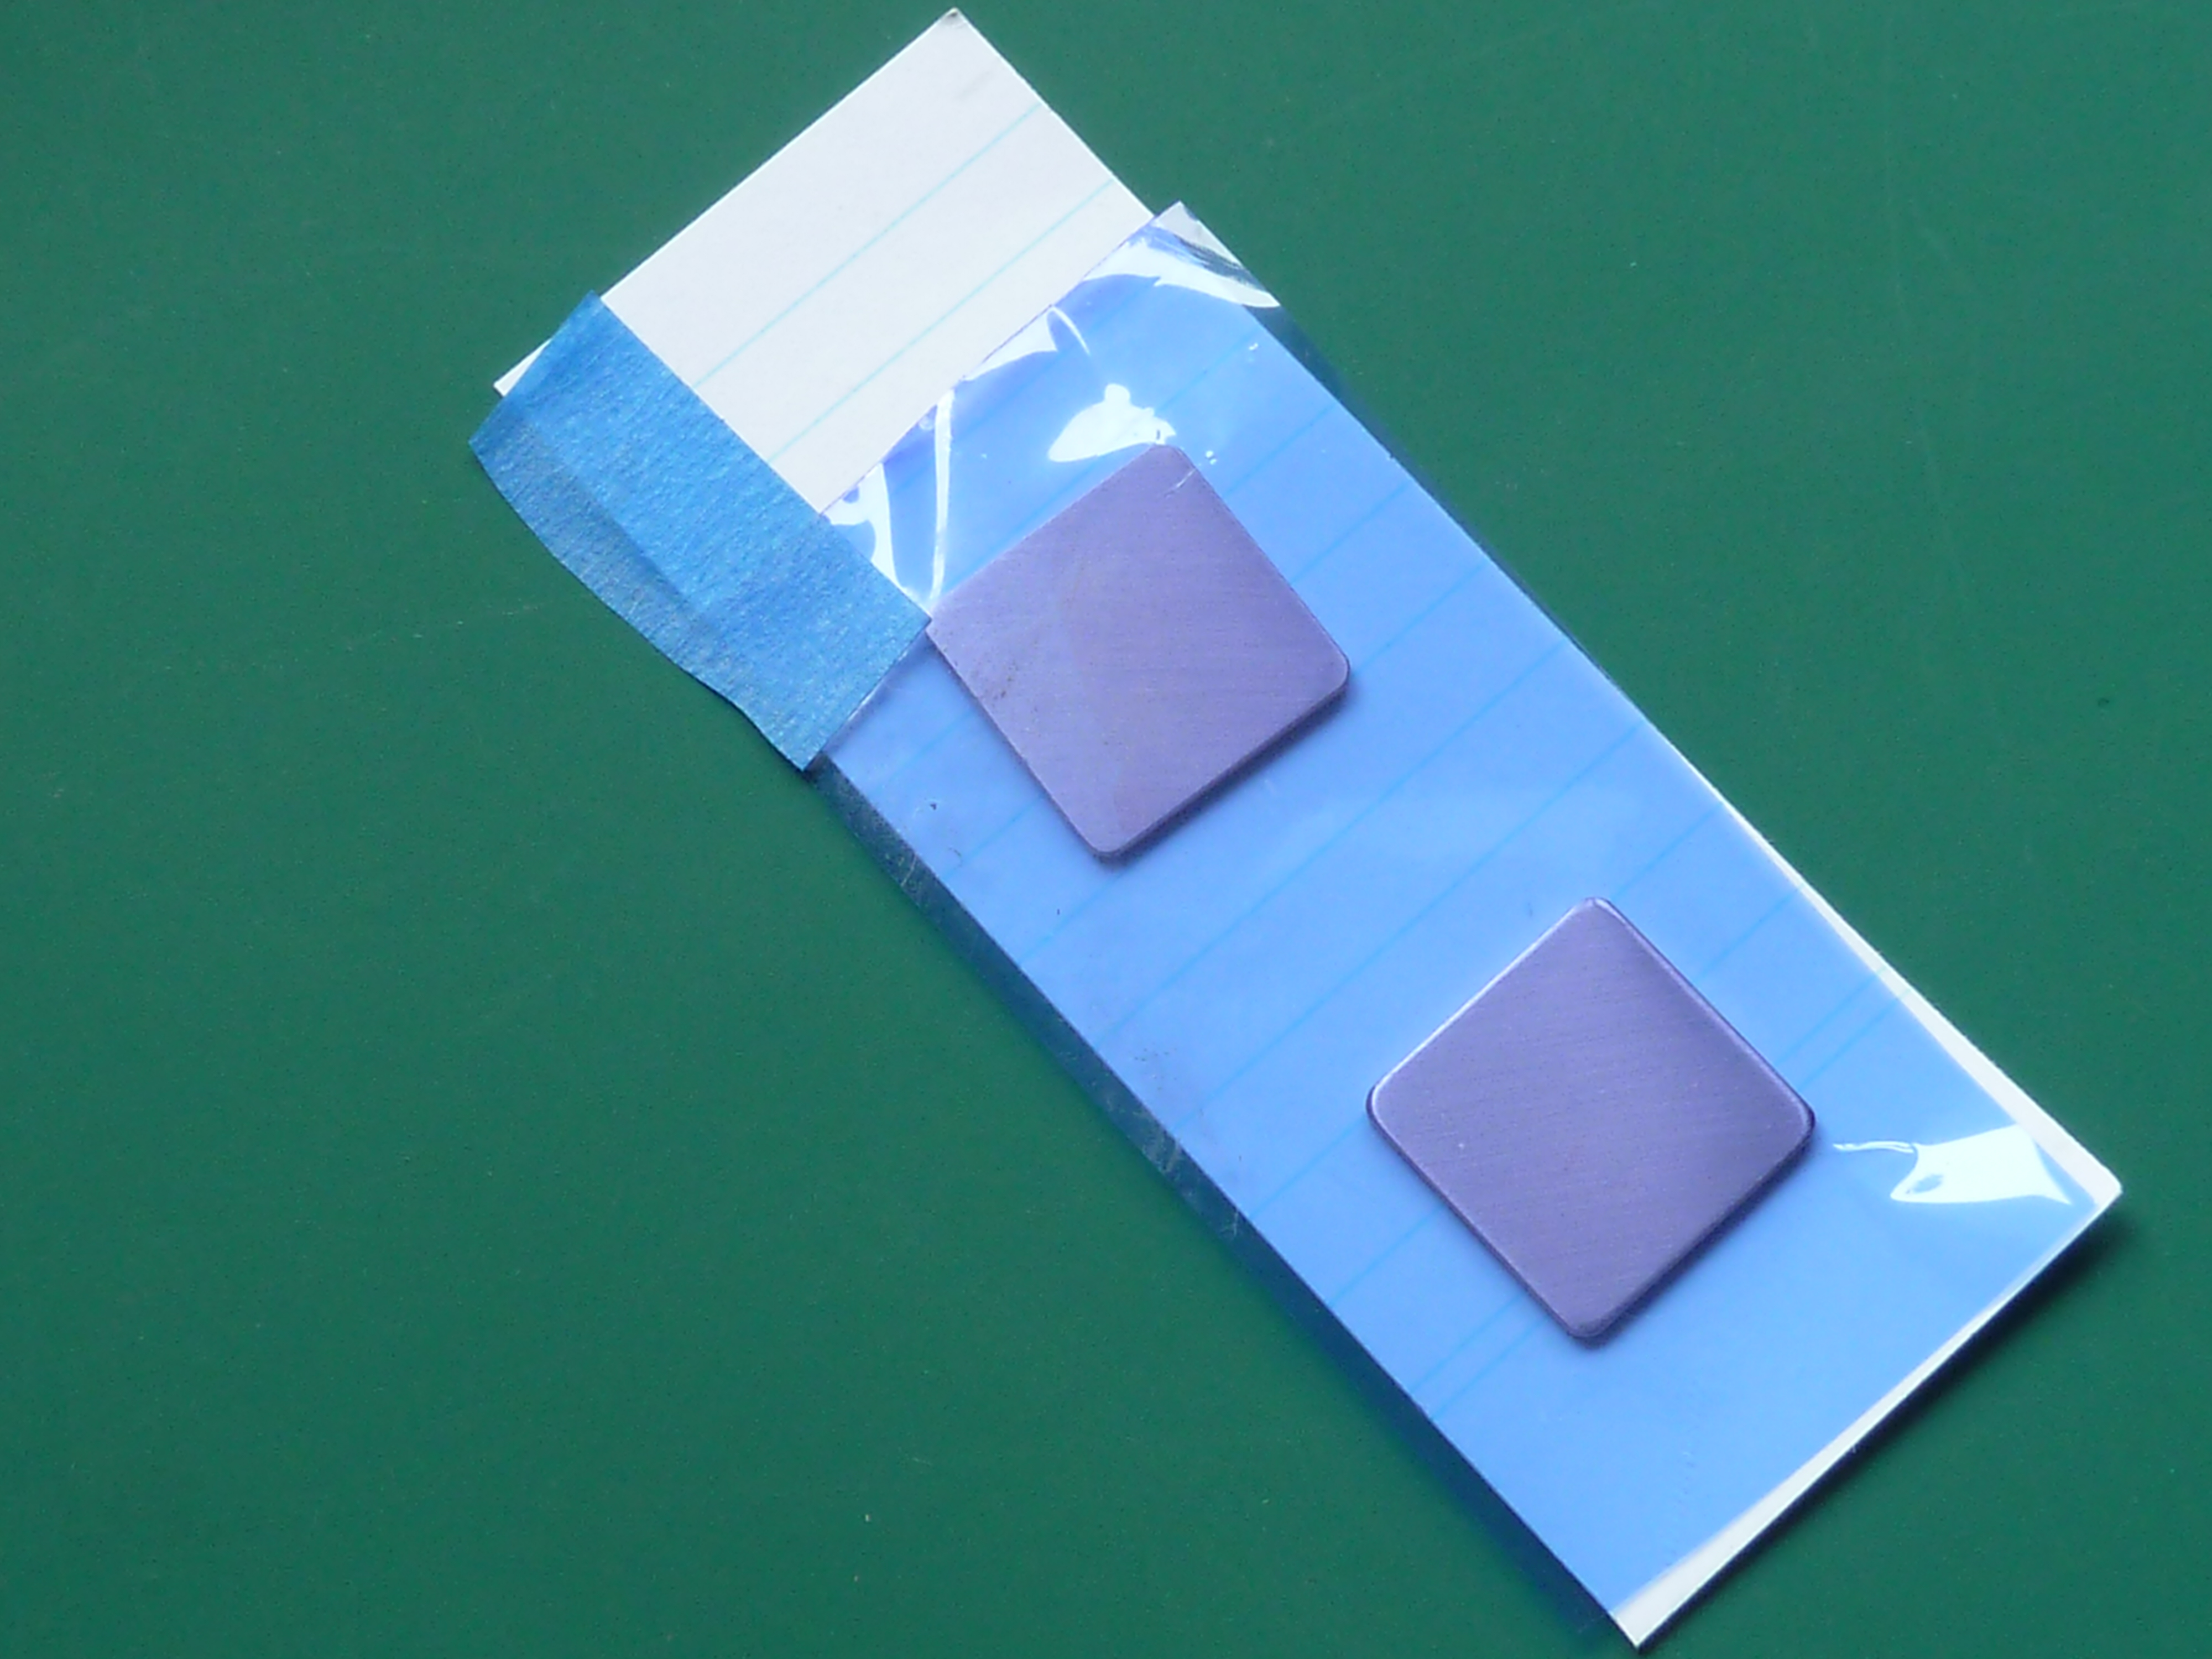
Prior to laminating the film onto the clean blanks it is necessary to remove the protective outer film from one side. To do this fix two bits of sticky tape on either side as shown in the picture below. When you pull them apart one side with take the protective film with it.

Once you have removed the outer covering from one side of the dry film photo resist apply the exposed film directly to the surface of the etch blank.
Again, make sure everything is clean and dust free.
The exposed film is slightly tacky which aids application, but take great care to ensure that it is applied smoothly and no air is trapped under it. I start from one edge of the blank and work across it smoothing with fingertips as I go. I’ve found that smoothing the film out with some decent finger pressure helps considerably in achieving a clean lamination without any trapped air bubbles.
In fact, I’ve watched YouTube vids on this where people gently smooth the film down and achieve perfect results. Well that doesn’t happen at MBIQ Mansions! That just leaves lots of air that expands as soon as it hits the laminator. I find that you need to press and smooth really quite hard to squeeze all the air out to the edges.
If the part to be etched is too small to go through the laminator on its own, use a piece of thin card as a carrier. You can actually laminate multiple blanks on the same carrier using this method.
I use a cheap Amazon Basics laminator for the actual laminating exercise.


I pass the blanks through the device twice in quick succession to ensure that the film has got hot enough to bond properly.
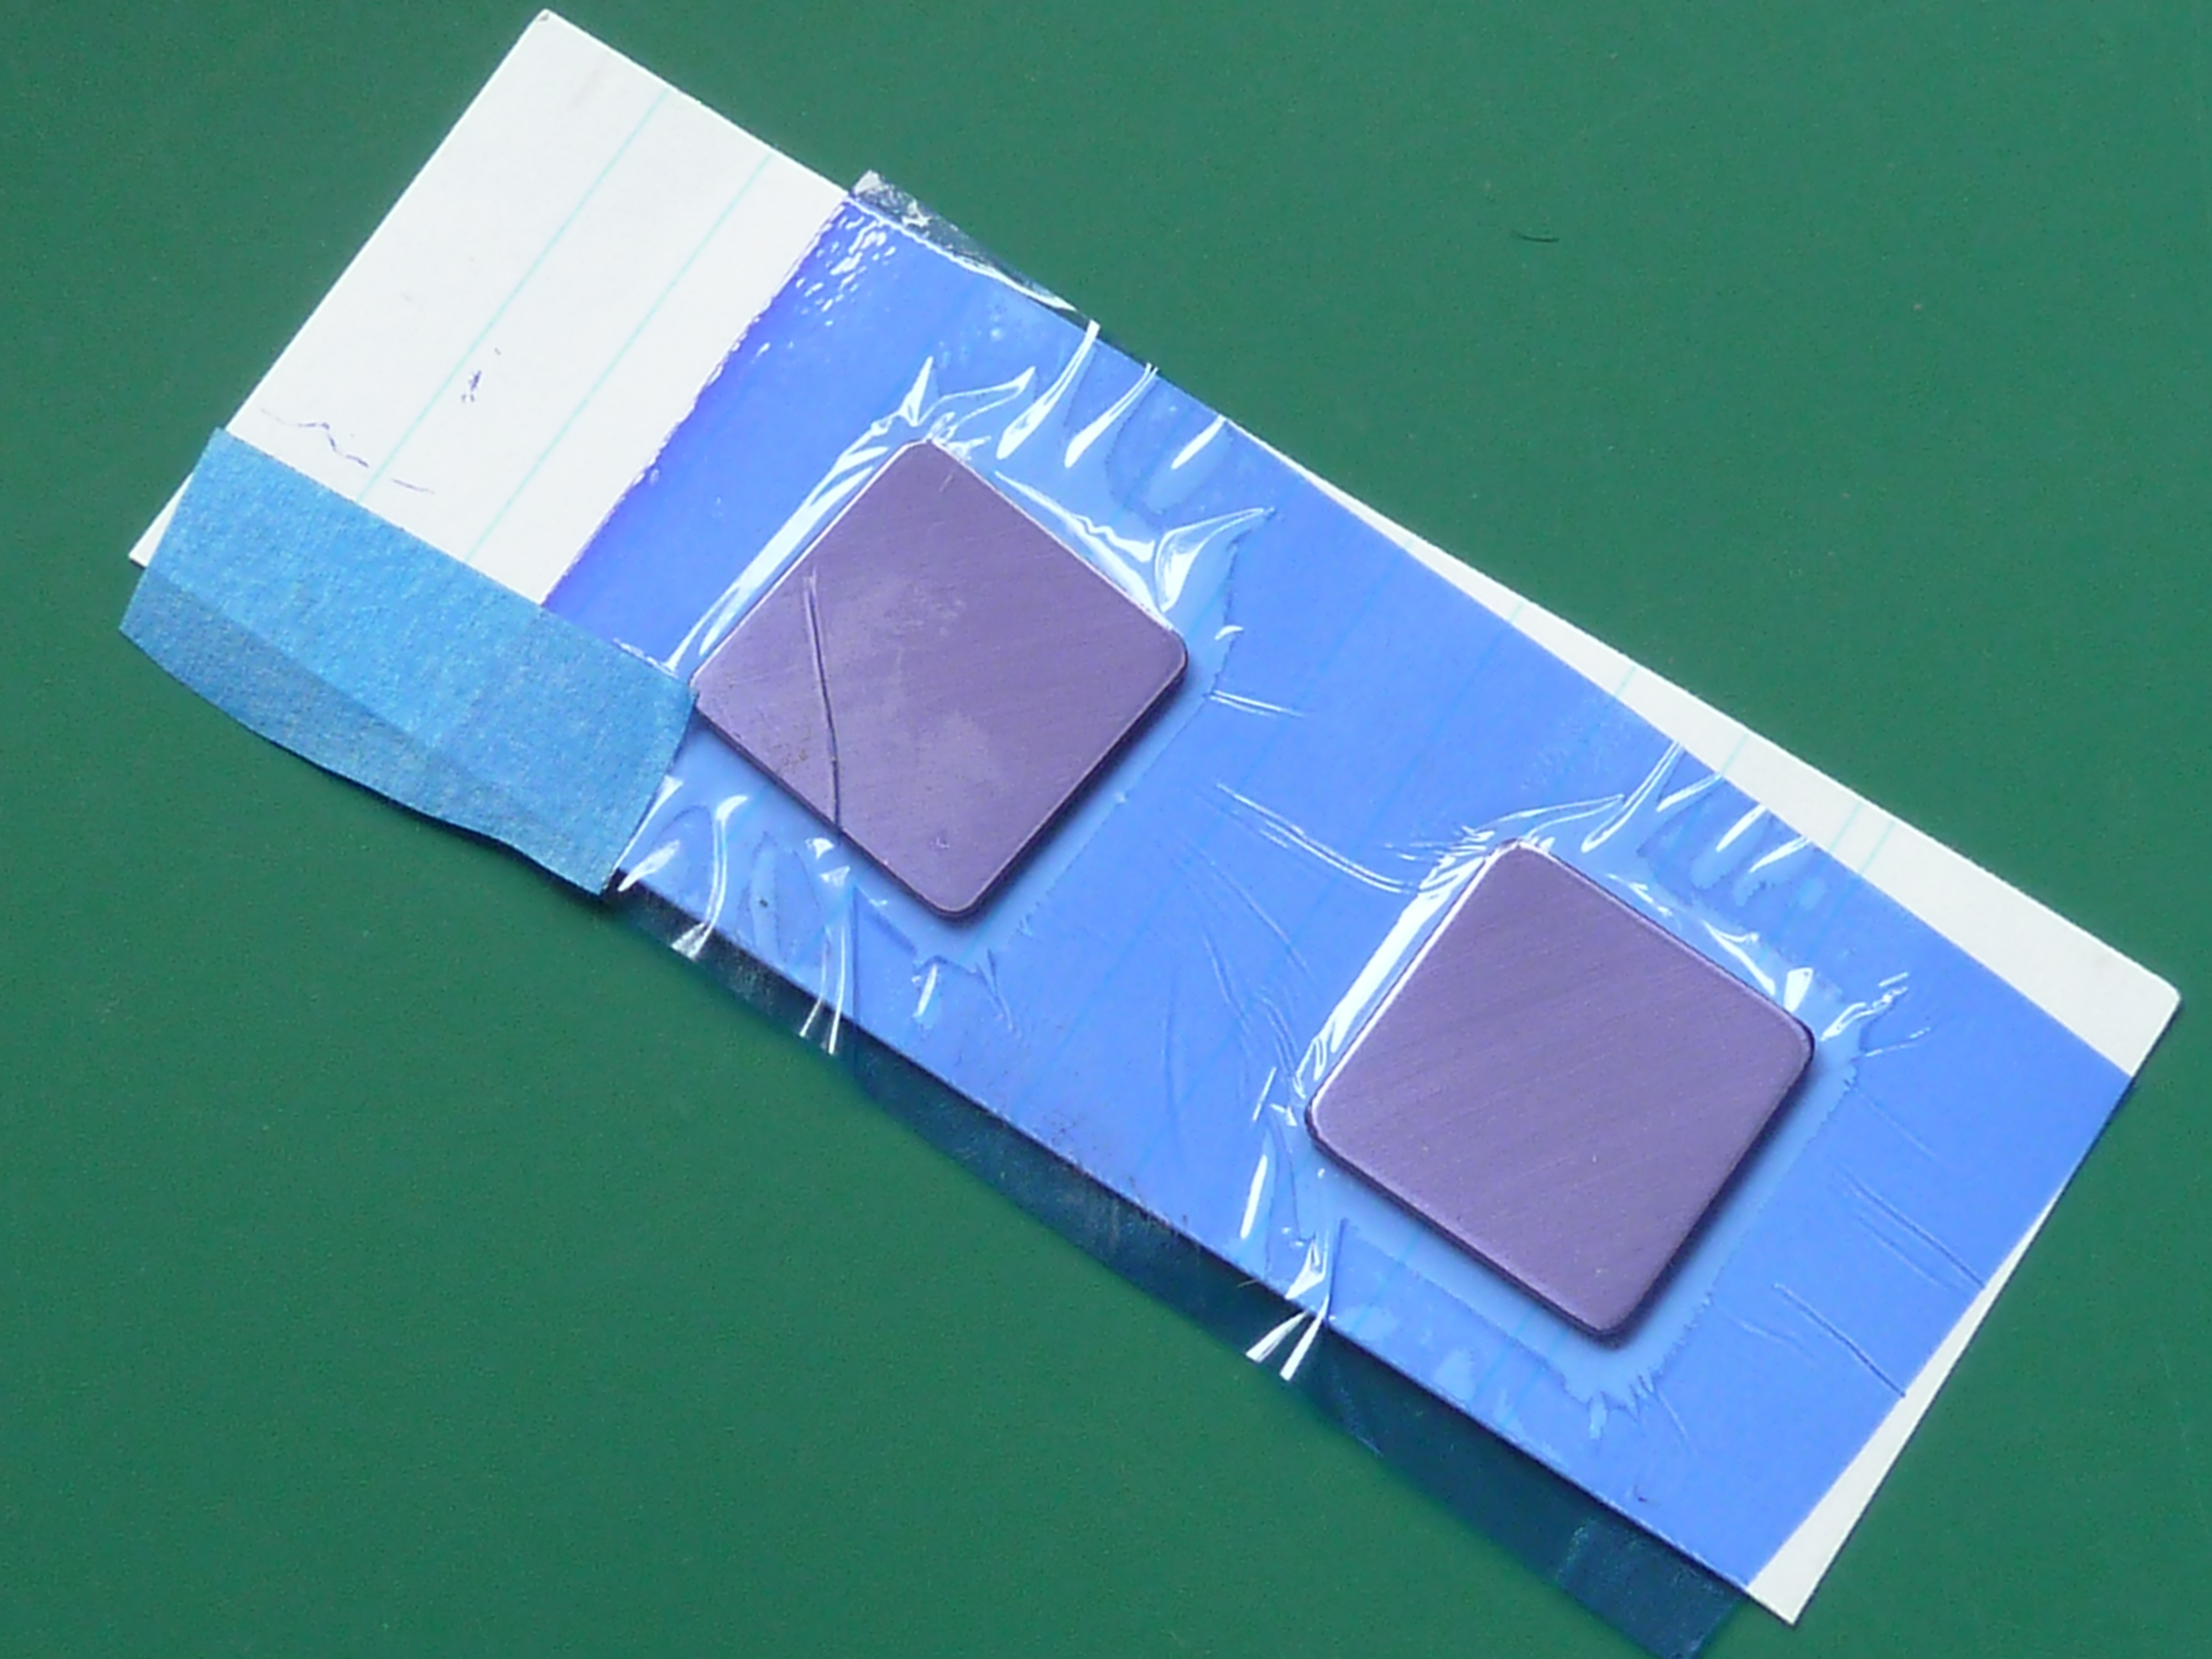
As you can see in the above picture, the right hand blank has gone well. The left has not. There is a crease in the dry film and so that part will need to be cleaned up with acetone and relaminated with fresh film.
Once the parts have been successfully laminated allow them to cool fully, then cut them free of the carrier card and store them in a light tight box until you are ready to use them.
To get the sharpest image possible it is essential that the picture is as close to the dry film resist as possible during exposure. To achieve this remove the remaining protective outer covering using sticky tape as before. Next, position the artwork image with the printed side against the resist. Otherwise some UV light can bleed in from the edges through the artwork film and blur them very slightly.
To ensure the image is held flat across the blank I sandwich them between glass plates.

The whole assembly is then placed in my homemade UV light box.
I’ve not provided any info on the construction of my light box because:
- it’s a little outside the scope of this blog.
- it was designed to suit a power supply I just happened to have to hand.
- I can’t find the circuit diagram or any of the calculations I made during its design. Parts list? Forget it.

You will find, after exposure, that occasionally some of the ink from the artwork sticks to the surface of the dry film resist. This isn’t an immediate problem as it will be removed during the developing process and won’t affect any later steps. It does however mean your artwork image is no longer as dense as before so might impact future usage.
I’ve got away with using them once more after leaving ink behind, but there must come a point where they start to let the UV light through and no longer function properly.
Once the blanks are loaded in the UV box close the lid and switch on, usually in that order, unless you want a bit of sunburn on your corneas. I don’t advise it though as it can be very painful. Look up “arc eye” or “snowblindness” for details.
Here’s a picture of me doing exactly what I’ve just told you not to.

I expose my blanks for 3:00 mins. However, I’ve arrived at this number by trial and error as I don’t know how intense the UV light is in my box. If you have a bought one check the spec and match it to Fortex’s data sheet.
It is possible to expose the film to natural UV from the sun by leaving it outside. However, exposure times will obviously be very variable depending on the weather and time of year. I can’t advise on it though as I’ve never tried it.
Once the laminated blanks have been exposed, let them rest in a dark environment for a minimum of 20 mins. I tend to leave them longer than this though. 30 mins in my light tight UV box with the LEDs off is normal.
If you don’t let them rest you will find that the developing process fetches all of the dry film resist off, not just the unexposed parts. Go on… ask me how I know.
Developing
Once the exposed blanks have been rested they can be developed. To do this I use Mega Electronics Developer Concentrate.

This needs to be diluted at 19:1 with water. I use distilled water and do it by weight. Helpfully, this developer is no longer available as Mega Electronics went bust. Fortex do a similar product though and a link to it is provided earlier on in this post.

I use two Chinese takeaway tubs as my developing and rinsing tanks.

Place the laminated blank to be etched in the developer and gently agitate the surface with a soft brush to brush away the undeveloped pattern. Don’t exceed 25-30 seconds in the developer, even if it looks like not all of the unexposed areas are film free. They will continue to clean up in the rinse tank if you carry on brushing them with a soft (separate dedicated rinse tank) brush.
If you leave the blanks in the developer too long, all of the dry film resist will come off and you have to start over again.
Once all of the unexposed dry film resist has been removed the laminated blanks can be left out in the light to dry.
Again: Do not allow the surfaces to become contaminated with dust or grease. You can’t clean them up with acetone anymore as this will dissolve the resist film.
If you find any imperfections in the resist at this stage, all is not lost. The next section details how you can touch up the laminated blank to overcome faults.
Etching
I use the Edinburgh Etch process. This is based on Ferric Chloride solution with a citric acid catalyst added.
I bought my kit from Gateros Plating (link at the start of this post), and my only observation is that I think I now have a lifetime’s supply. Given how much is needed for modelling scale photoetch, the kit is rather large for my needs.
I won’t go into detail on the specifics of the Edinburgh Etch process and mixing the solution. There are lots of web articles on it, and the kit comes with detailed instructions too. Suffice to say, that I etch for about 45mins at room temperature. How long you use depends on the depth of etch that you are trying to achieve. You’re going to have to experiment here.
Needless to say, all of the areas you don’t want etched have to be protected from the acid solution. In this case that means sealing off the backs and sides of the blank, as only the front face has the dry film resist on it.
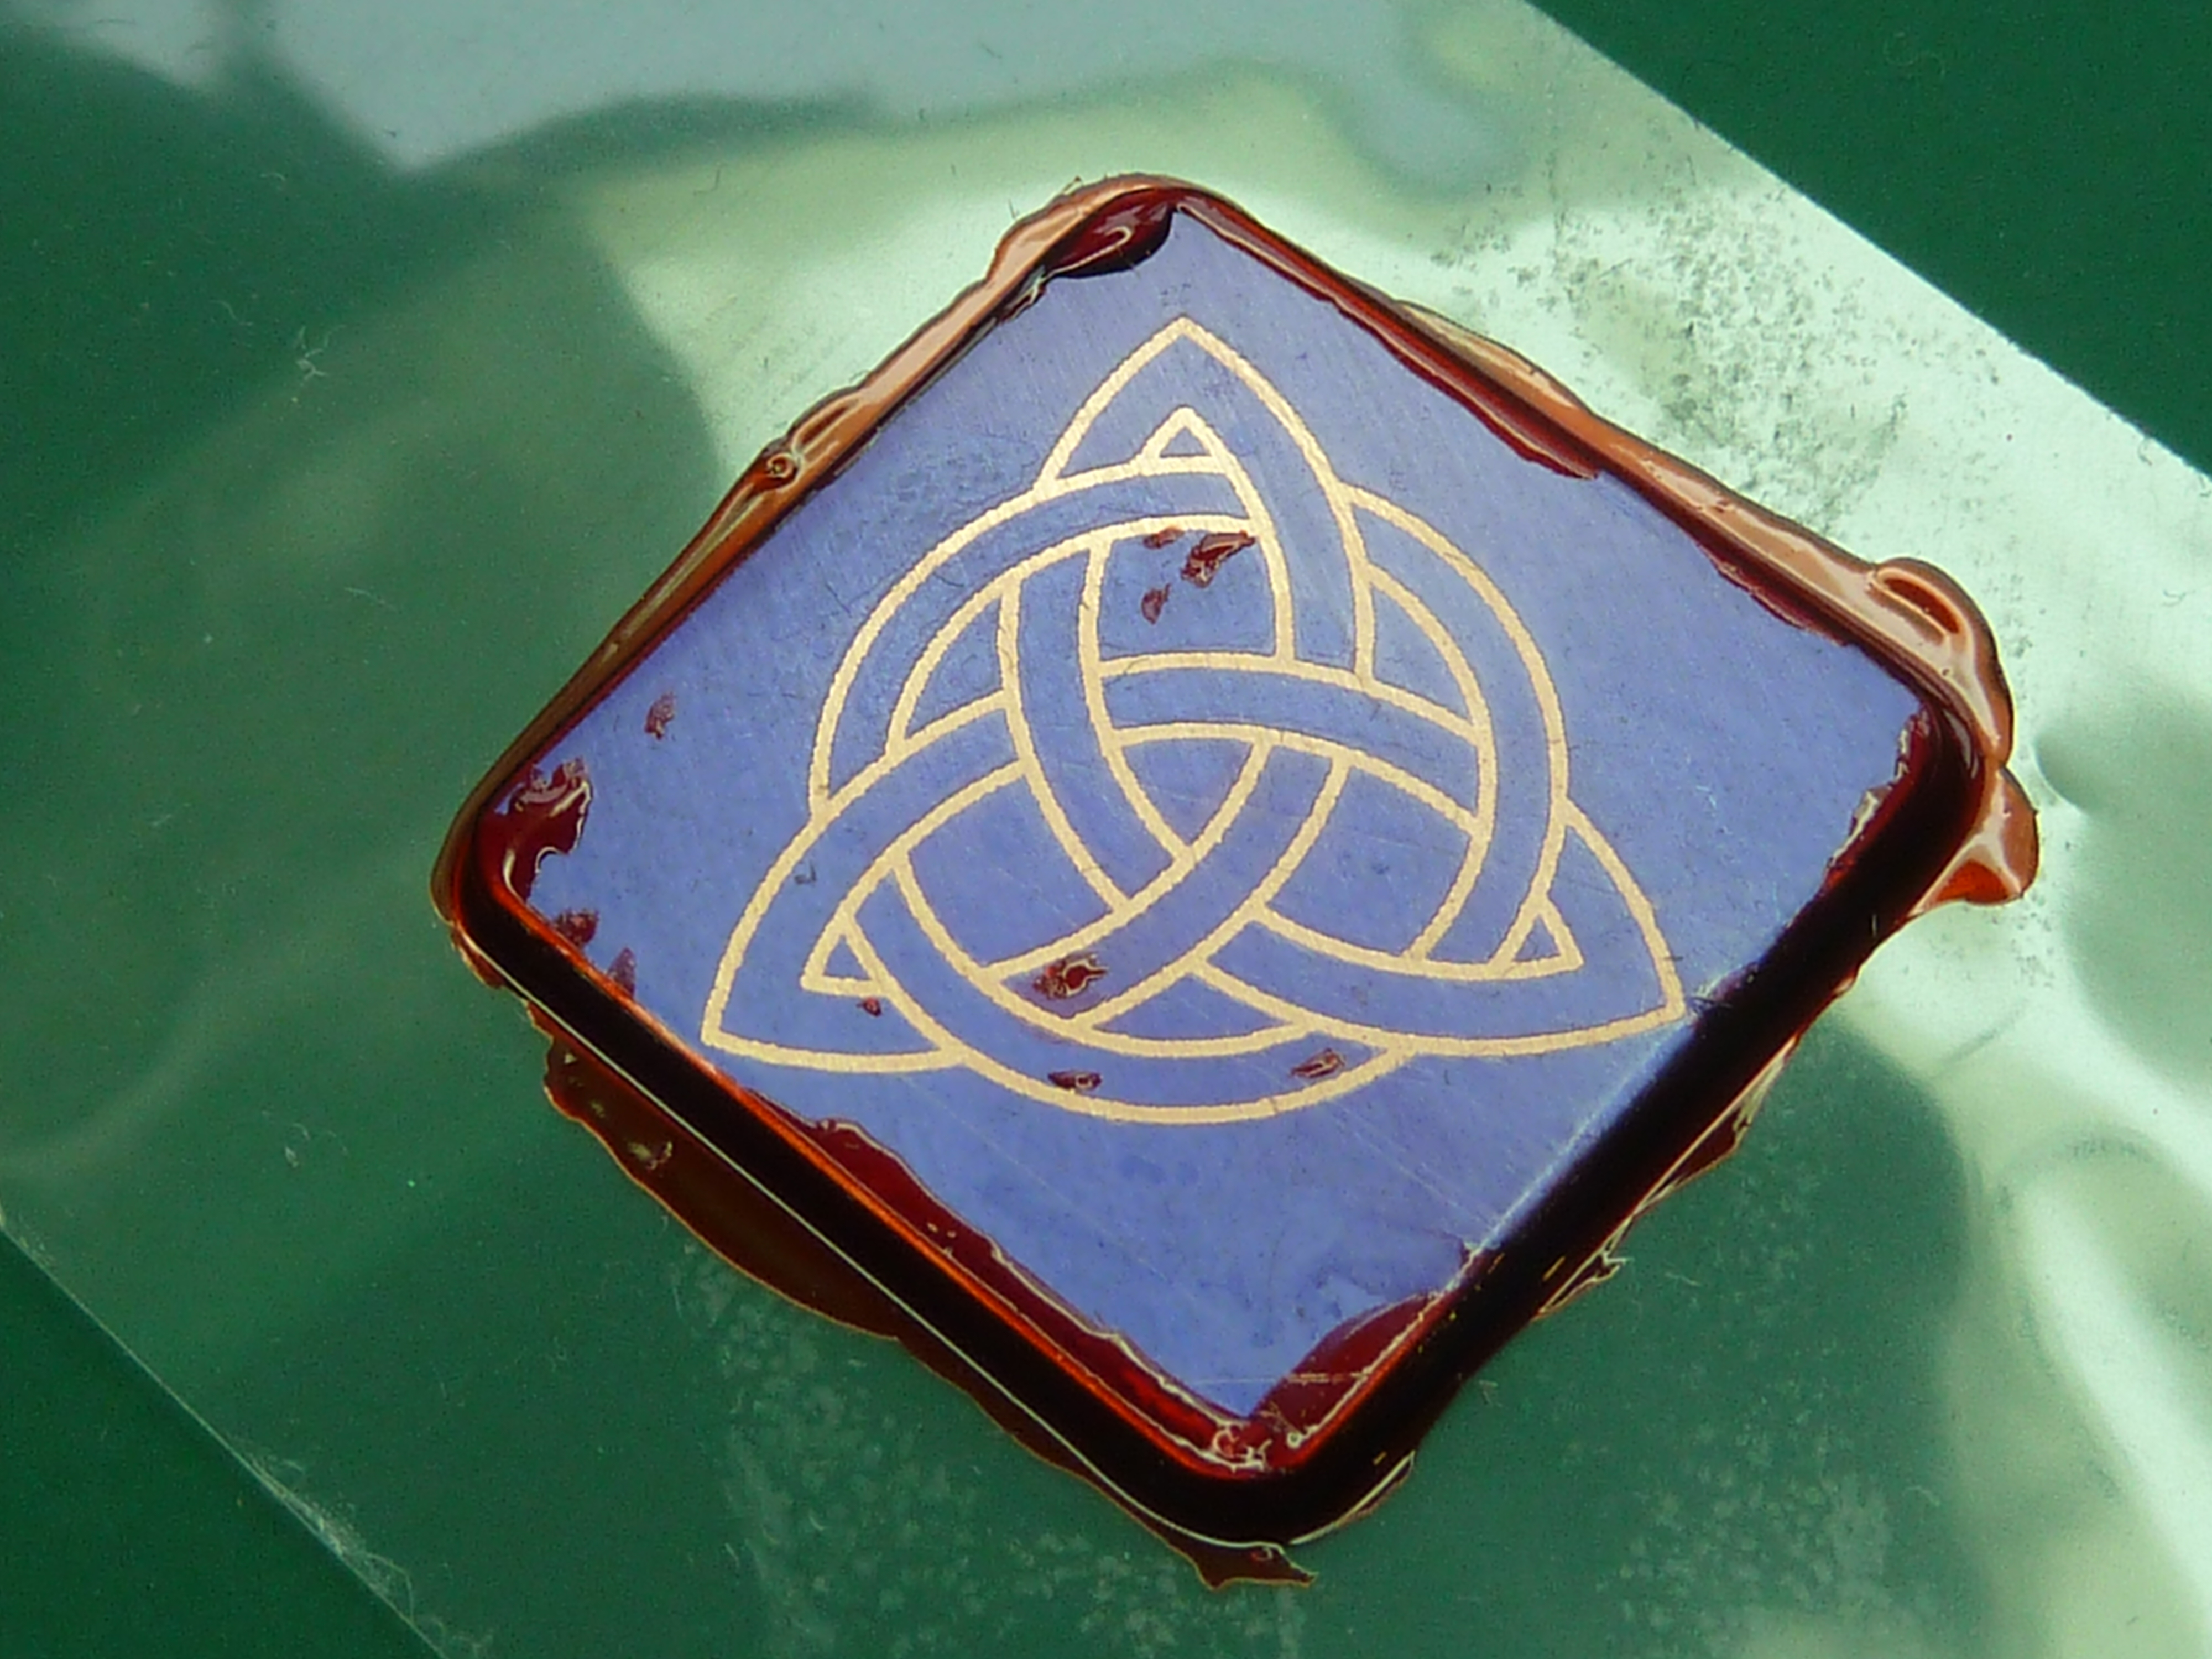
To achieve this I mount the blank on some waterproof clear tape, then seal the edges with acrylic paint. I’ve settled on Tamiya’s Clear Red acrylic for this because:
- It was to hand at the time.
- I like the way it paints.
- You can see through it to check coverage.
If you have any imperfections in the resist these can also be touched up with a dab of acrylic, as you can see in the photo below.
The blank is then suspended inverted in the etch solution. The reasoning for this, apparently, is that it allows the by-products to continuously fall free and fresh metal to be exposed. I don’t agitate the solution during etching as I’ve found this can leave flow patterns in the surface if you are etching large areas (have a really close look at the brass nameplates at the start of this post).
Edited to add:
Since the above comments, I’ve added an aerator to my etch tank based on an aquarium air pump. The gentle agitation has improved the quality of my etchings considerably and overcome the flow marks completely. I also find I no longer need to etch with the piece horizontal. All of my etchings are done with piece vertical now. That considerably eases the handling and set up.
The sealed blanks are then stuck to duct tape which is then draped across the etching bath. I don’t stick the blanks directly to the duct tape as it has a slightly textured surface and I’ve had instances of that allowing the acid in behind and ruining the blank. I don’t use clear tape for the whole operation simply because the stuff I use isn’t that cheap.


The etching solution I’m using in the above picture is quite old and close to the end of its life. Fresh solution is a golden brown and as it is used gradually becomes dark green/black. As it does so the etching rate also slows.
Once the blank has been in the solution for 45 mins the bath is drained, the blank removed, and rinsed in cold water.

If all you want is an etched pattern then the process is complete at this stage. The blanks can be removed from the backing tape and cleaned up with acetone which will disolve both the acrylic paint and the dry film.
However, in this instance I wanted to blacken the etched pattern. As I’m using copper I used Liver Of Sulphur (or Sulfur if you really have to). LoS doesn’t work on brass though, unless you treat it to bring the copper to the surface first.
I applied the LoS warm and prior to removing the dry film resist. I’ve found that you need to work the LoS into the surface with a soft brush for it to properly ‘adhere’. Otherwise the surface goes black, but the treated copper flakes off easily.
I actually worked the surface a bit too hard on my example and lifted the etch resist. Minor intemperate verbage resulted.
Here’s the cleaned up blank with splodge.
I gave the blank a gentle rub on the Scotchbrite to clean it up a little. Nonetheless it has removed some of the staining from the etched areas.

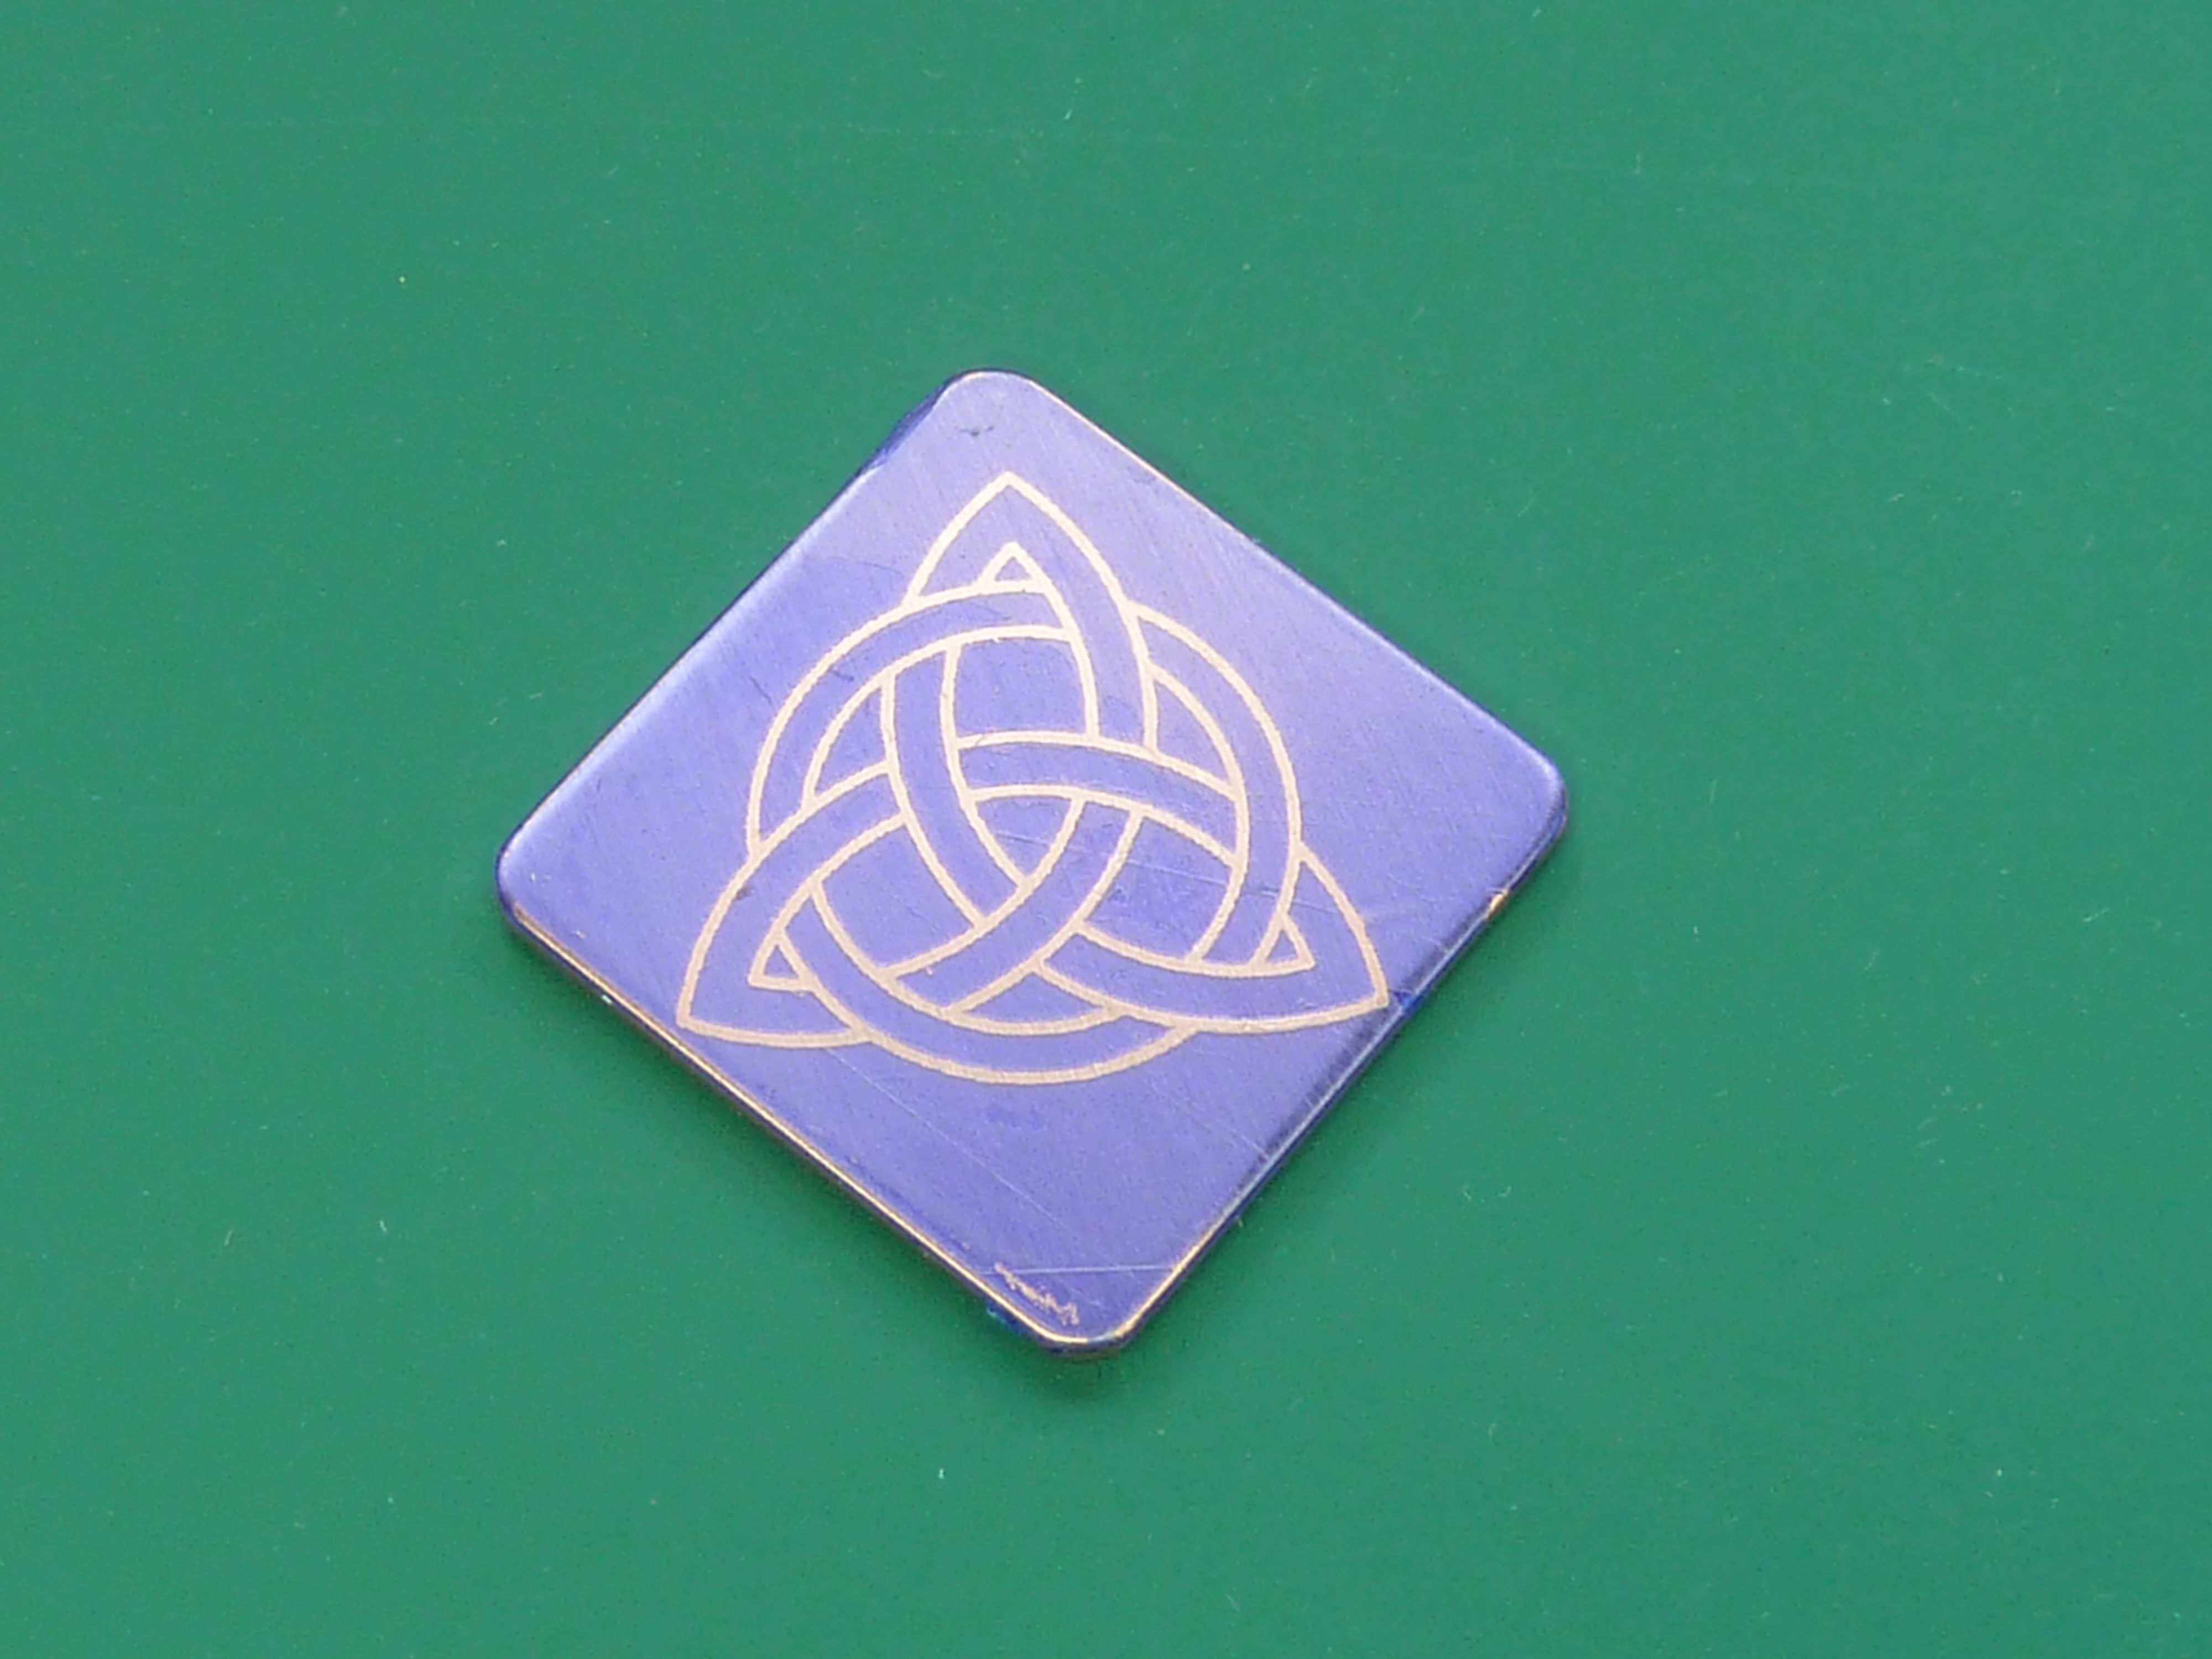
Here’s a slightly better one I made previously.

All that remains is to seal the surface of the metal to stop it oxidizing, if required.
There are any number of lacquers on the market to do the job, but I’ve settled on Everbrite as it does the job, and is easy to apply.
Update to include double sided photoetching:
As I mentioned early on in this post I now use these techniques mainly for producing photoetch components for my models. The basic process is much the same with one main difference. I etch both sides of the piece when creating photoetch parts.
This obviously requires two photo etch masks which are in perfect register. I achieve this by simply creating a mirror image of the top mask and taping the two masks together (printed face inwards). I’ve found that adding text to the mask is the best way of aligning them. You can add specific alignment crosses for the purpose, but text is better for me. It is immediately obvious if the two images are even the slightest bit out of alignment and the text can also be used to self document what that actual etch mask was for long after you’ve forgotten.

I add stringers to one side of the etch mask to keep the parts together after the etching is complete. Being exposed only on one side, they etch at half the speed of the rest of the image and stop all the parts falling off into the bottom of the etch tank. You can also use single side etching to add details to the parts being etched.
Well that’s it for this post (until the next update) . Hopefully I’ll soon be well enough to get back to model making and posting on here. I do, probably, have enough pictures and progress to justify another update on the Miss Severn build anyway. So watch this space, but don’t hold your breath.

Delighted you are still with us!
>
LikeLiked by 2 people
Very interesting and informative !
Good to hear from you again, and get well !
LikeLiked by 1 person
Godspeed and get well soon! Best regards.
LikeLiked by 1 person
Love your site, I also will be building a Sopwith 1/8 if you would ever consider making up any extra photo etch for the Sopwith and wish to sell them please let me know. Thanks for all the great information on the Fokker builds and Sopwith builds.
LikeLiked by 1 person
I would also go for an extra set of etch for my Sopwith if its possible.
LikeLike
Which would you both like. The fuel tank filler ferrules are relatively simple to make. If you’d also like a Sopwith nameplate, they are much harder and require a decent lump of brass (60 x 40 x 2mm).
LikeLike
Both, And anything else in the future I love your attention to detail(can never have enough) if it is not to much trouble to make up any extra sets let me know what you would charge , if you have a PayPal account we could do that. Thanks for your consideration Robin R.
LikeLike
What’s your email?
LikeLike
Here comes
LikeLike
?
LikeLike
Oh..
I thought you asked for my e-mail, and it would be found when posting.
Or did you ask for Robins ?
LikeLike
Both. I have Robin’s. I deleted his post so he doesn’t get a rain of spam. Can you send me yours.
We can organise stuff properly.
LikeLike
Inspired by your Camel build and the etching, I did further research and had a go myself. Was able to make the fuel labels, JUST about, but struggled with getting perfection and any labels of note, much as you describe. As per private e.Mail. I have been using the iron on method and getting a good image transfer using laminated sheets or glossy magazine pages is hard work as well as needing a laser printer, which is expensive. SO I am throwing in the towel on that method, and as per your blog and eMail recommendation I am going UV.
I am splashing out on the UV sensitive sheet you are advocating, the Dry Film Photoresist Developer Concentrate and Premium Jetstar Inkjet Artwork Film… Expensive at £65 inc postage, but if it works will be well worth it. I may even try the developer on the POSITIV 20 I bought before. Fingers crossed.
As for UV Lamp, I also got into a bit of 3D printing. Resins are best for detail, though expensive and very, very messy. So for that, I also needed a UV Lamp and found that the nail curing ones work very well and have all the hard work done for you at about £20. e.g. 365+405nm 72W LED UV Nail Dryer Lamp.
I have to add, etching is an extremely satisfying past time. Something special about the finished artwork, polished and painted.
LikeLiked by 1 person