
It’s been almost 2 months since the last update, and in all honesty, despite a lot of effort over that period, there isn’t that much tangible to show for it.
I attempted to produce the main components of the engine in pewter, but after a lot of iterations and variations I wasn’t able to produce something that was good enough for me. I think that it is just beyond the basic set-up that I have. No matter what I did, I couldn’t get the metal to flow into all of the detail of the moulds, so have reluctantly given the idea up as a bad job.
Instead I have been learning the ‘cold casting’ technique. This is really just resin casting with the mixture loaded with metal powder (aluminium in this case). Up to 80% metal by weight is possible apparently, but after a number of trials I’ve found that the maxiumum I could achieve, and preserve all the detail in the castings was 67%. That also makes the maths easier when working out amounts.
I think the results of cold casting are pretty good, and provided you thoroughly dust the mould with the metal powder before pouring, you can achieve a very realistic finish. It will even polish up to a degree. A mirror finish isn’t on though.
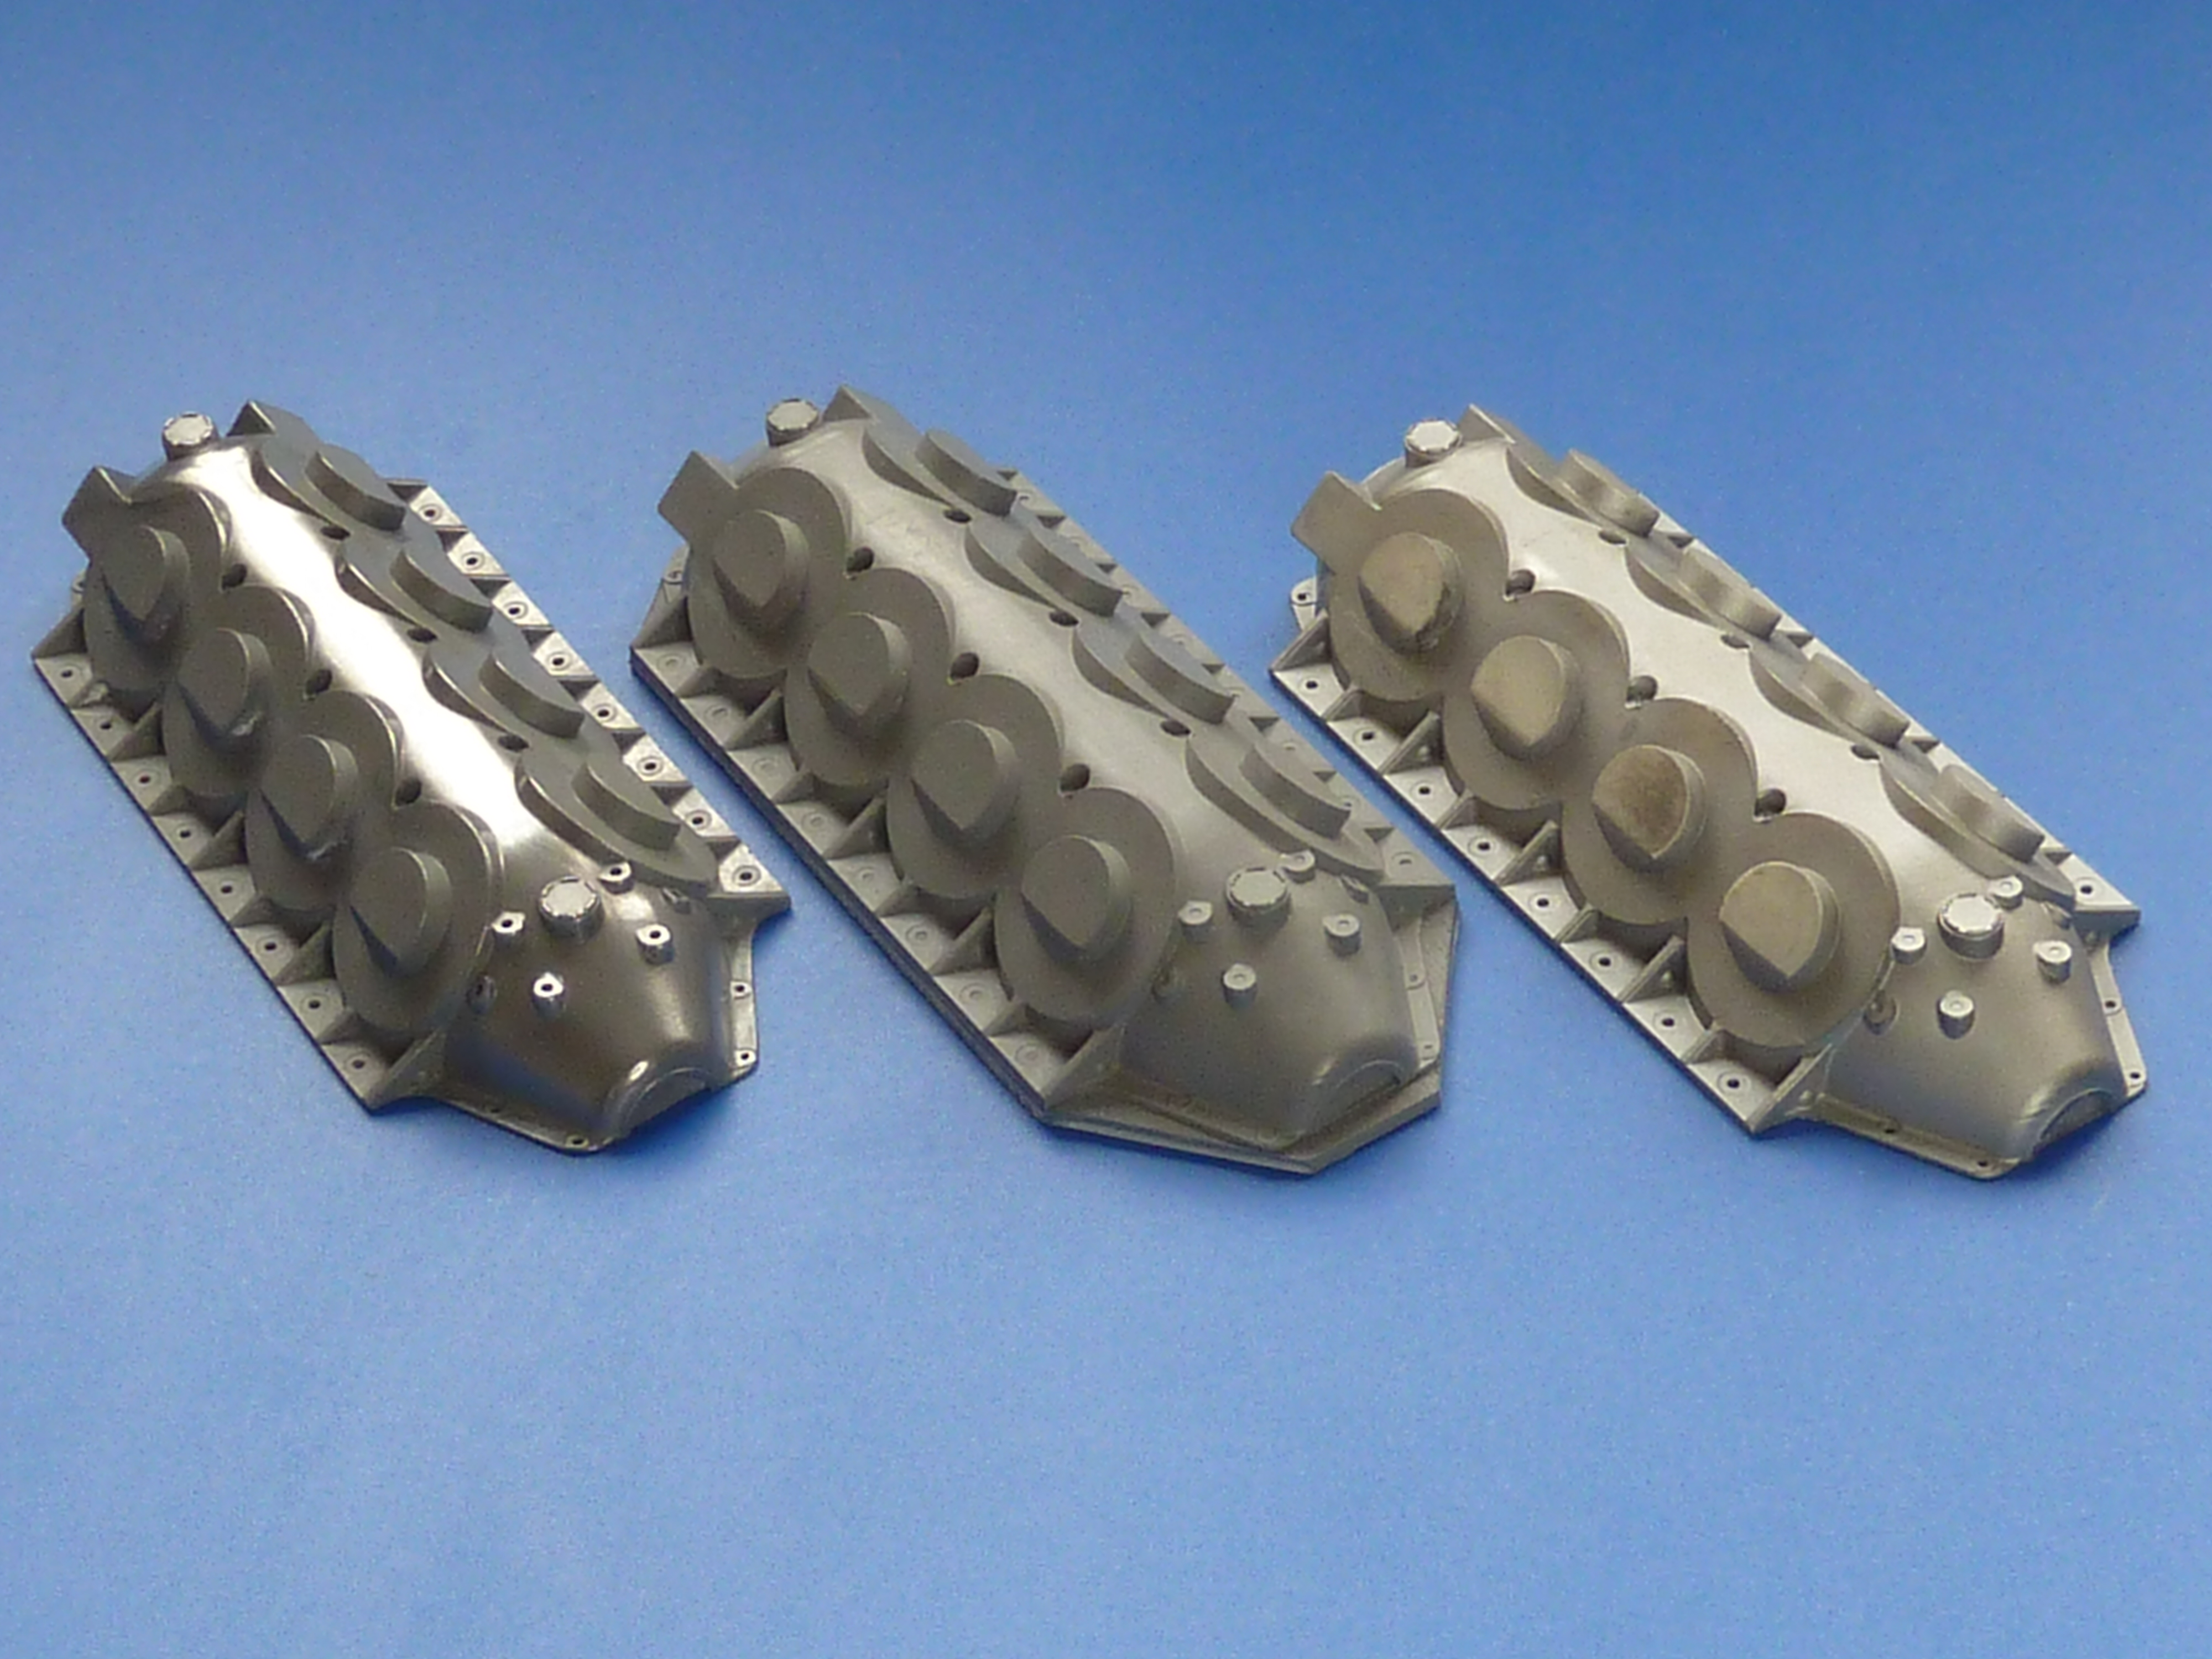
One big problem that I did come across, due mainly to inexperience with casting, was mould shrinkage. Using ordinary silicone, the moulds were fine the day after pouring them, but after a week or so they had shrunk slightly. About 1 or 2% by my estimation, but enough to ensure that there were unacceptable mismatches between the larger mating parts. The high temperature moulds I use for pewter casting use a slightly different silicone cure process and so don’t suffer so badly.

The outcome of the shrinkage problem was:
a) The generation of a lot of scrap parts.
b) The need to remake all of the moulds where dimensions were critical in ‘Additional’ or ‘platinum’ cure silicone. This has an advertised shrinkage of less than 0.1% which was good enough for my uses.

The other aspect that I had to learn about was hardness. The various rubbers come with a quoted hardness (usually using the Shore A scale), but unless you’ve actually handled the stuff the bare figures don’t mean much.
Shore 65 is pretty stiff, which means the mould will support itself, but isn’t really flexible enough to release items with significant undercuts. 15 is very soft and spongy so undercuts aren’t a problem, however, stopping the mould from flexing all over the place is. 65 is also pretty gloopy and slow to pour, whereas 15 is thin to the point of oozing out through the gaps between the bricks in my ‘Lego’ bunds. Thick is hard to degas and pour, thin isn’t.
In the end I went for 25, which gives a fairly soft and flexible mould, but one that will retain its shape provided it is supported properly. for the latter I used the original ‘Lego’ bund into which the mould was made.
I have also invested in a vacuum chamber for degassing silicone mould material before casting, and a pressure pot for resin casting.
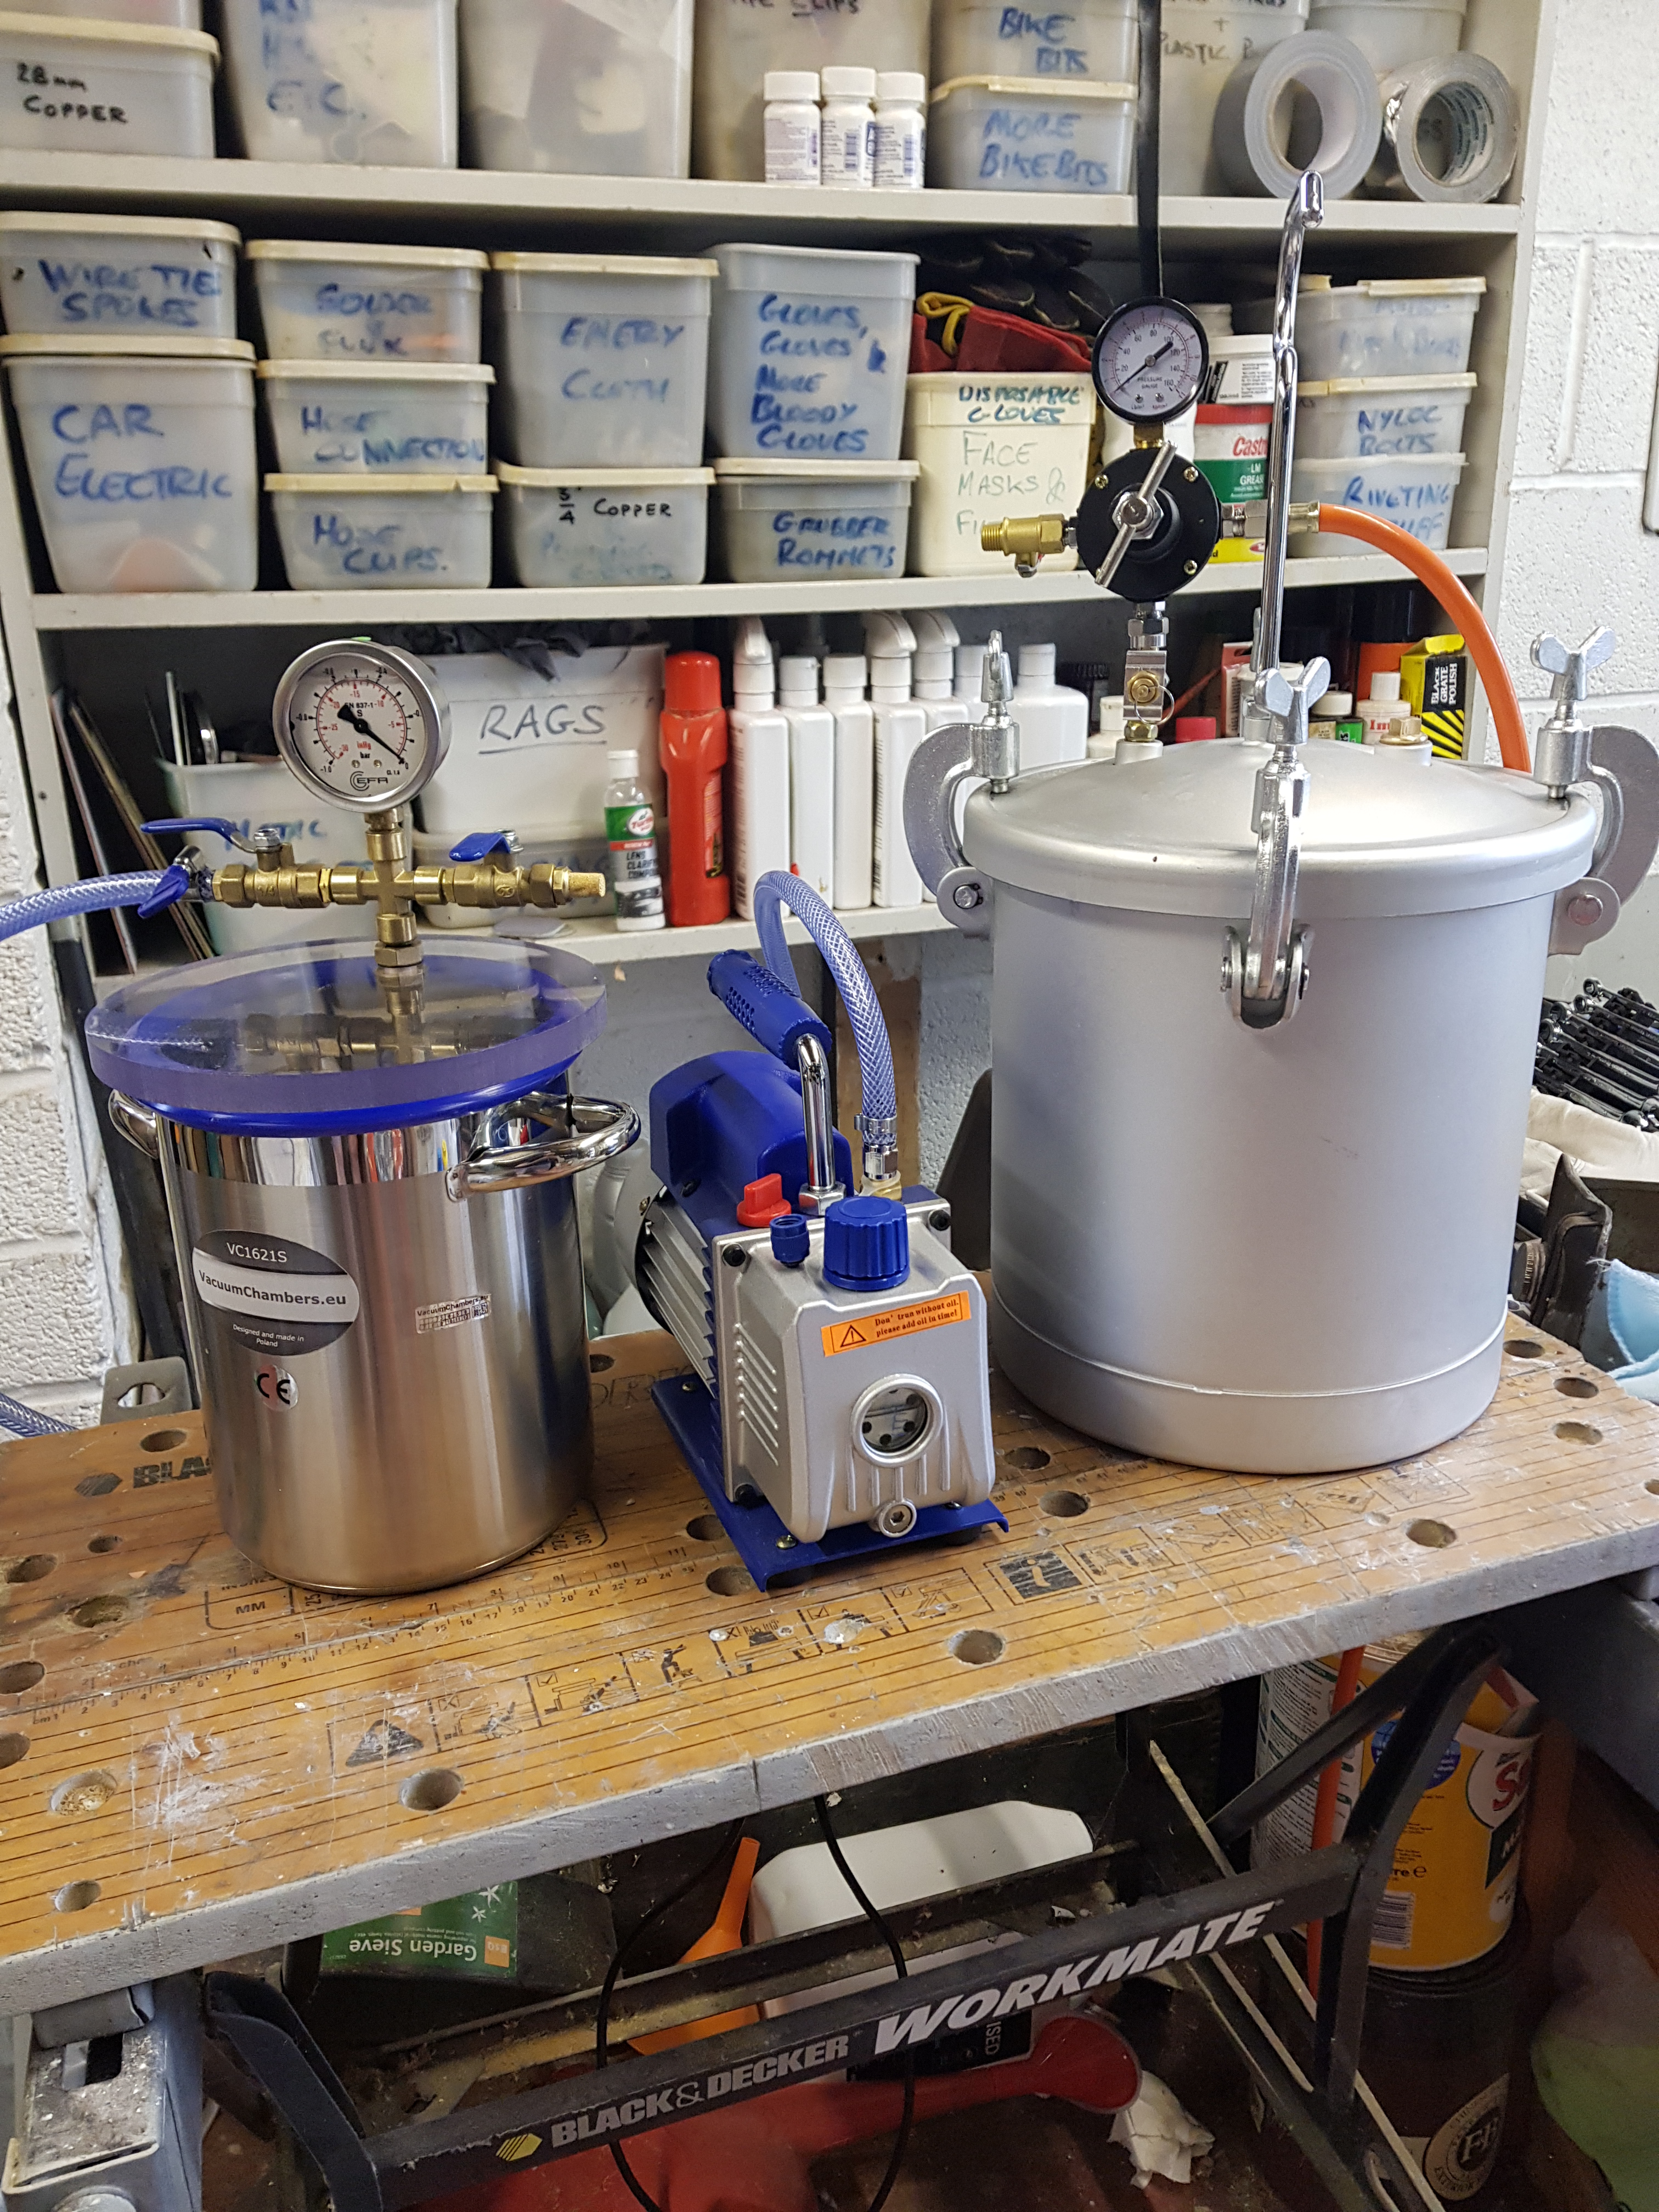

I find both of them essential to obtaining good bubble free castings. The vacuum chamber removes any entrapped bubbles in the mould material which, especially with the platinum cure, is quite thick and impossible to mix without getting some air in there. This results in bubbles actually attaching to your mould master during curing, and so being faithfully replicated in every cast item thereafter.
The pressure pot (actually a converted pressure paint pot for spray guns as it was significantly cheaper than dedicated items) ensures that any bubbles trapped in the casting resin when it is being poured are crushed to invisibility.
The compressor is an old one I had retired due to a seized motor which was uneconomical to repair, but which I actually managed to free up in the end. While it doesn’t really have the throughput required, it can take its time and pressurise its own isolated 8L tank to 120psi before hand. So once I have pre-charged that I can vent it into my 10L pressure pot after the resin has been poured and it gives me about 53psi overall, which is ideal. It also means my pressure pot reaches the necessary pressure in a couple of seconds, which is important when the resins you are using start to cure after about 2 or 3 minutes.
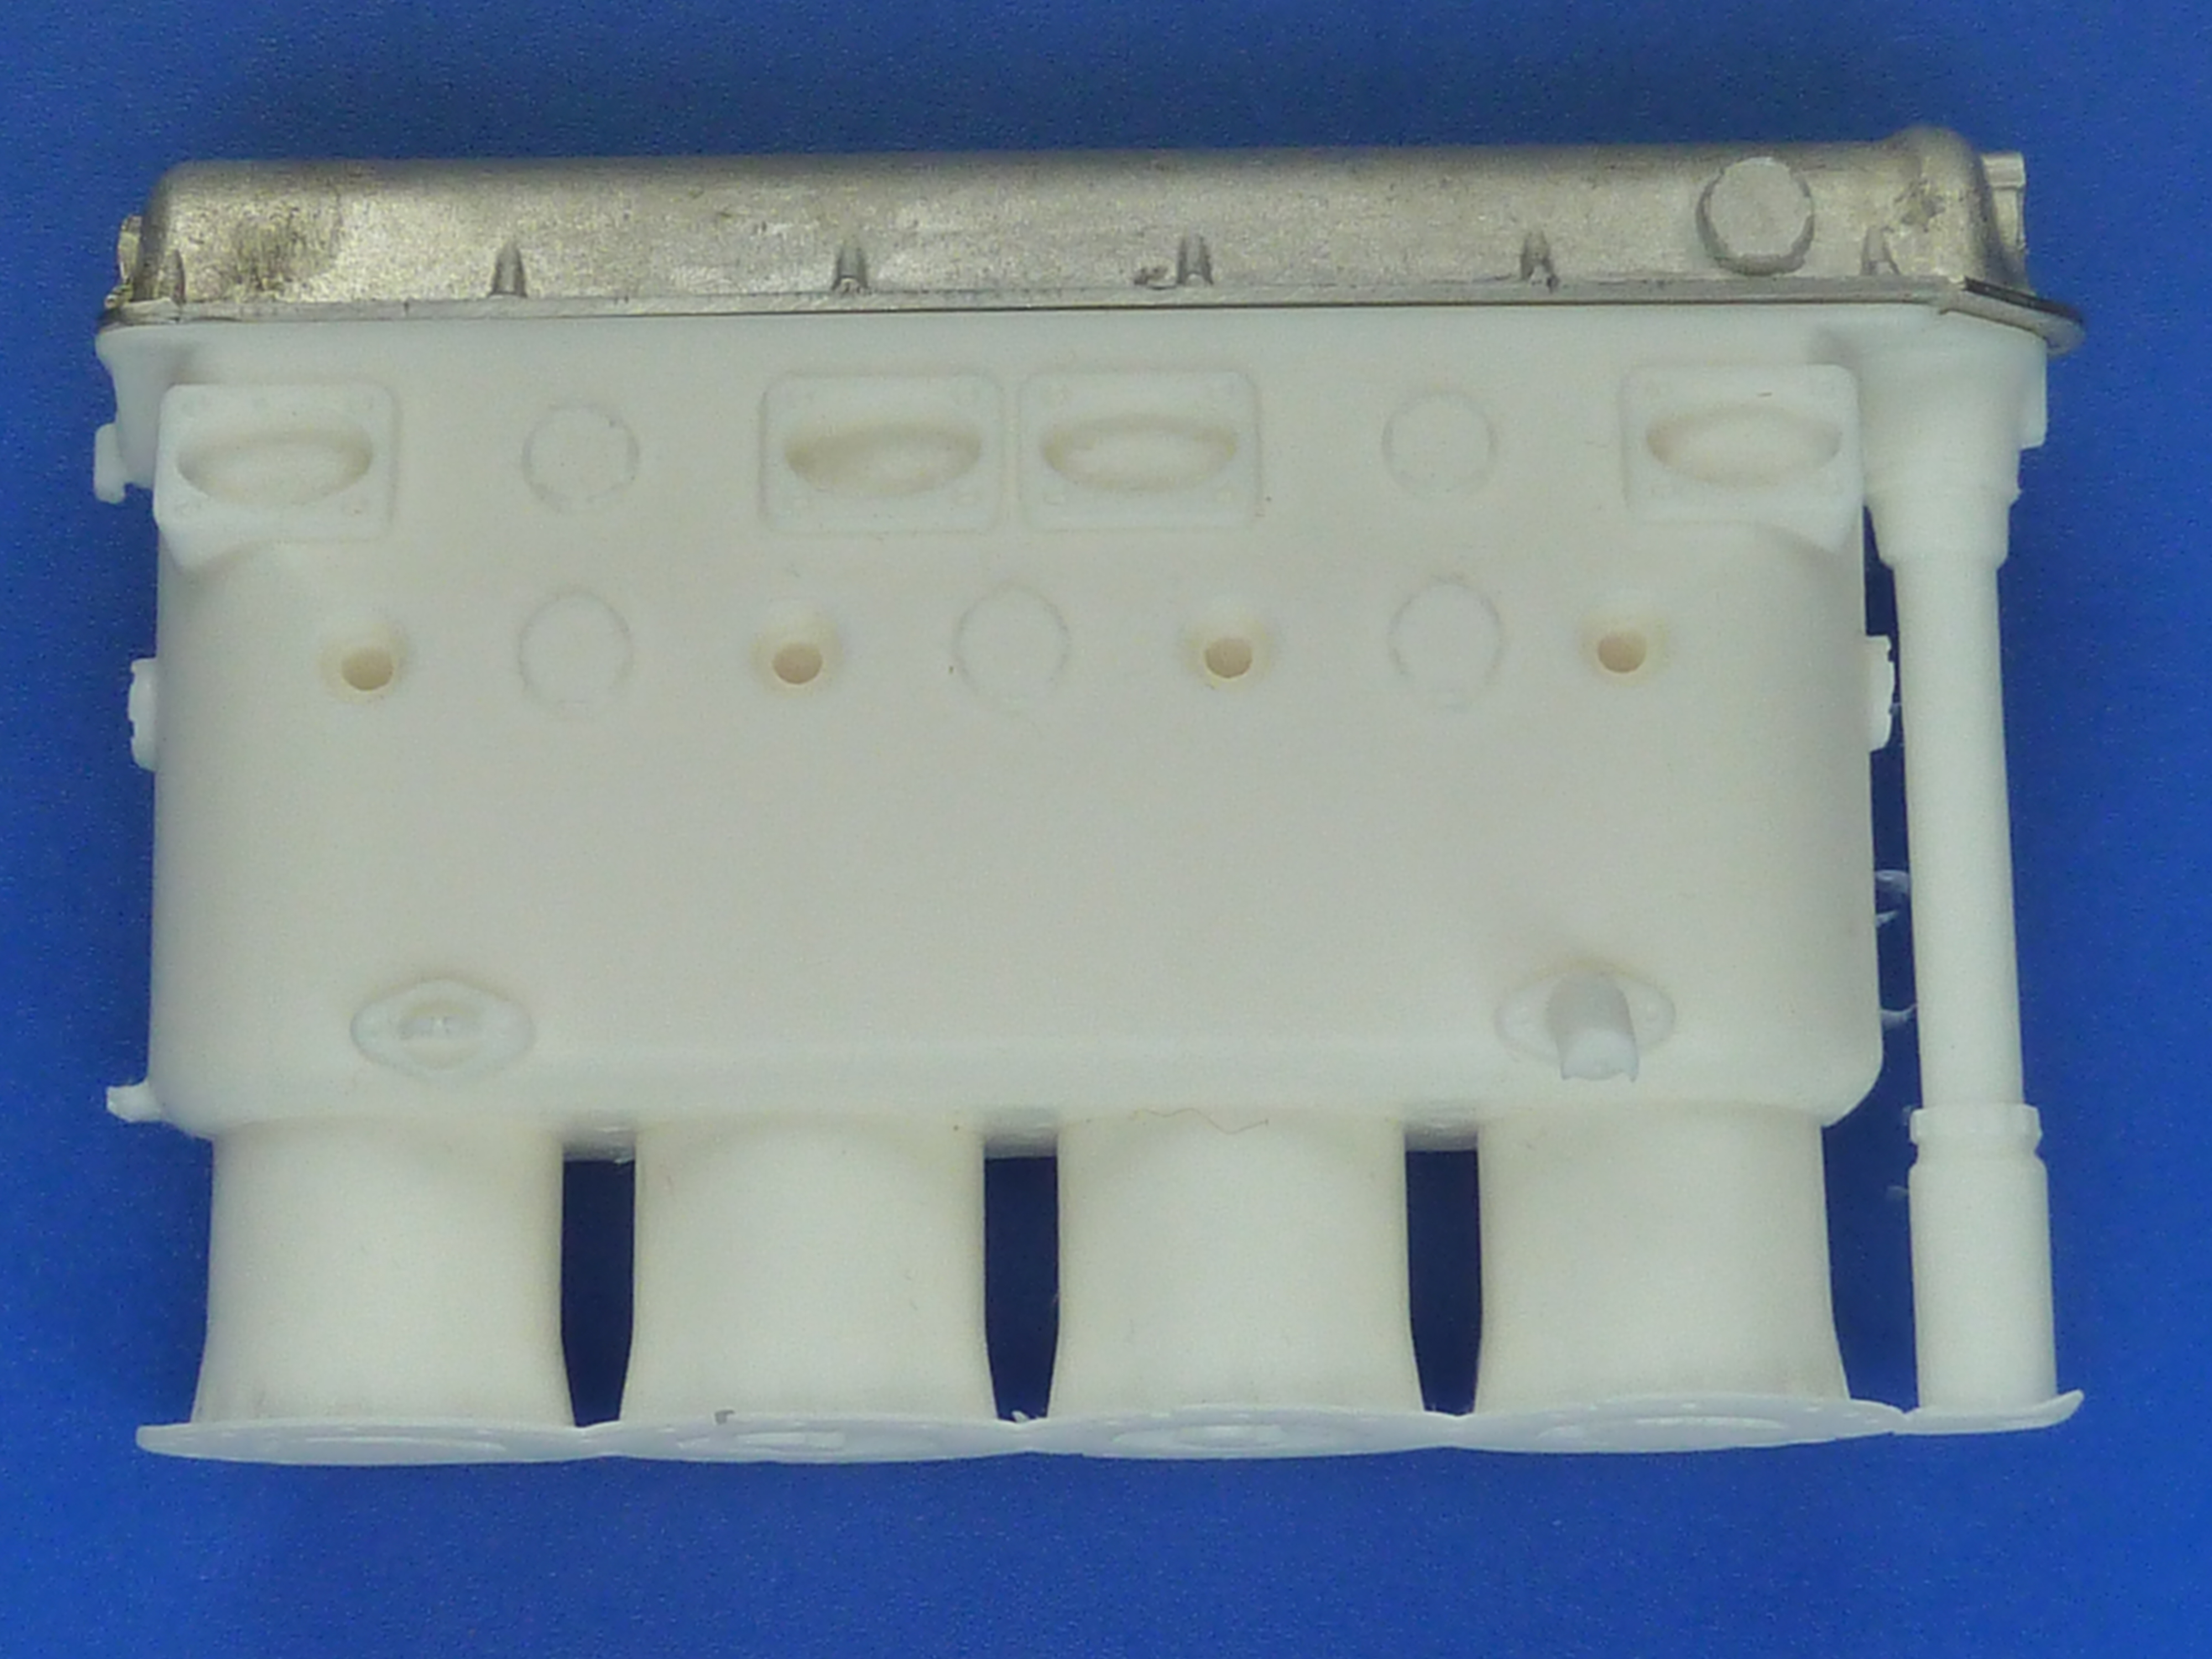
The experience gained from the now scrapped castings also lead me to get the cylinders reprinted in their component parts rather than as a preassembled item as I had before. Separating the cylinders means that I have some room to juggle things if parts still don’t quite line up. Well that’s the plan…
Having overcome all of the casting problems and climbed a very steep learning curve in the process I have been busy making castings for 3 engines (2 models plus a spare set).


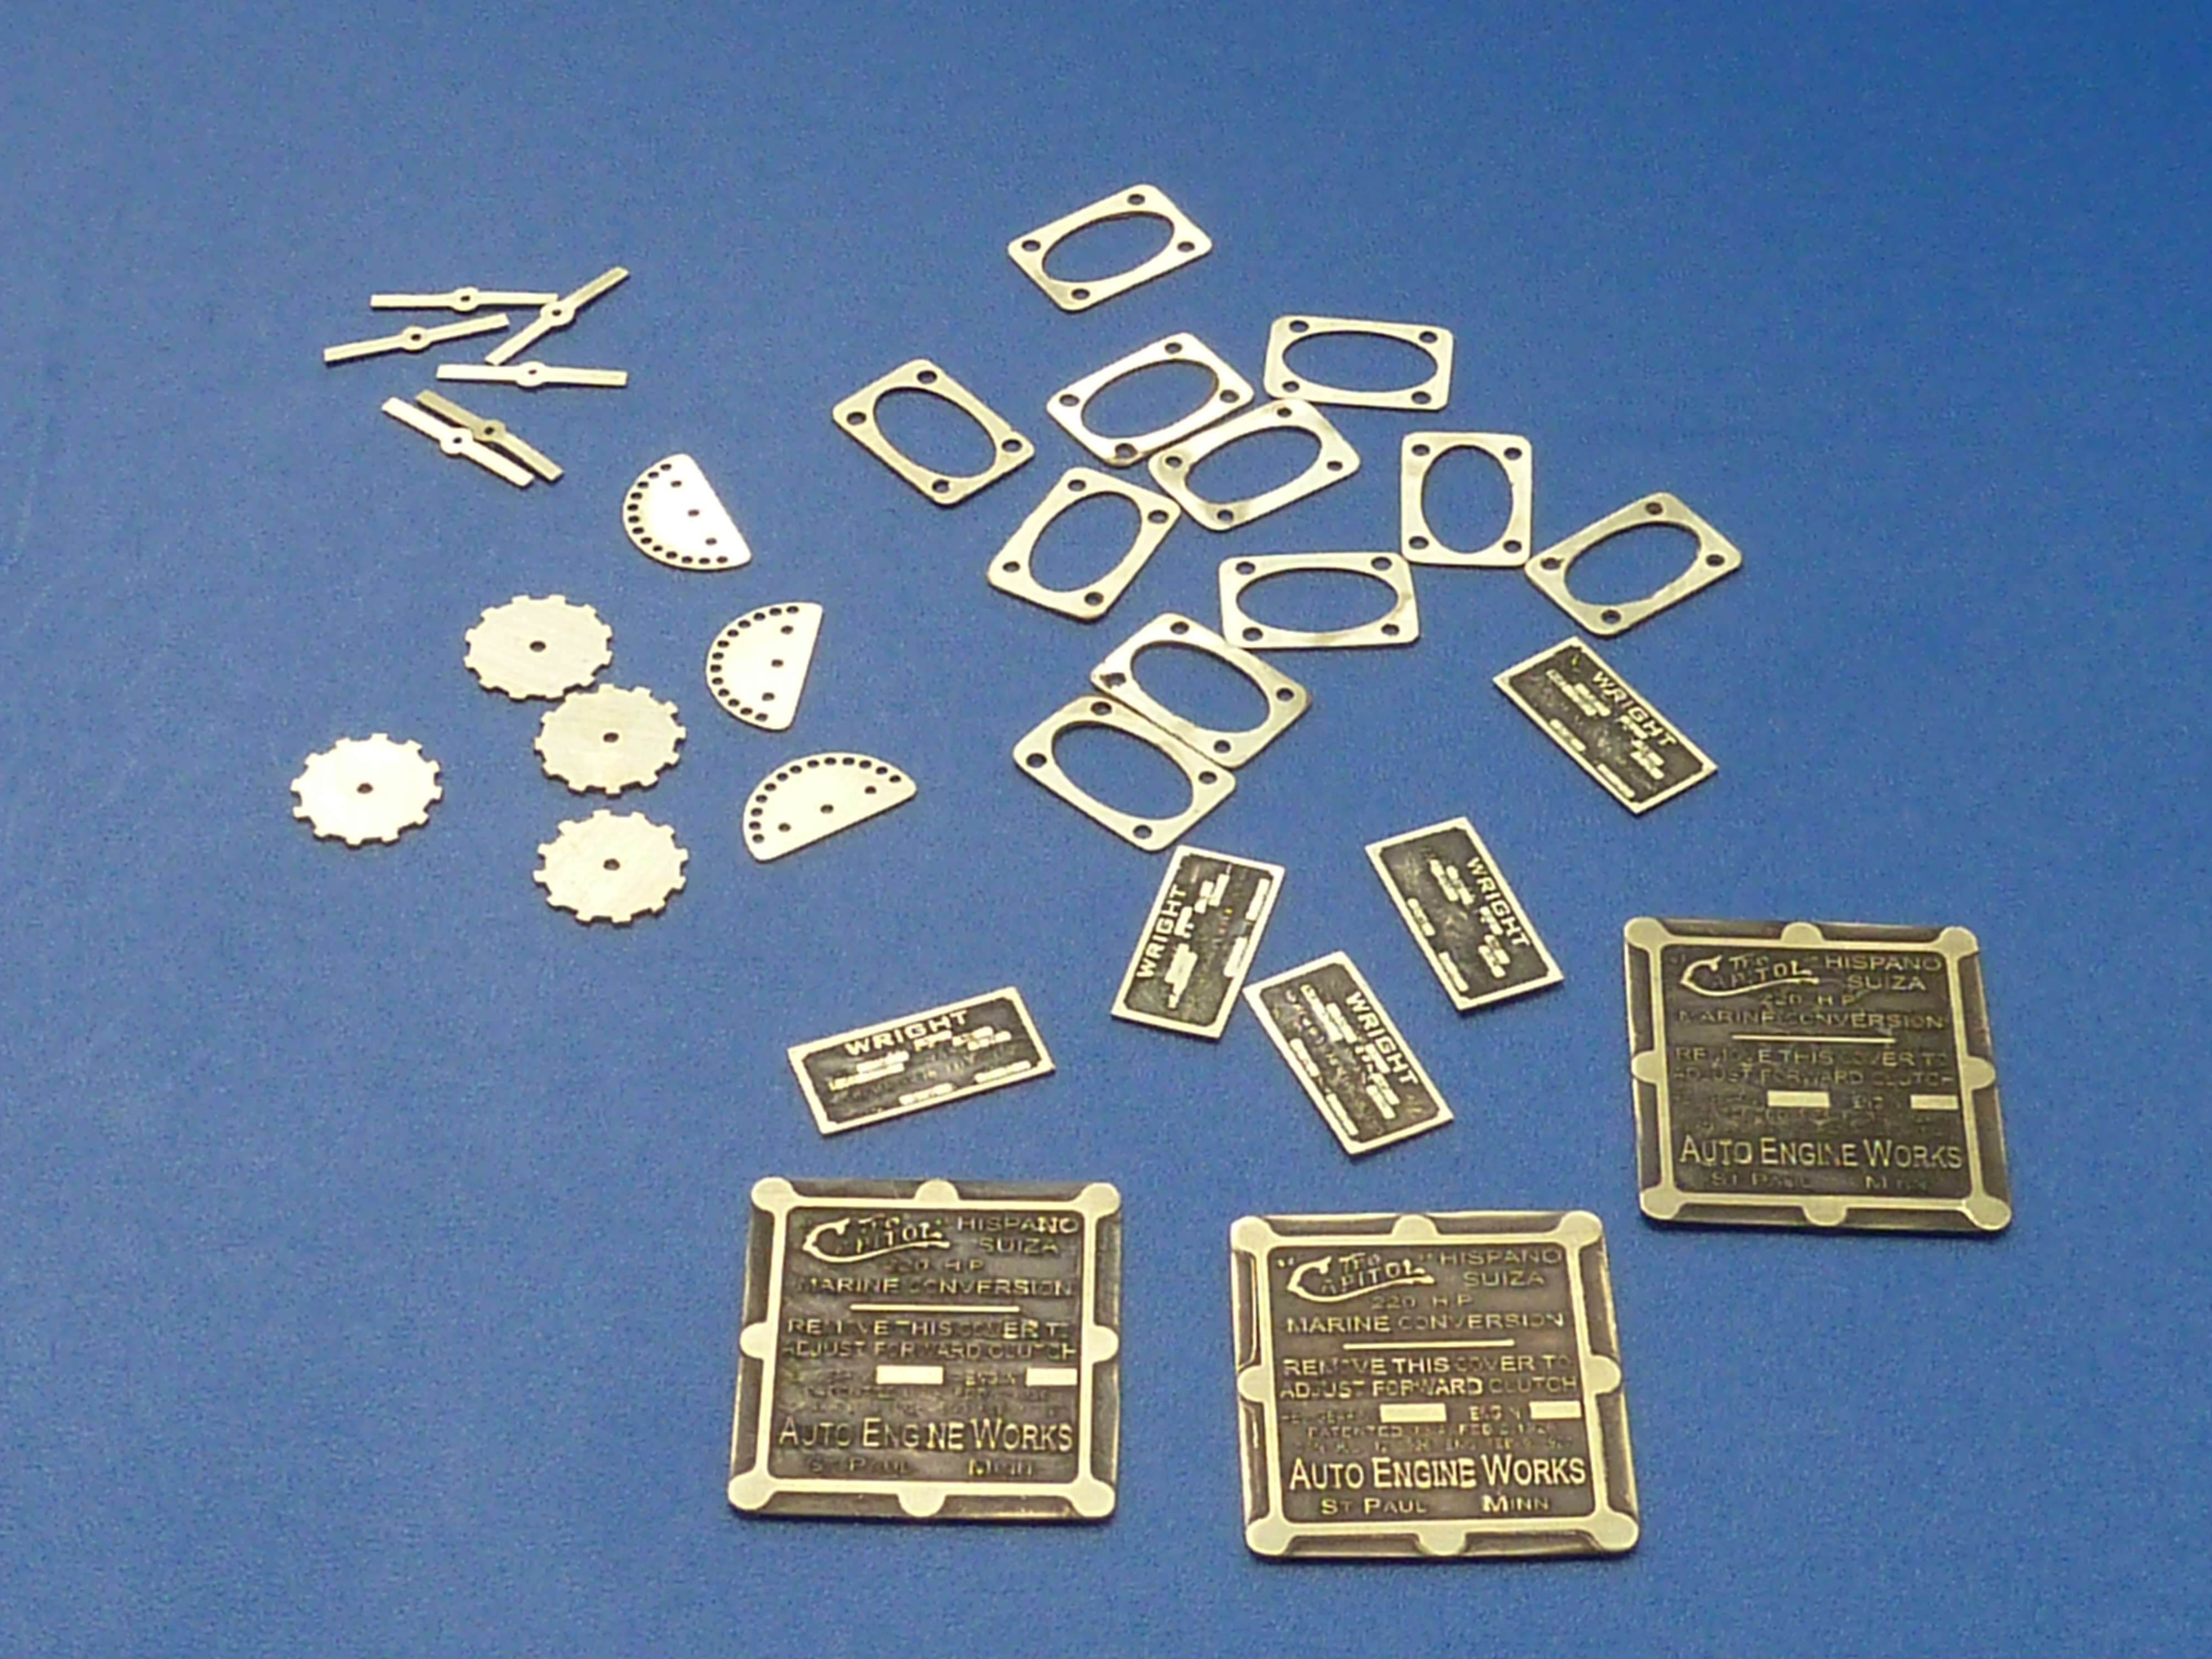
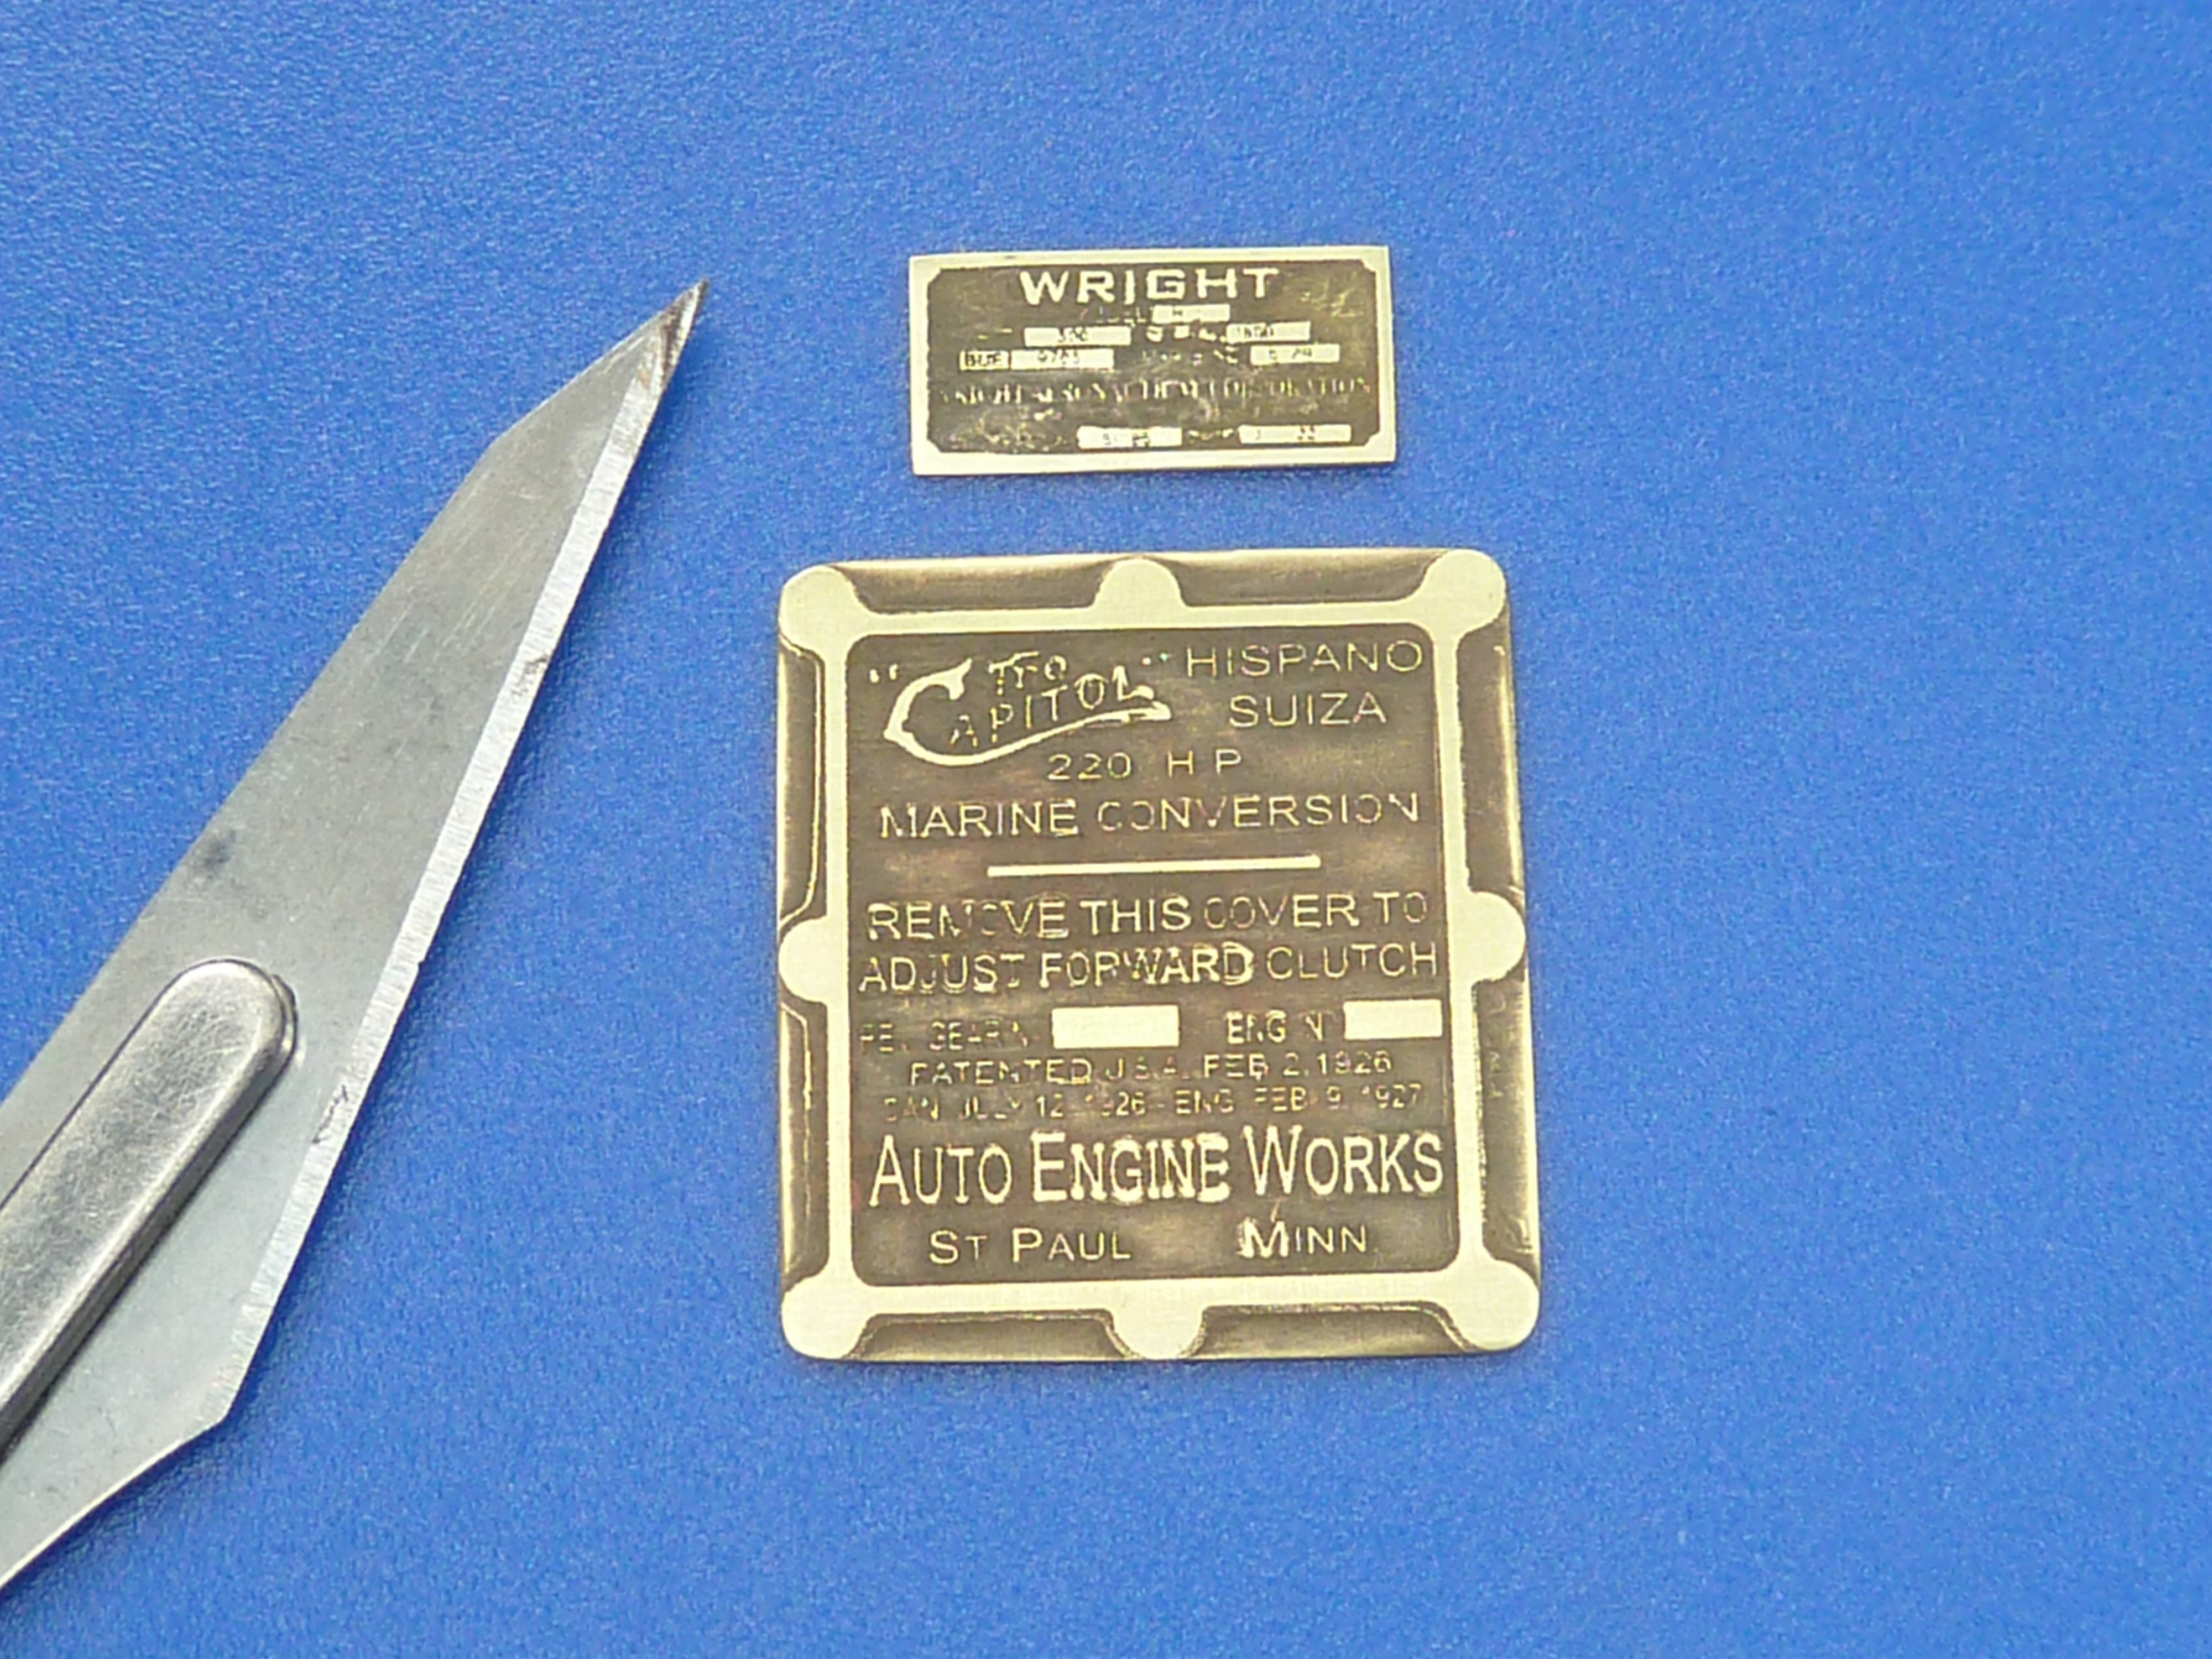
In parallel with all the above I’ve made up some doubled sided photoetch masks to produce a set of detailing parts.
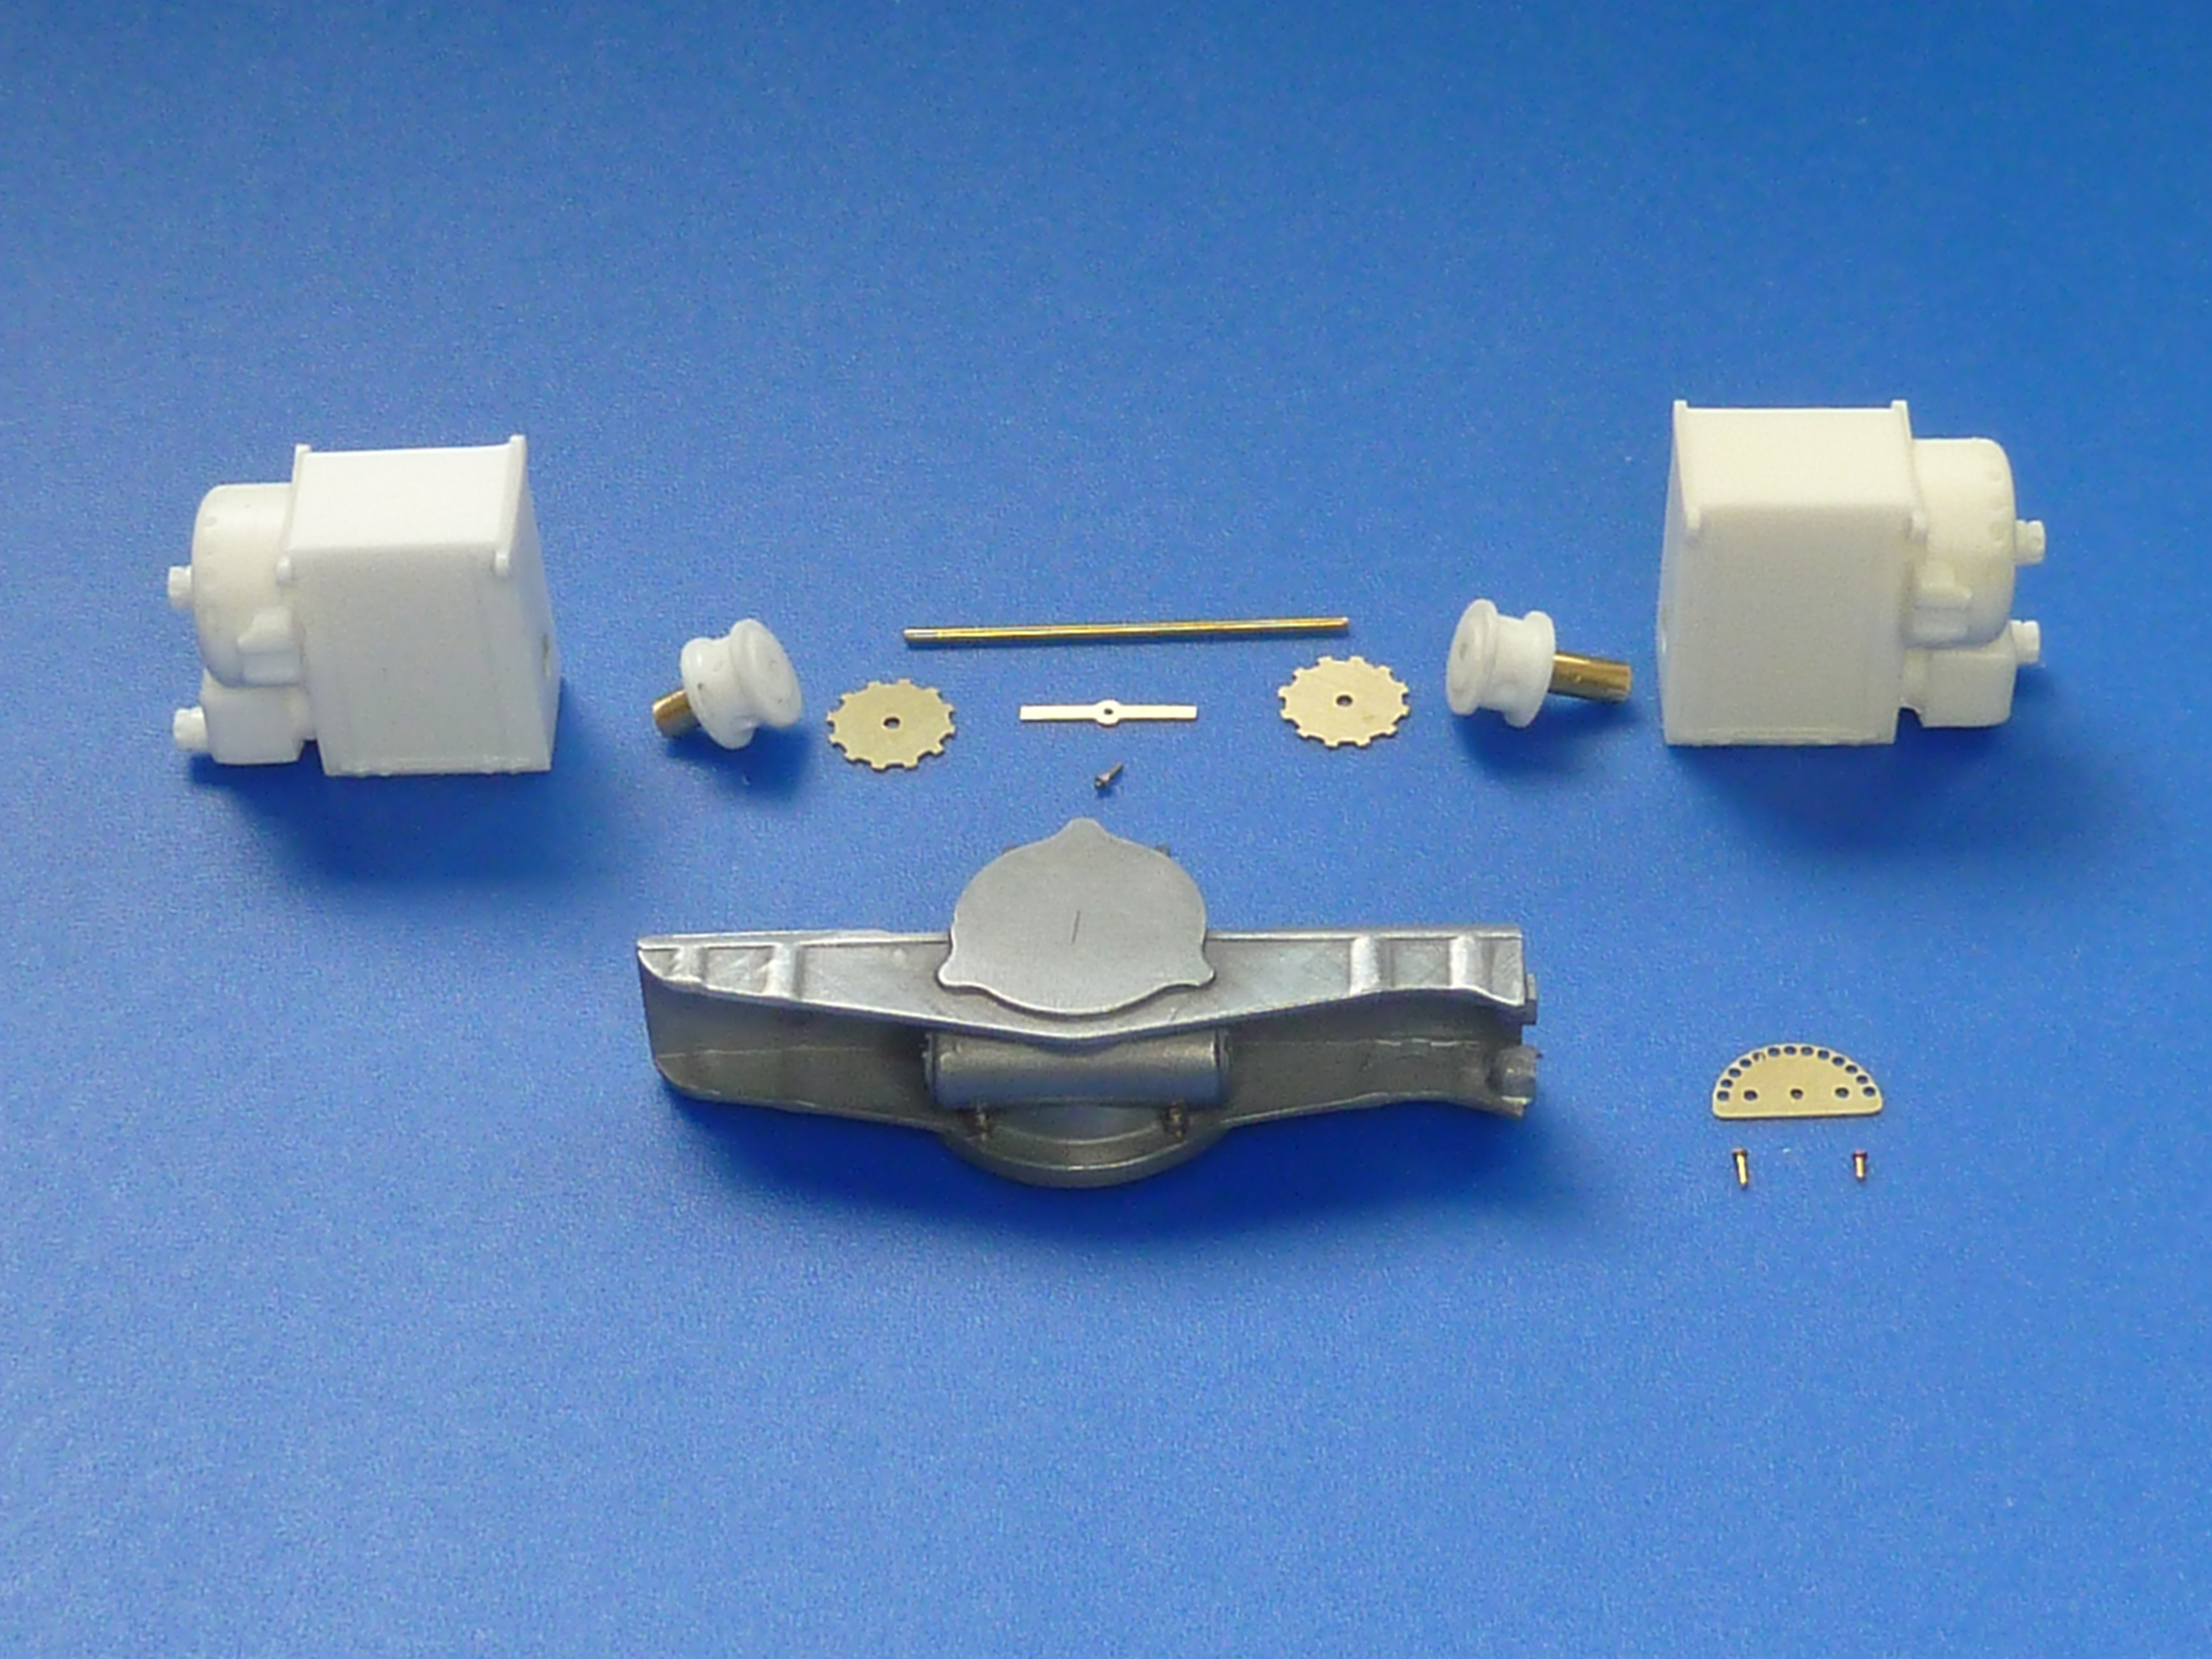
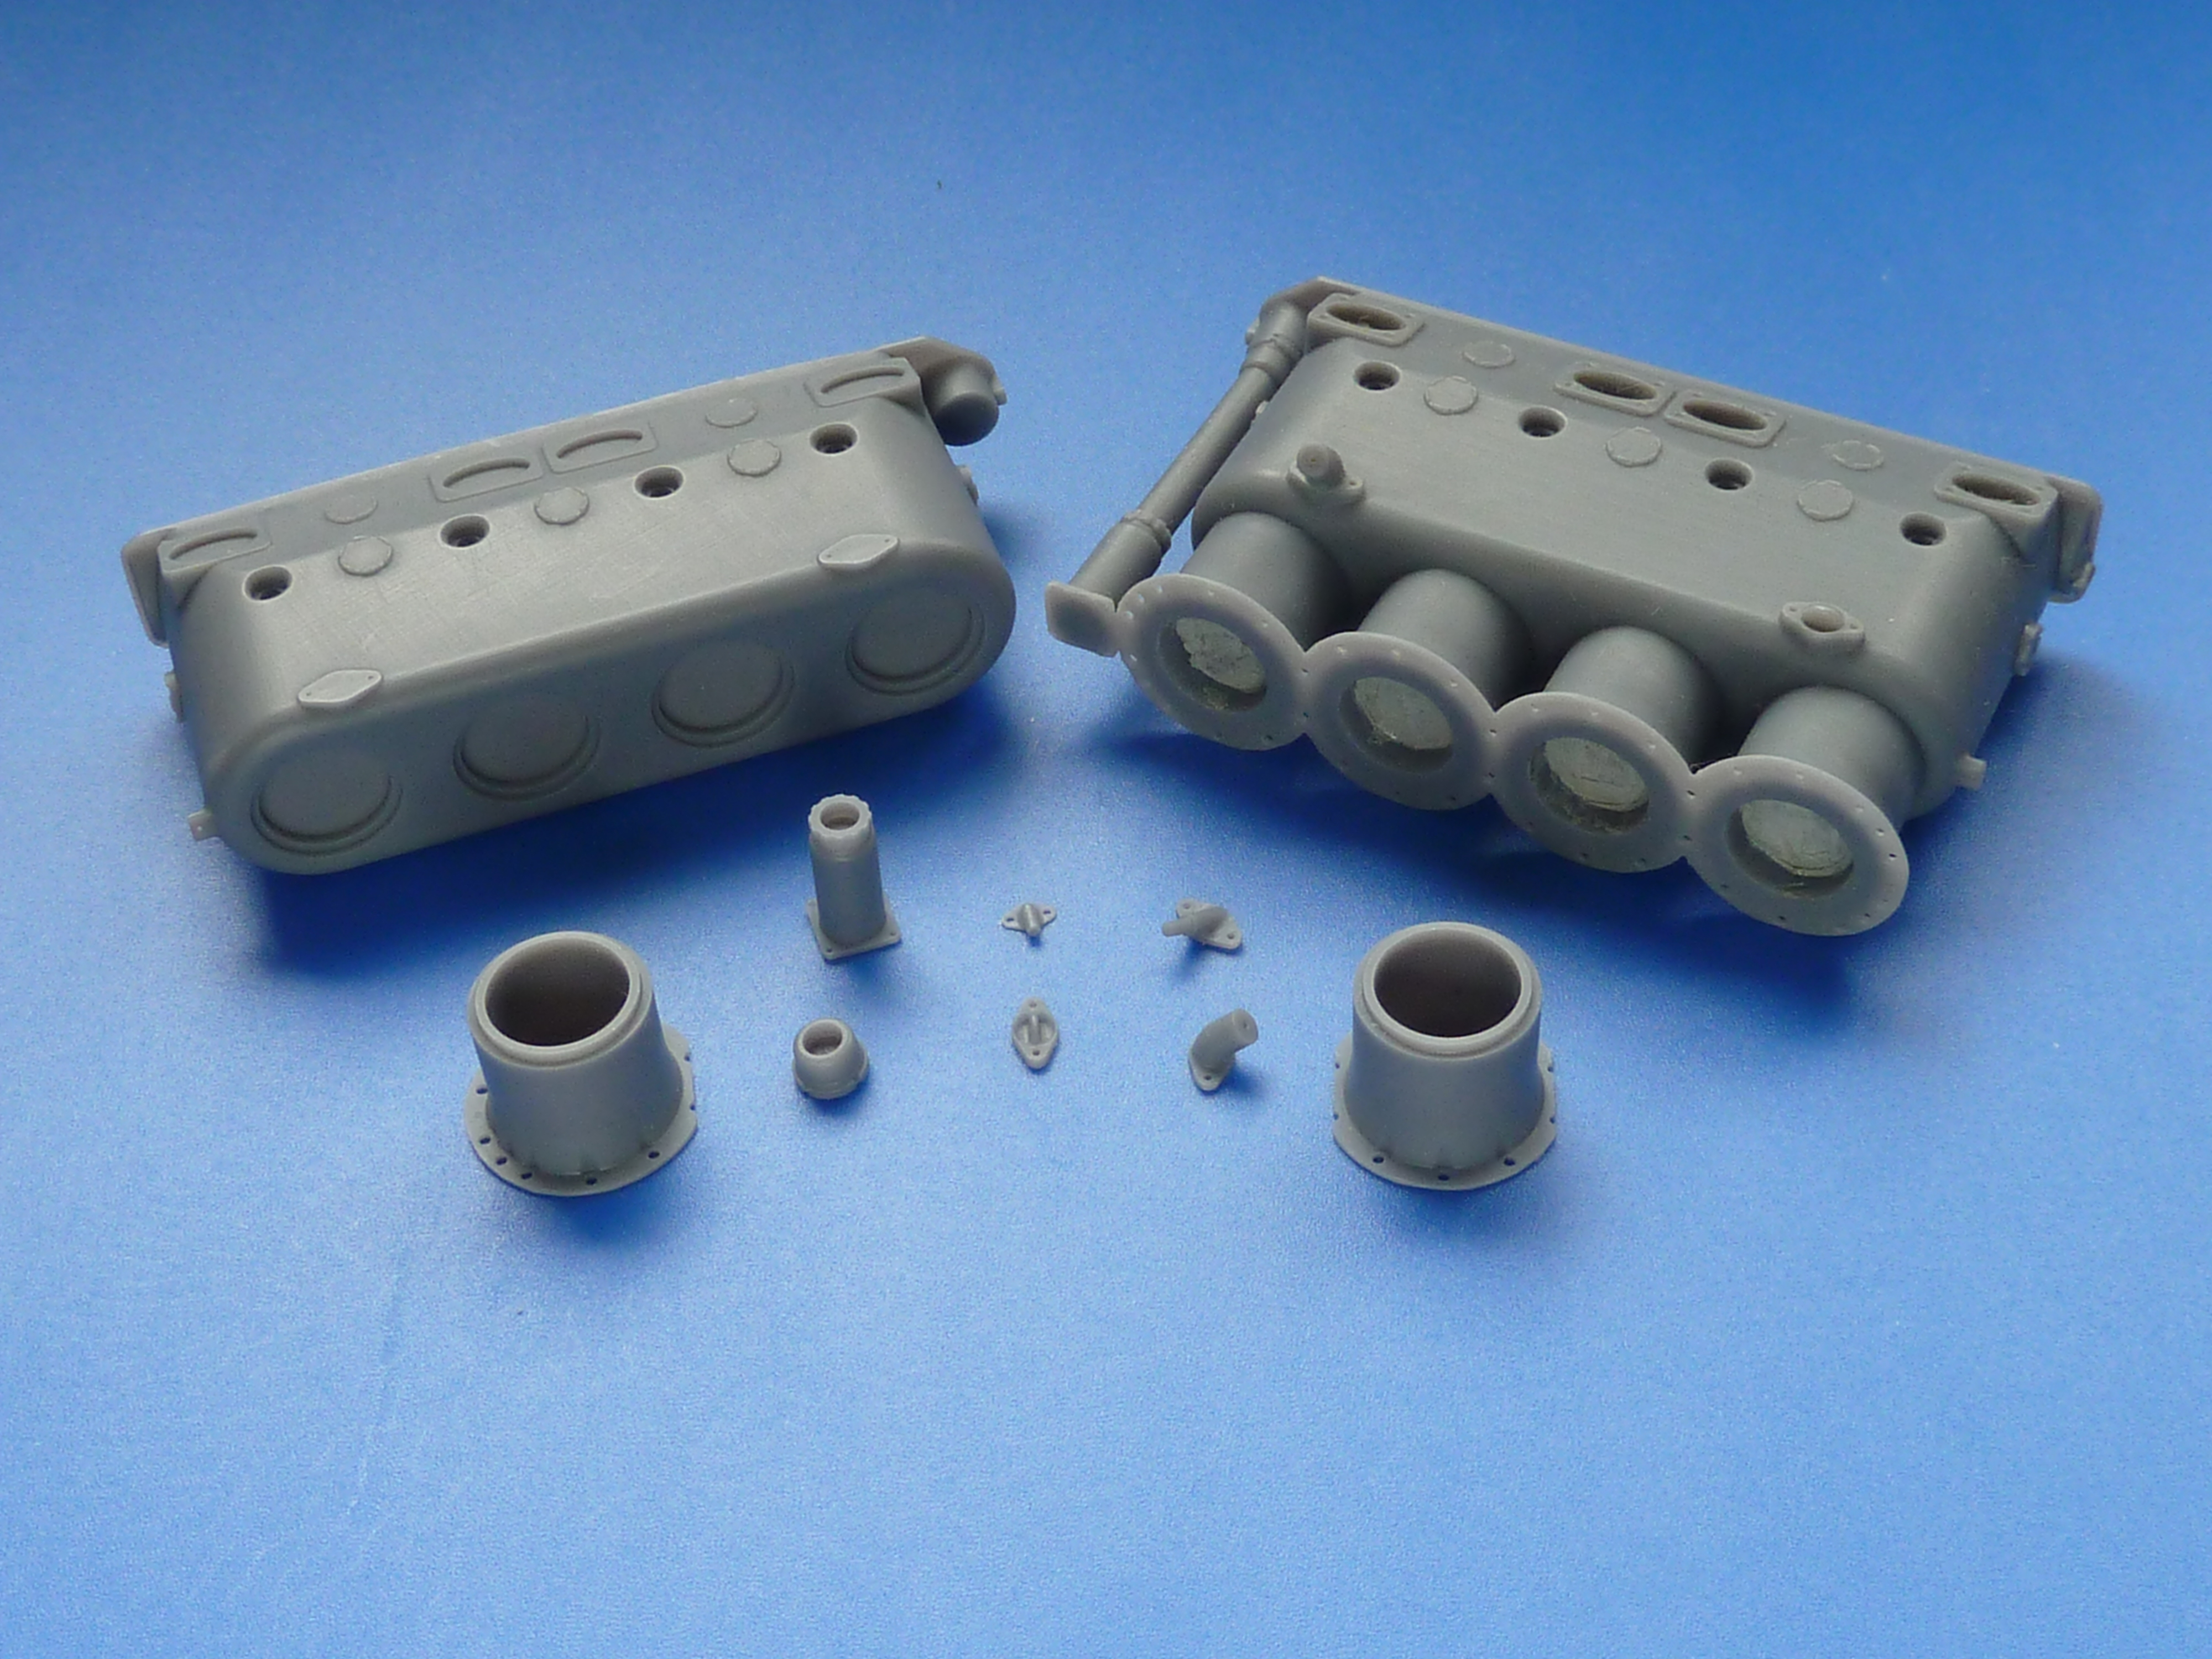
I’ve also pushed on with the Stromberg carburettor.
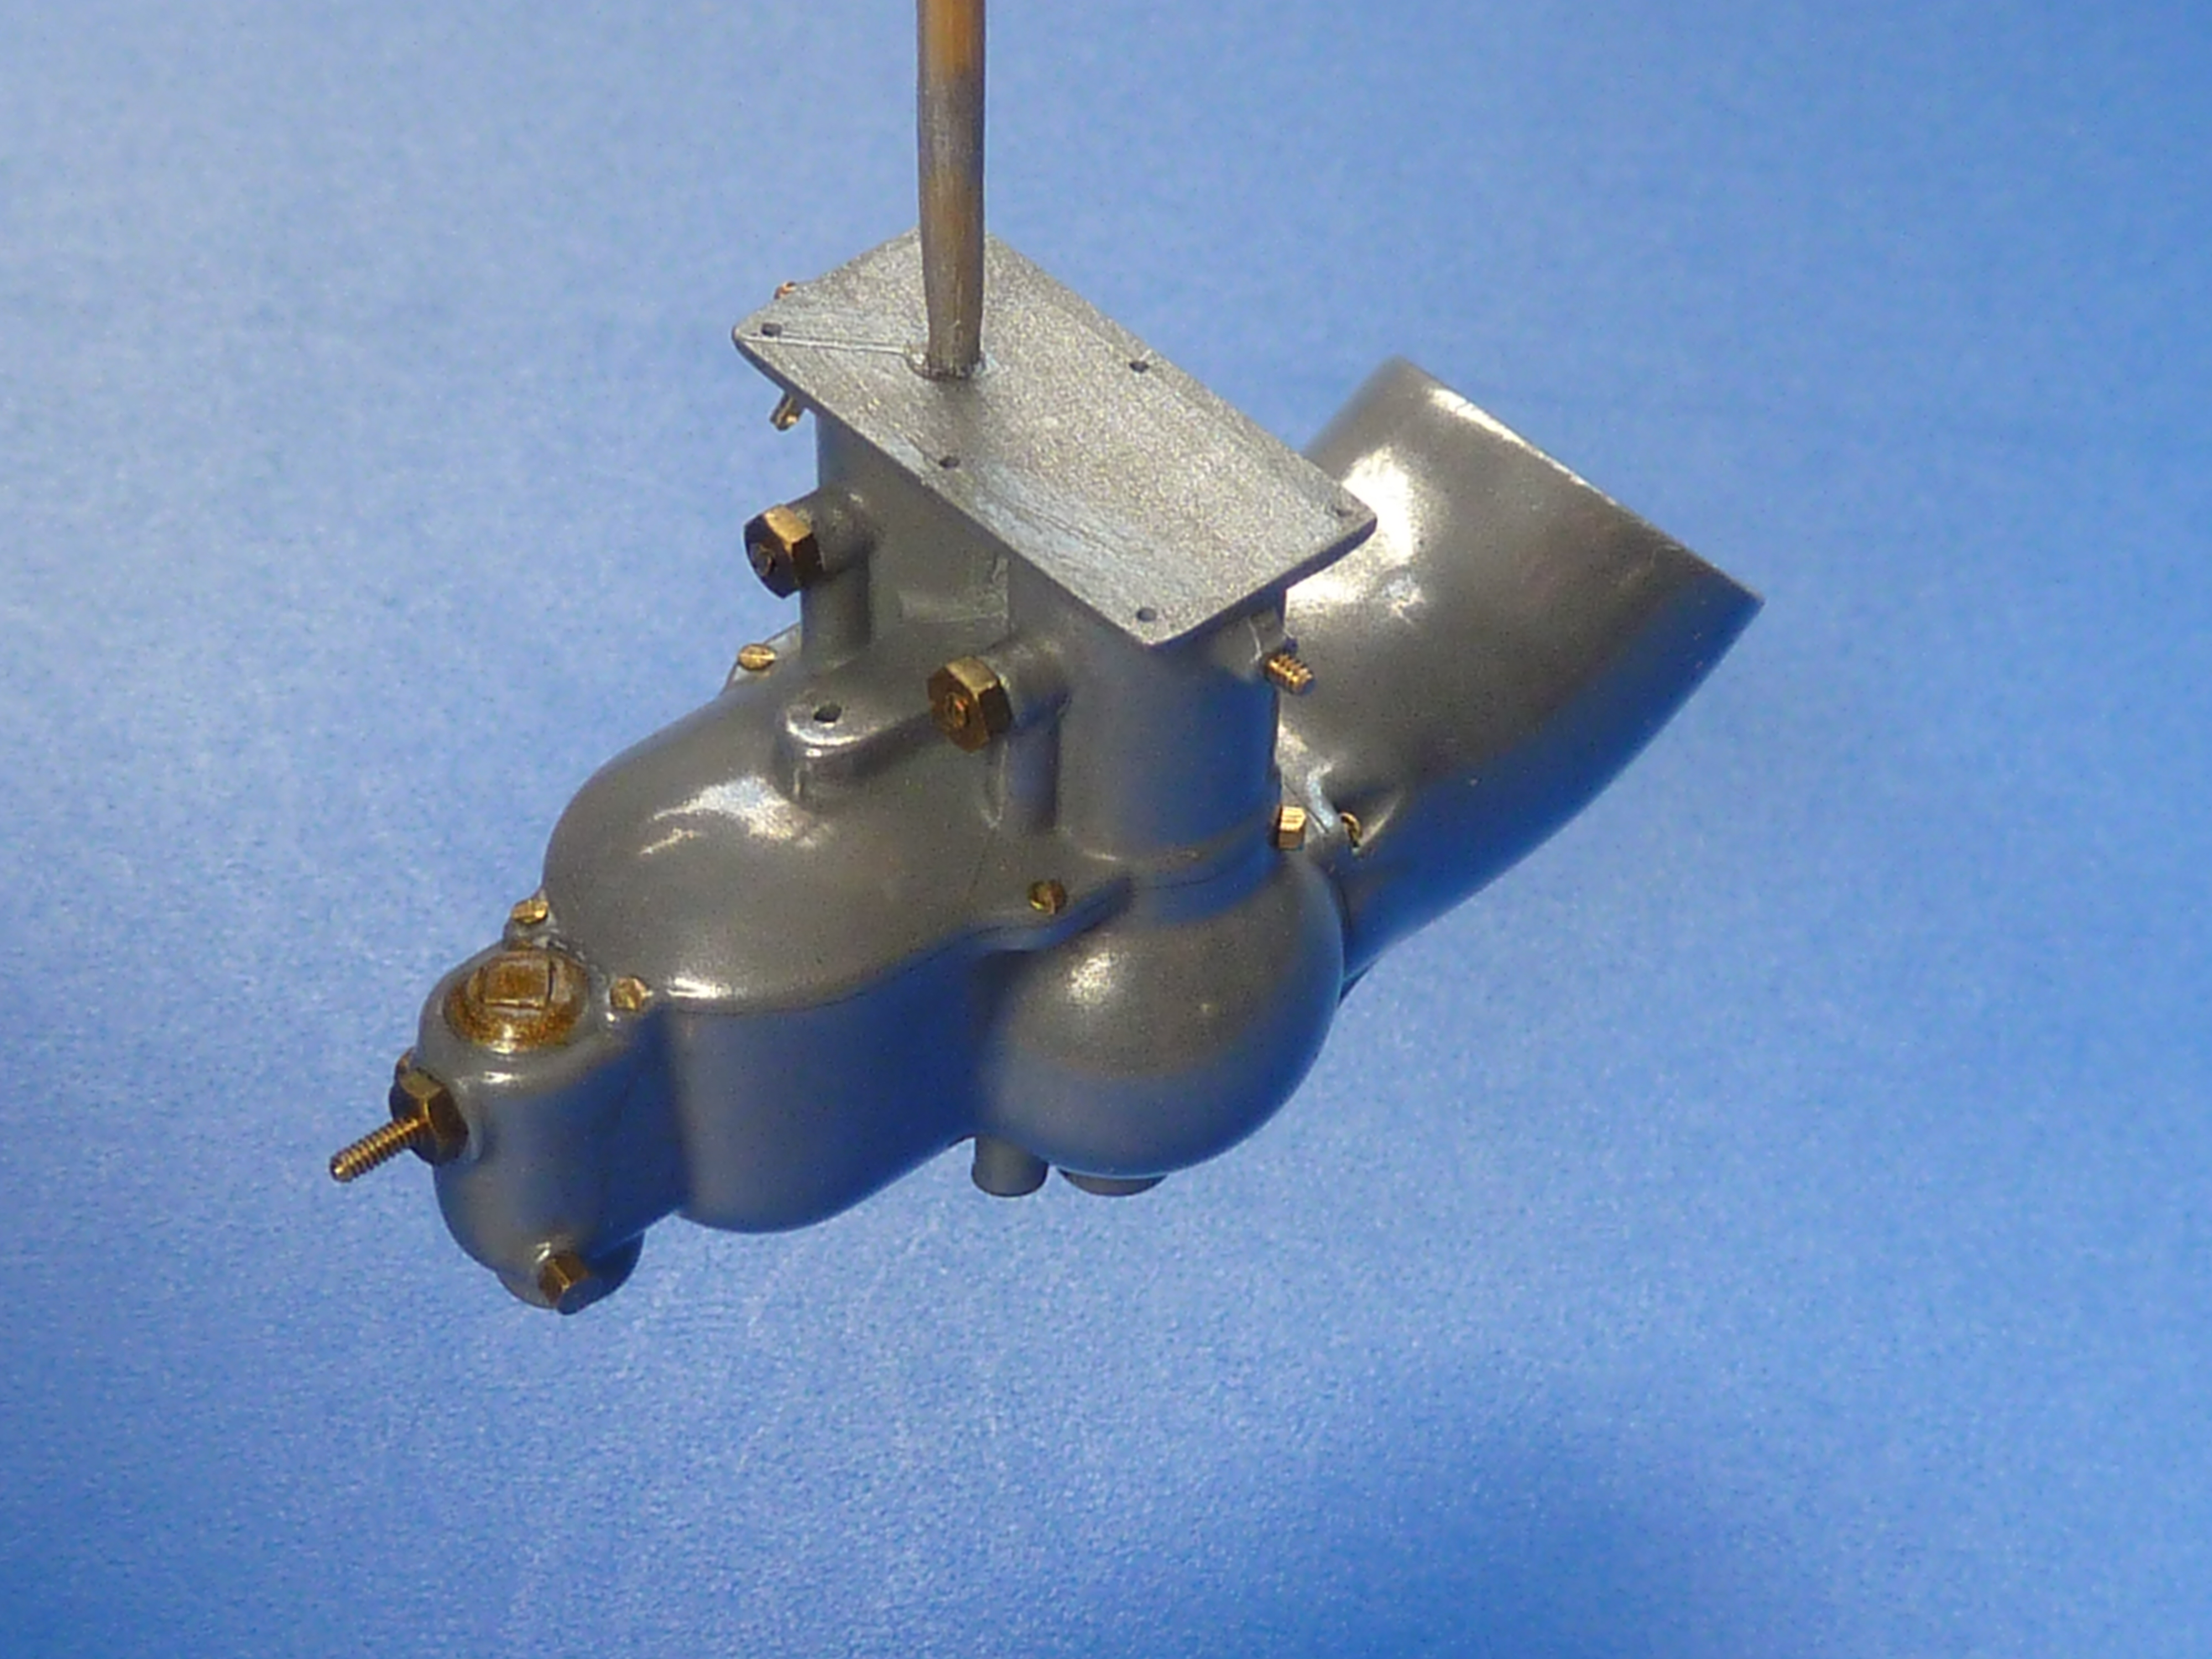

I’m currently working on the air filter for that carb. I was going to try casting it in pewter and made some mould masters for that, but I think the caps will be better made in brass and plated. The core is a 3D print with some plated brass mesh wrapped around.

I have now reached the stage where I am in grave danger of actually assembling something that looks like an engine.


It is odd, but what you do, gives me GREAT GREAT joy. Thank you, my friend. I only wish there were more of us on this planet.
LikeLiked by 1 person
No doubt, all of your work here is beautiful. Obviously you need to get a certain finish, fit and level of accuracy. But if you could pardon my ignorance for a moment, what are the reasons for using the different materials? especially, why choose the metal over a resin or plastic?
Speaking as a modeler several levels beneath your own, I will never make my own parts like this but I am curious about how these choices are made.
I am currently building a kit that was sure to be a tail sitter without significant nose weight. So I thought it might be a good idea to buy metal landing gear to support the extra weight. Well I honestly think the after-market white metal landing gear are less well molded than the kit’s plastic ones. They also bend and may actually be weaker. There is the advantage they will look more like metal!
Perhaps this is just an inferior product? But again, why make this choice? Inquiring minds need to know!
LikeLiked by 1 person
White metal parts never have the crispness of good injection moulded plastic ones in my experience. They require extra work to bring them up to scratch. However, no paint can match the finish you can achieve with them. In the case of u/c legs they don’t sag with age, which overloaded plastic ones can. It also depends what alloy they have been cast with. The ones in Tamiya’s 1:32 F-4 Phantom II are very robust, but if I recast them in the lead free pewter I use they’d be hopeless.
Regarding finish: the Clerget kits I’ve built are a good comparison. The plastic ones are much better in terms of crispness of the mouldings, but the quality of finish that can be obtained with the metal is much better. I removed all of the fine detail such as the bolts and studs though, and replaced it with aftermarket items. It required 4 or 5 times as much effort to complete, but the finished item is in another league in terms of replicating the real thing.
I’ve gone for the cold casting technique here because I think the finish will look much more realistic than paint in the final model. You end up with natural variations in sheen that are very hard to replicate in paint. The painted cylinder block included in one of the photos in this post isn’t actually just paint. It tried brushing it over with some metal powders that I have. While it improved it a little, and broke up the artificially uniform look of the fresh paint, it also made it far too dark for cast aluminium to my eye, so I tried to go natural metal but couldn’t. So cold cast was the next nearest option. If you look closely at the magneto support bracket in the post you’ll see what I mean. It would be very hard to get as good a real metal feel with paints. Some can do it, but I can’t.
I have tried AV Vallejo’s Model Air metallic arcylics. They are undoubtedly some of the best metallics I’ve used (they are airbrush only), but I’ve found them very soft and take too long to harden enough for me to handle the model during builds, so I use them sparingly.
https://acrylicosvallejo.com/en/product/hobby/sets/effects-en/metallic-effects-71181/
LikeLiked by 1 person
Wow! Thank you for a speedy and thorough answer! I see exactly what you mean about how realistically metal looks like metal. And honestly, it helps me understand and accept some of the limitations of my painted metal finishes. Also some helpful info to consider on using those landing gear again.
It is always a pleasure to see your level of craftsmanship!
LikeLiked by 1 person
When I handed one of the recent cold cast parts to the other half, her first comment was “I was expecting it to be heavier”.
LikeLiked by 1 person