
We’re on the home straight now and this is the concluding part of this little (?) build thread (“Praise be! There is a God” from the back row).
Now at this stage it should have been a simple case of getting on with the painting, but there was a small set back…
Whilst I was sorting some stuff out I put the model on the floor to give me some room to work in. I was on my own so there was no danger of someone coming in and inadvertently kicking or treading on it.
CRUNCH!
Yeah… I stepped back and trod on it
More extemporising in areas of English not frequented by school dictionaries.
Not my greatest day in the office really.
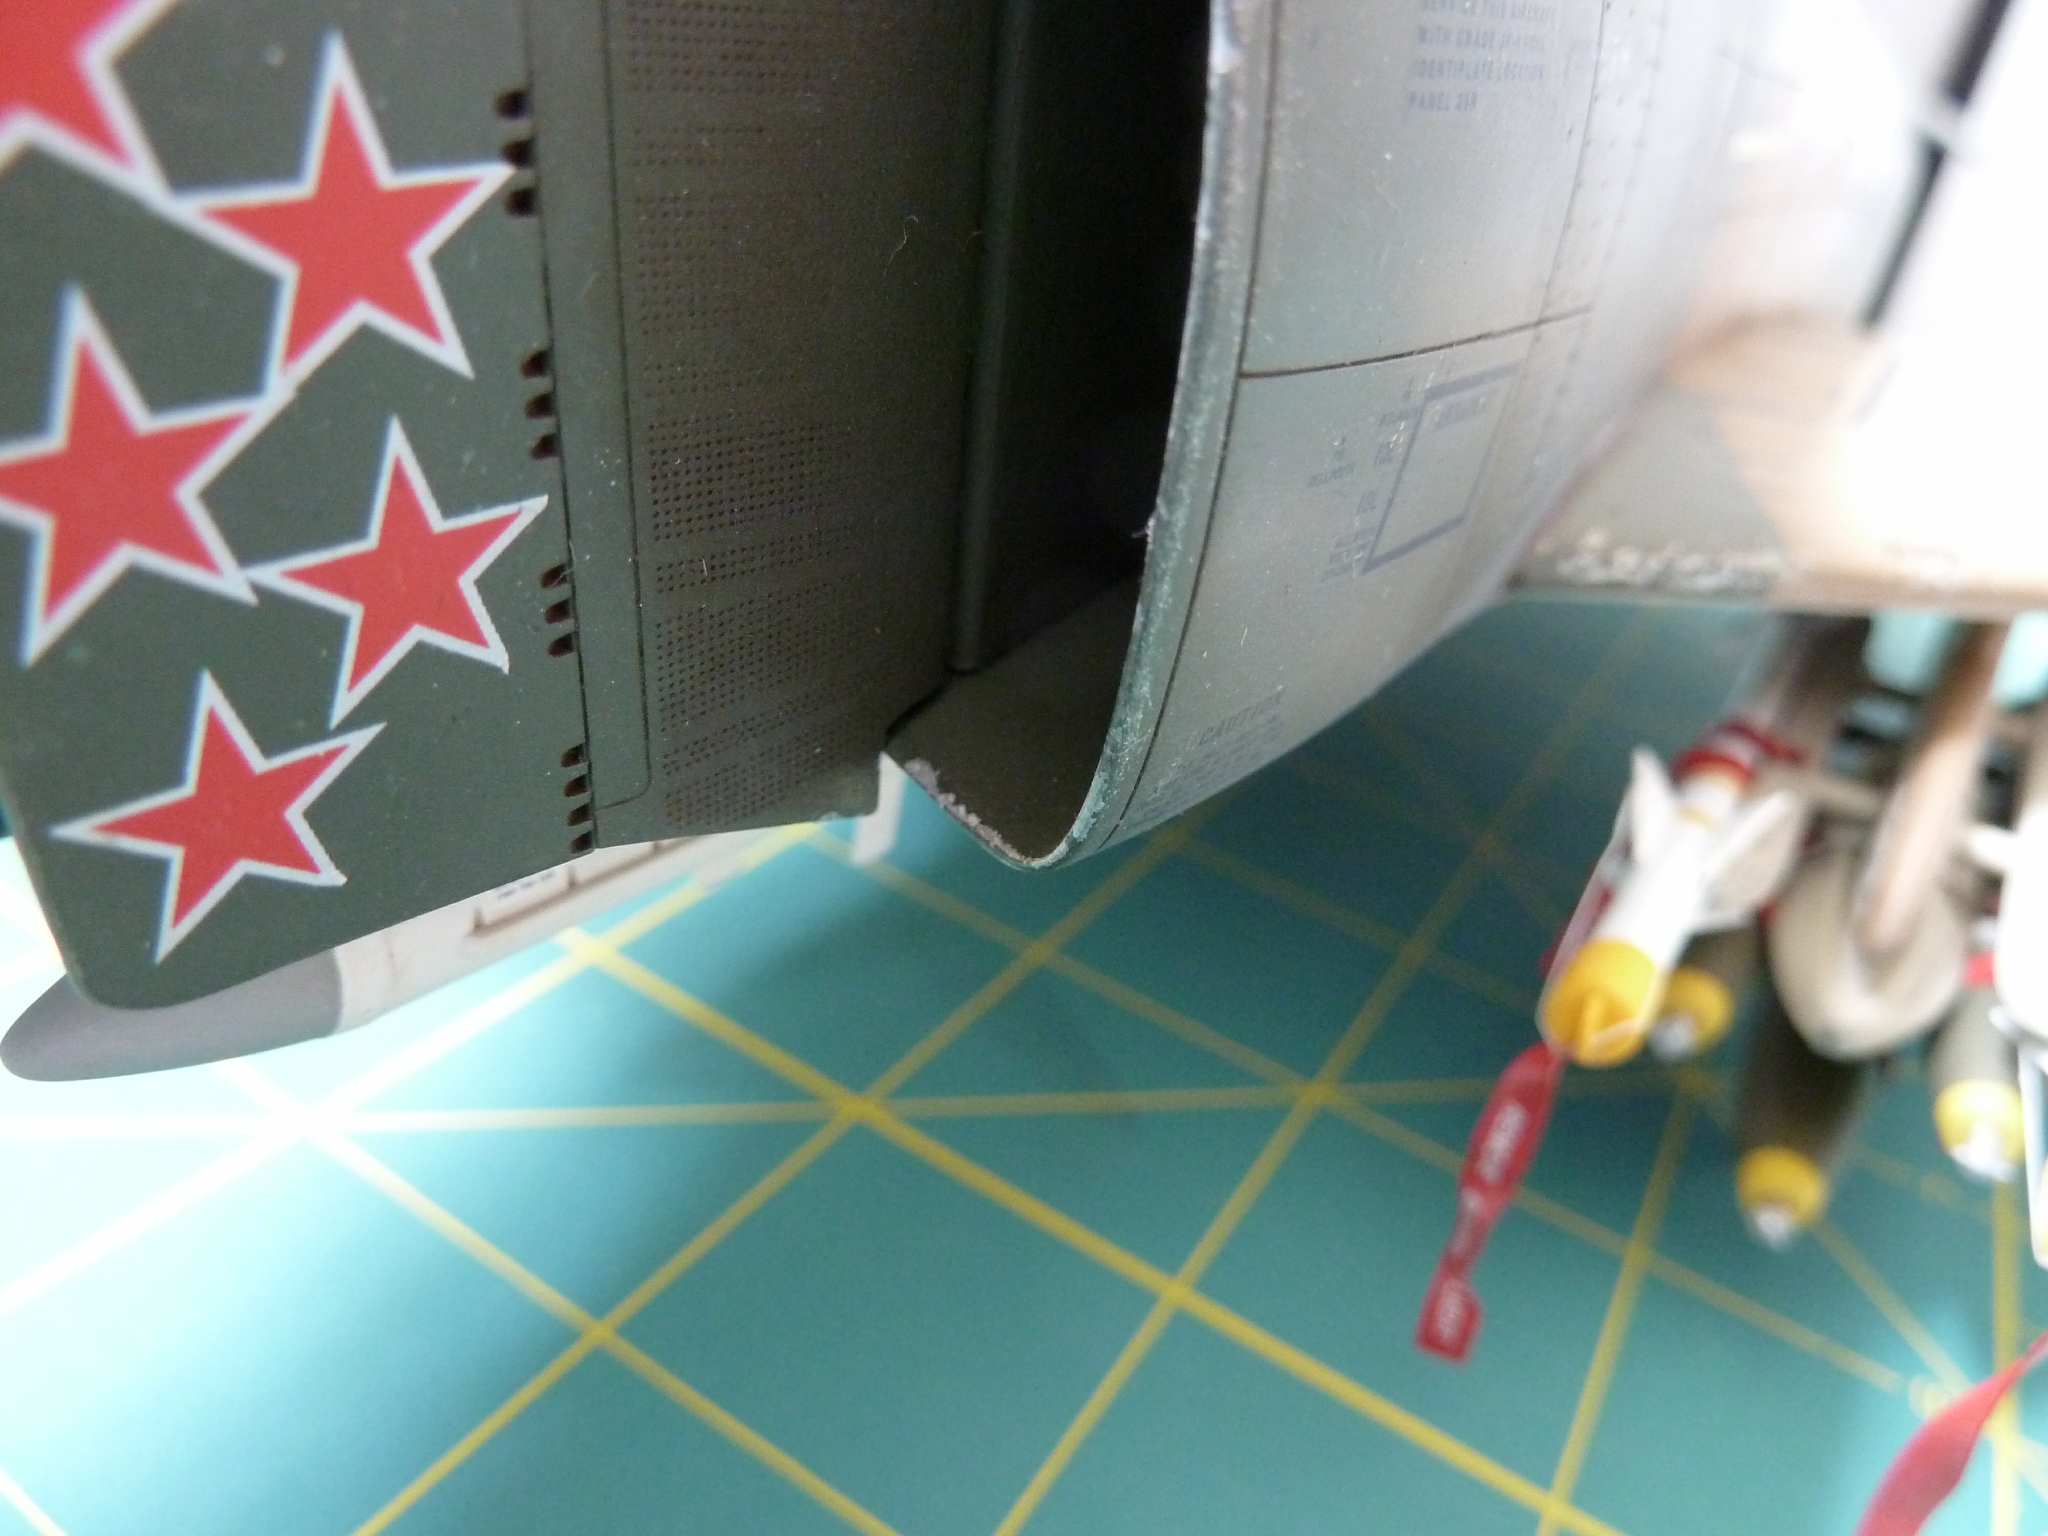
After a few moments wonder at just what depths of stupidity I won’t stoop to I examined the damage which was actually remarkably light. An aileron and wingtip broken off and some seams in the wing had burst. The undercarriage was surprisingly unmarked. All-in-all a close shave and it only took about an hour to repair things, but the wingtip joint isn’t that good now, especially underneath.
After that minor drama it really was onto the painting, but learn from me kids.
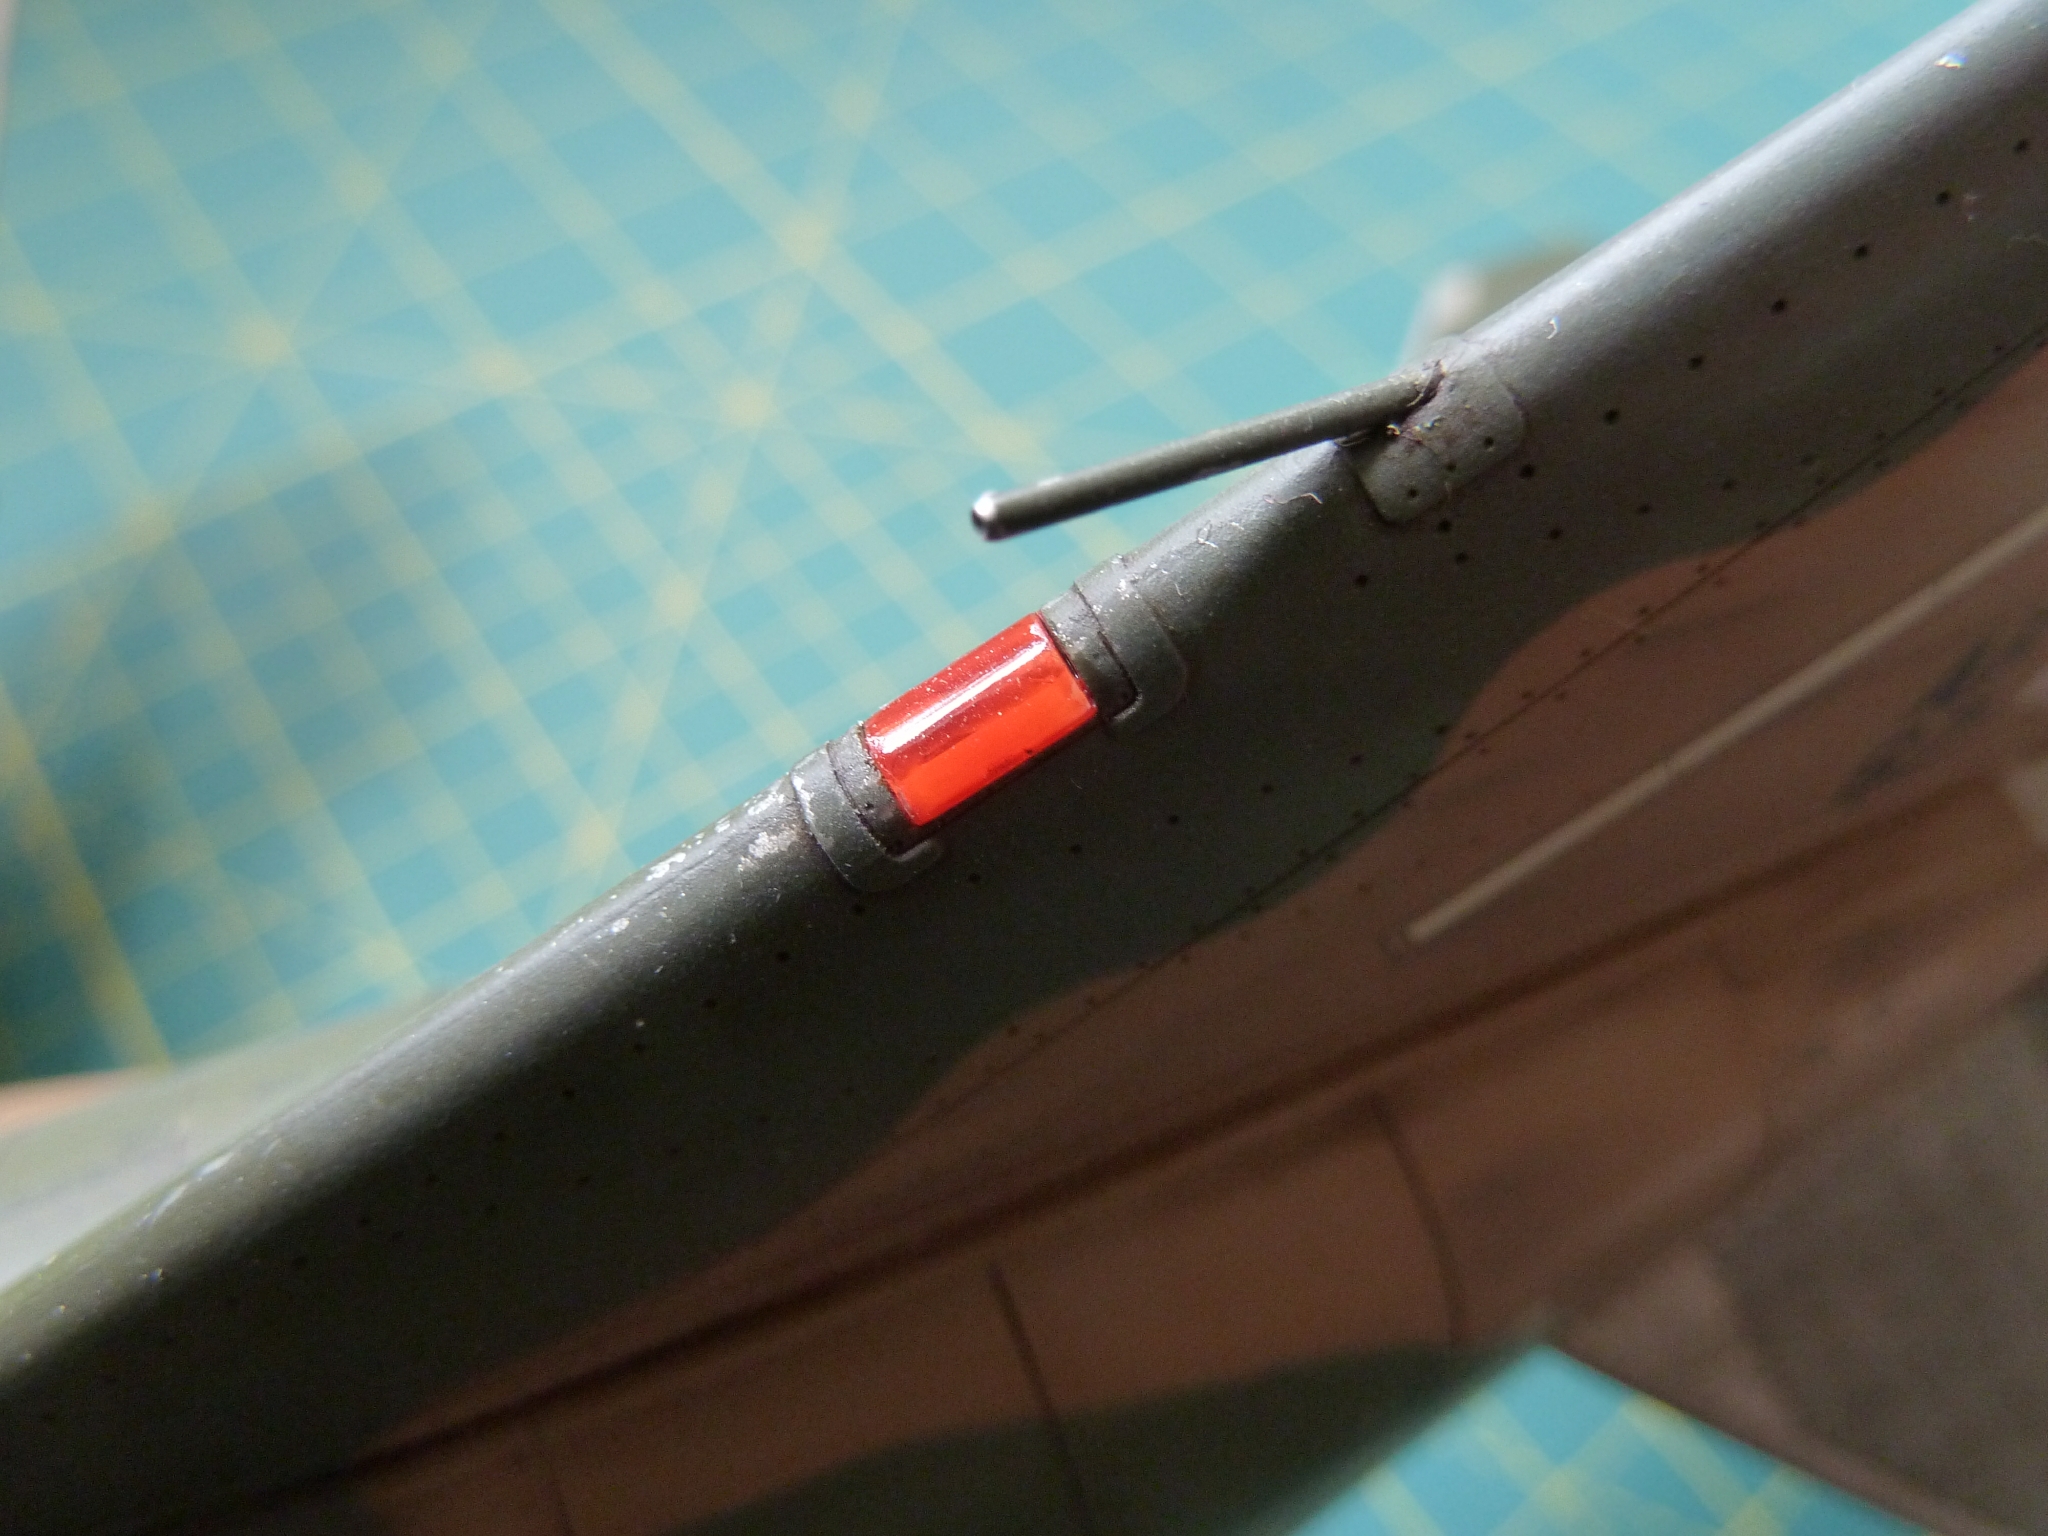
The first part I did was the fin navigation light, mainly because I had to mask the lens anyway so I might as well paint it first. Any painting mistakes on the edge line would be hidden by the main coat. To get a nice bright light (a bit too bright in the end I think) I painted the recess for the clear plastic part white, inserted the lens and then painted over the outside with a clear red gloss.
Next I sprayed the radome matt black which went without drama. Matt black seems to be a very easy to spray indeed for some reason but does need a protective varnish asap or it marks at the slightest touch.
As a final preparation for the camouflage I sprayed the leading edges of the wings, intakes, fin, canopy frames and cockpit sides with some silver to allow for weathering scratches later.
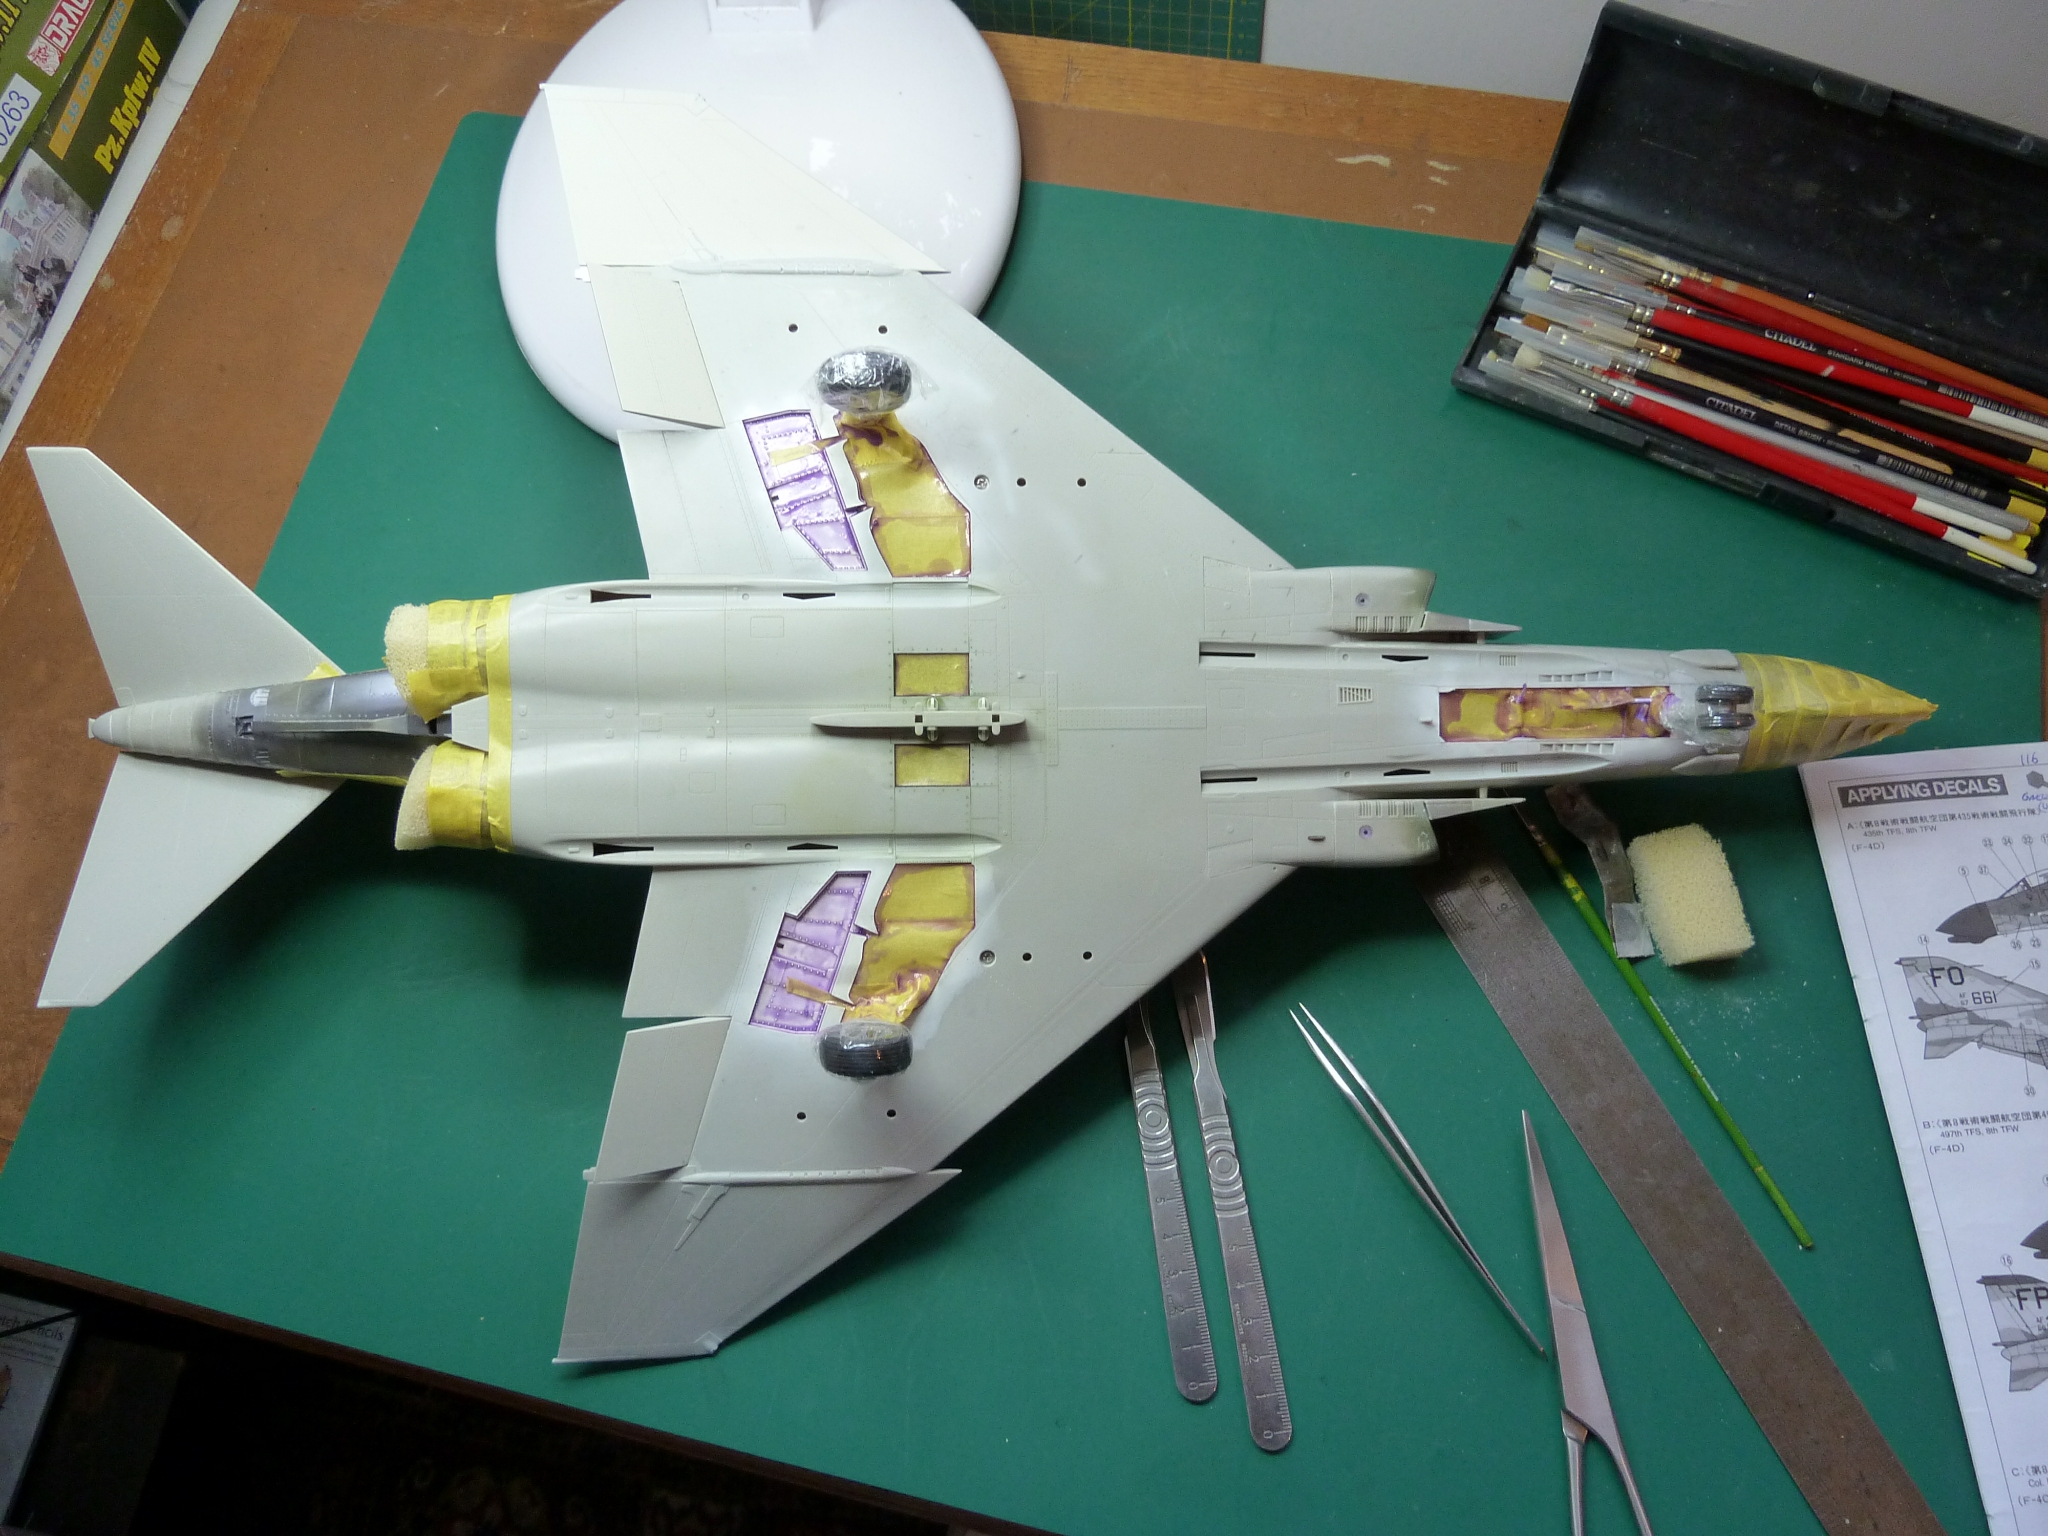
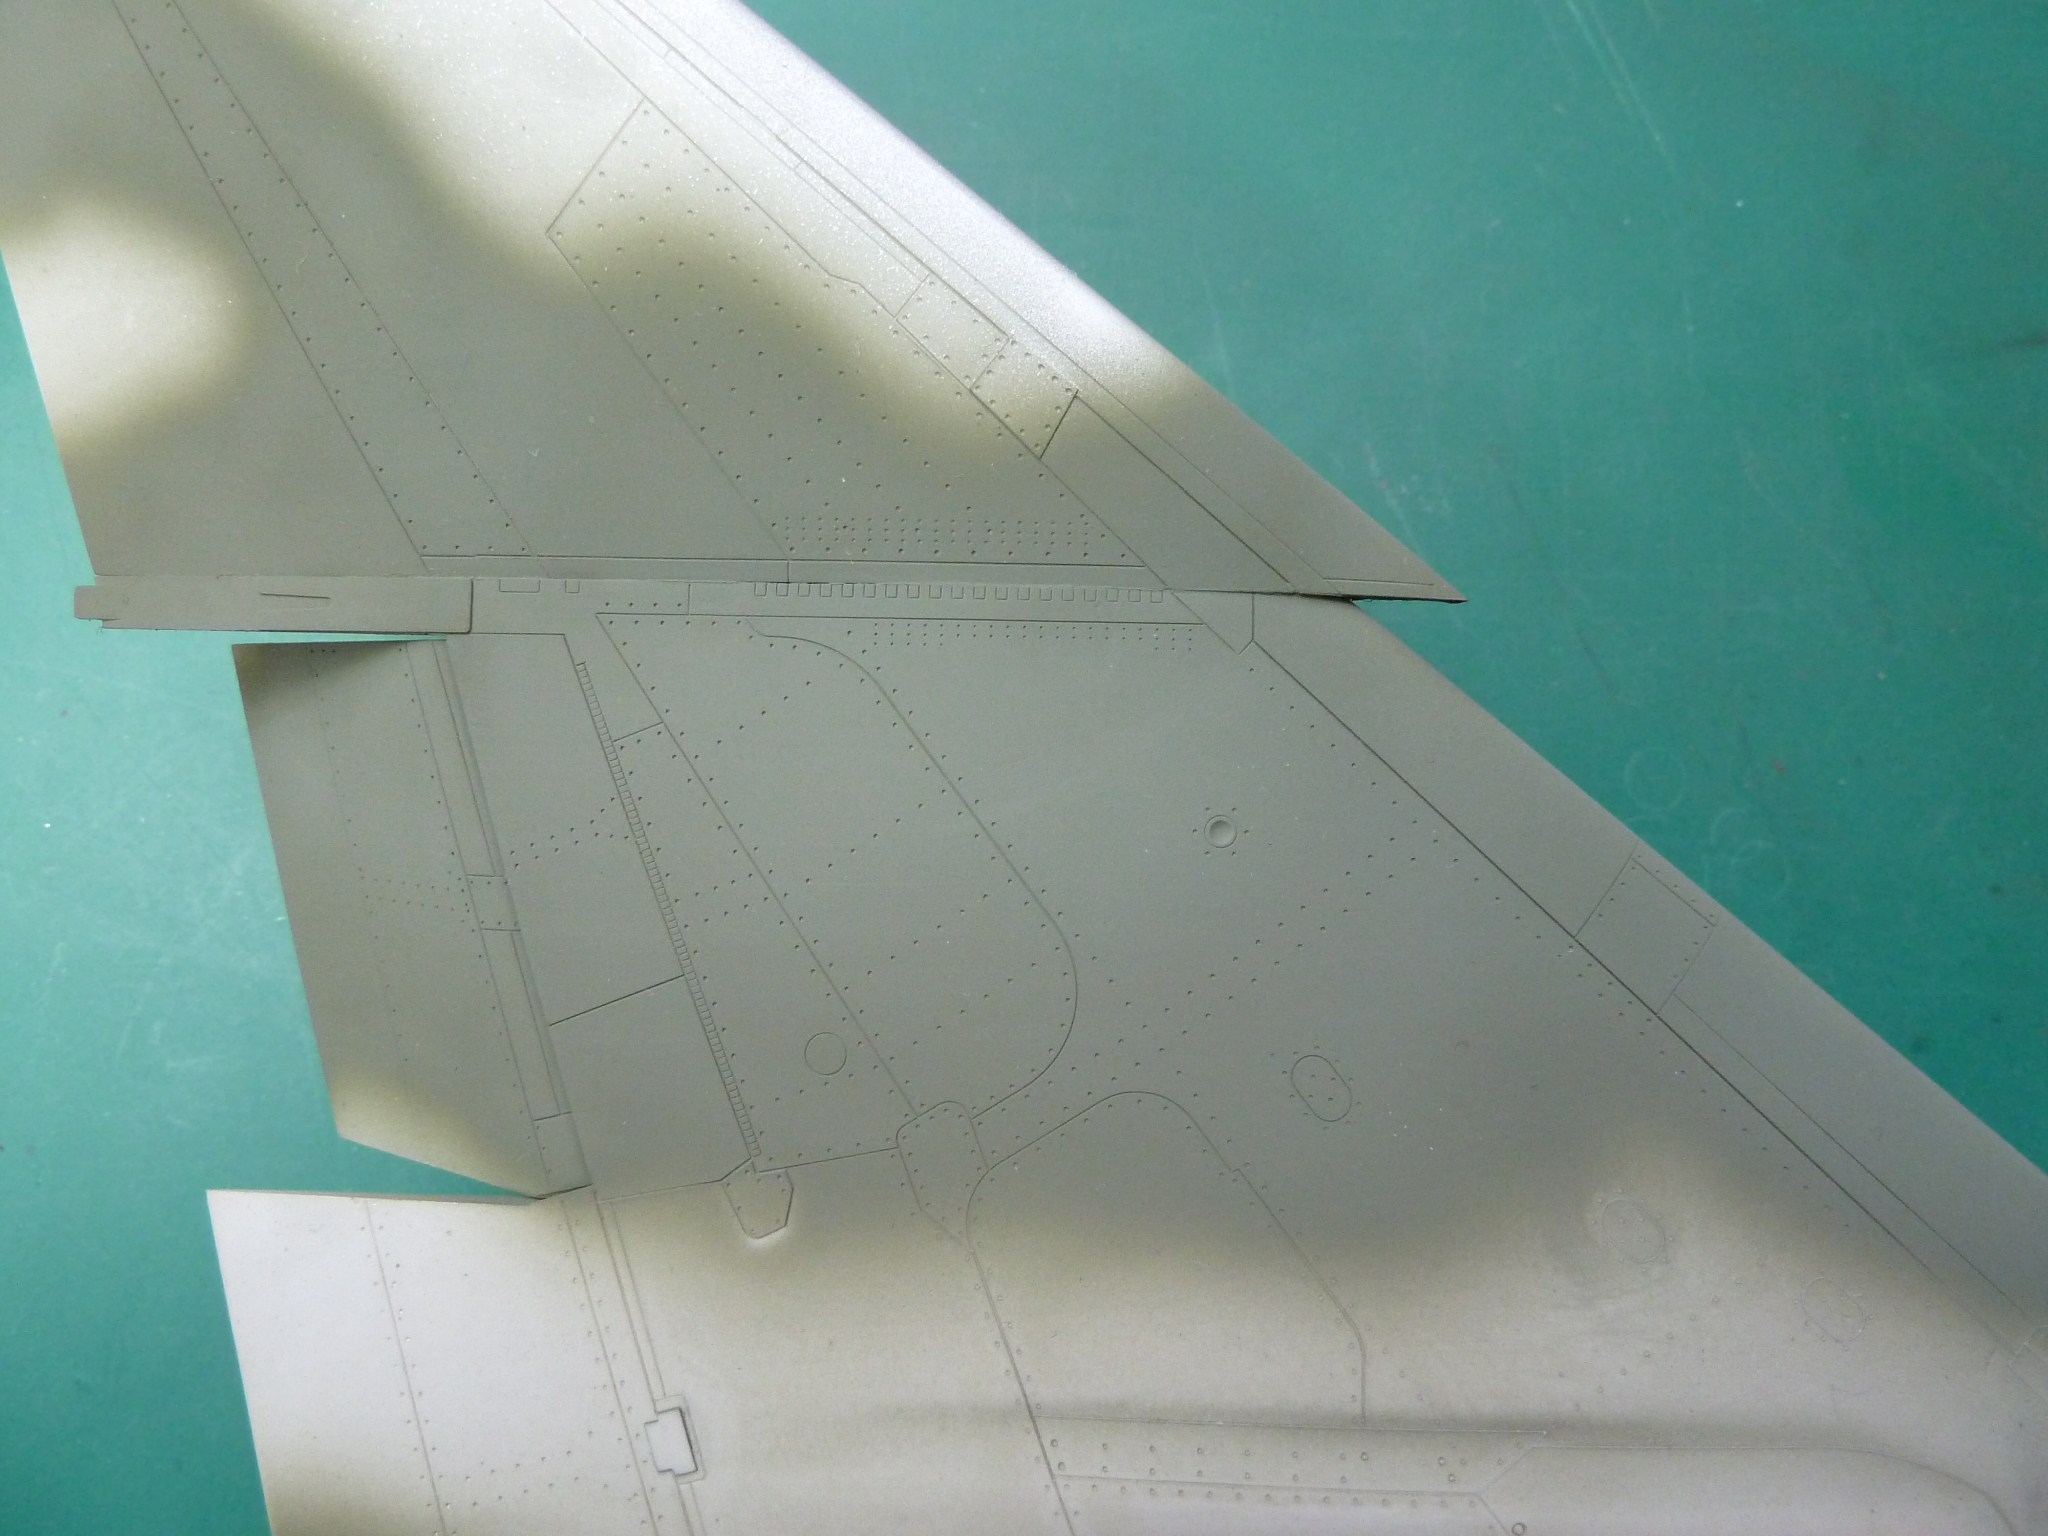
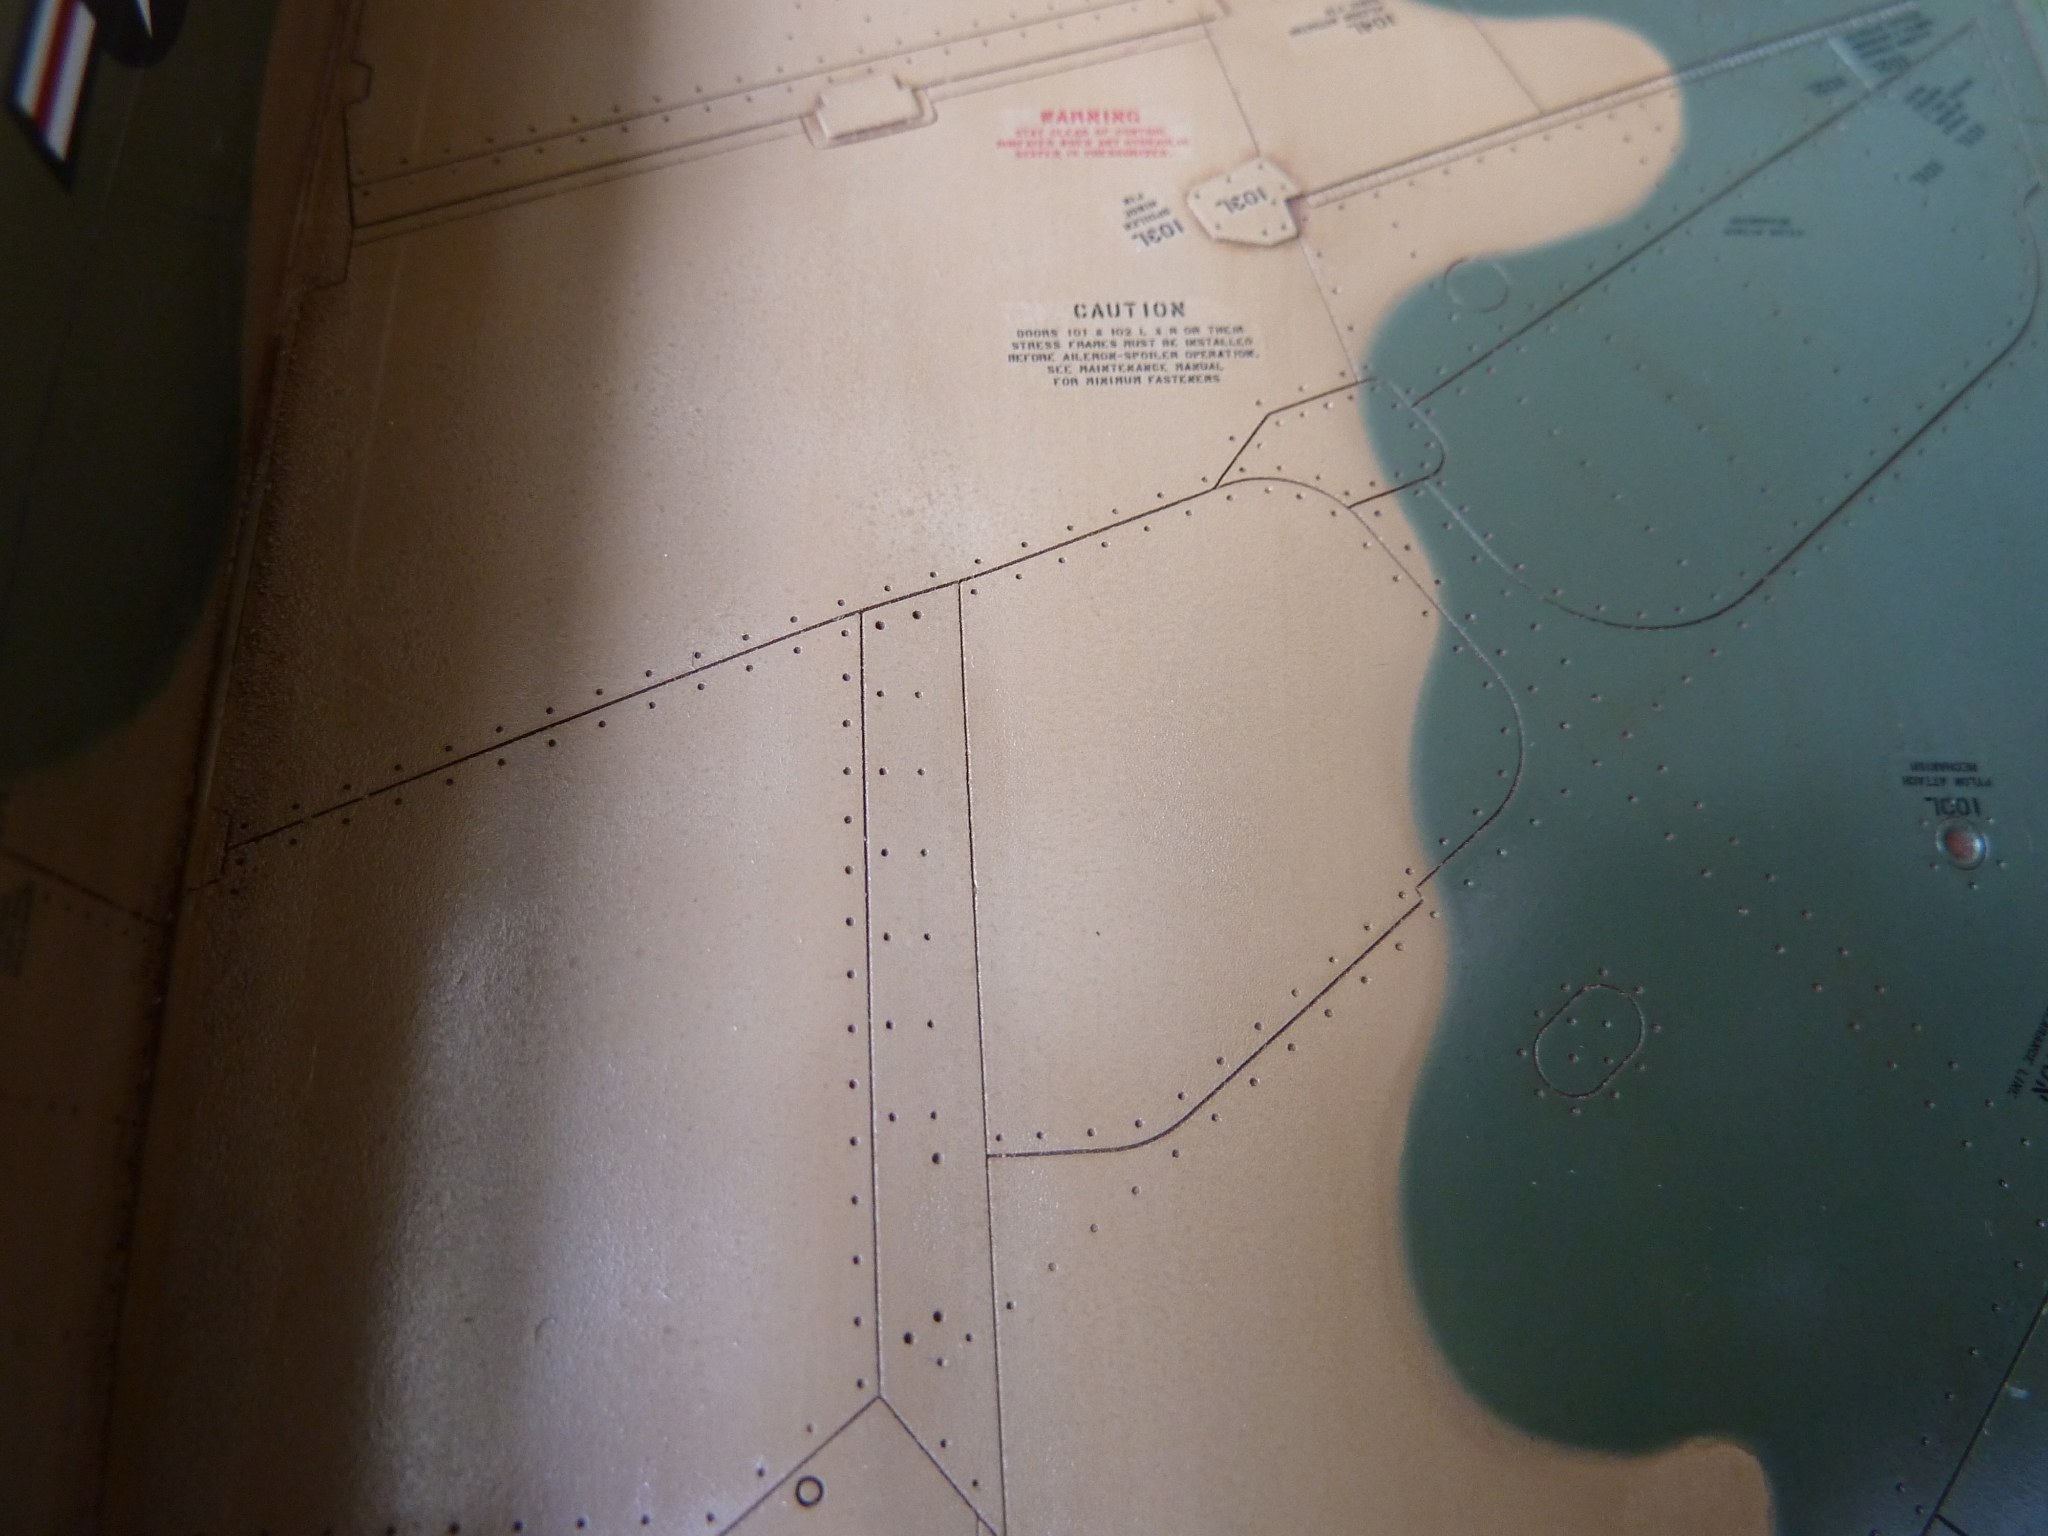
The the next step was to mask all the existing work off. As you can see in the picture of the unpainted aircraft I’d already done the cockpit area and radome. Some people leave the canopies off until after painting but you always get obvious join lines where they attach which just aren’t there on the real thing, so I prefer to glue the fixed sections on and fill any gaps before painting.
I use Tamiya’s own masking tape mainly. It’s low tack so doesn’t (usually!) lift off paint underneath it when you remove it and the waxy paper it’s made of cuts beautifully with a new scalpel. You can be really accurate with it. The other stuff I use is called Maskol from Humbrol. It is a latex solution you paint on and when it dries it forms an impermeable rubber membrane which peels off easily (again, usually).

I won’t go into the details of the majority of the masking, but it’s tedious work and needs to be very accurate. If a change in colour doesn’t follow a panel line exactly the error leaps out at you on the finished model.
Here are the masked off undercarriage bays and airbrakes. The airbrake bays have been done with Maskol, hence the purple colour. I’ve also tidied up the tape edges and sealed seams with the stuff too.
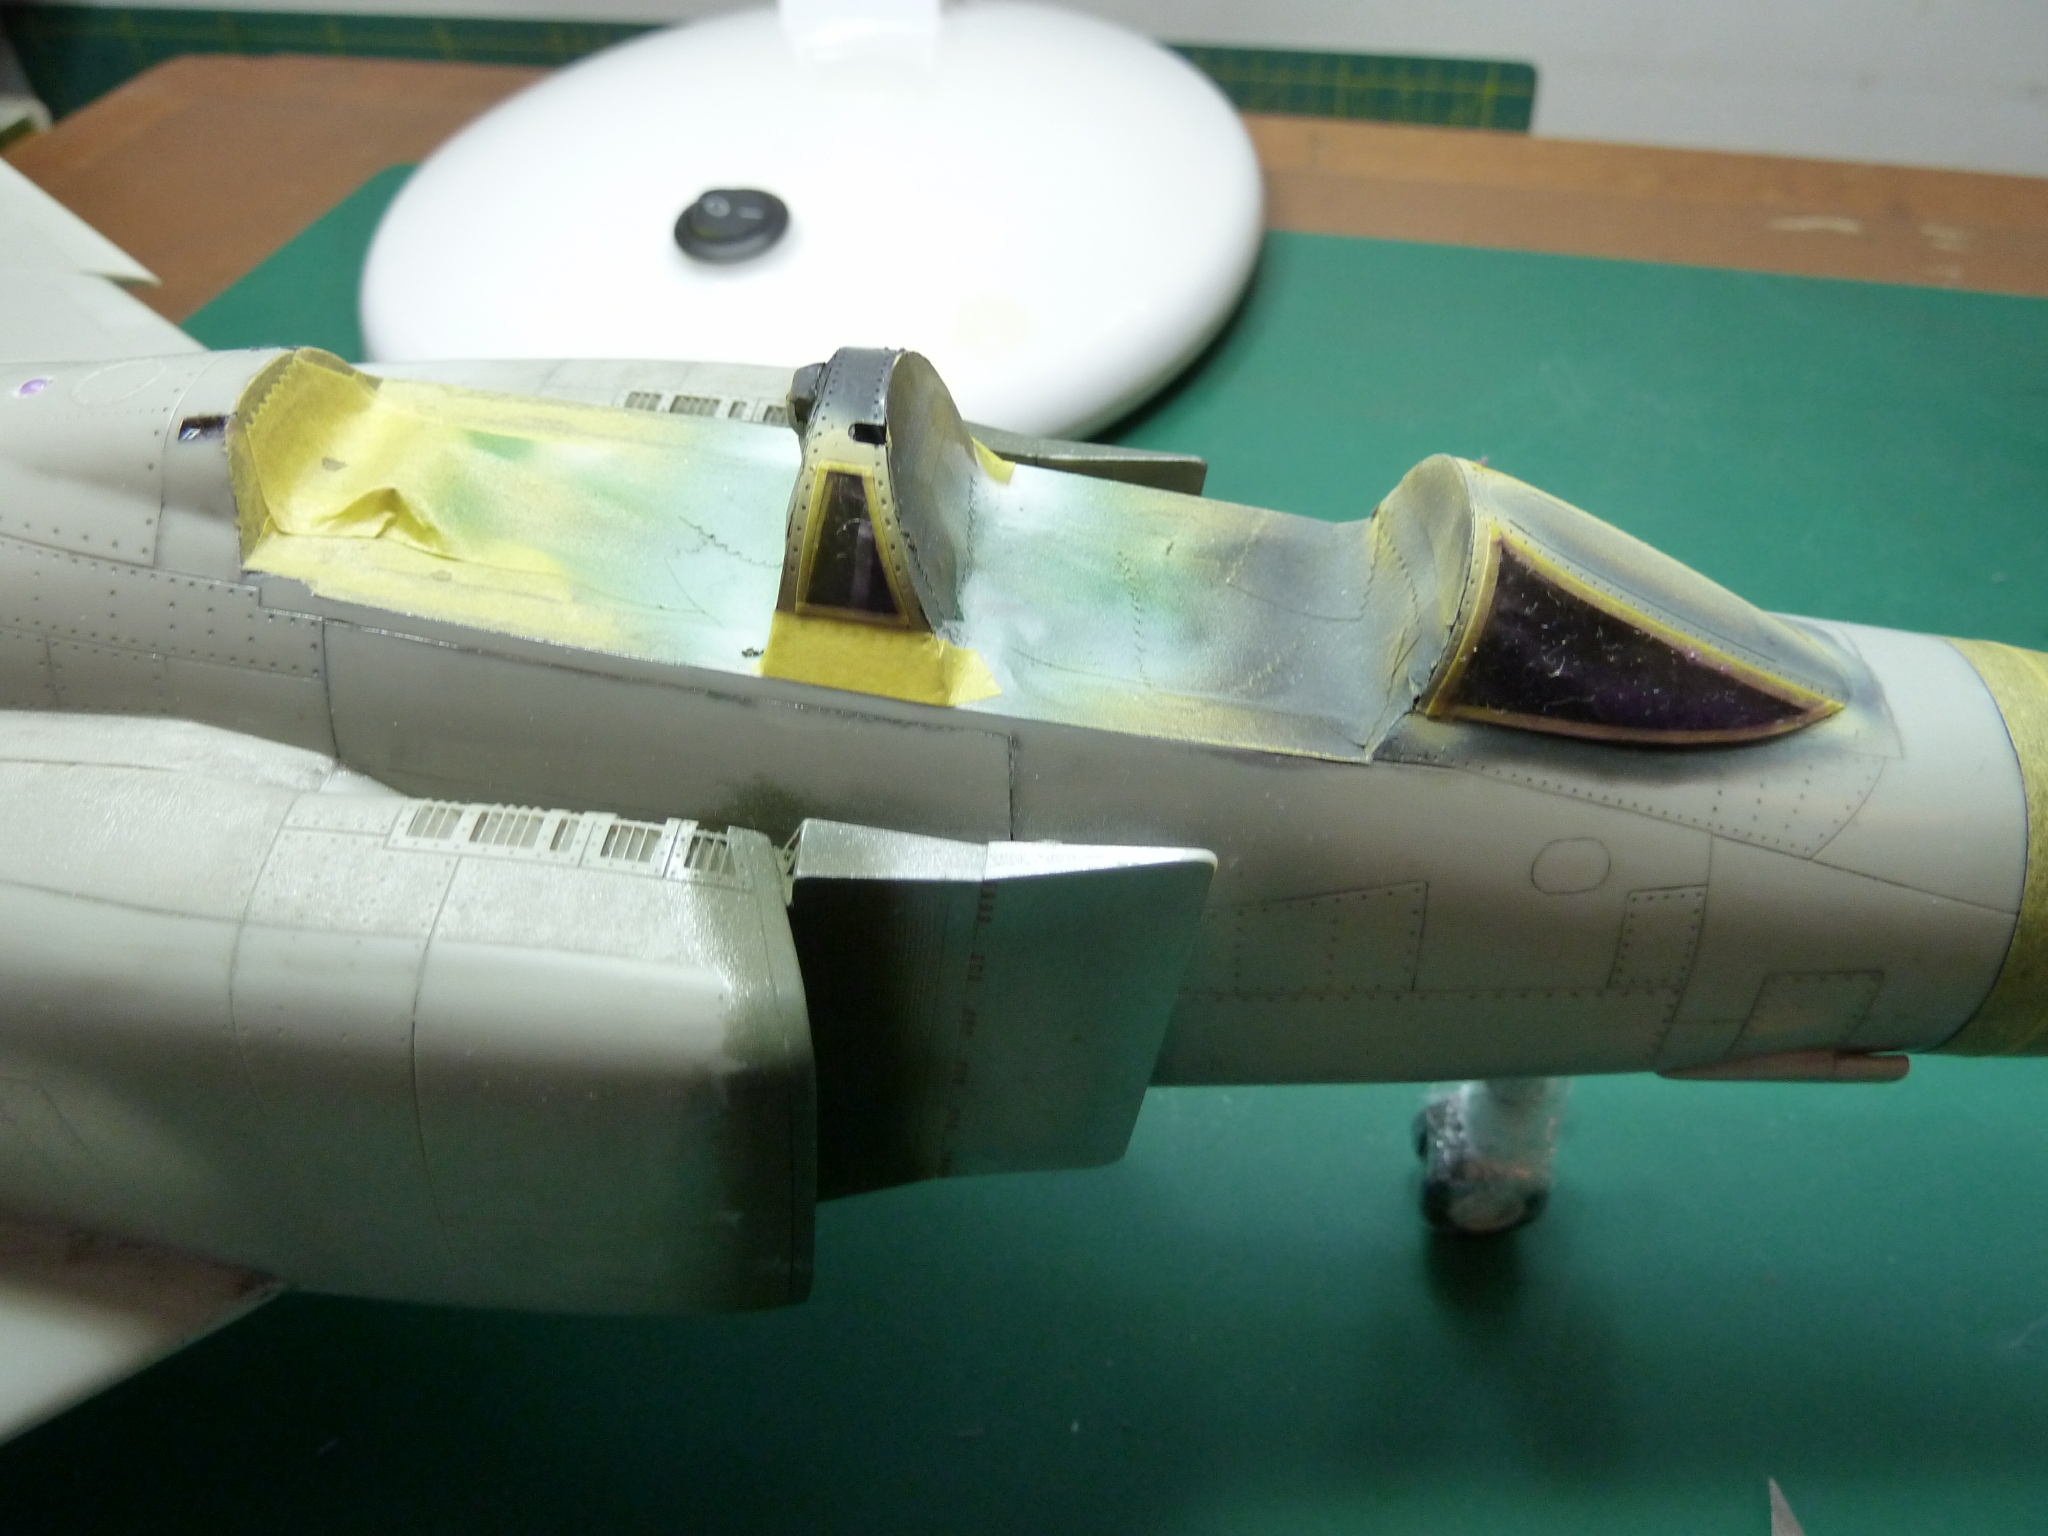
The canopies are particularly fussy and awkward from the masking point of view.
Masking the canopies on this model was actually a two stage process. if you look closely at them in real life they have fibreglass stiffeners on the perspex where it mates with the frames (pale yellow lines). I masked the clear areas first then sprayed on matt black, so the frame would appear black from the inside, then sprayed on the pale yellow. When all that was dry I remasked it all to cover the clear areas and a thin line of the yellow ready for the camouflage.
The centre of the transparency areas are covered in Maskol by the way.
The finished effect
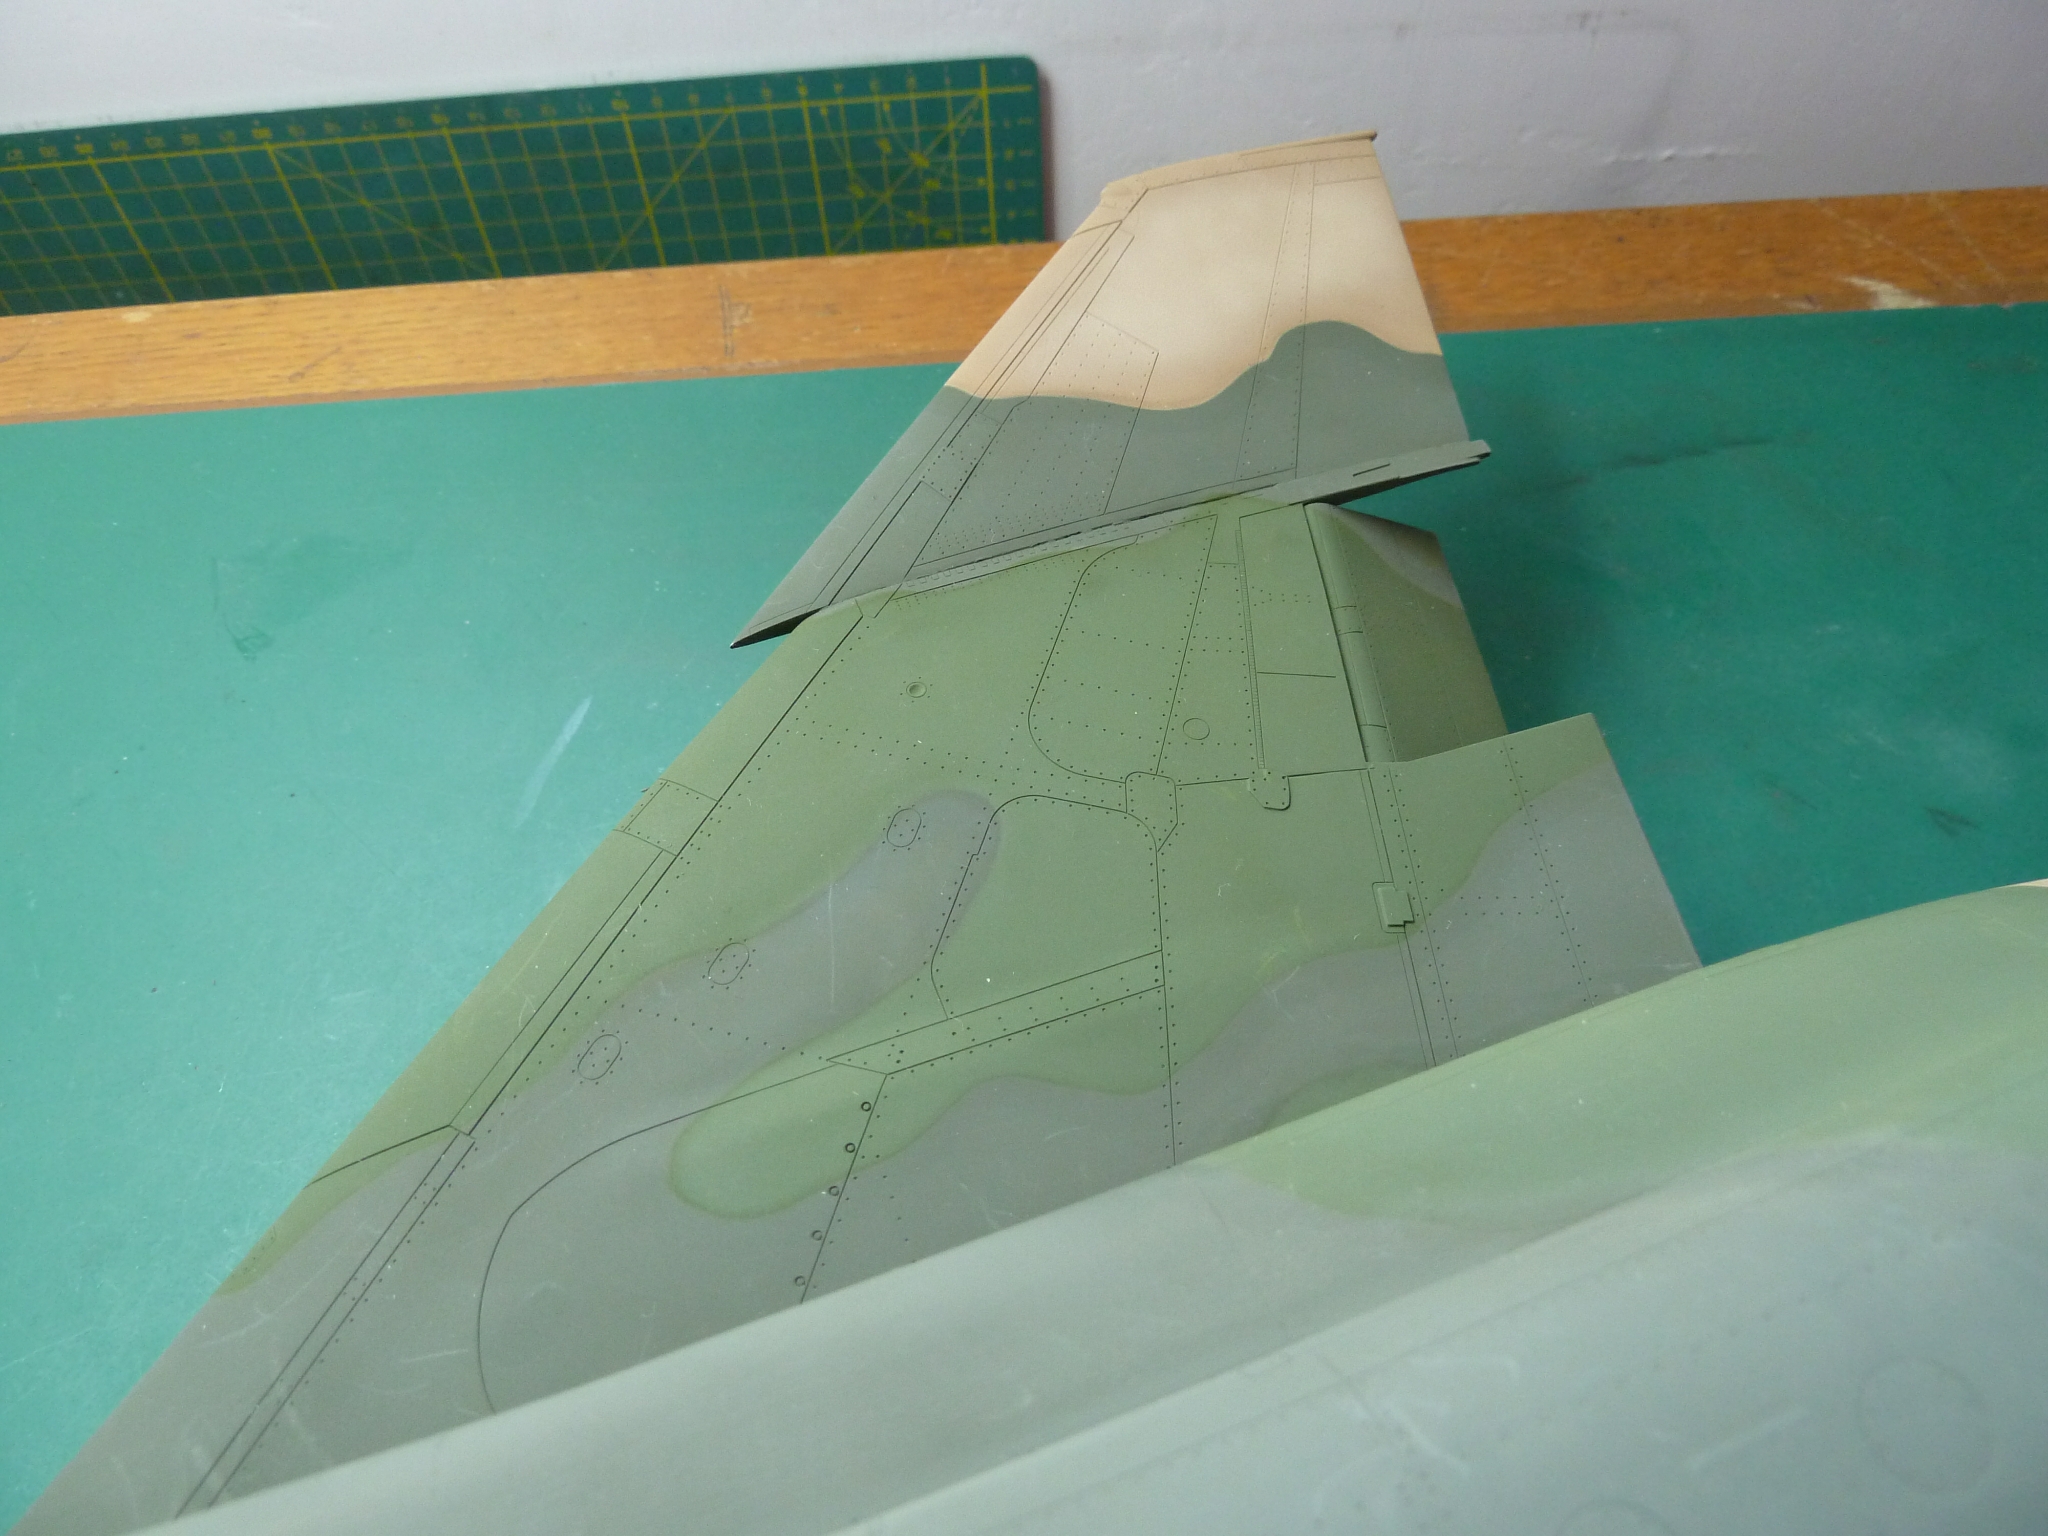
Once everything was protected it was out with the airbrush and the paints. The South East Asia (SEA) colour scheme appears on a lot of US aircraft so at least the exact paint colours are easy to obtain. It’s a 4 colour (color) scheme of dark and mid green, tan brown and light grey undersides.
For no particular reason I started with the dark green and painted the basic pattern freehand. When that was complete I added a little white to the mix and sprayed the centres of the colour blocks. This gives the impression of depth to the panels, adds interest and simulates, in a pastiche kind of way, the ageing and bleaching of the paint in the tropical sun. It’s important to go easy with the technique though. I think it is much better if the effect is almost subliminal.

After the dark green came the mid green. I did consider painting the pattern freehand again, but the feathering of the sprayed edges was too crude compared with the real aircraft so I decided to mask them with rolled up BluTack and paper. The BluTack is good because you can adjust the pattern to your heart’s content before committing to it. Also if you use a rolled bead and spray perpendicular to it you get a slight feathering of the edge underneath it, so it isn’t utterly hard as you’d get with tape. Even so I think the transitions on the final model are a bit too stark really, I want something between freehand and BluTack. As before the centres of the colour blocks were over sprayed with a slightly lighter mix.
It was all repeated again for the tan brown.
BluTack masking

Lightened centres
The lightening this time was overdone a bit. Well that is what I thought at the time. Sitting here with the model in front of me the lightening effect is only really evident in the brown now, and then only if you are looking for it. It is extremely hard to see in the greens, so perhaps a bit more wouldn’t have hurt.

Having completed the upper sides it was the turn of the underside. This was left until last because the colour crosses all the other three on the fuselage sides and wing leading edges. Leaving it last meant that I avoided any problems with steps in the transition line due to errors in masking.


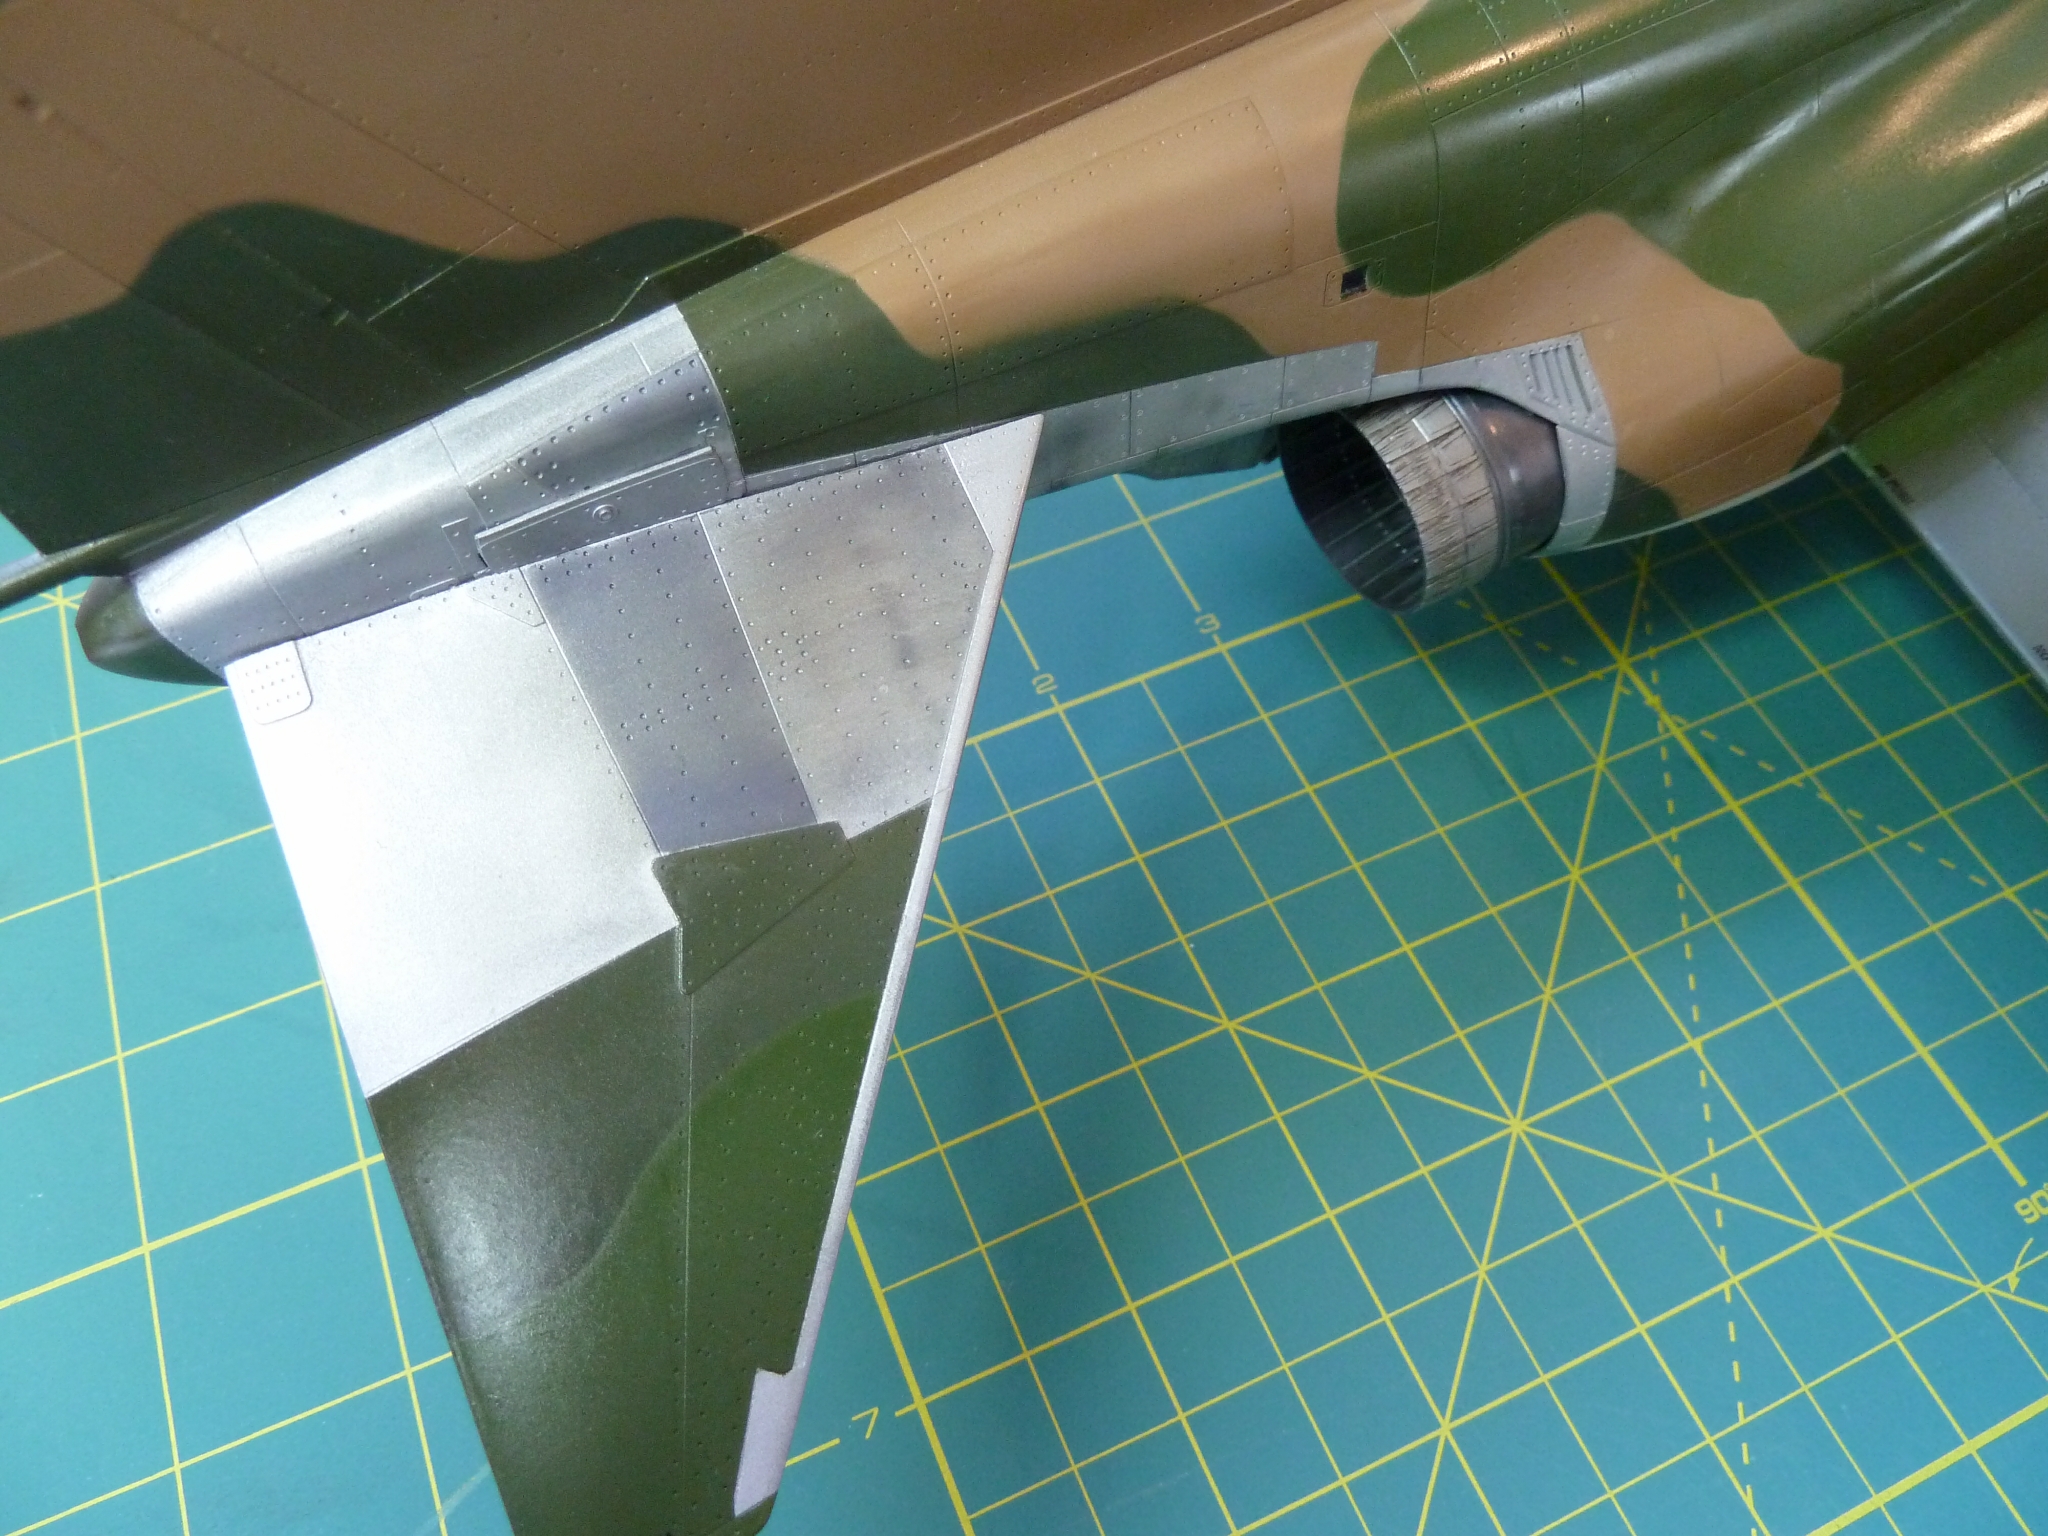
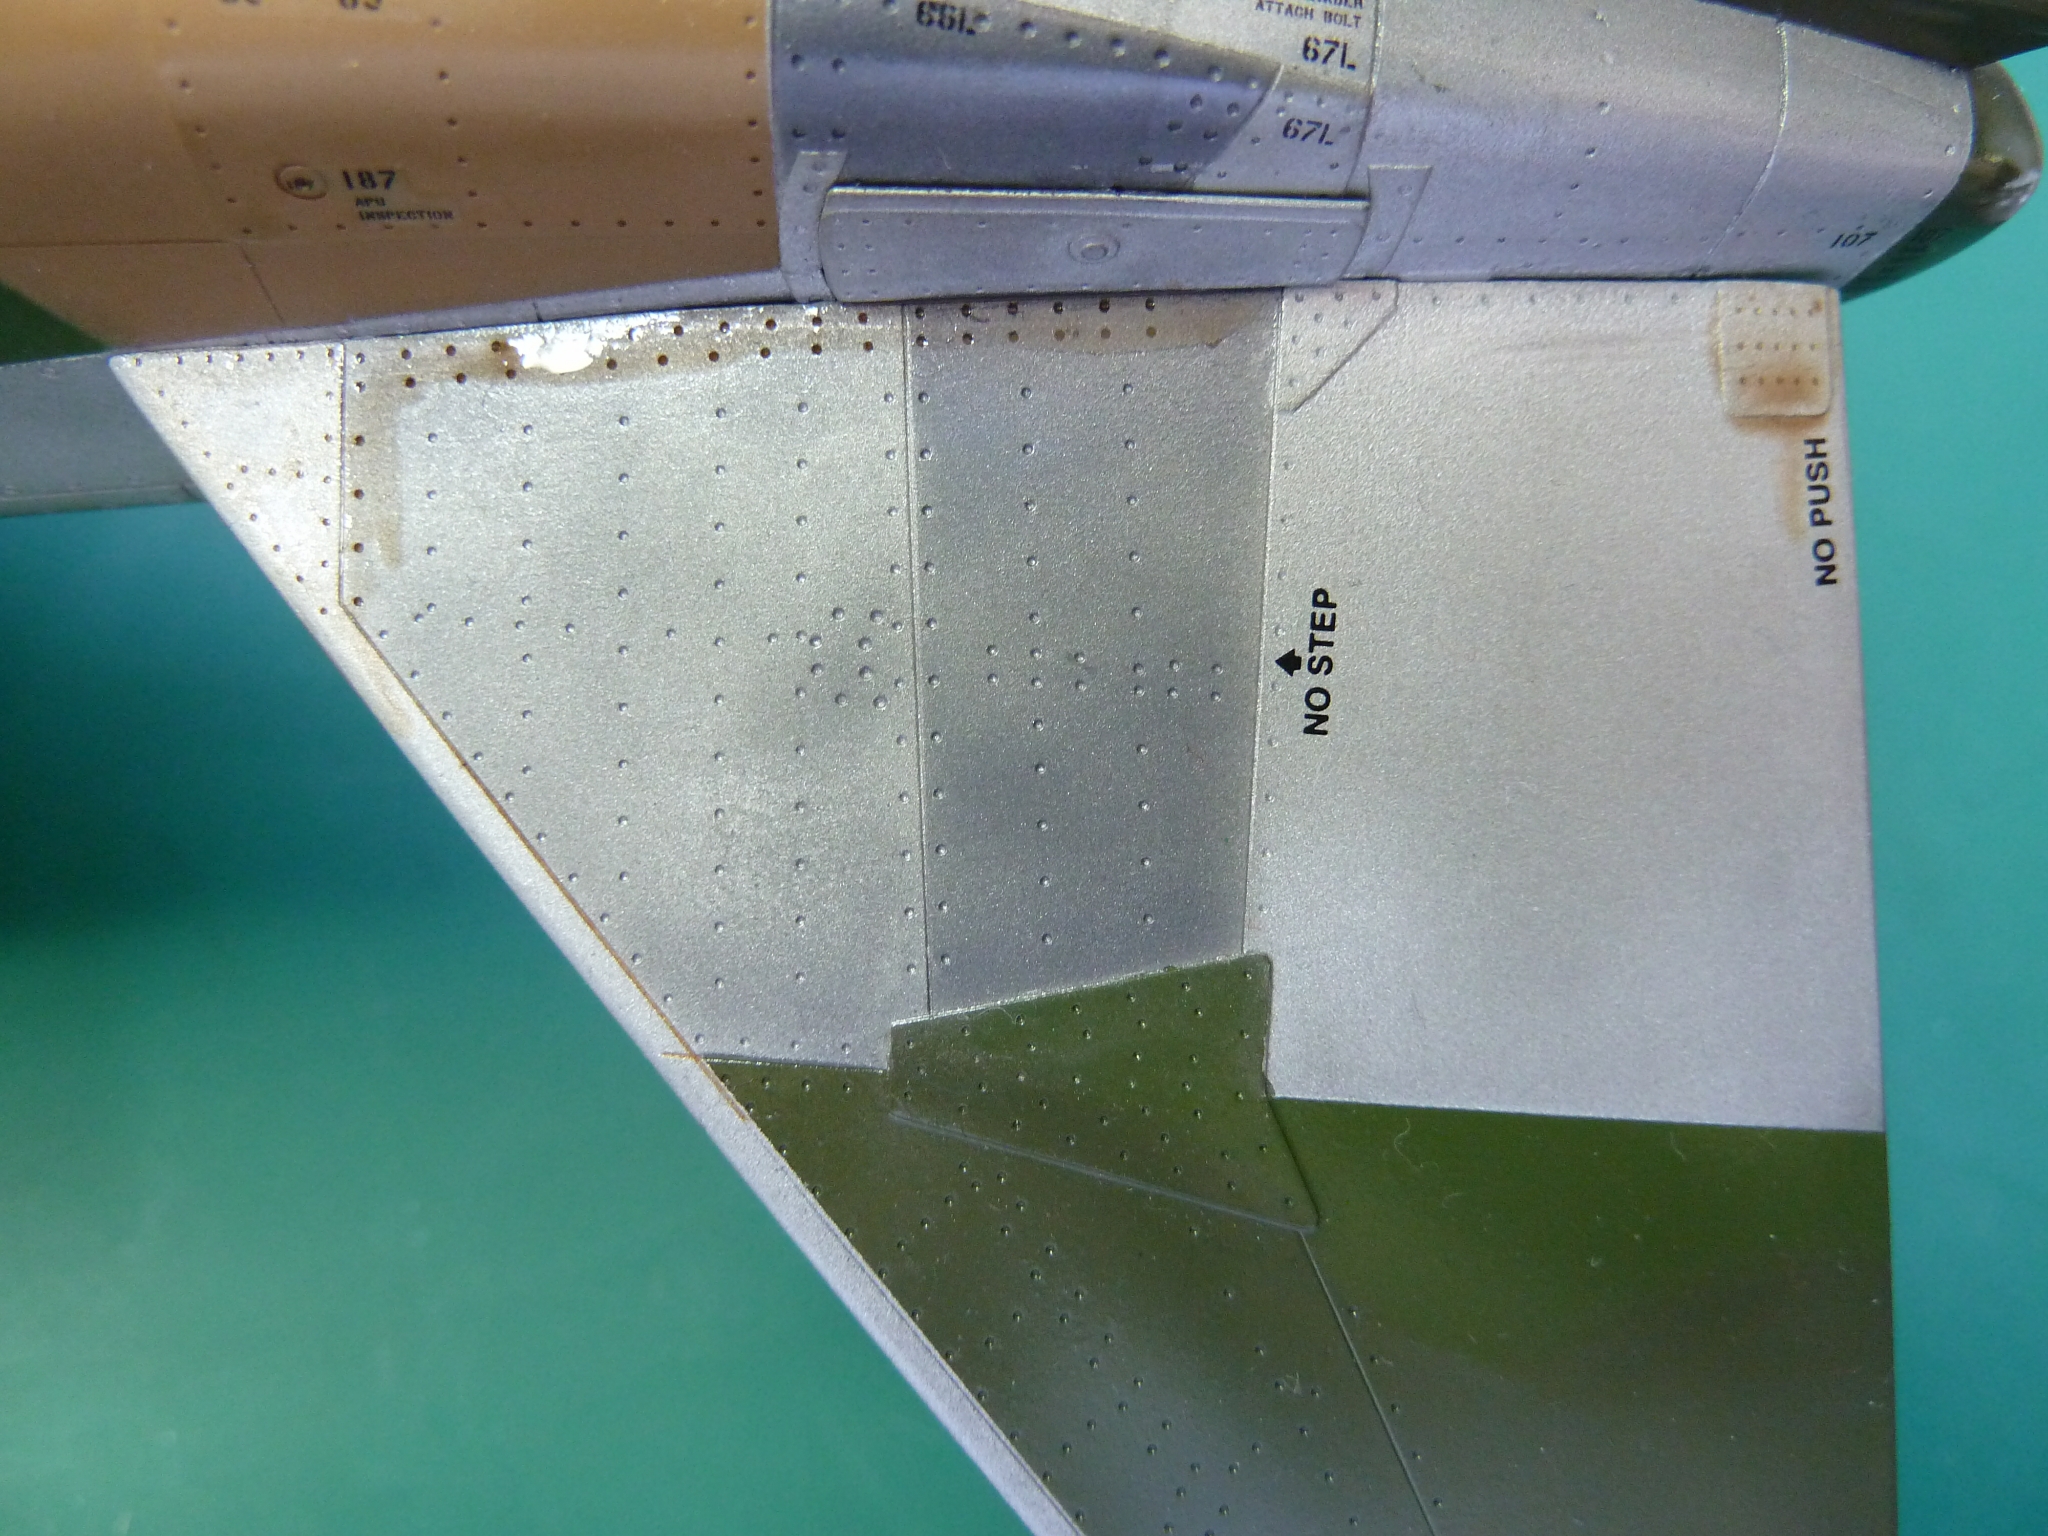
The final stage in the overall painting was to spray the metallics on the empenage and around the nozzles. This was straight airbrushing and masking based on various photos of aircraft in service. There seems to have been a lot of differences between aircraft in the tones and such like. In the end I chose a scheme which was an amalgam of many and exact replica of none. I painted it using Humbrol Metal Cote paints again which, as I’ve said before, are a bit of a sod with my airbrush, but we got there in the end.
I also took the opportunity at this point to spray a little matt black around the nozzle area while it was all masked off to give the impression of soot from the engines.

Having completed all the colours, the final step was to seal everything in with an acrylic gloss varnish. The nozzle pics above were actually taken after the gloss had been applied as you might have spotted. The acrylic is impervious to turps and protects everything from the later weathering stages but is also there to ensure the decals lie down properly on the surface.
If decals are applied to a matt surface they trap microscopic bubbles of air under them which appear as silvering when they dry out. If you apply them to gloss you can avoid this.
So next up was the decals, and this is an area where I really need to improve.
Aside from the gloss varnish, I also use a couple of products when applying decals called ‘Micro Sol’ and ‘Micro Set’. Micro Set is applied to the location where the decal is to be placed and Micro Sol directly on the decal once it is in position. The two solutions actually dissolve the acrylic varnish and the decal to an extent, so that when they dry out the decal is pulled down into all the dents and panel lines on the model. The flip side is that once applied you are committed as the decal becomes very, very delicate and will tear if you fiddle with it.
Aside from the above, applying the decals will be familiar to anyone who has made models in the past. Cut the one you want out, drop in some water and once the adhesive has softened slide it off the backing and into position.
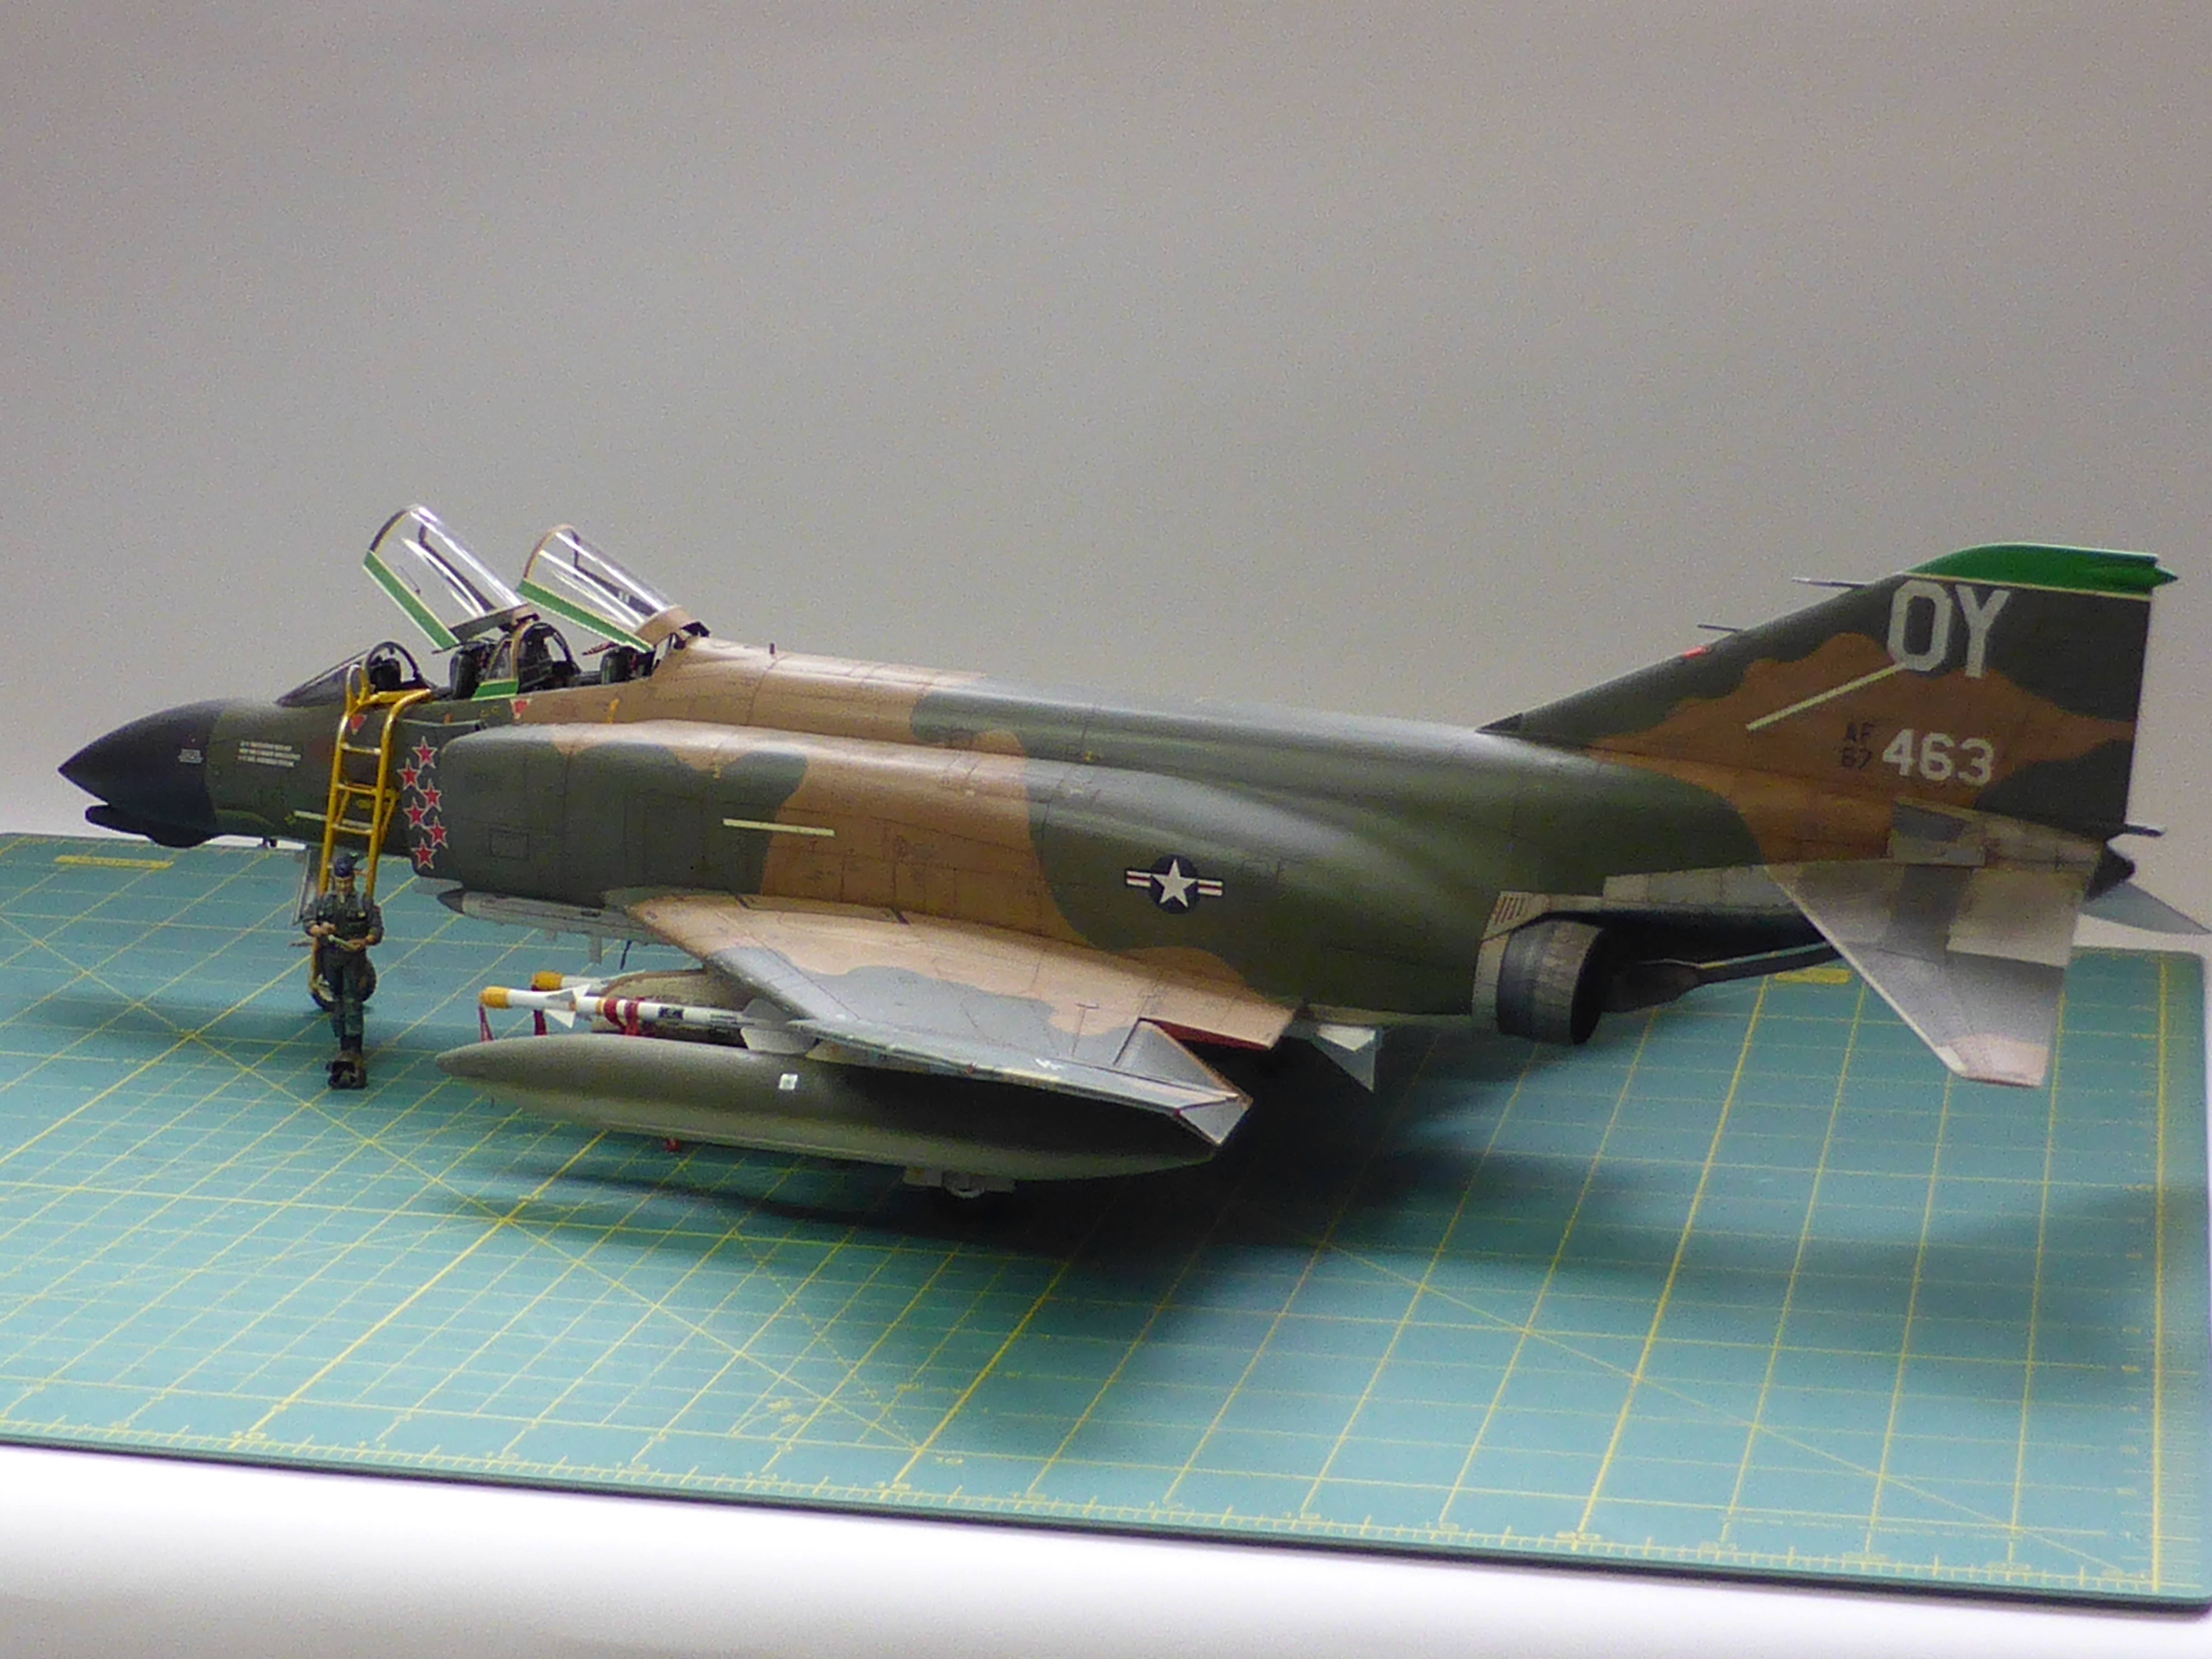
I put the main Tamiya decals on first and they went without a hitch. Then I put the special set on that represented 463. These were a complete and utter sod. I have never used decals so fragile and given their large size they were a nightmare to work with. The phrase never again springs to mind. The tail numbers were particularly difficult on one side. The first side went like a dream but the other side broke and split up badly. I ended up trying to put a mosaic together. I got there after a fashion, but the tail number isn’t straight at all and one figure is noticeably askew. But given the mess it’s made out of, it’s actually quite good, honest. To add insult to injury, a while after applying these particular decals I noticed that one of them even has a spelling mistake in one of the crew’s names. It was a Greek company that made them. No wonder the country is bankrupt.

Skew whiff 6
After that débâcle I moved on to the detailed panel marking decals. These proved to be a bit intense and the positioning instructions vague. There are also a lot of variations which without seeing the actual aircraft you can only guess at. Some had black text in places, some red etc. Some aircraft it would appear had none at all, I assume having lost them during repainting in the field.
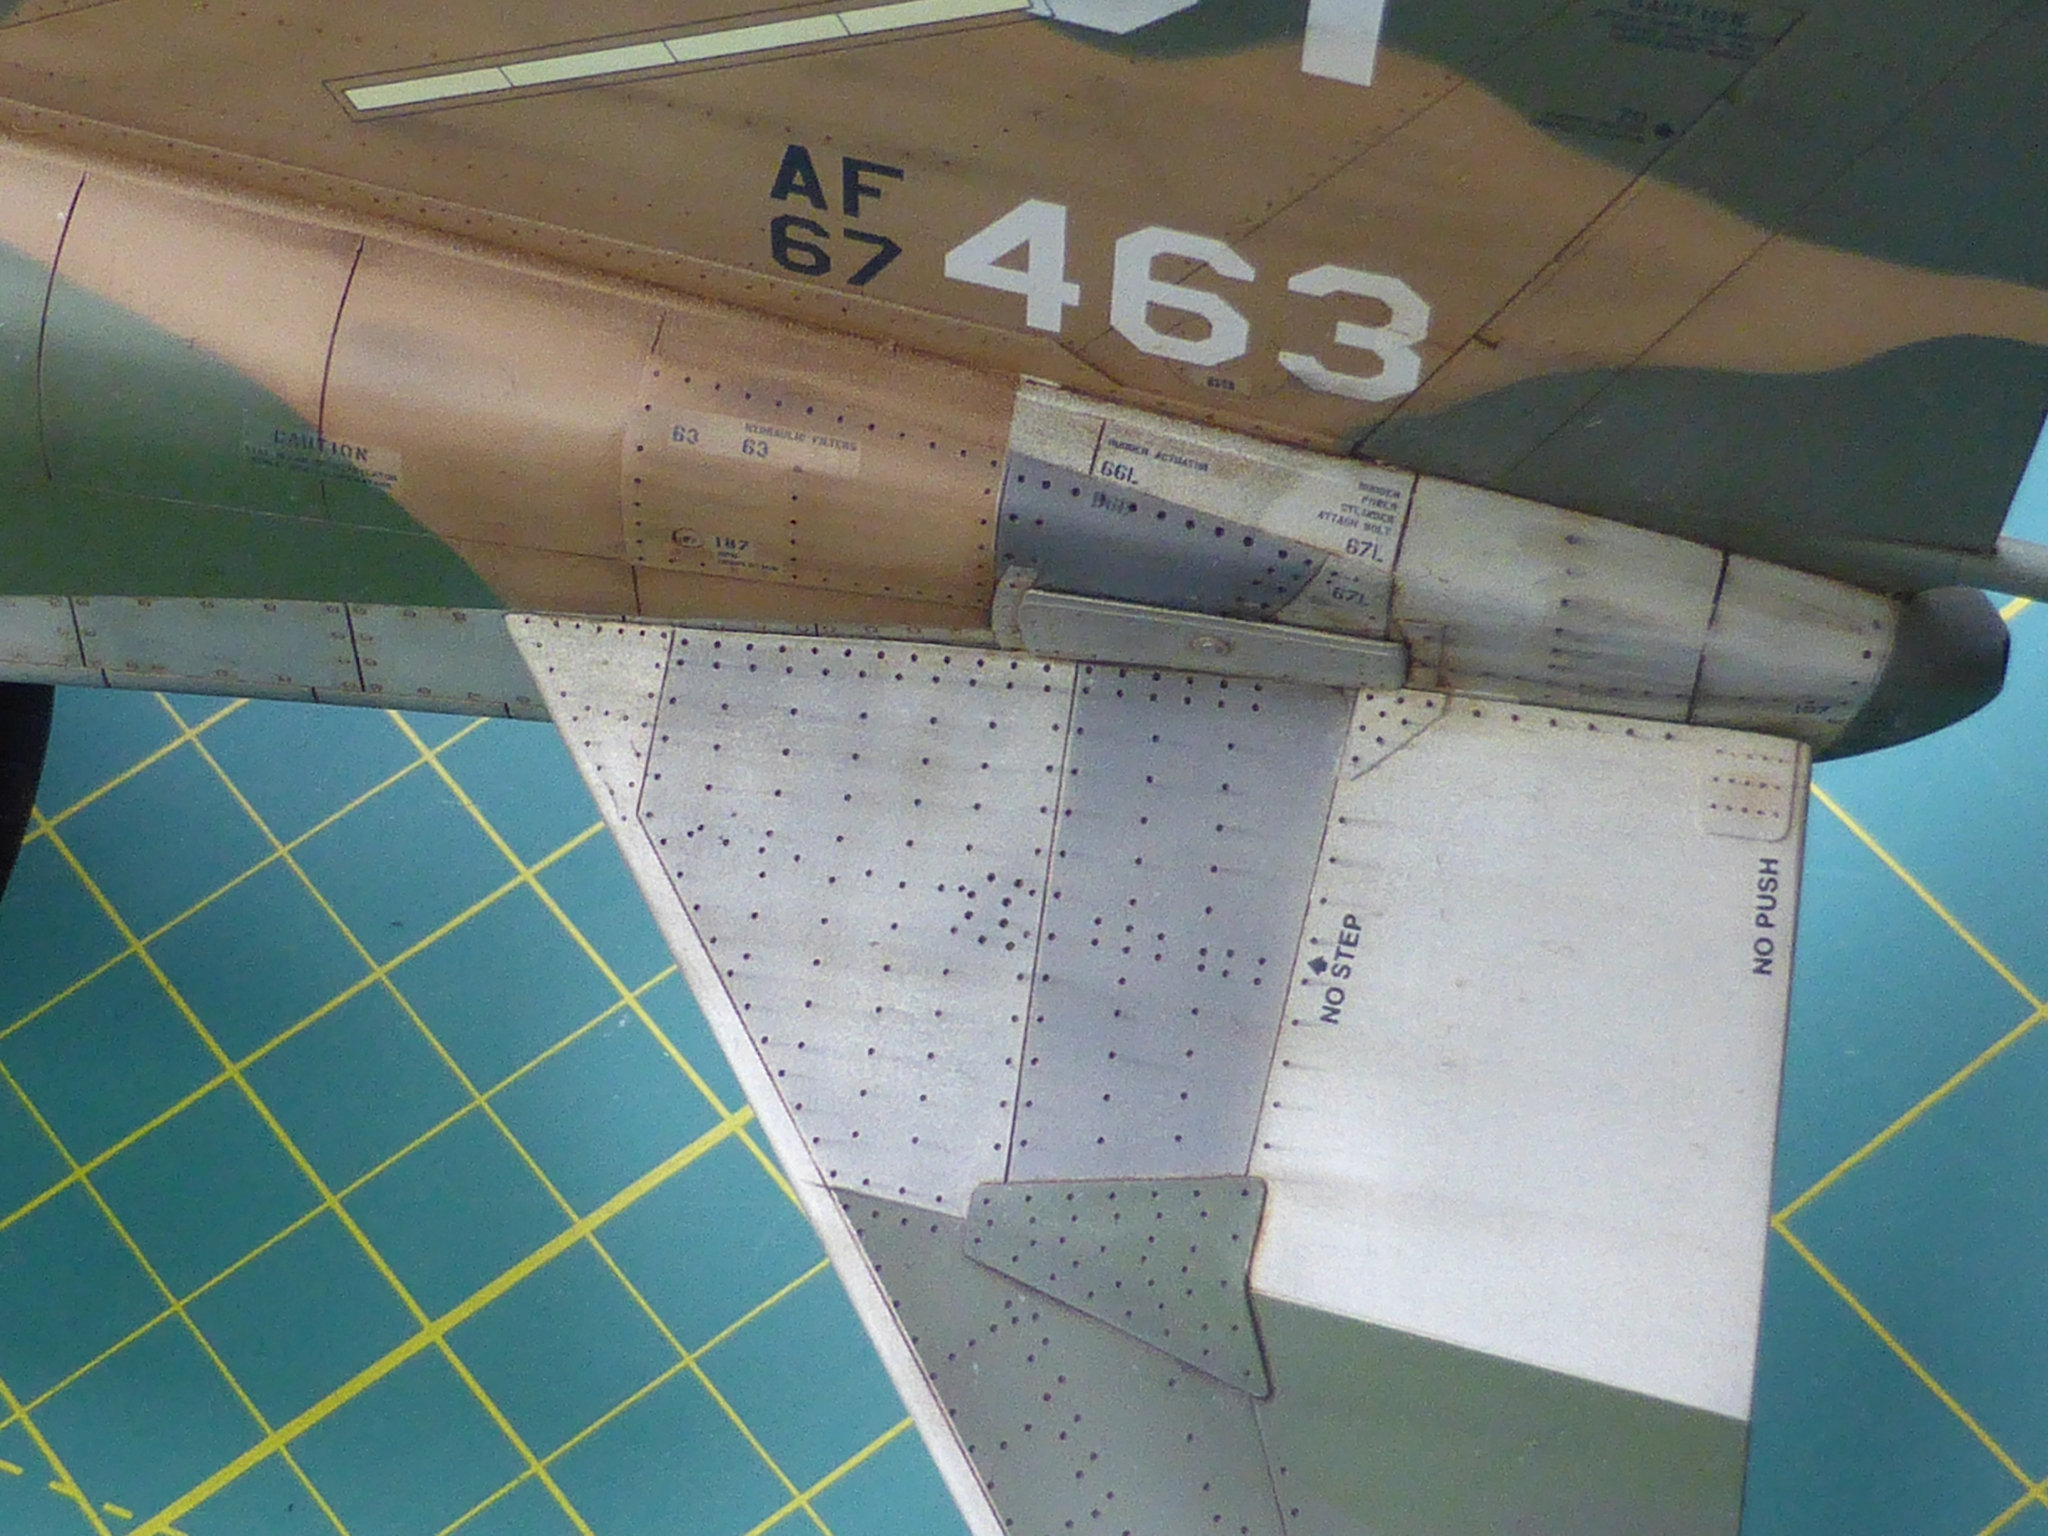
Close-up pictures of 463 show that it definitely had them on the nose so I assume all over.
When I checked how many minor decals were included it came to around 500! And as I say positioning info was vague at best. In places there simply wasn’t enough space to include all that the instructions said should go there. Also, if you recall I was using a set designed for the F-4E/RF-4E not the D, so quite a few were not applicable. Even so I suspect about 400 went on and it took most of a week to do.

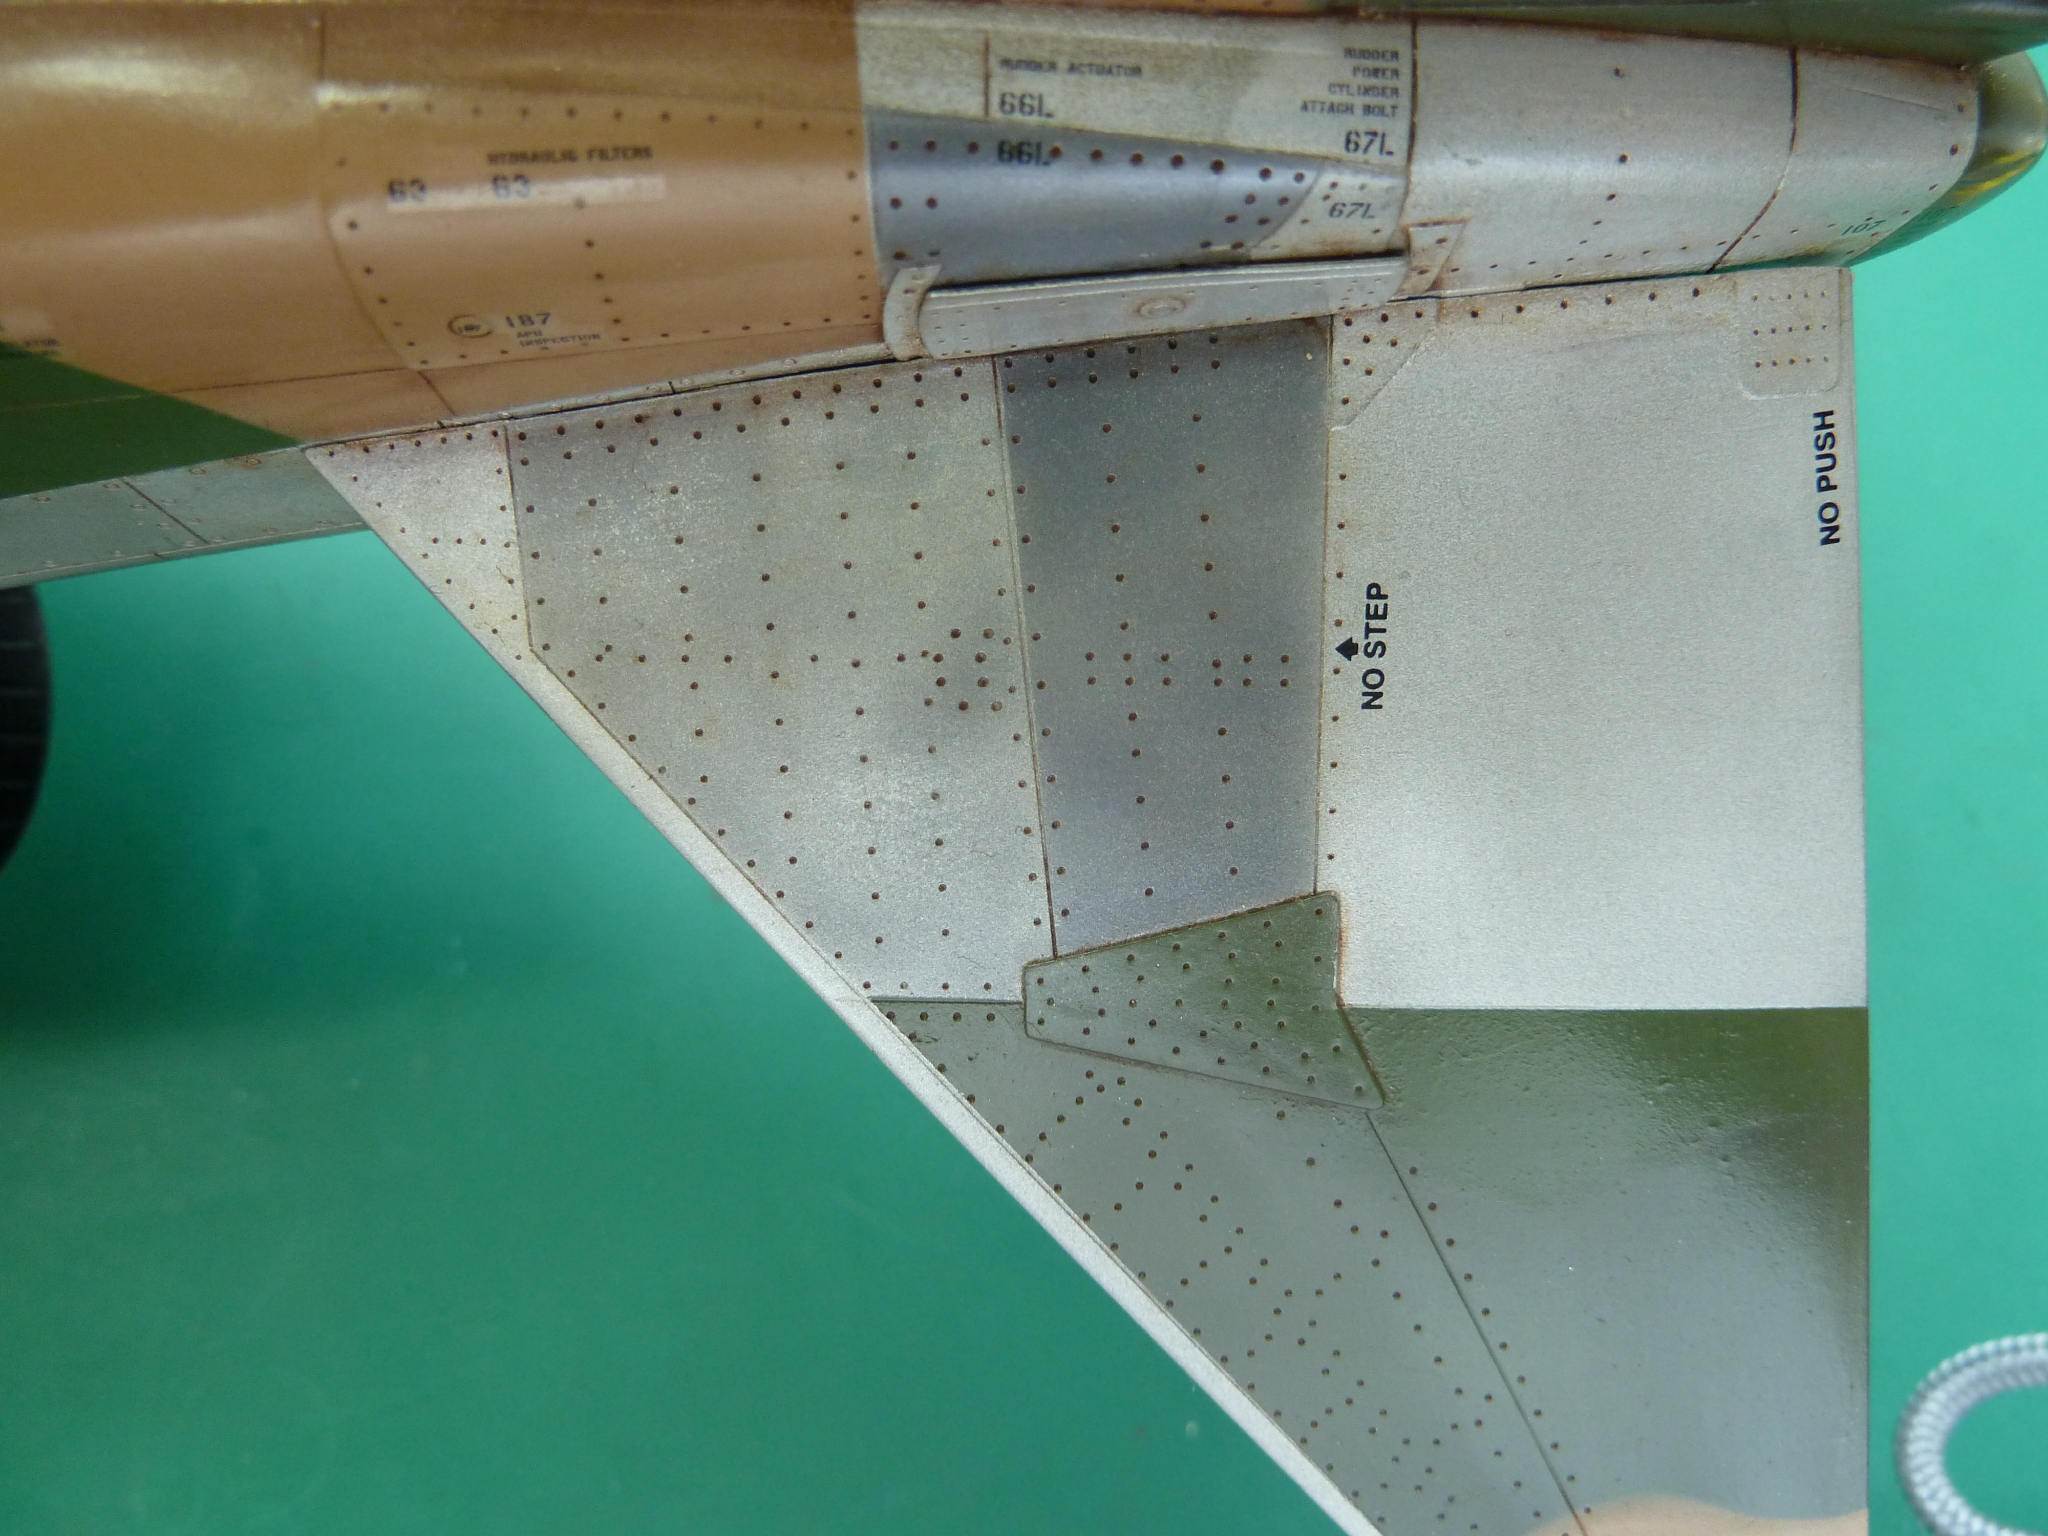
I also had a lot of problems with the panel decals silvering, despite all the precautions. Others manage to apply them reliably and repeatedly so it’s just something I must get better at. The silvering is a constant annoyance when I look at the model though.
You can see what I mean in this picture. The silvering makes the carrier sheet of the panel decals obvious.

Having finished the decals, for better or worse, I put another coat of acrylic gloss varnish on top to seal and protect everything from the weathering which was the next step.
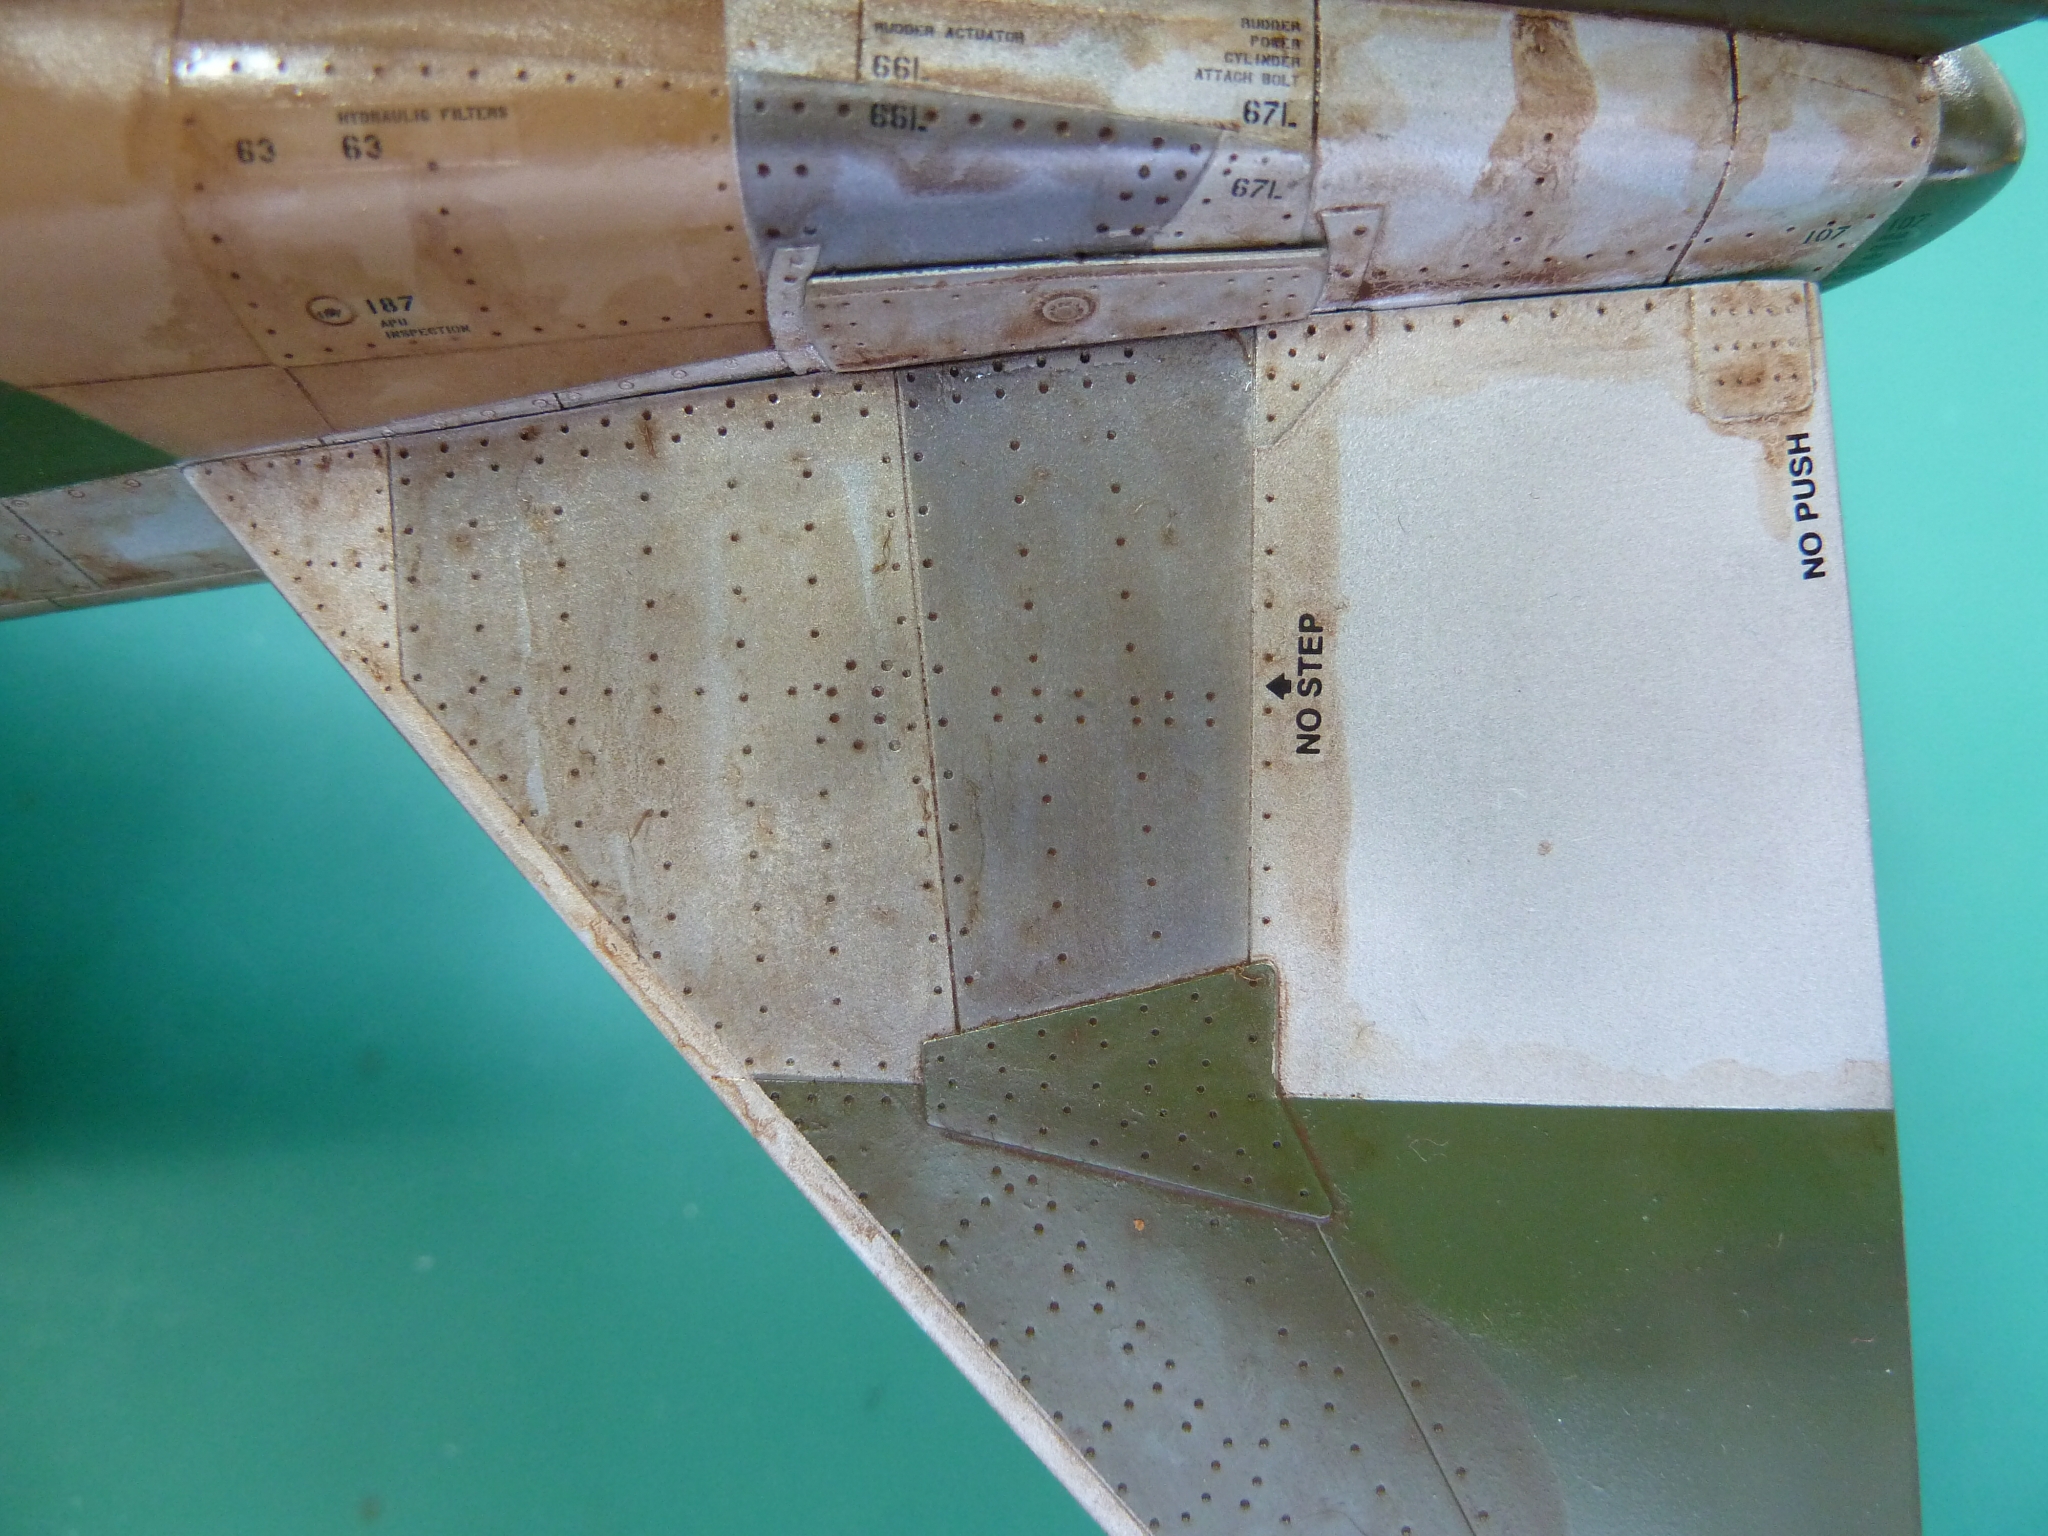
The first stage of the weathering was to apply scratches and wear to the leading edges of the wings, fin and intakes. These get quite a bit of stick on operational aircraft as even rain is hard at supersonic speeds. The droplet doesn’t even feel the aircraft coming until a few millimetres before impact so they just smash into it. Dust at low level is also quite abrasive.
I applied a fair degree of chipping to the wings and got a bit carried away if I’m honest. It’s over done and the chip sizes are too big. I’d be more circumspect if I did it again. The chipping on the intakes and fin is better.

I also put some chipping marks around the sides of the cockpit entry, more on the port than the starboard as that is side where the crew get in.

The next stage of the weathering was to apply a localised wash to all of the panel lines and rivets. The wash in this case was less dilute than used before as I was after a contrasting colour rather than a delicate tint.
The pictures below show the model immediately after the panel line wash was applied. As you see you don’t have to be that accurate with it.

Once the panel line wash was about 3/4 dry I went around with a soft cloth slightly dampened with turps and wiped it off. This removes the bulk of the wash but leaves behind the stuff in the panel lines themselves, leaving you with a nicely highlighted line especially on mouldings as crisp as Tamiya’s.
The various steps are shown below on the tailplane.
Just beginning to apply the wash.
Wash complete
Wash removed
The acrylic gloss coat is there to protect the existing enamel paints from all of this treatment.
The next stage was to apply dirt streaks at all the likely spots on the airframe. Anywhere where water might collect and drain back from as the aircraft flies through the air. So streaks were added on the downwind side of access panels, panel lines and rivet holes. I used a mix of media to do this.
On the metallics I put a dab of graphite from my 6B pencil in each rivet hole then wiped the whole surface front to back with a soft brush to streak them all in the same direction.
For most of the others I used a very small dab of artists oils. A mix of black and burnt umber in this case.
Around the panels it’s important to get a sharp into wind edge so before applying the streaks I masked off the upstream side.

The very last thing before I removed the remaining masks on the canopy transparencies was to give the whole model a VERY delicate misting of Tamiya acrylic buff all over. As with the droptanks this gives the impression of dust embedded in the paint’s surface and it also pulls everything together.
Combined with the washes and streaks it unifies all the stark camouflage colours into a whole. They stop looking like individual colour blocks next to each other, which are a bit false, and suddenly look more like the real thing.
After a check over the model for any unfinished areas (I missed one! A dab of oils that haven’t been blended into a streak dammit) I sealed everything in and protected it all with a coat of matt varnish and that was it for the airframe and the masks could all come off for the first time for months.
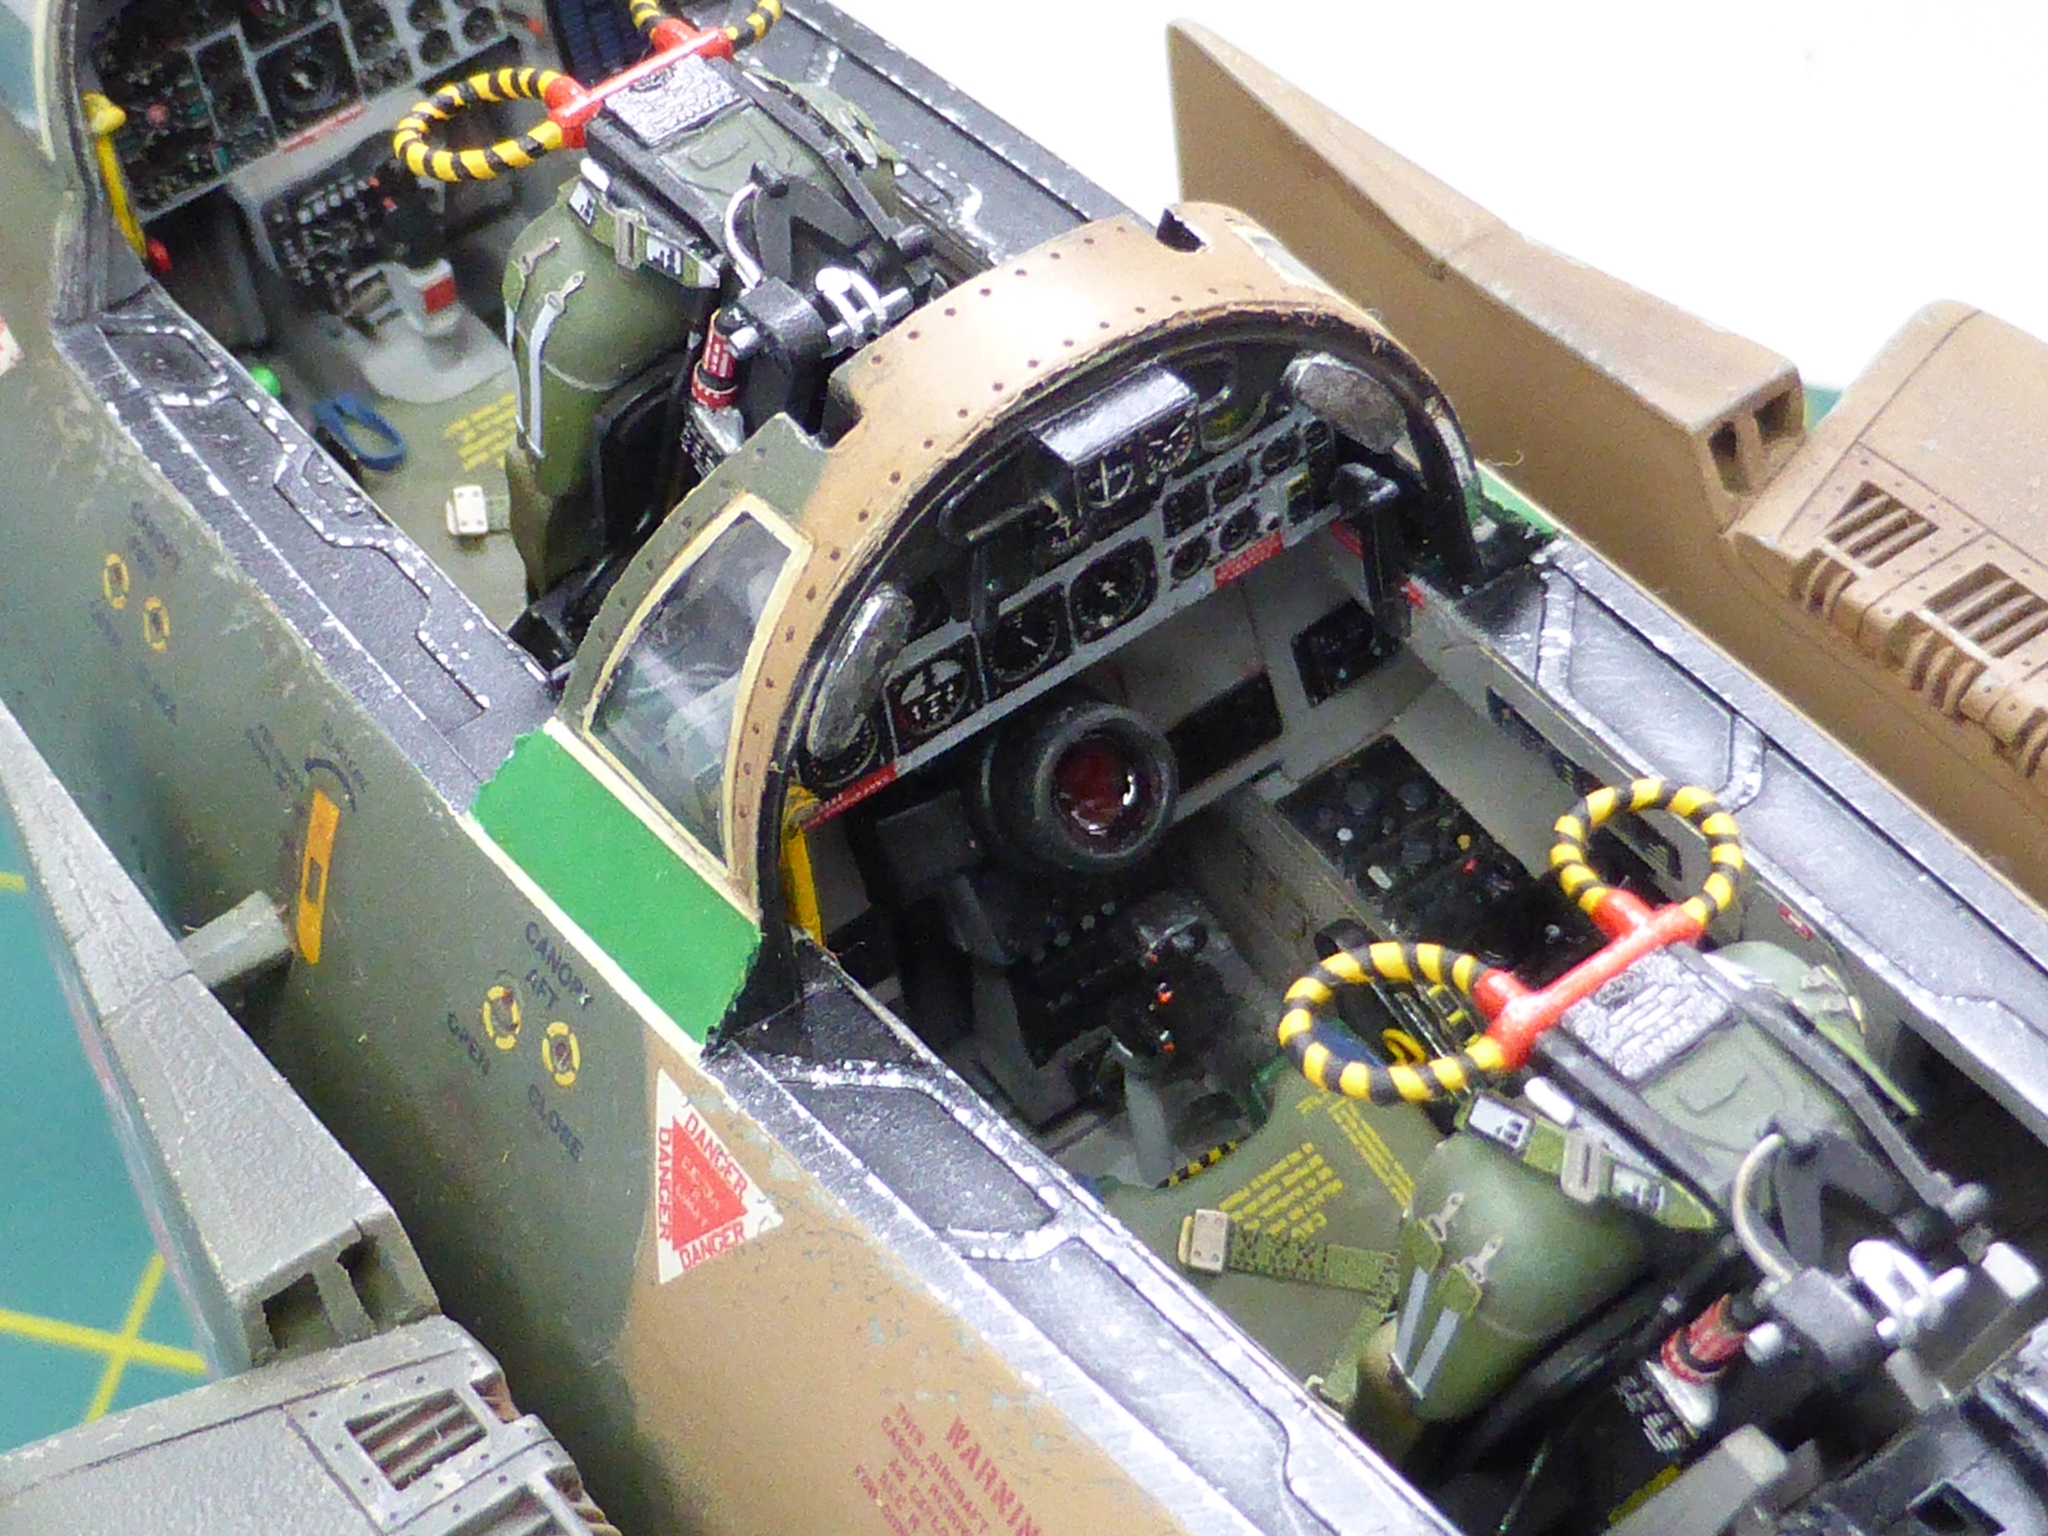
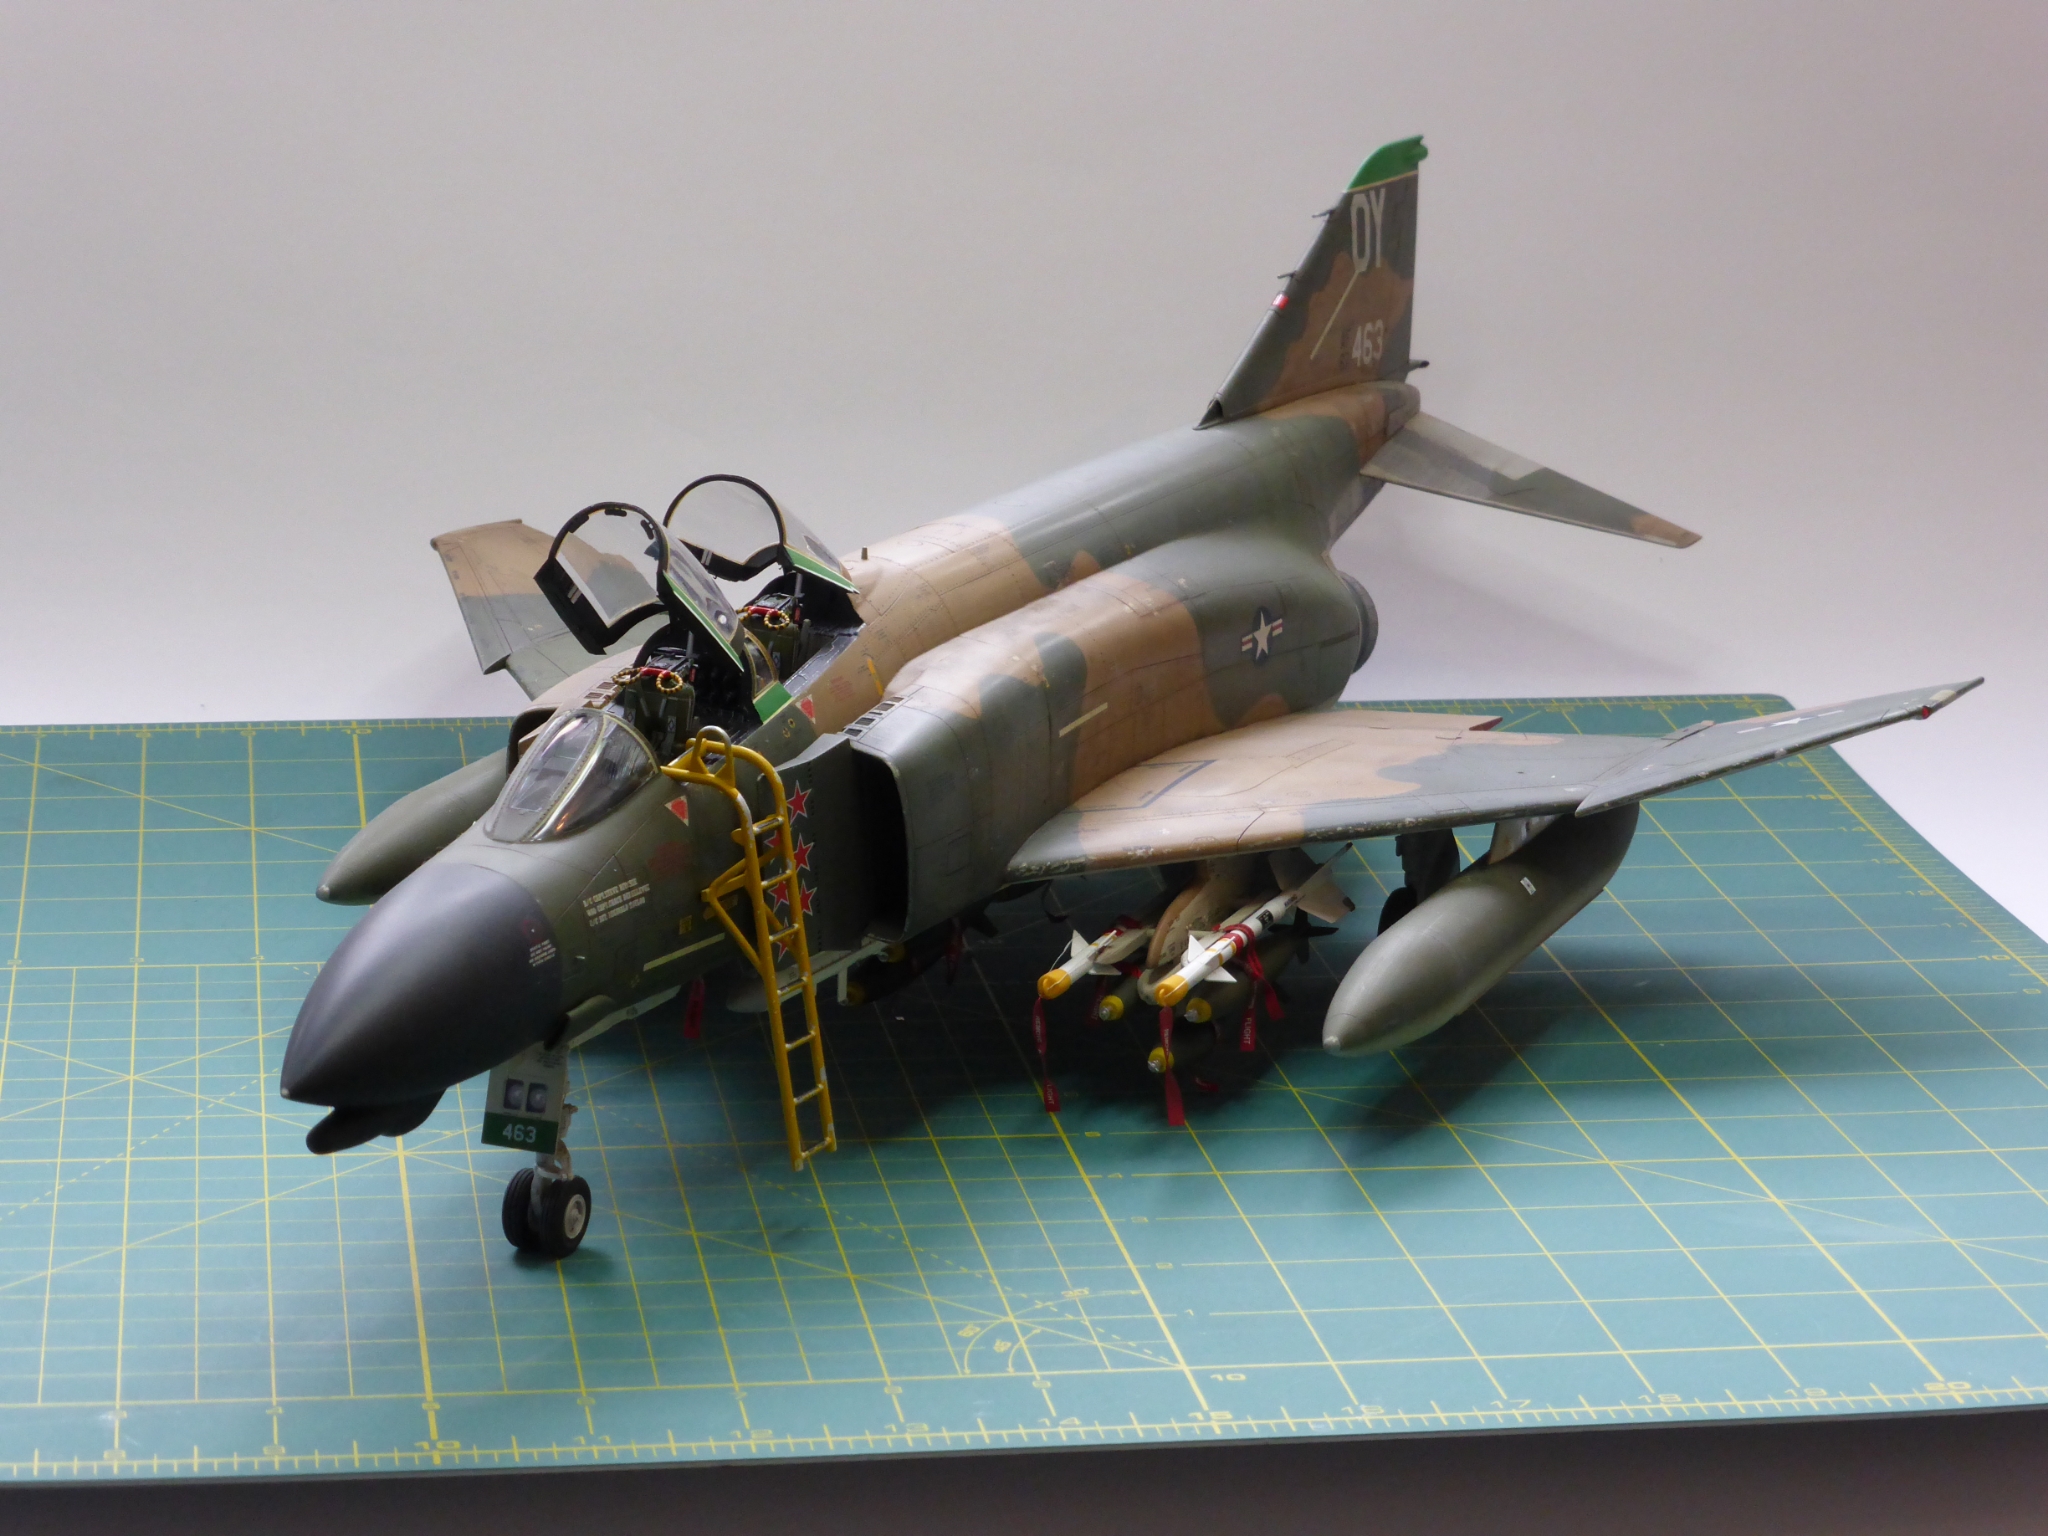
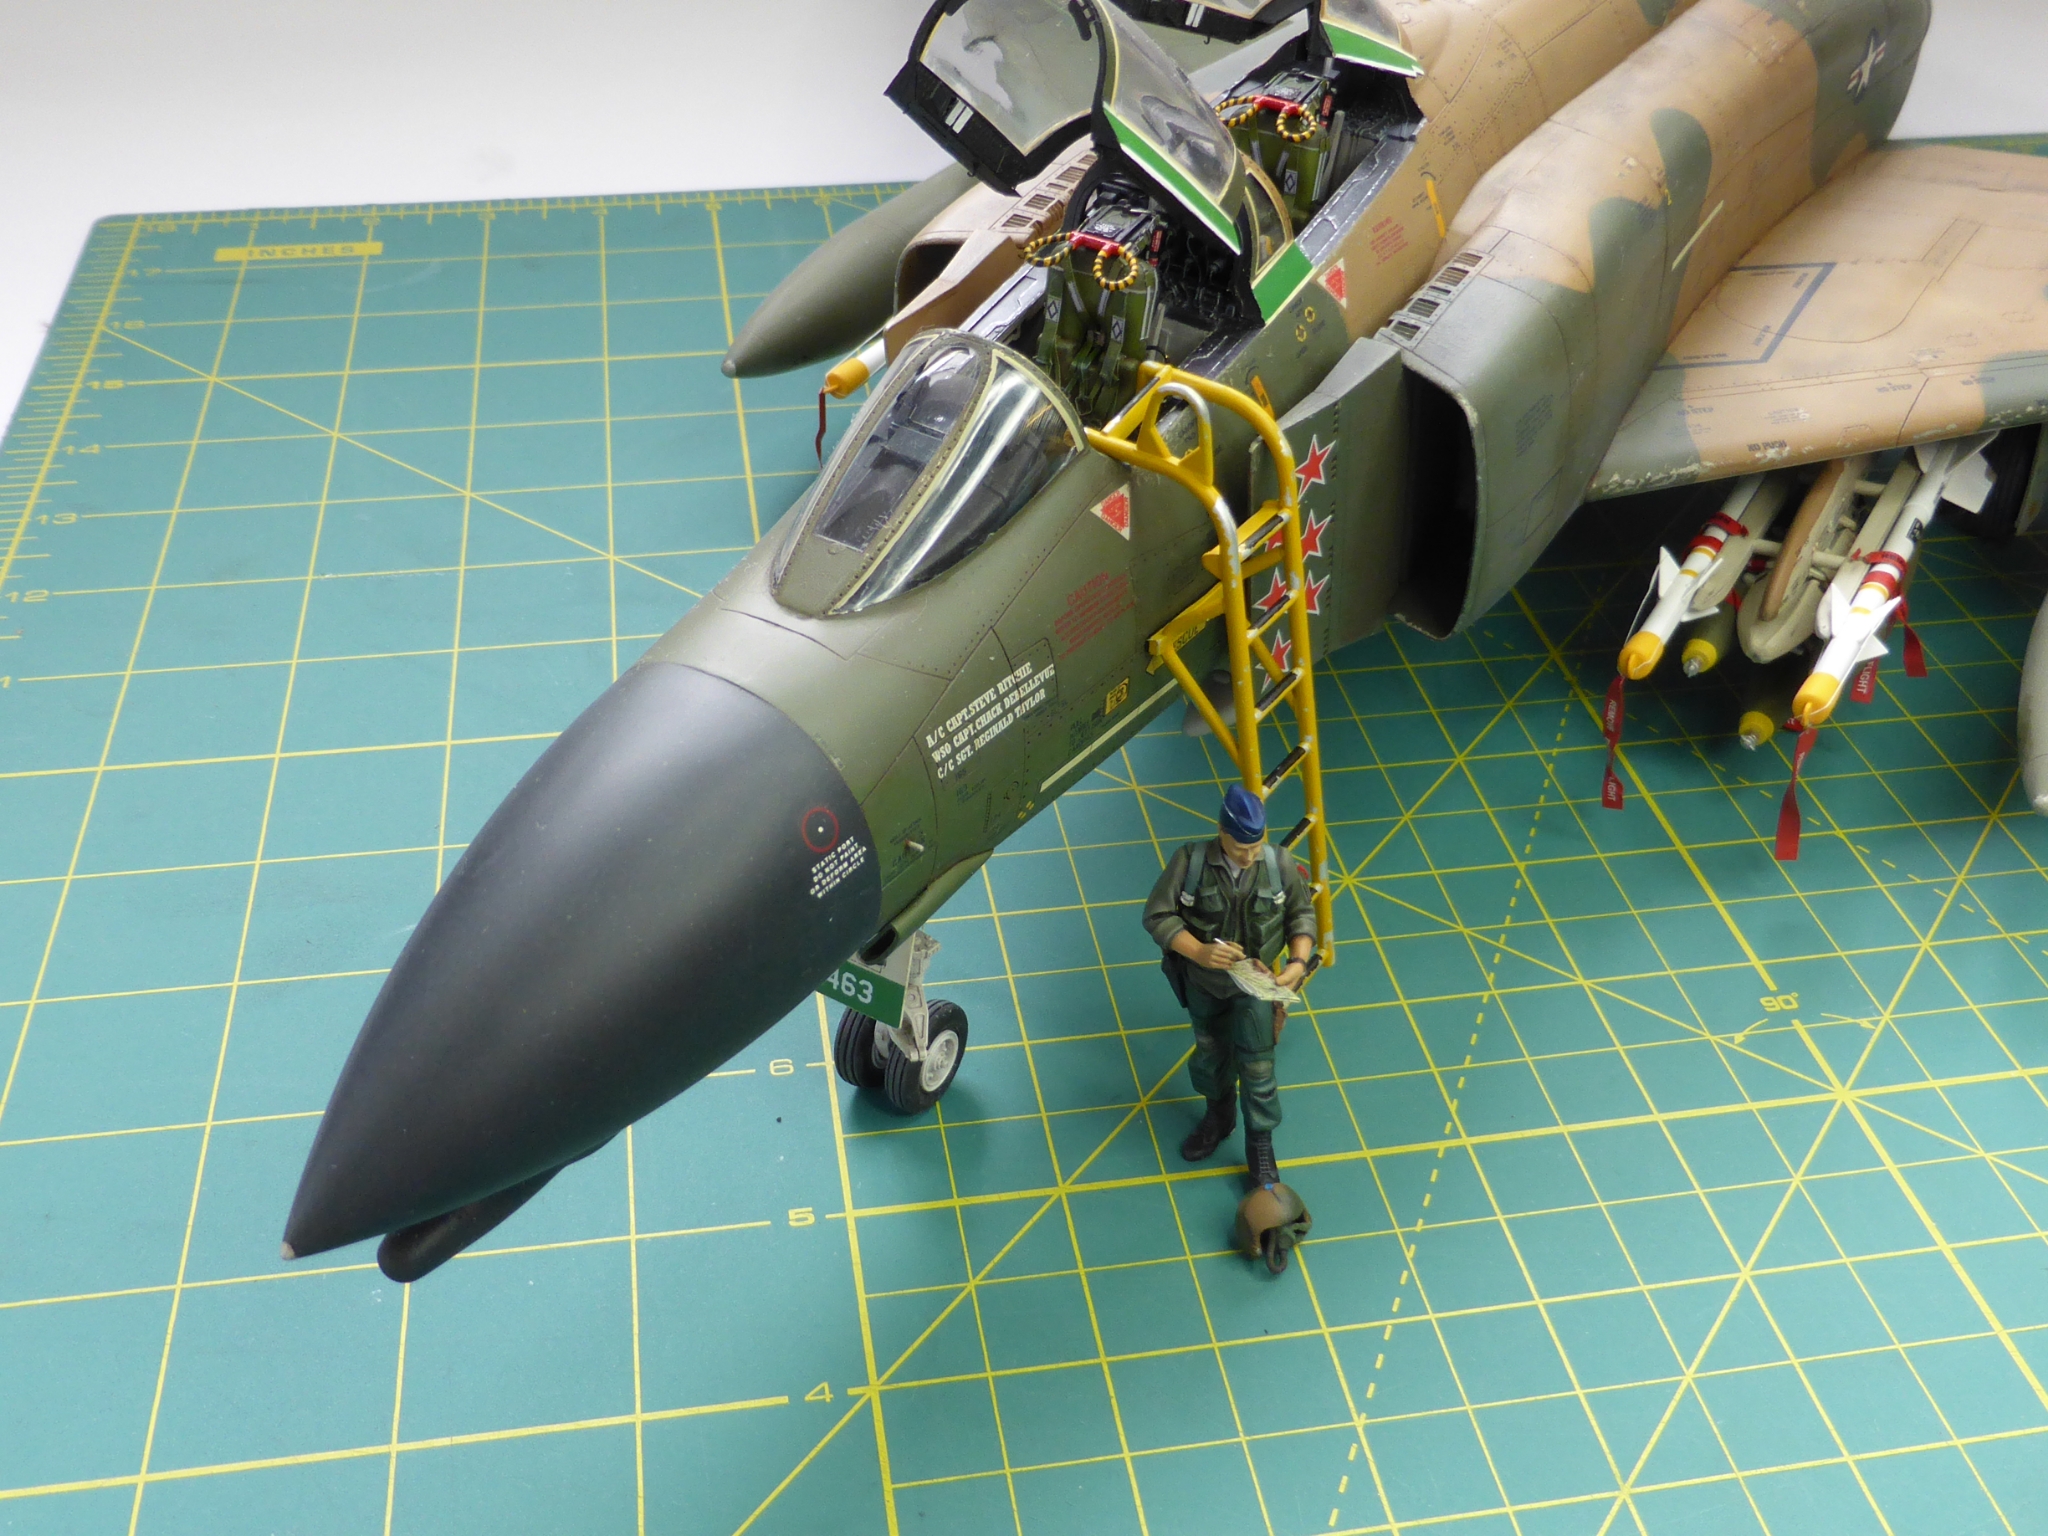
After that all that was required was to glue on the weapons pylons, insert the seats and add the canopies, which had been painted in parallel with the main affair. There was a slight hiccup with the inboard pylons in that they have a small fairing around the aft mounting points and I had them reversed left to right. So rather than skirt the openings for the undercarriage they intruded into it in an impossible fashion.

So deep breath, break the pylons off. Cut the fairings off and reverse them. Then refit both pylons. I couldn’t just switch the pylons over as the noses are colour matched to the camouflage on each wing.

You can see how the two fairings fit clearly here.

To give the canopies a nice bit of sparkle and clarity I gave then a bit of a polish with some Autoglym car wax prior to fitting them. It really makes a difference to how they look when in place.
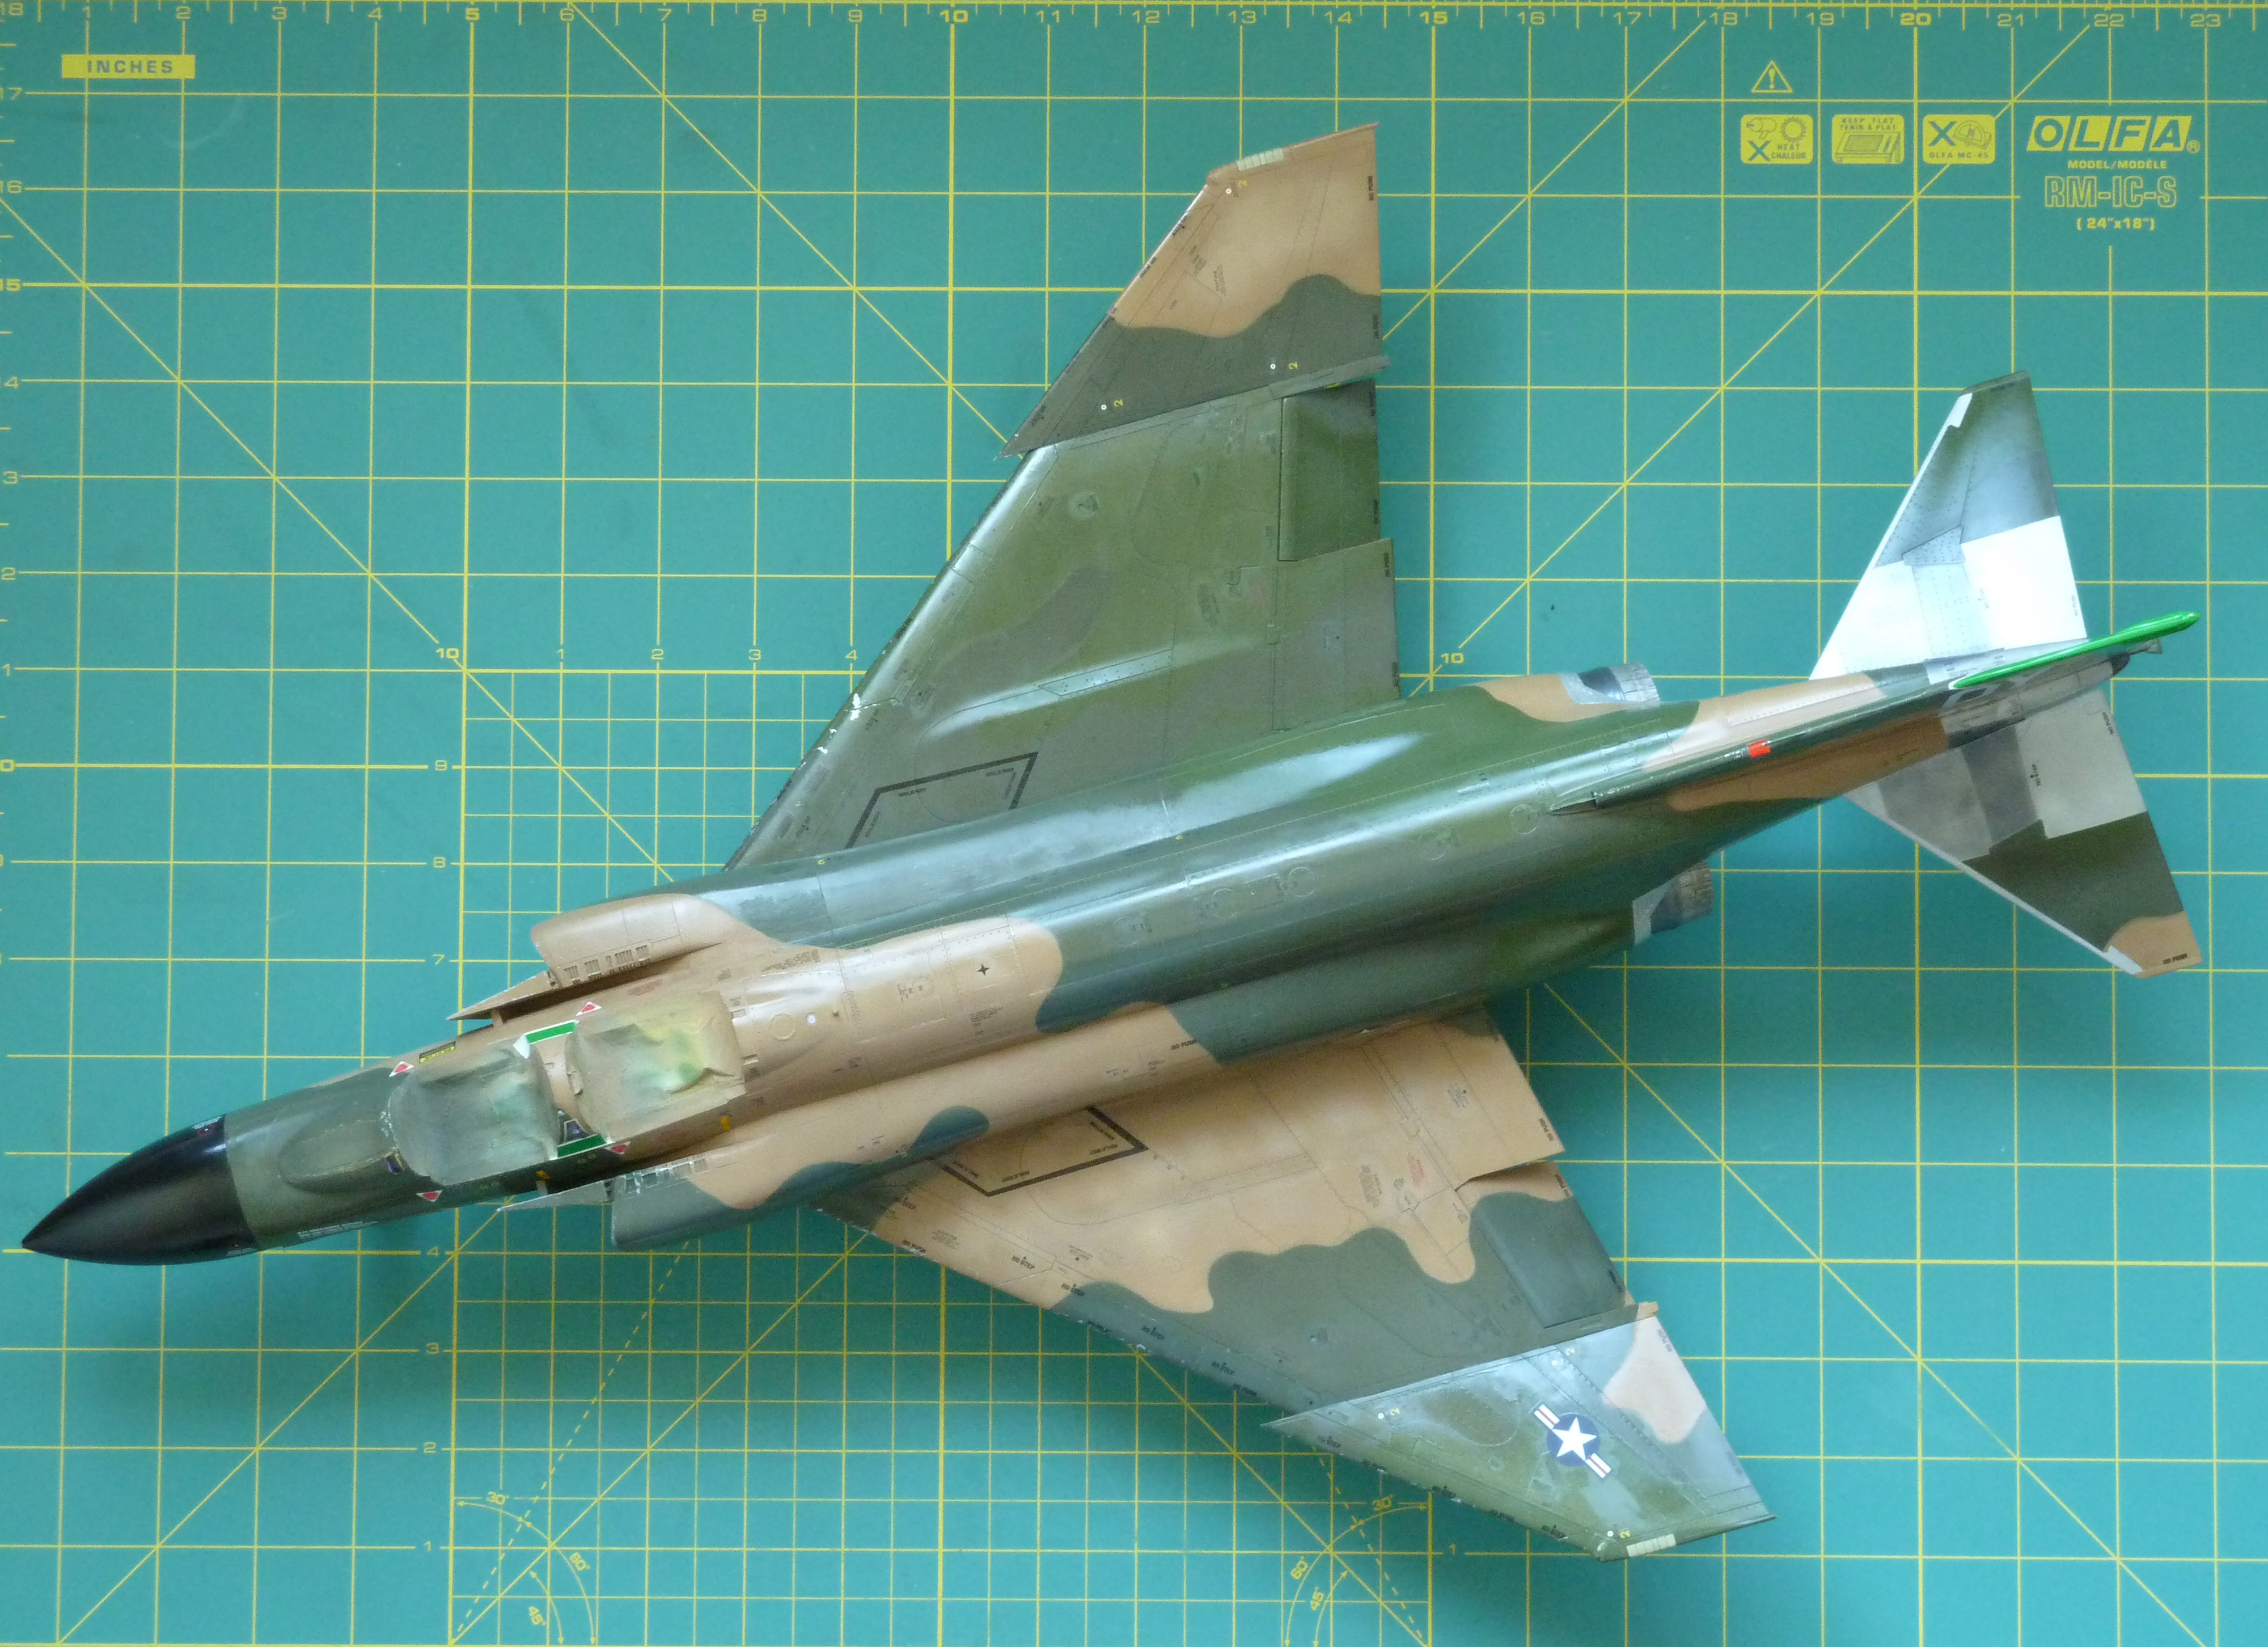
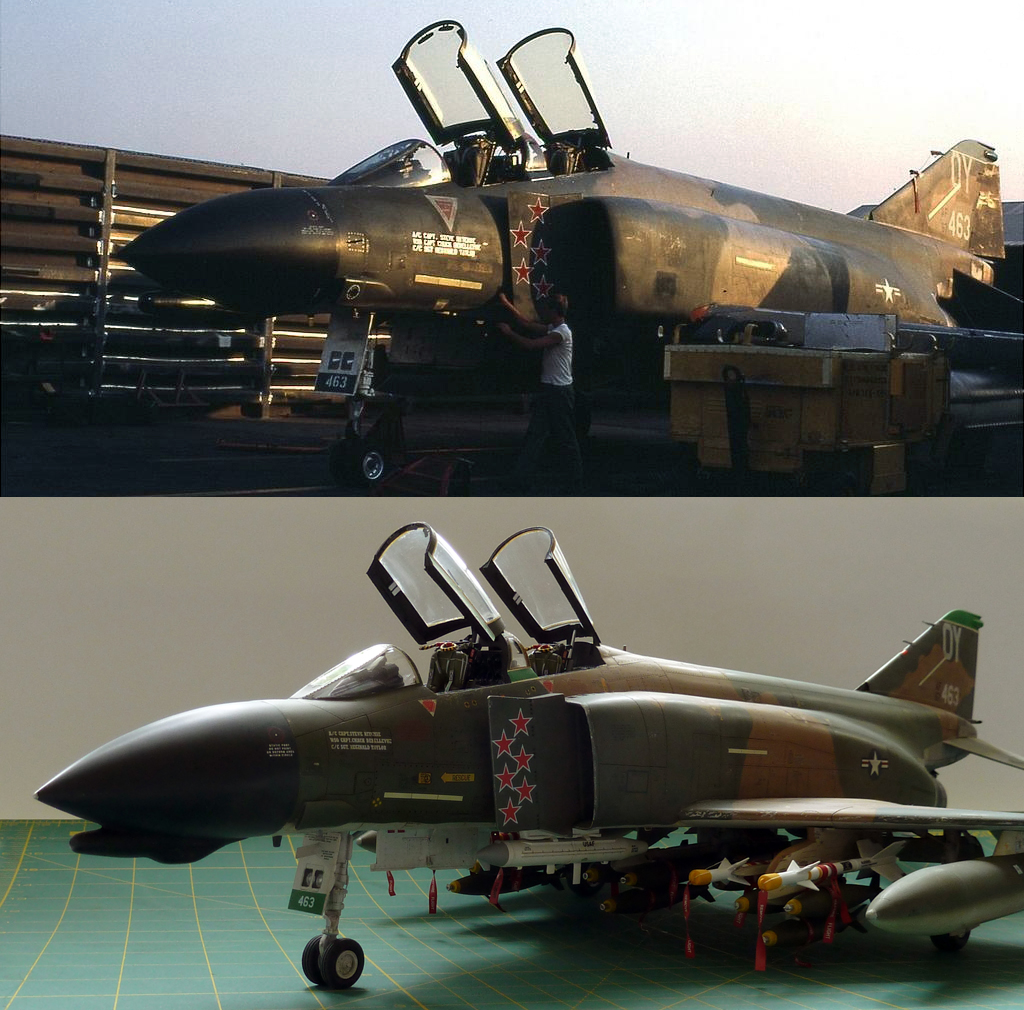
And that was it. One finished McDonnell F-4D Phantom II based at Udorn in 1972.


So that’s it for this model. I’ll get it right next time…

I think the weathering looks grand! Flying through hailstorms was sometimes unavoidable in SEA and that would leave large “bald patches” on leading edges.
LikeLiked by 1 person
I like the detailed description about your painting process.
LikeLike