Having made a number of models for other people, the Other-Half (CJ) asked if she could have one to display on her desk at work (which was nice). I was in the middle of building Kinetic’s 1:32 scale Hawk 100 series model in the colours of BAe’s Demonstrator ZJ100 and, apart from the size of it, the subject was perfect.
ZJ100, or 102D as it was known at the time, is special to both of us as it was at the centre of BAe’s Hawk Development Programme which we both worked on at BAe Brough. She in the Sub-Con Procurement area, and I in the Avionic Systems Dept. and then Development Project Management team. In all it consumed the majority of 8 years of my working life.
The motivation behind asking for the model was two-fold: CJ’d have one of my models to look at during the day and it’d also serve to remind some of the people where she works that she hadn’t always worked in tiny Financial Planner’s office in a small rural town in one of the quieter areas of England.
As a result of the request I put aside the Kinetic model (which will doubtlessly appear on here in due course) and purchased the Airfix 1:72 BAE SYSTEMS Hawk model (A03073)

and, to add detail to the diorama I had in mind, Eduard’s pre-painted cockpit set and PE set (catalogue nos. SS354 and 73354 respectively)


and finally a pair of modern RAF pilots from PJ Productions.
Assembly of the Airfix model was straight forward and relatively simple. The only real correction required was to the positioning of the cockpit internals. The rear bulkhead should be flush with the rear of the fuselage canopy cut-out, but as designed it is recessed in the model which is incorrect. The Eduard instructions tell you to shorten the cockpit floor at the front by 1mm which does bring everything forward and resolve the problem.
The Eduard set comes with self adhesive instrument panels and some other parts. I found this to be more trouble than it was worth at this scale, the adhesive making the panels stand-off the underlying surface. When pressed down to minimise this the glue splurges out the sides, so in the end I removed the glue entirely and used thin CA to fix them as normal.
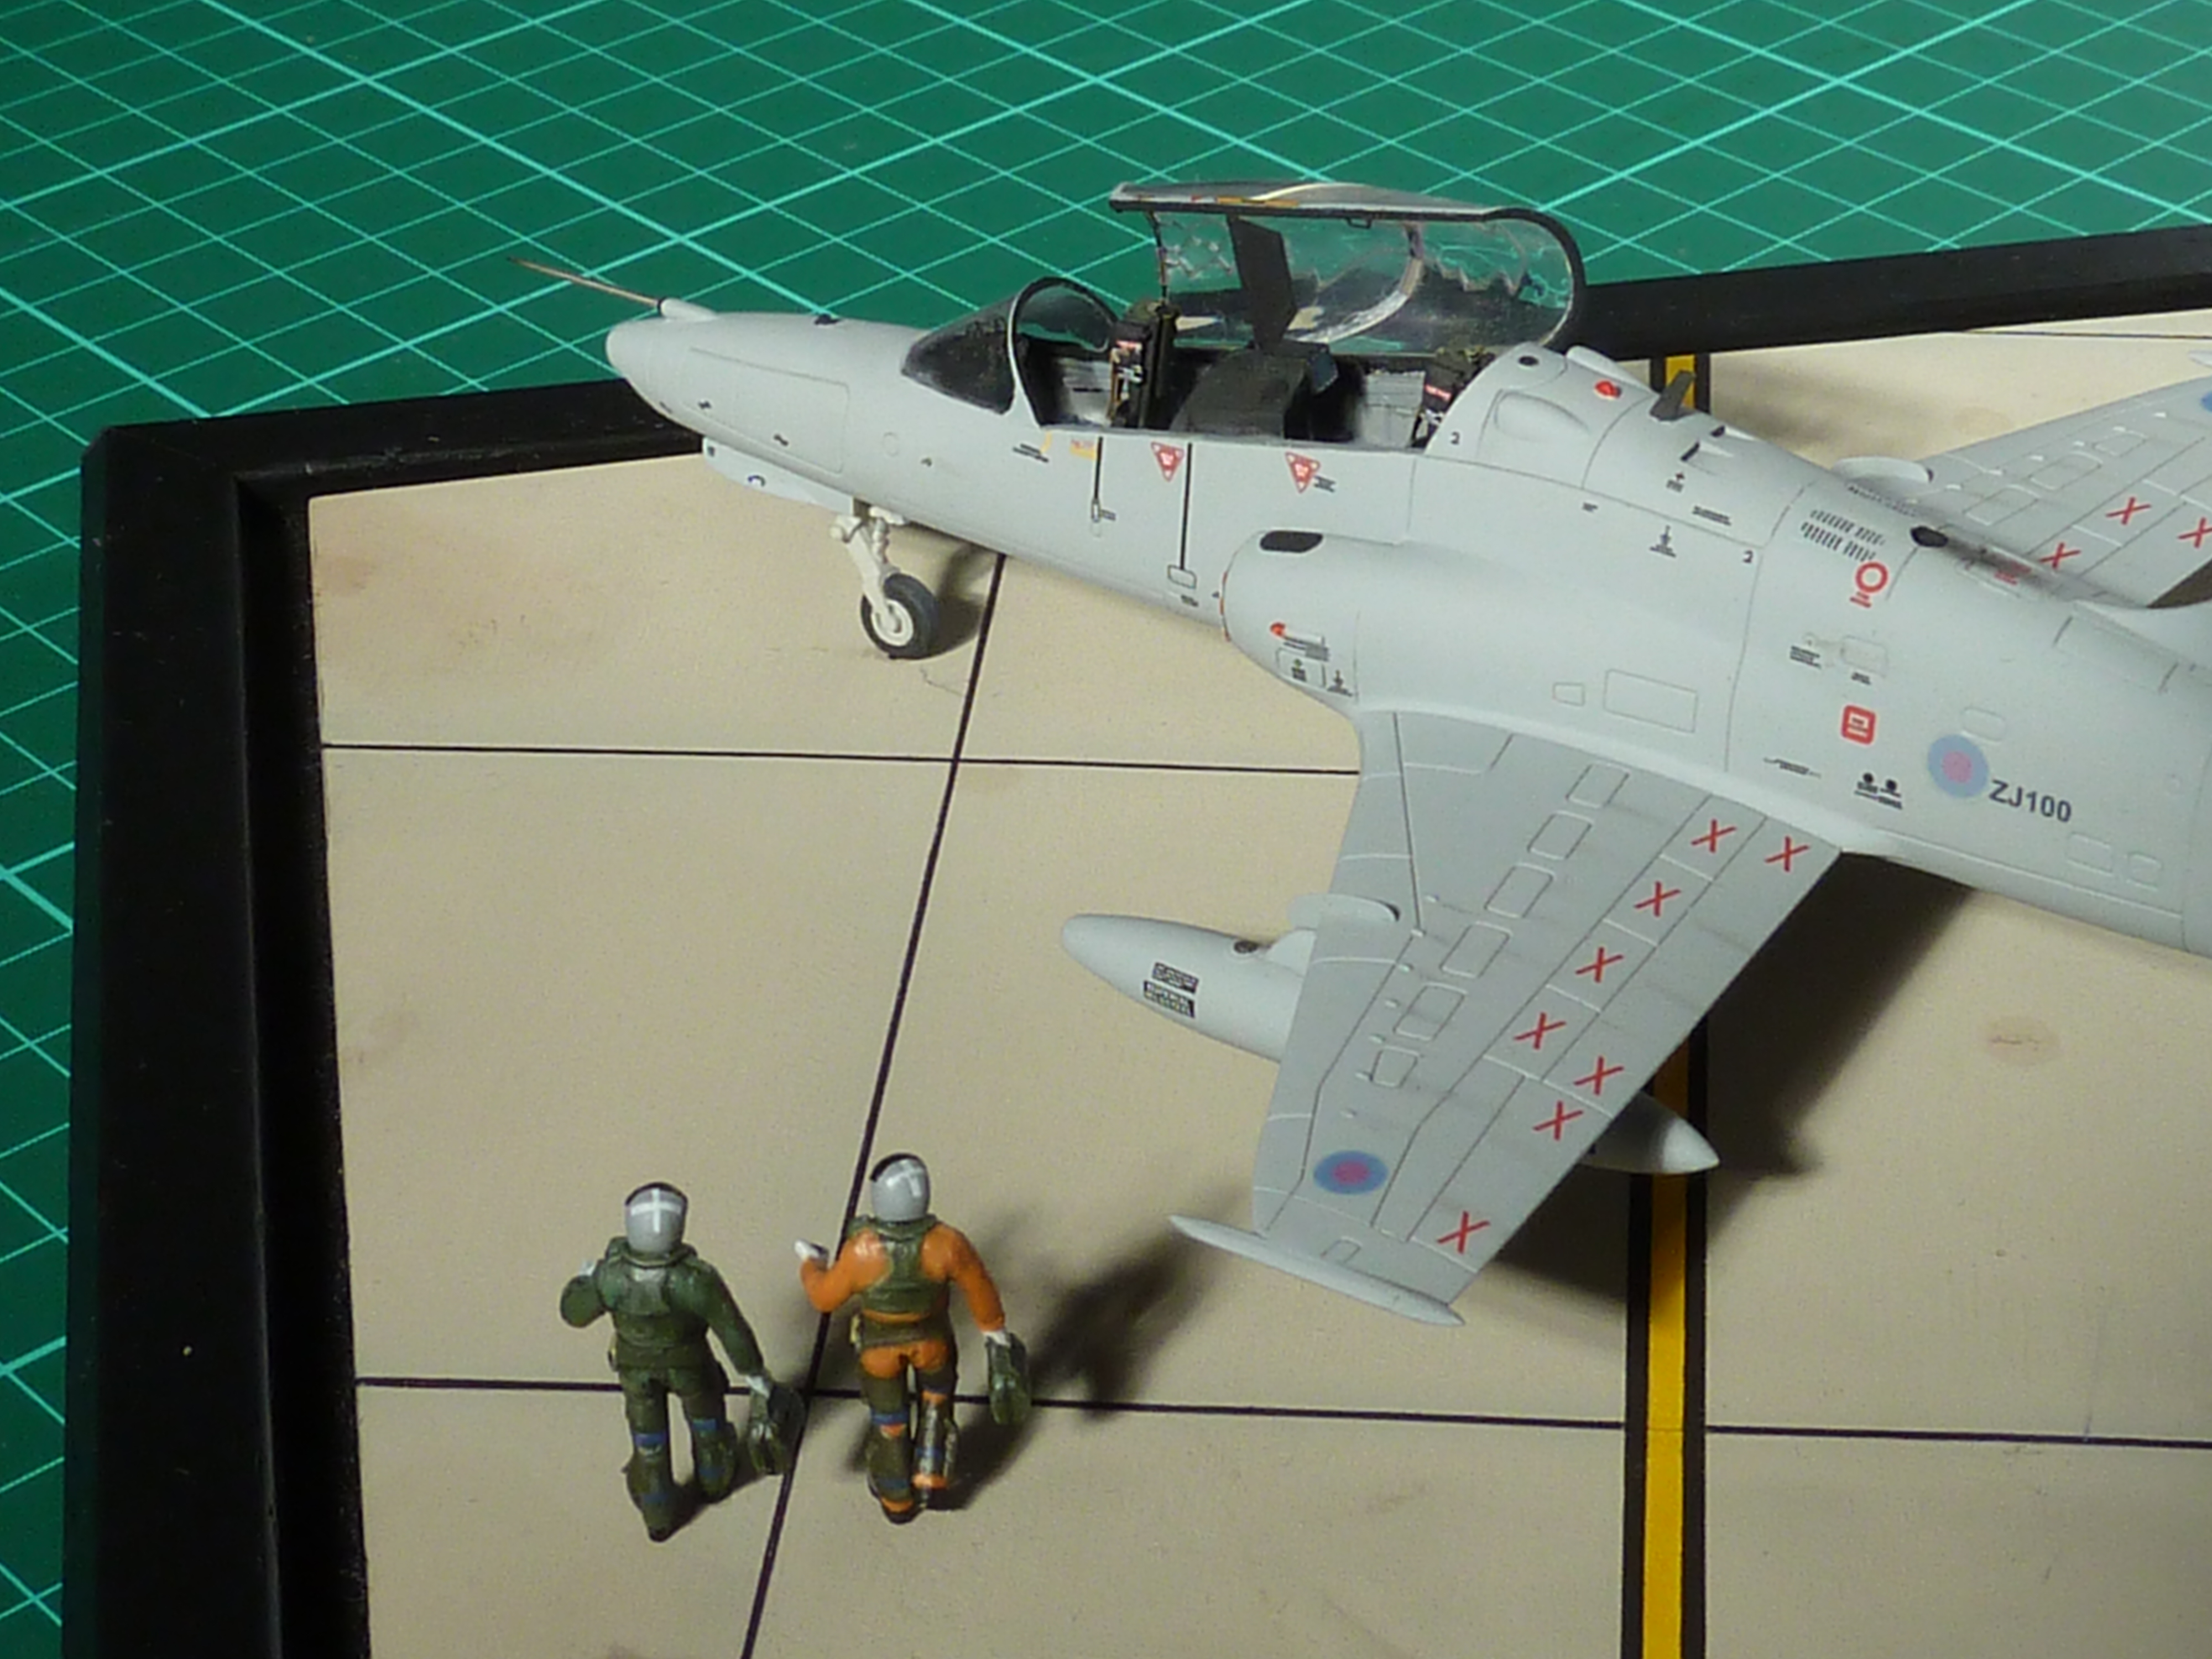
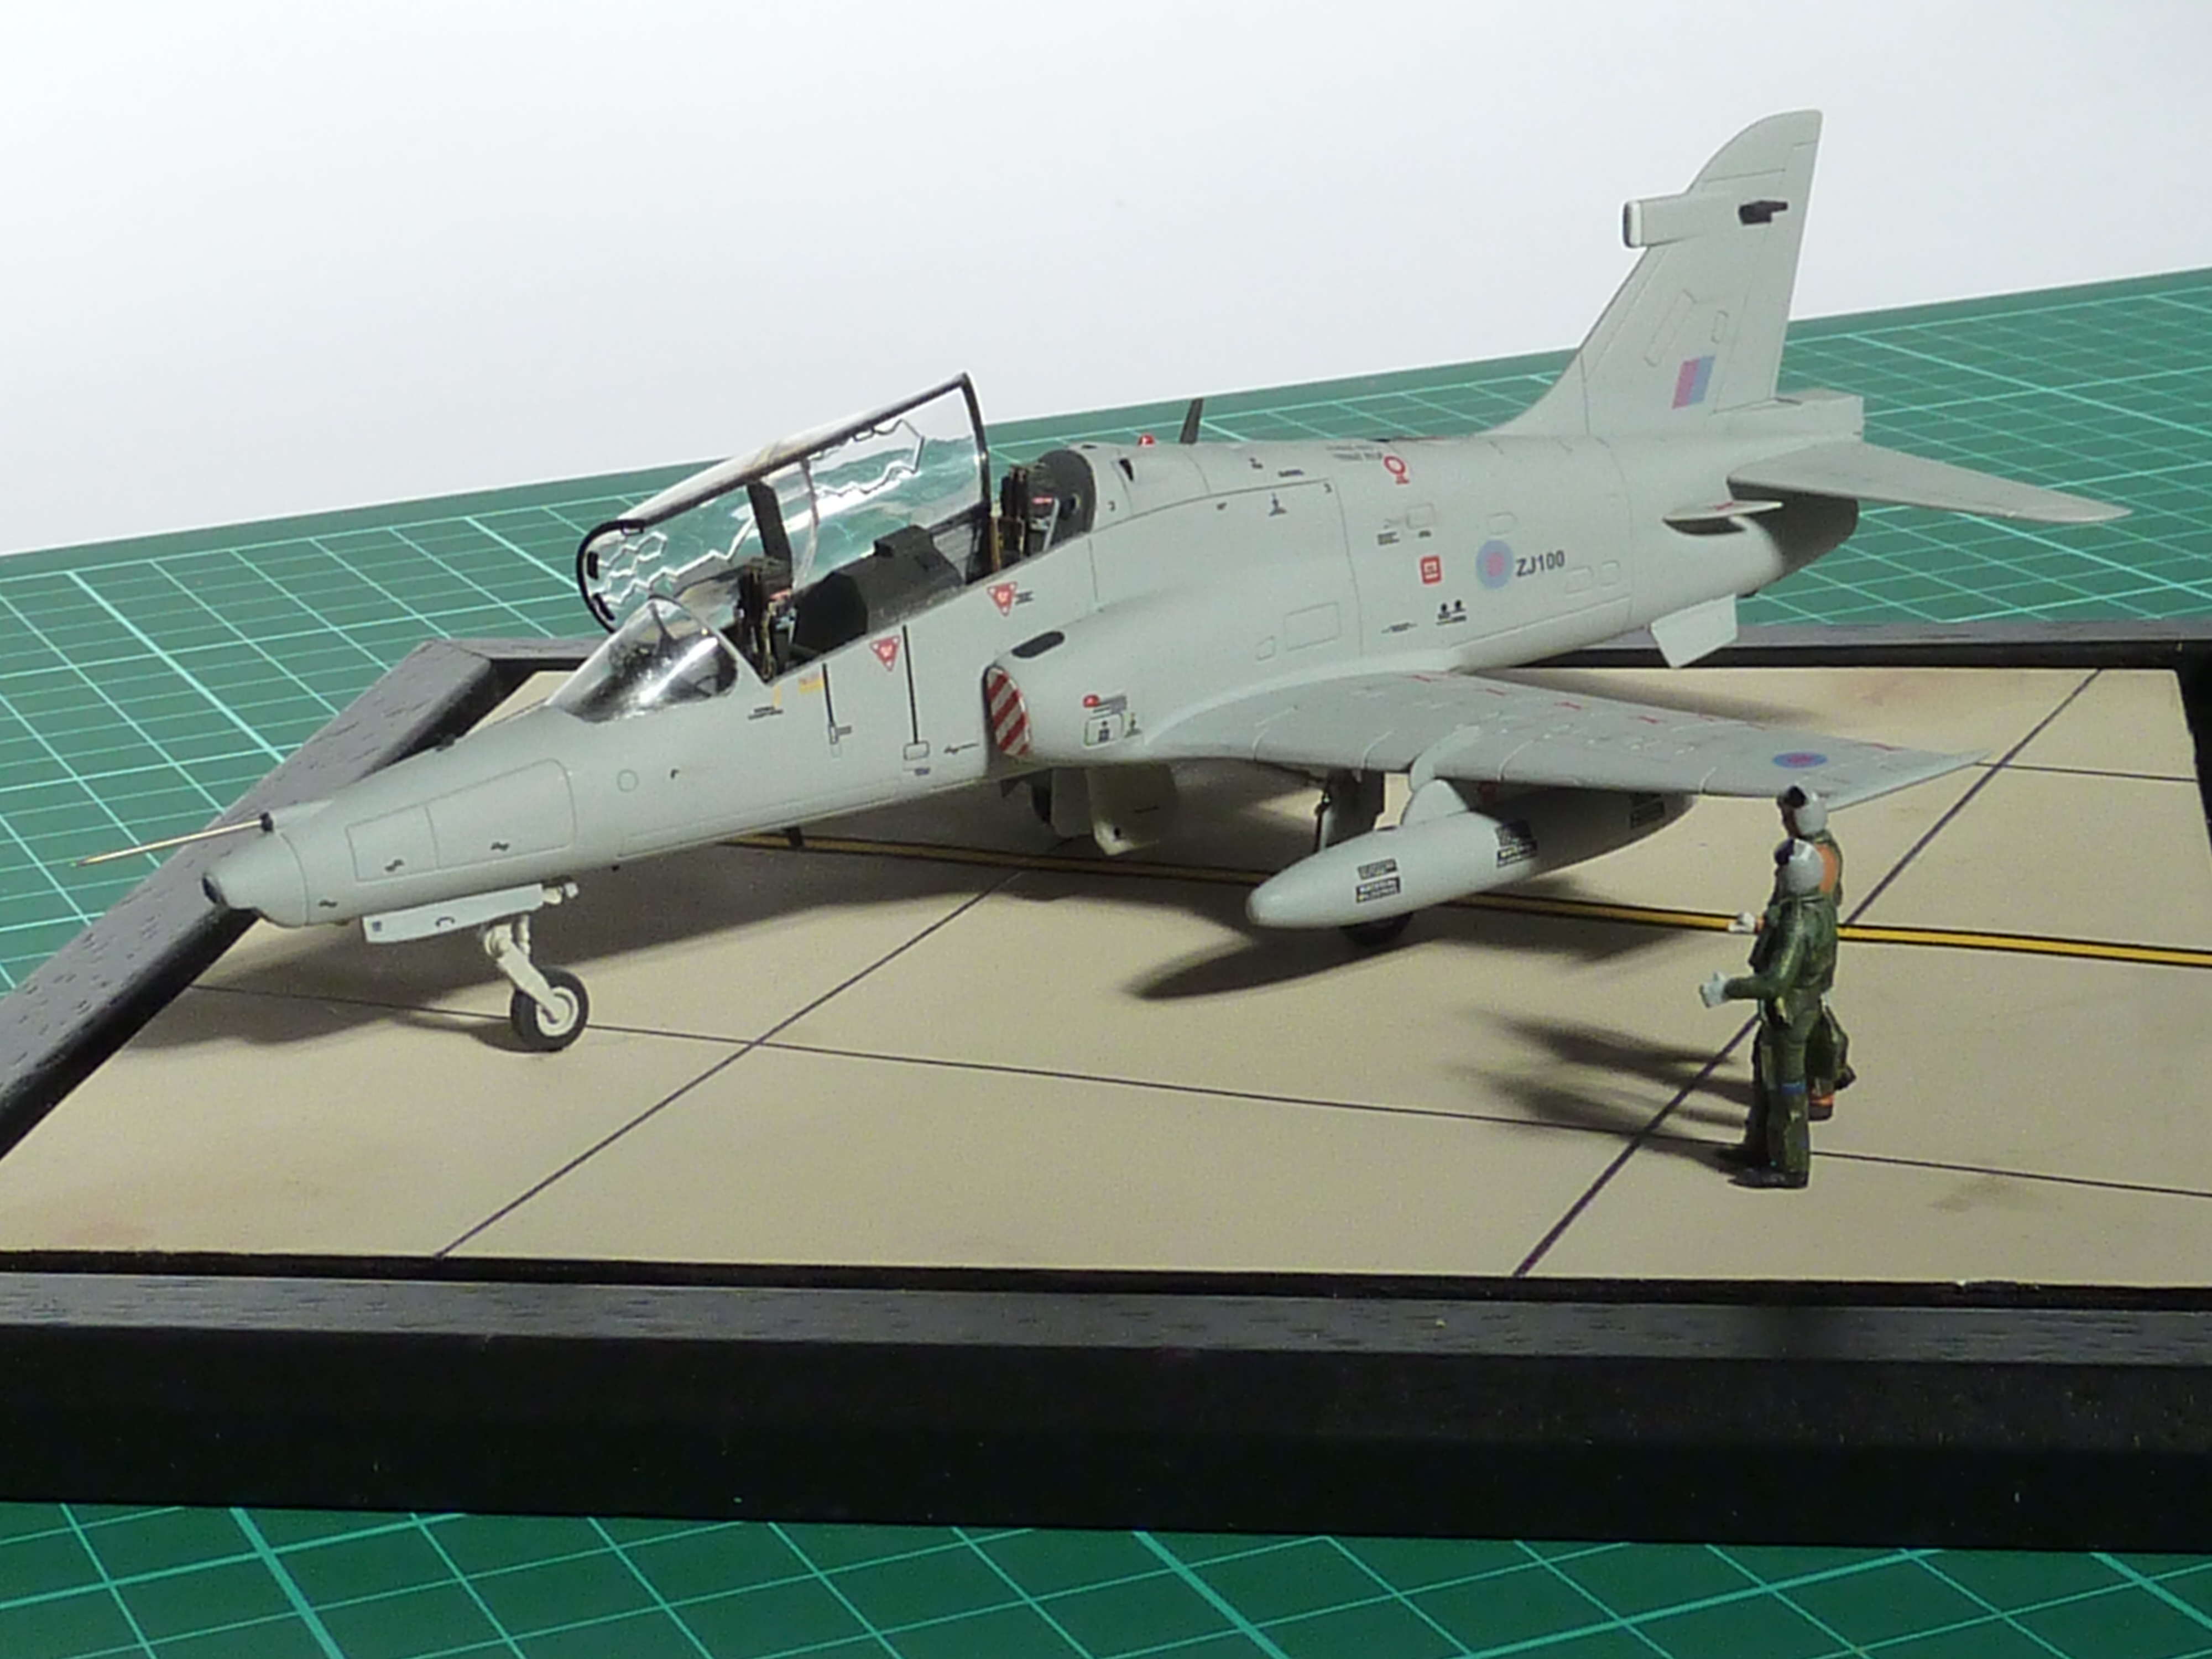
In place the panels look good, once you’ve touched up the grey areas to match that used in the rest of the cockpit, and the PE also gives you a HUD Monitor screen in the back cockpit which isn’t in the Airfix kit. There wasn’t enough room in the real aircraft to fit a proper HUD in the rear, so a TV screen was what the guy got.
The seat harnesses are particularly good to my mind.

The only other problem I had was fitting the windscreen over the PE HUD and glareshield which I had inadvertently fitted too high in the cockpit. In the end I had to resort to lifting the windscreen up at the sides on a couple of pieces of 0.020 plasticard and then hiding the whole mess behind filler.
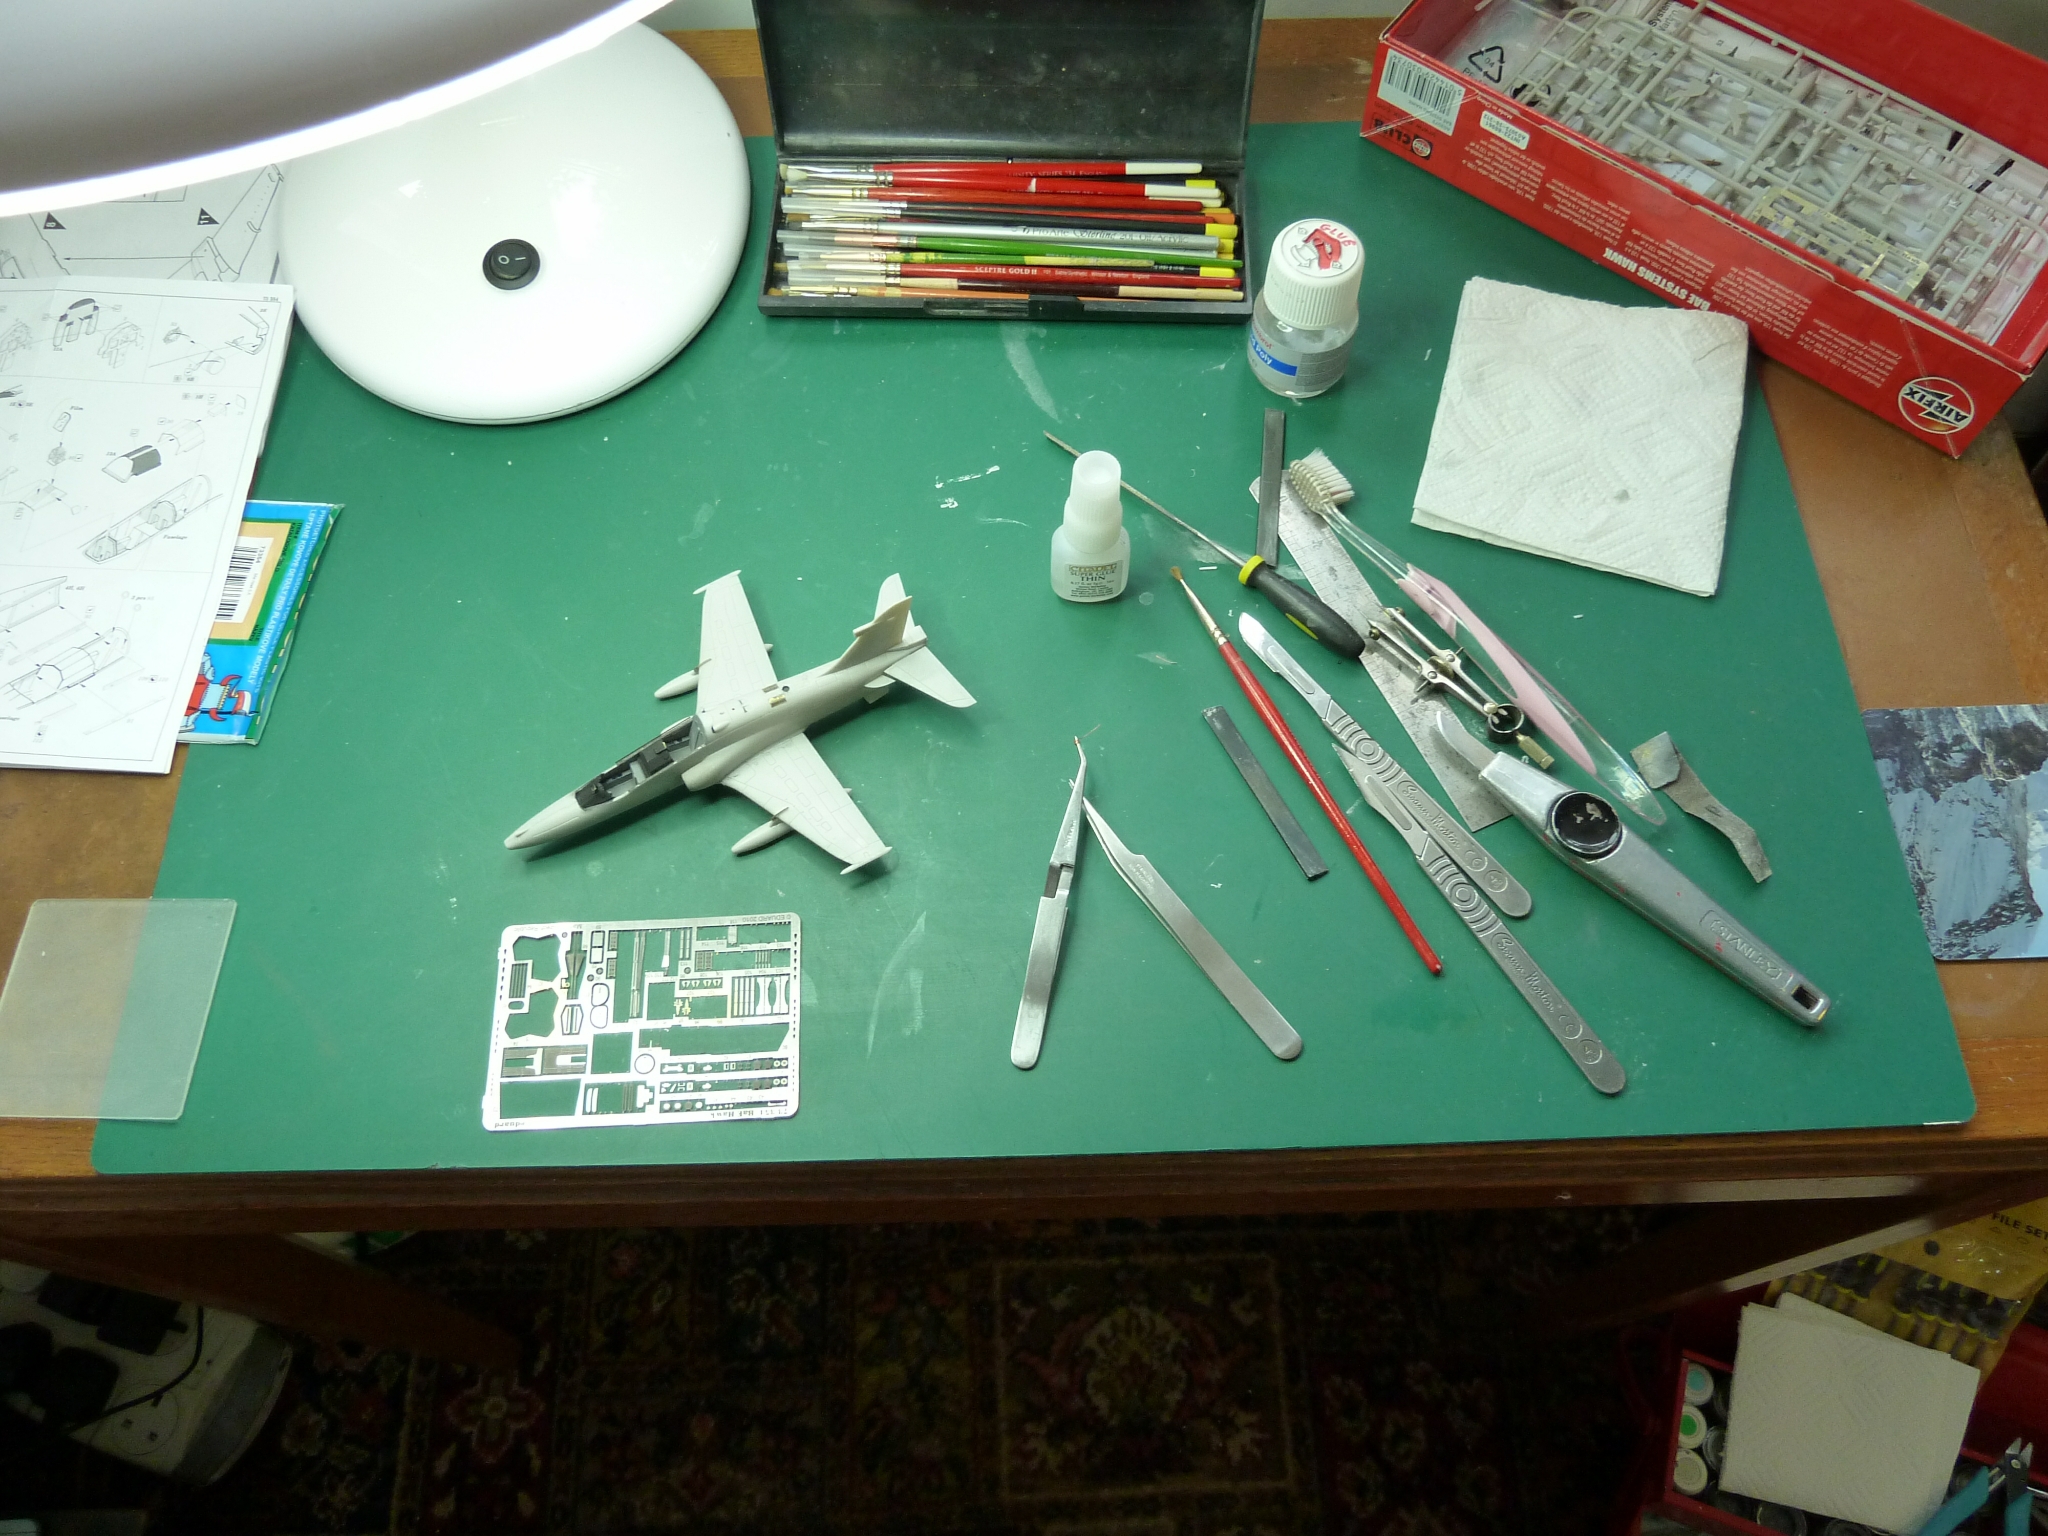
As a final flourish I added a blunted needle for the pitot probe and some thin wire for the AoA and standby pitot probes.
One point I will make here is that I regularly see Hawk models with the airbrake deployed on the ground. While this isn’t impossible, the Hawk, Hunter and Harrier all have interlocks that automatically raise the airbrake when the undercarriage is deployed to stop the pilot dragging it down the runway. The only time I’ve seen it deployed on the ground is during testing when a ground key is inserted to override the interlock.
Having assembled the model I then gave it an overall coat of Humbrol’s 127, which is supposed to be a satin light grey, but it looked more matt to me. Then there was the usual application of a couple of coats of Klear prior to adding the decals.
The ubiquitous Micro Set and Sol were used with the decals and they went on extremely well, without a hint of the dreaded silvering. There were 2 issues with Airfix’s decals themselves though.

The first is that the emergency canopy release decal is too large to fit on the side of the canopy frame. I ended up cutting off the top two lines of text to get it to fit. Goodness knows what it’s supposed to say. There isn’t that much verbage on the real aircraft for certain.
The other problem concerns the vertical black lines on the port cockpit side showing where the aircrew steps are. They should go from the steps to the cockpit coaming, but are too short. I noticed this way too late and was forced to use them as is. I opted to line the decals up with the coaming as this was the stronger visual signature, but it does mean the bottoms of the decals don’t line up with the step panel lines at the bottom. You’ll see what I mean in the front fuselage picture above. Ho hum…c’est la vie and all that.
The decals specific to ZJ100, including the low vis roundels, were made on the inkjet at home and went reasonably well. The colours of the low vis markings were a bit of a disappointment though. I spent some time getting the shade right but forgot the effect of putting them on the grey background, so they ended up darker than I wanted. It’s something I ought to address for the 1:32 model when it gets back on the work table.
I then added a very light weathering to the airframe. BAE SYSTEMS’ Hawk demonstrator aircraft log relatively few flying hours during their lives due to the nature of what they do. Most of their life is spent in the hangar being updated to test new developments. They also tend to get repainted regularly for each specific marketing campaign. The result is that they always look pretty new and unsullied by life.

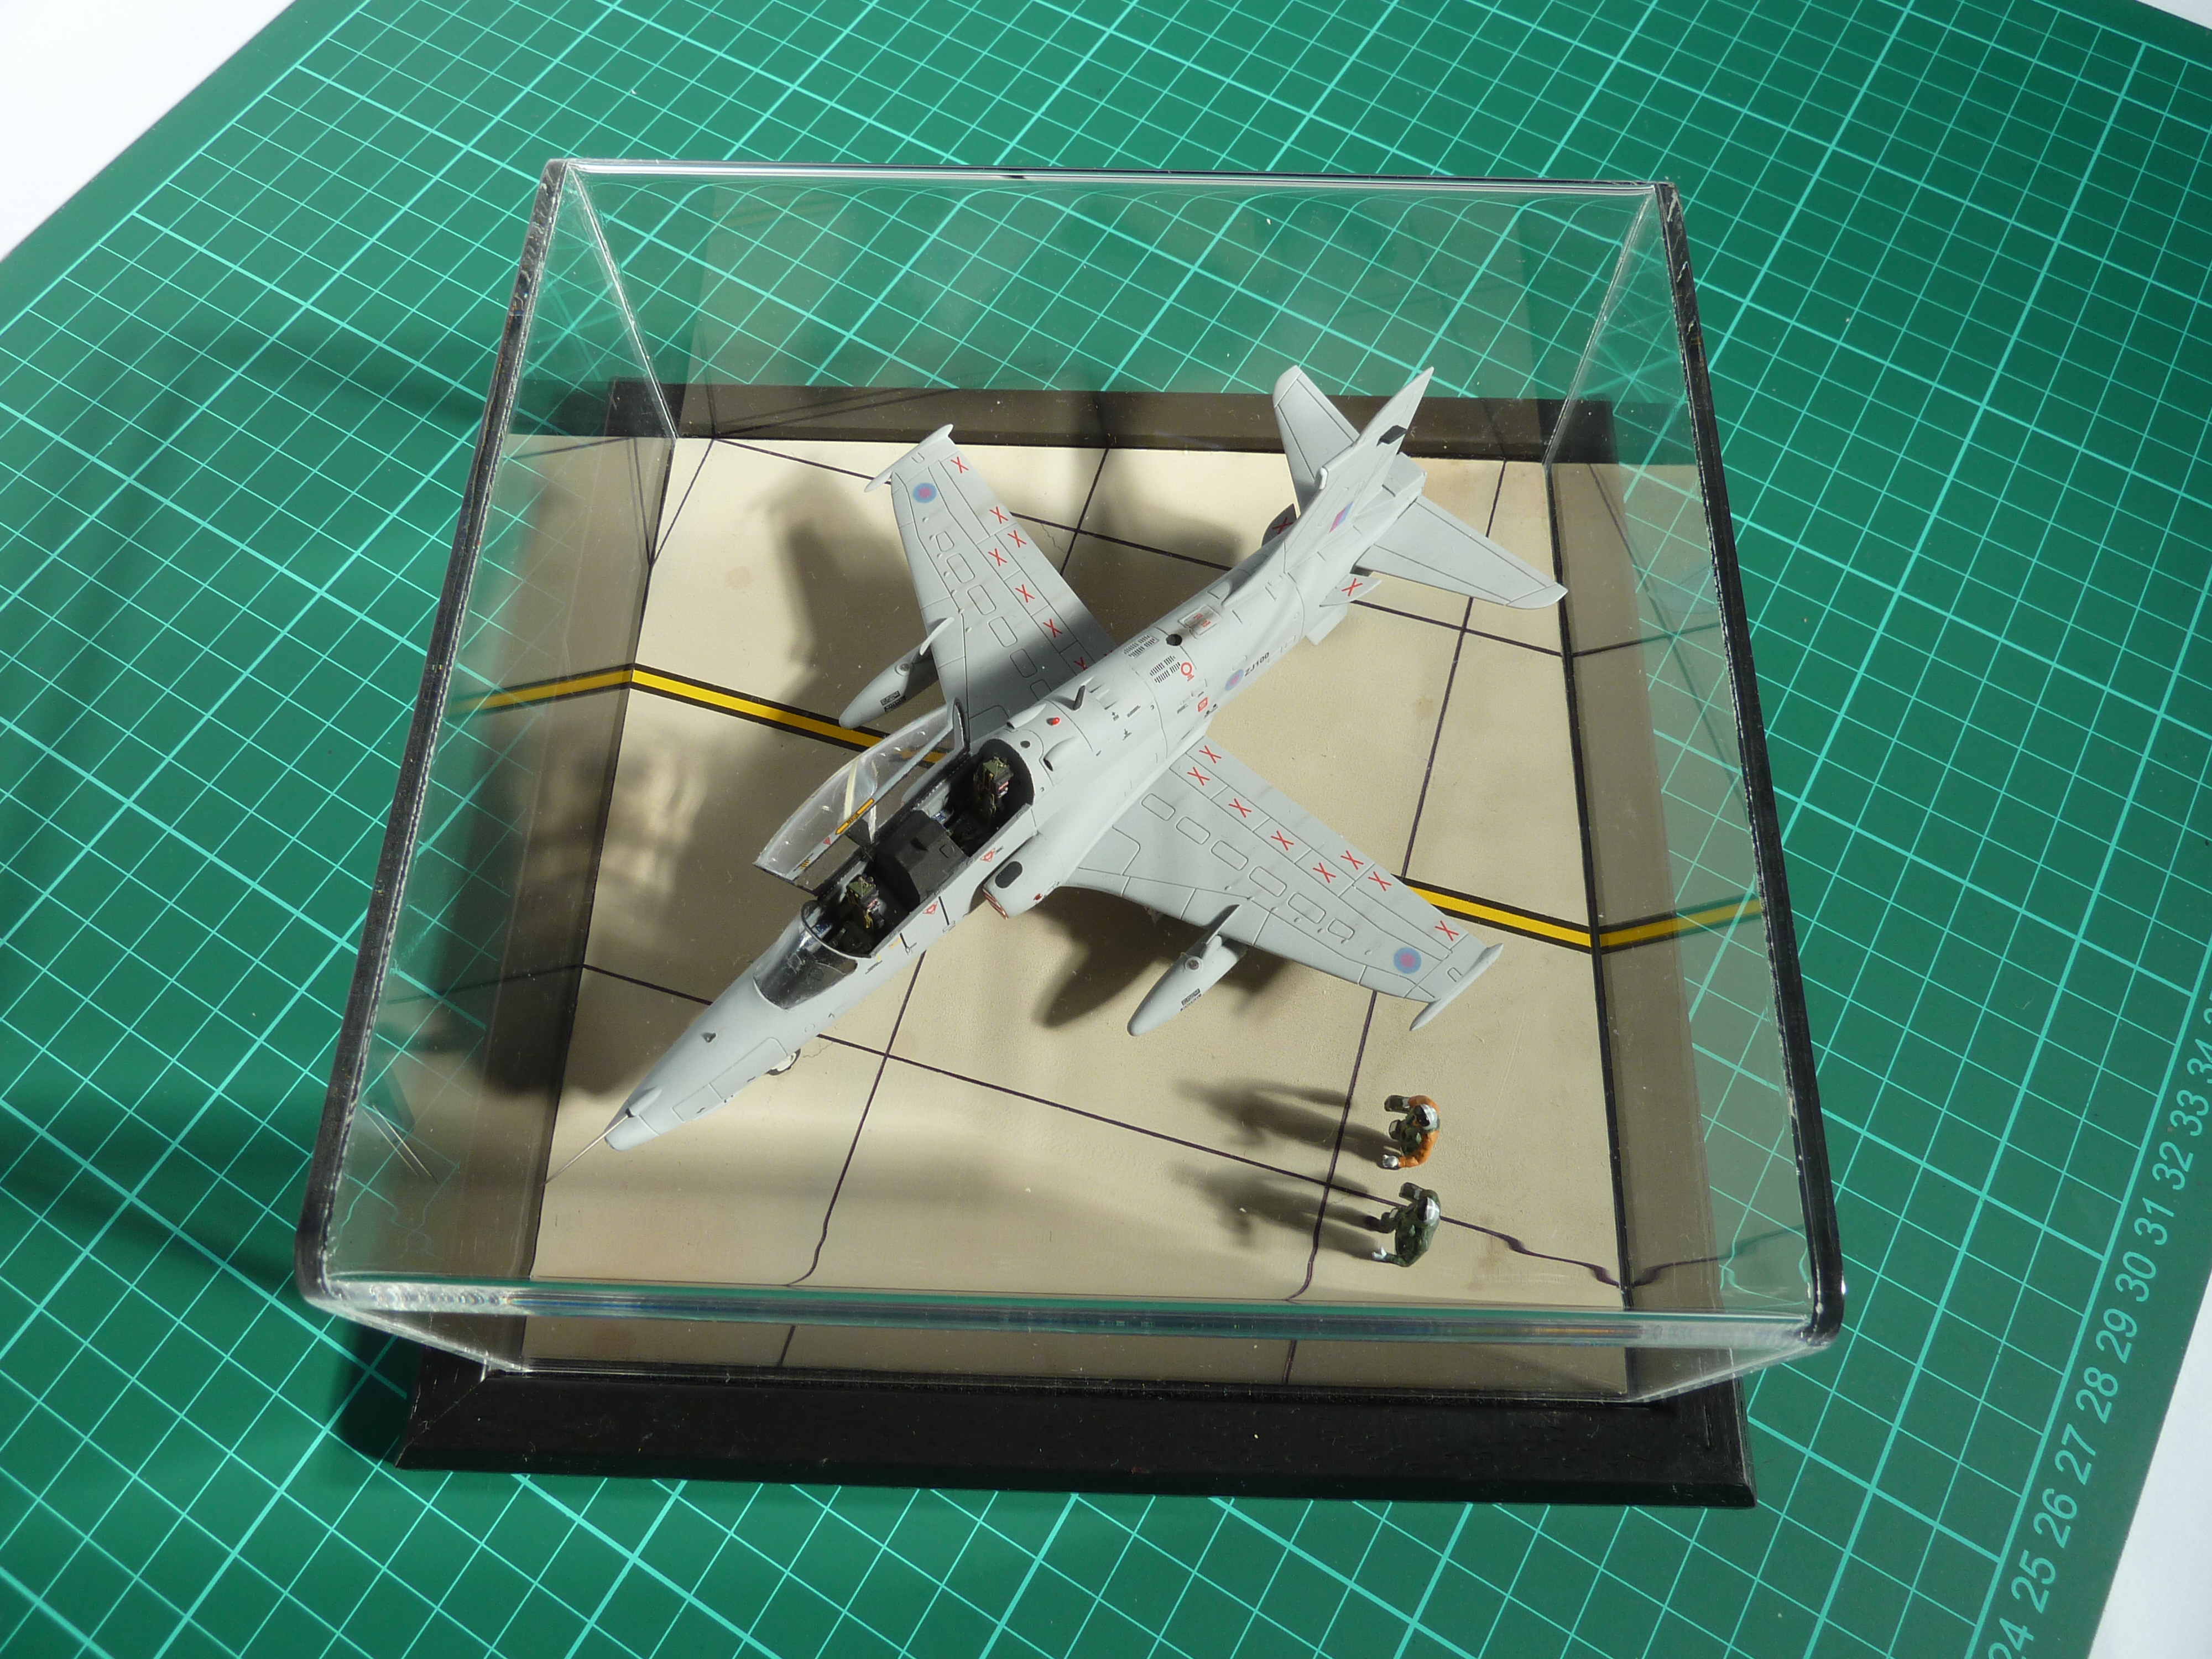
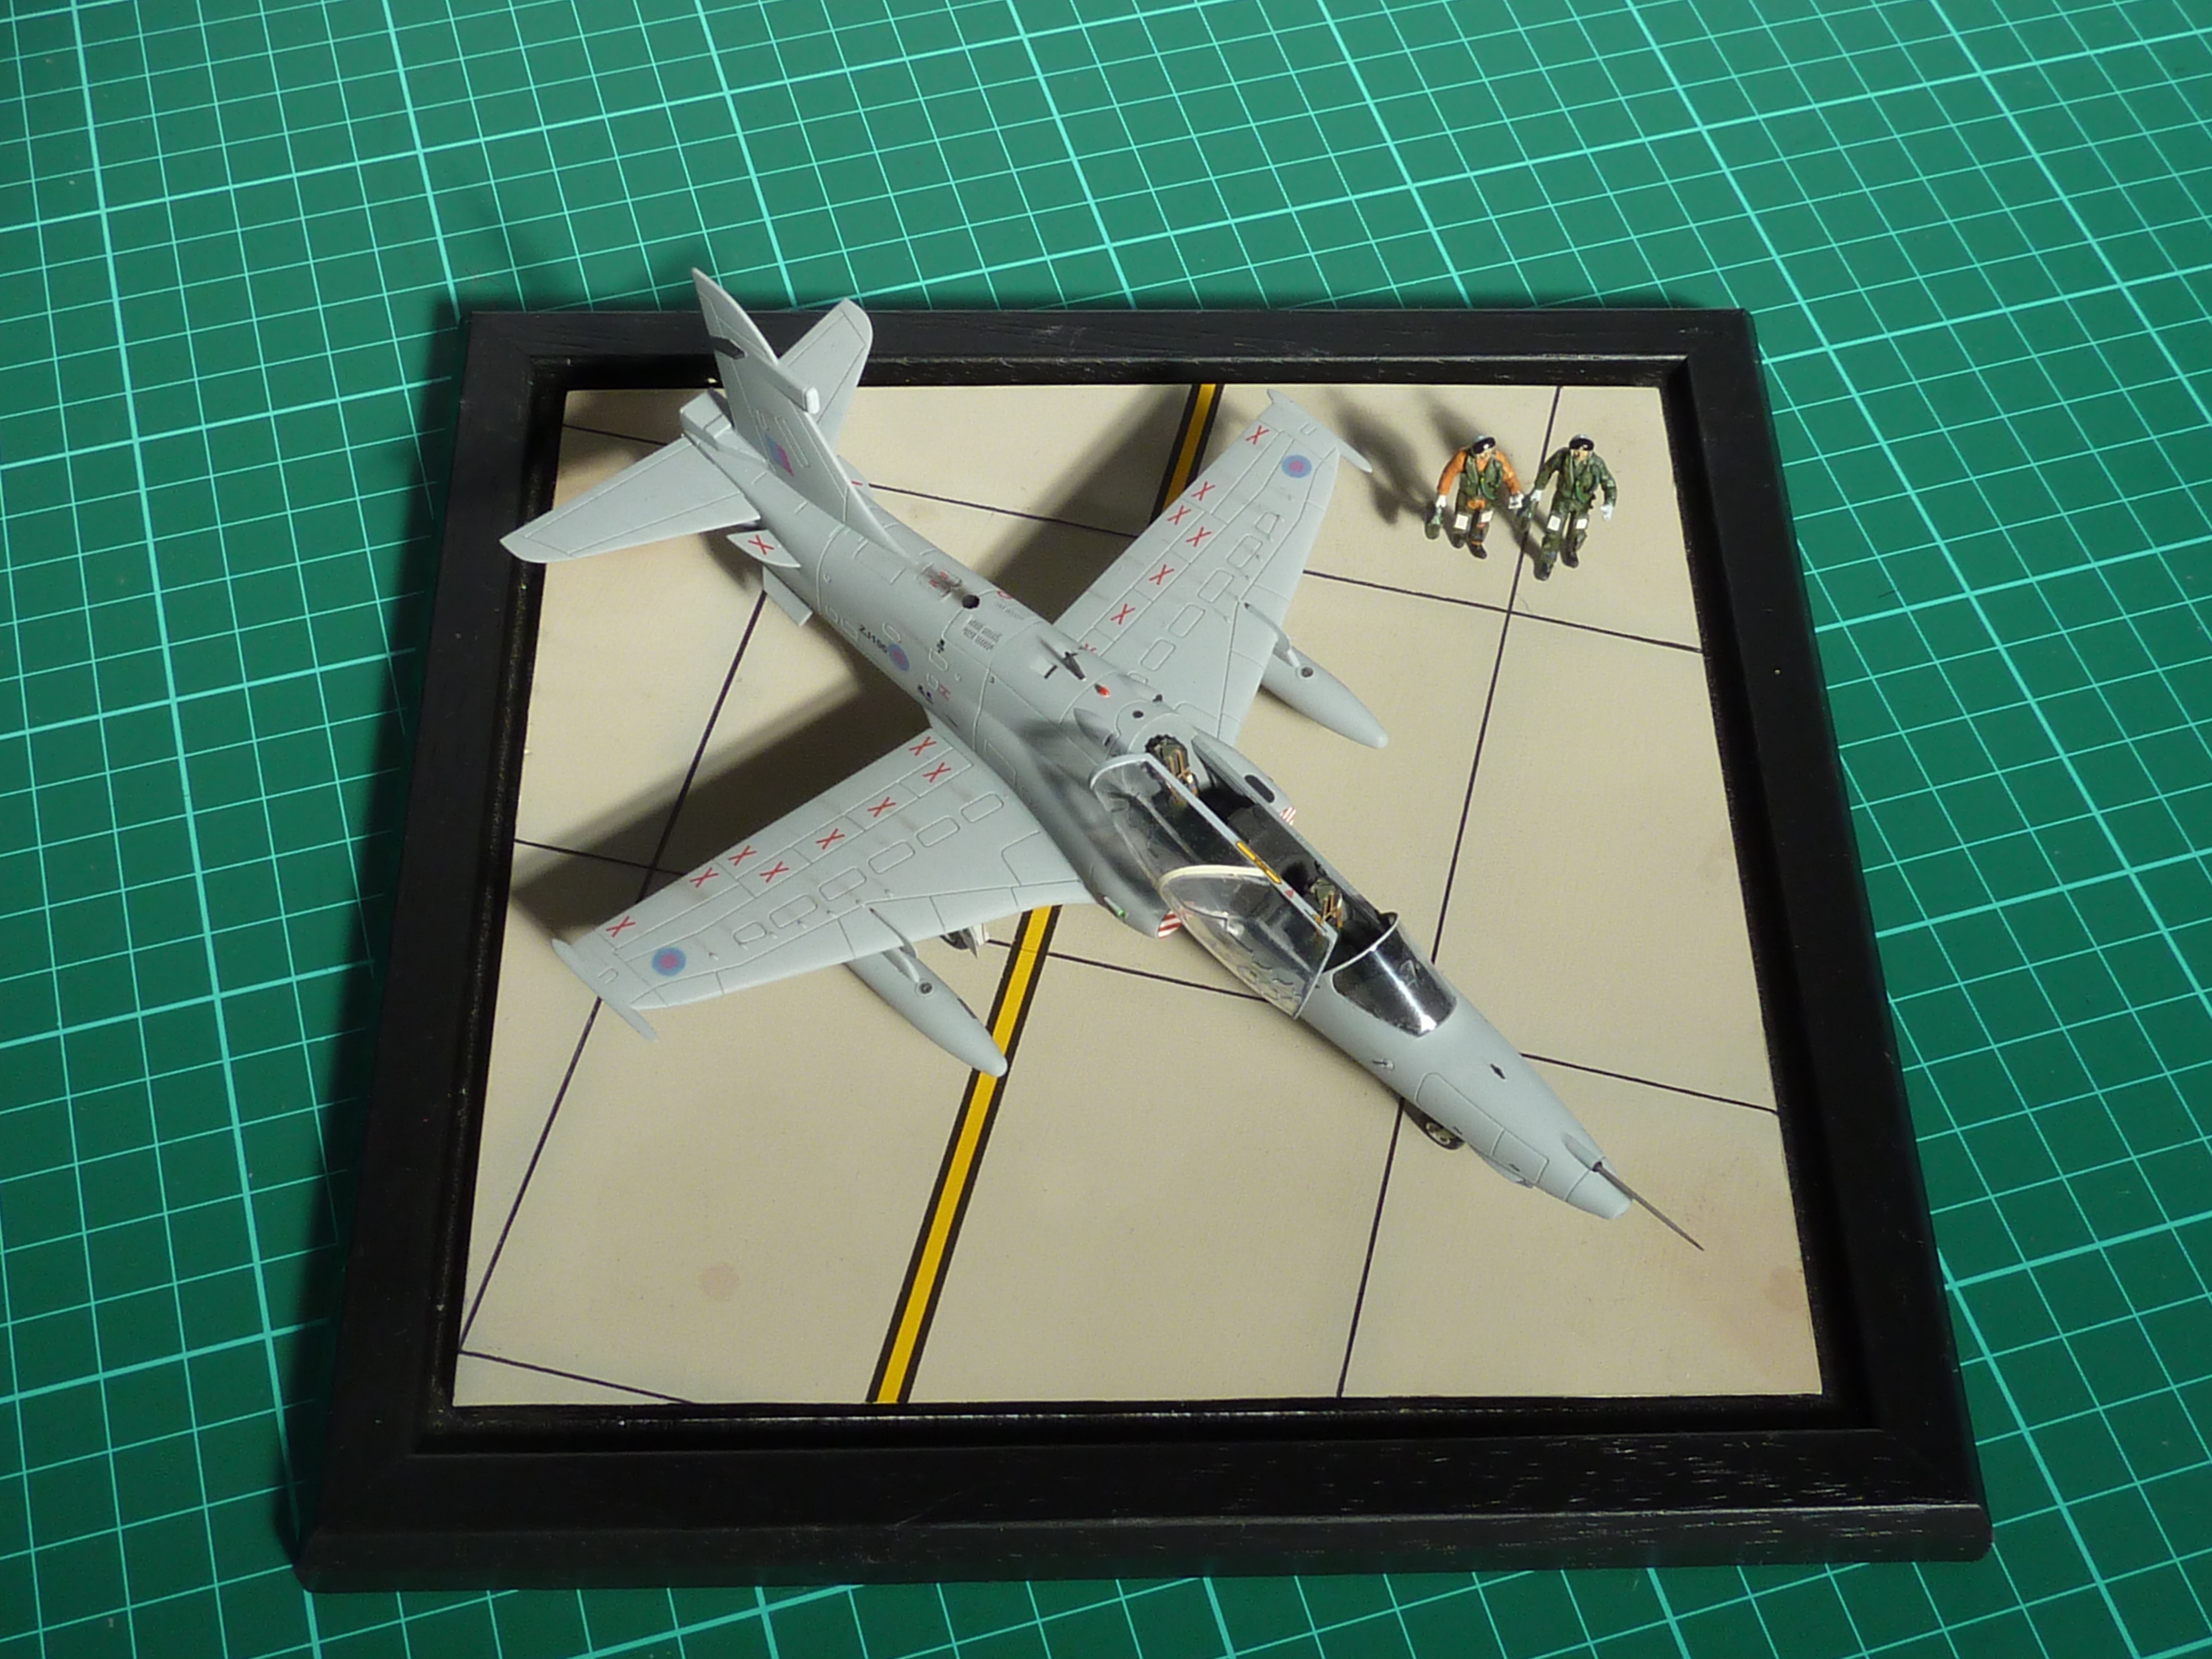
As the model was going to sit on my beloved’s desk it would obviously need some protection in the form of a case, which in turn meant a small diorama. I went with a fairly straightforward arrangement replicating the aircraft waiting on the hangar apron for a sales demonstration flight with the customer pilot and the test pilot walking towards it. It also meant it was logical to have the canopy open on the model, though the absence of a Houchin ground power unit and ground crew is unexplained…
The display case was a custom job ordered from Acrylic Display Cases in the UK (where I’m based). I went for the black ash base and I was very pleased with the item which arrived about a week after I ordered it.

The actual diorama base was made from some 3mm plywood I had knocking about which I faced with 0.030″ plasticard. I scored in the concete expansion joints and to give the ‘concrete’ some texture, masked off each section and painted them with raw cellulose thinners to melt the surface. A stiff brush was then pulled through the ensuing goo to distress the surface and give the impression tamping marks. The result came out quite well, which given it was the first time I’d tried it, was a pleasing relief (no pun intended).
Once the surface had hardened again I pre-shaded the joints and random areas with black from the airbrush and then painted it in concrete like tones. Then it was the usual burnt sienna washes and a few more concentrated drops to simulate stains. Finally the expansion joints were filled in with black Biro and a few (very few) cracks were added with a sharp H pencil.
As the thing still looked a bit dull I opted to add some colour with a taxi-way line in yellow and black. Logic told me that this would probably be aligned with the expansion joints but that meant the aircraft would be parked askew. Put it down to lazy positioning of the aircraft by the ground crew who have now made themselves scarce.


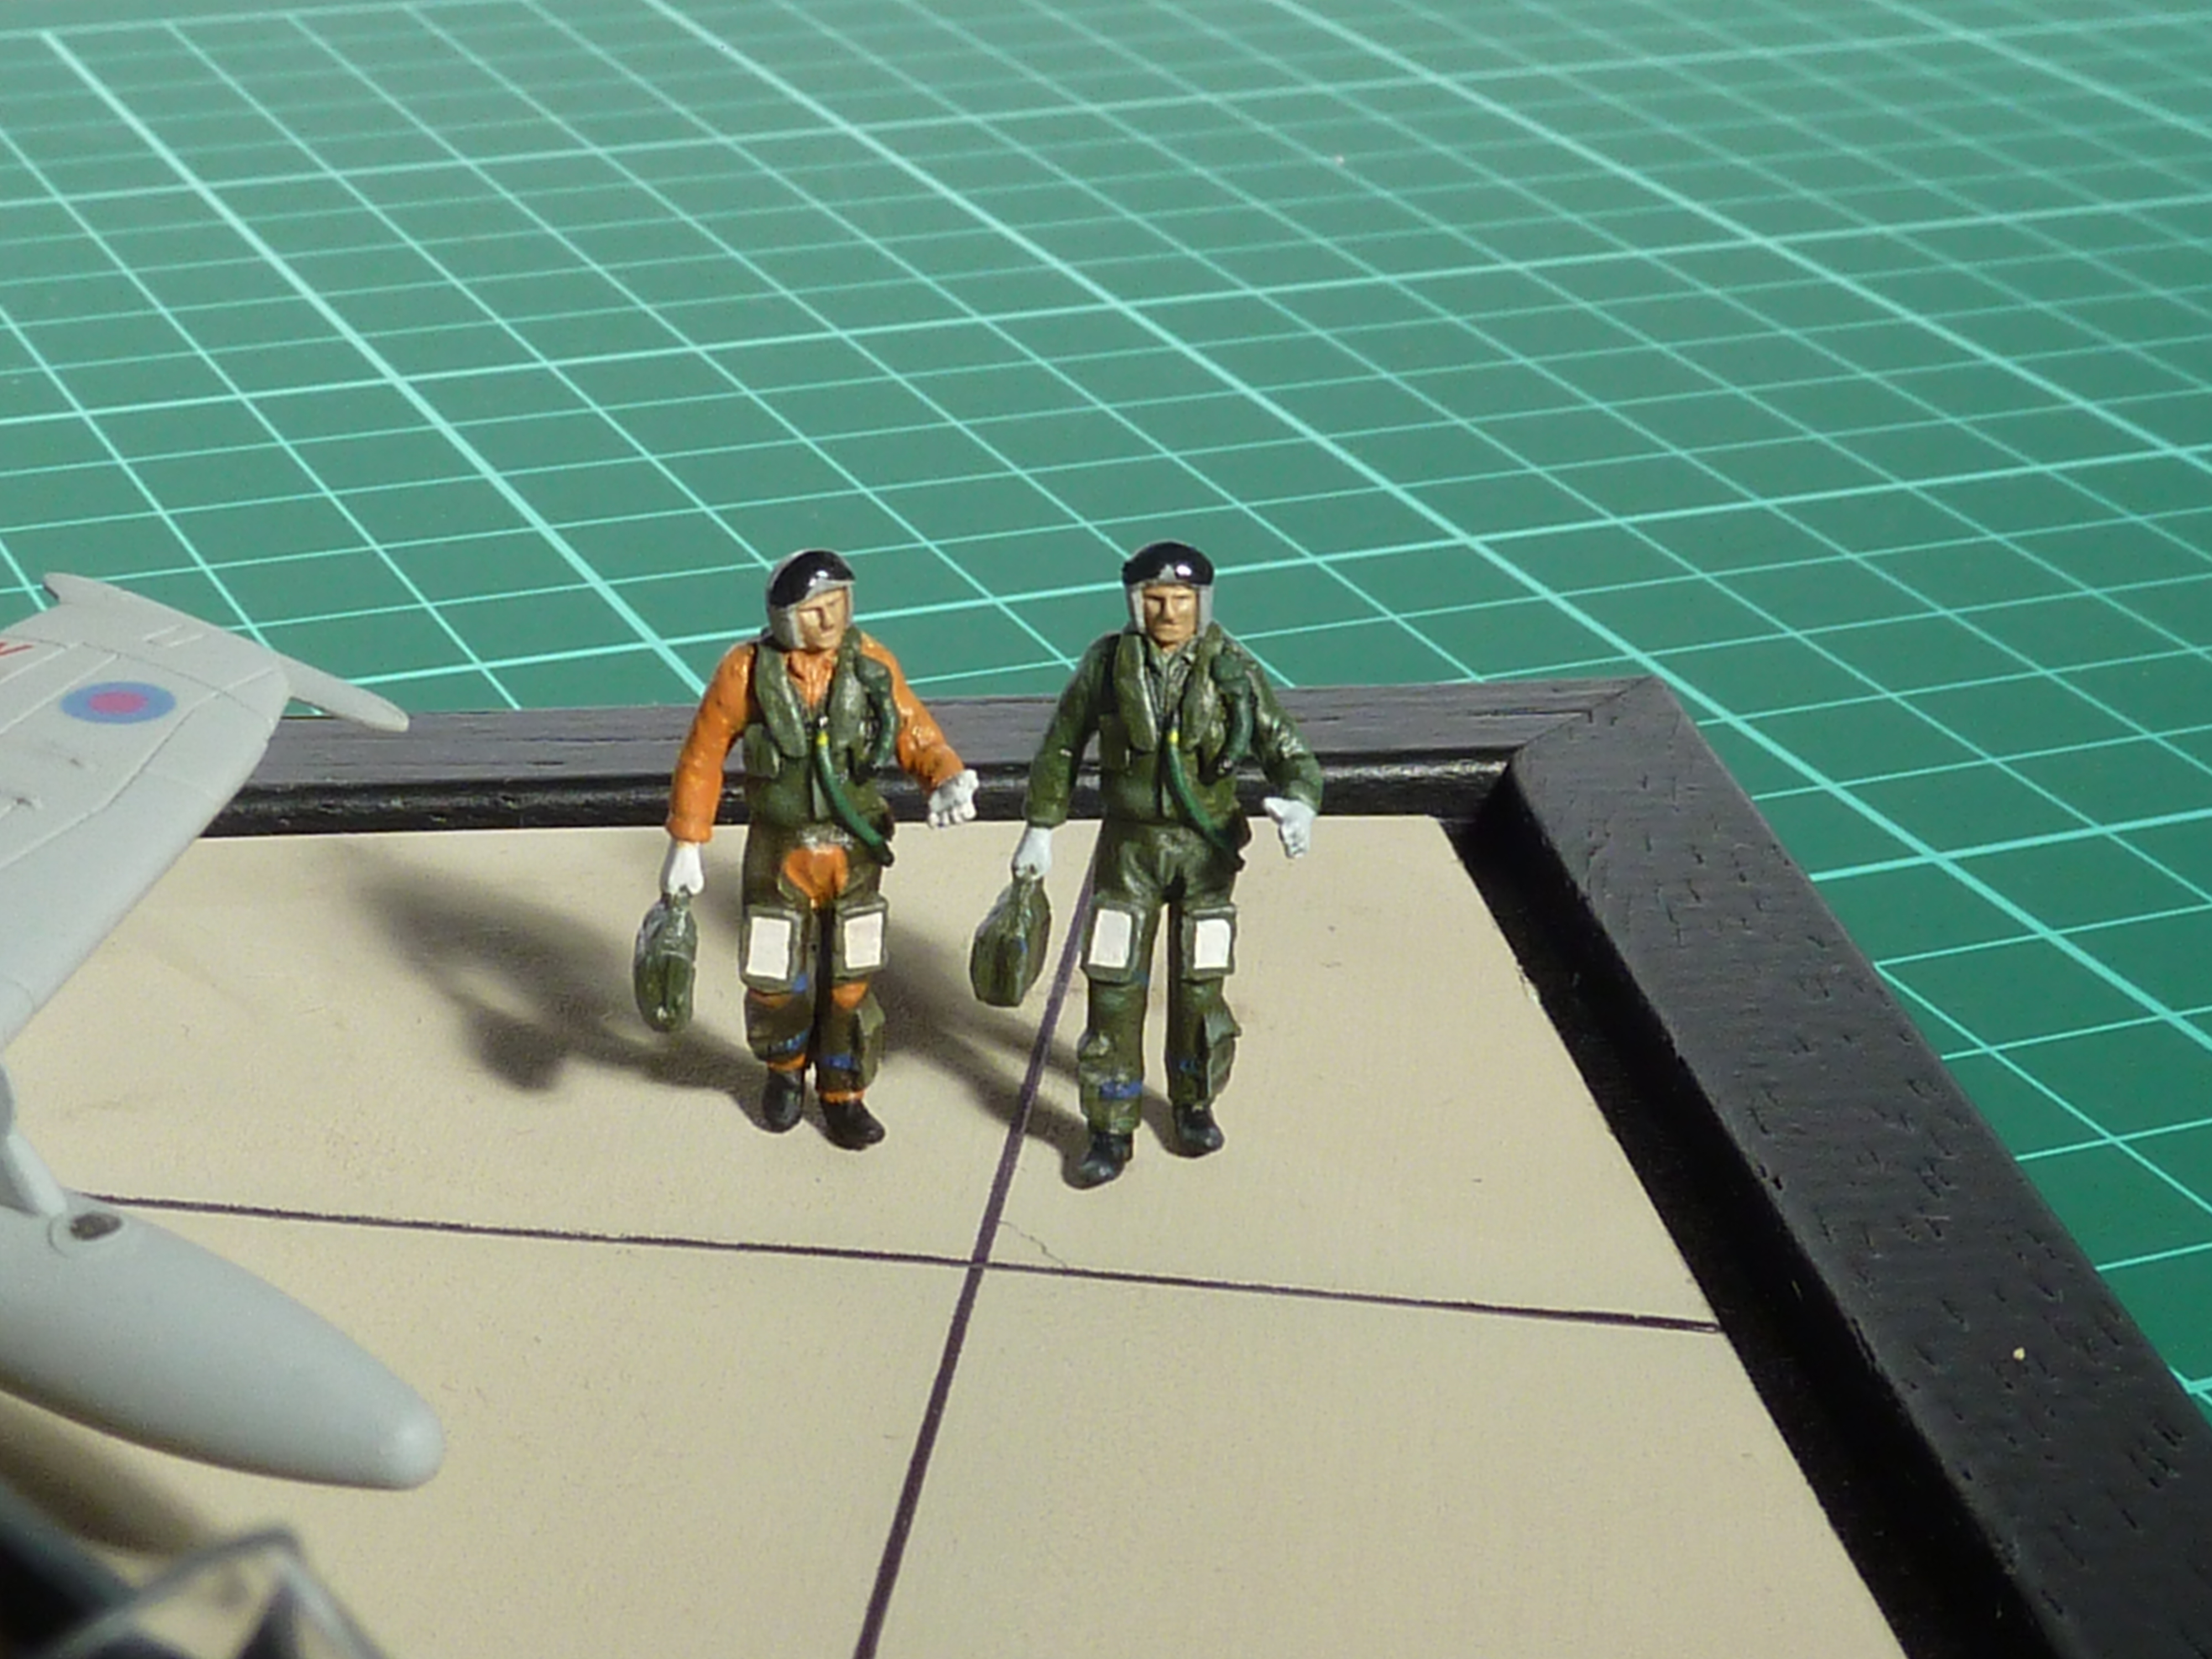
The final part of the little diorama were the two crew members. These were obtained from PJ Productions, as mentioned above. I opted to do one in the usual green to represent the customer and the other in orange flight overalls to represent the test pilot. I notice in the latest Typhoon pictures the test pilots seem to be wearing green too now, but at the time this model depicts (1995 ish) orange seemed to be in vogue.
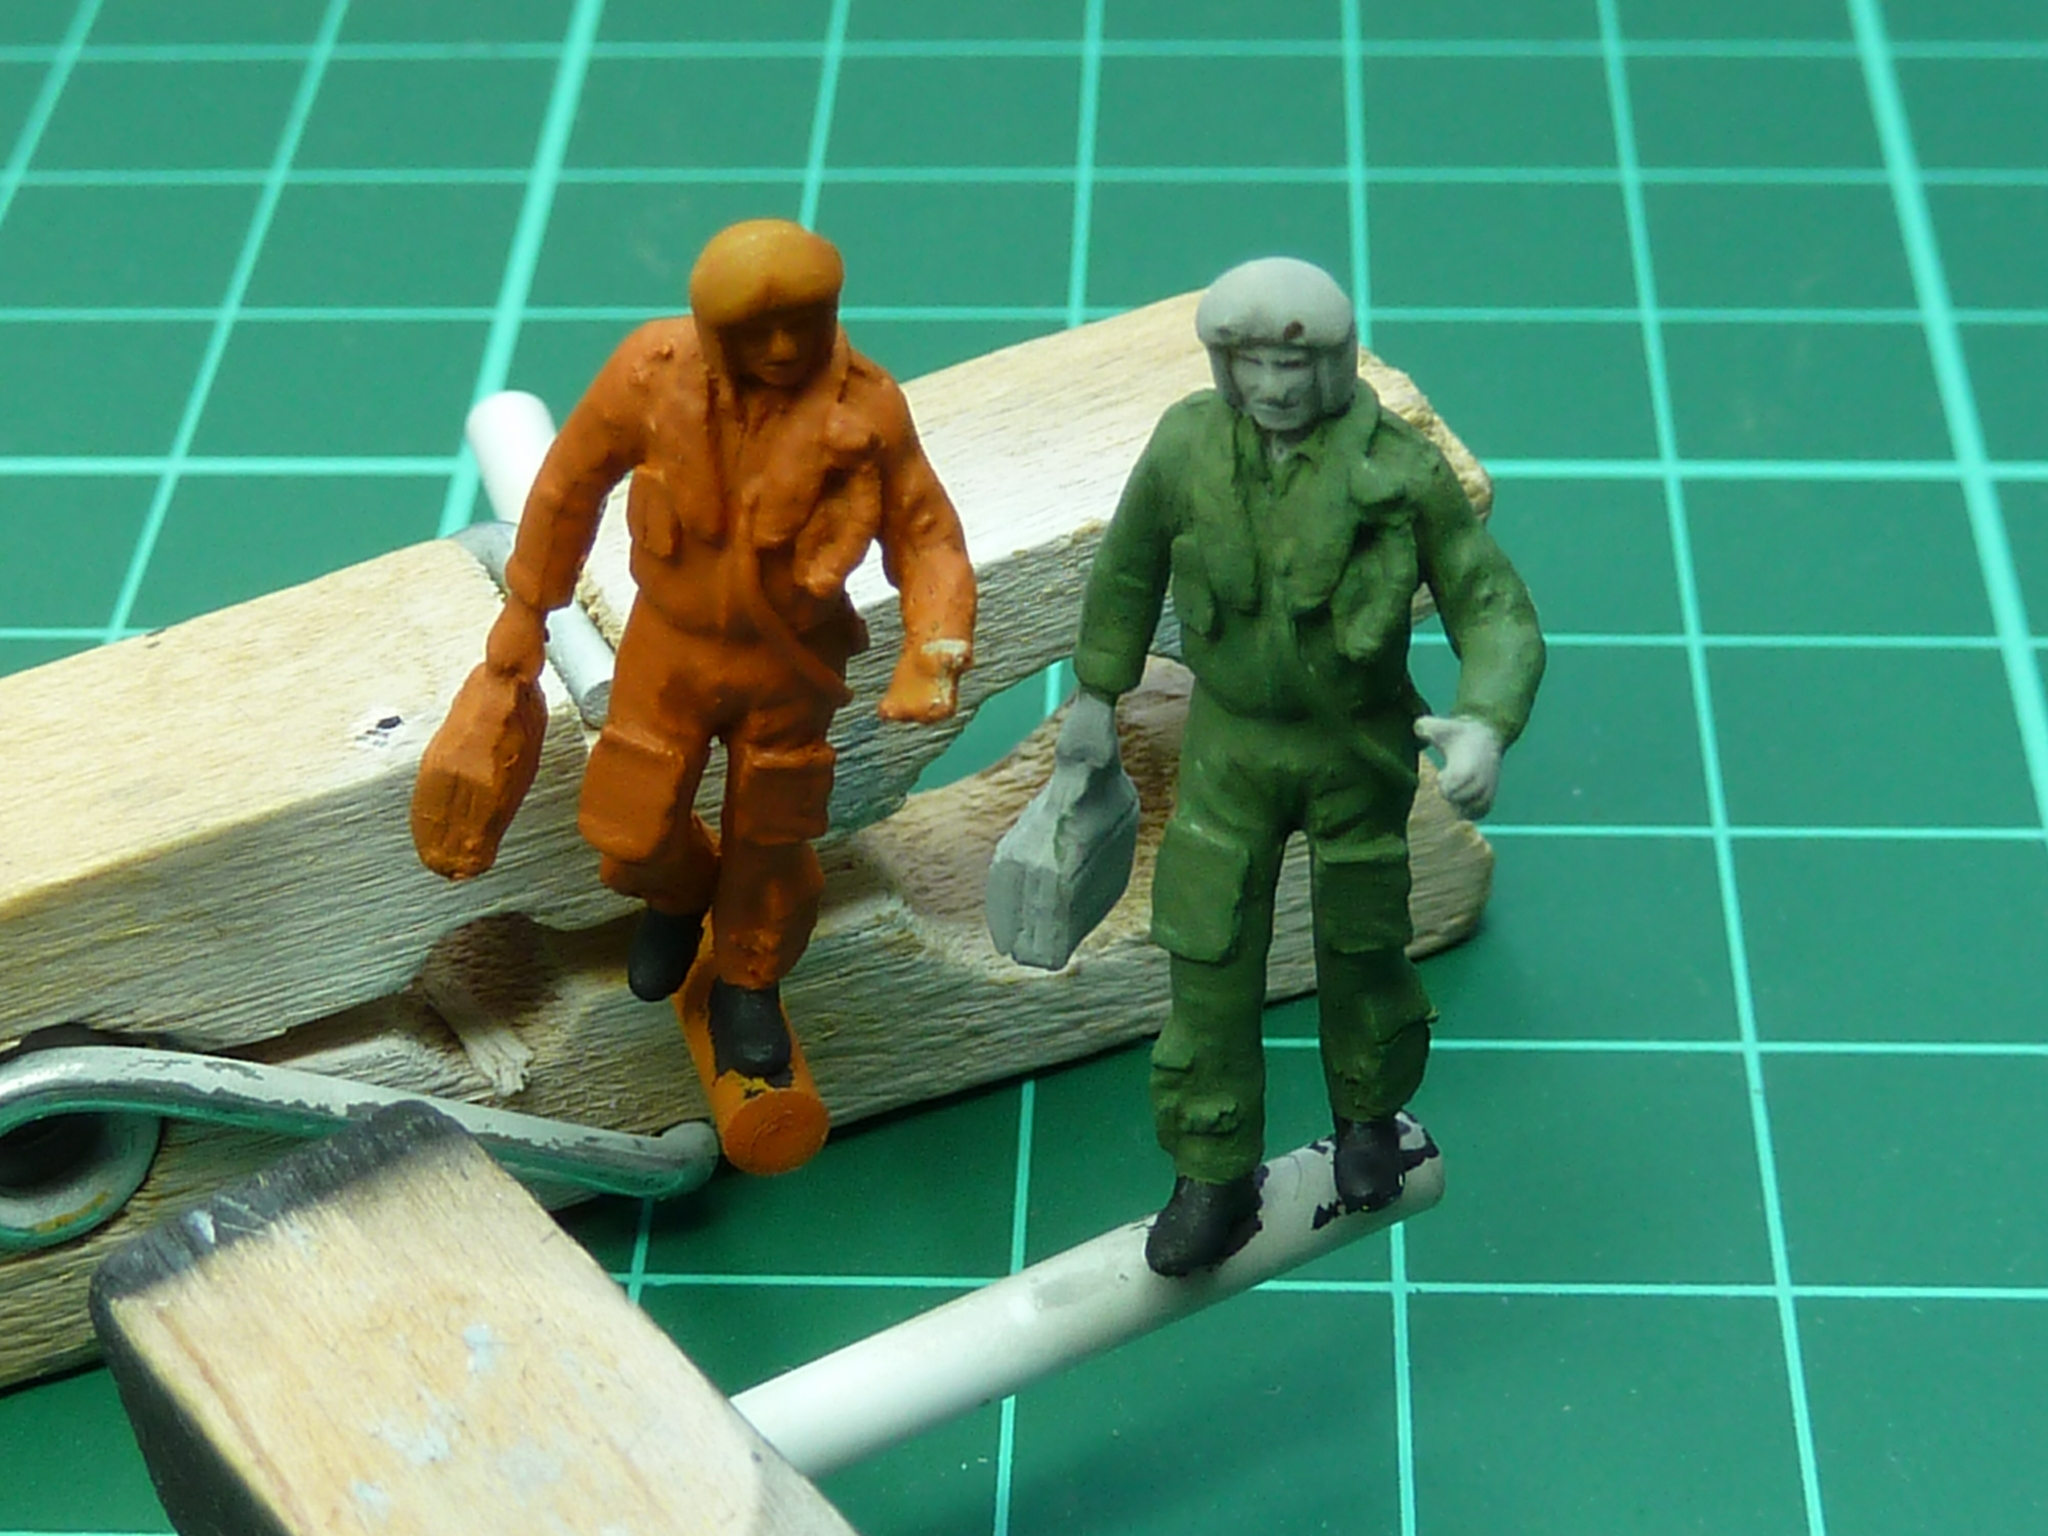
As usual I painted the base colours of the pilots in Humbrol enamels and completed the detailing in artists oils. These pics were taken the day after I’d finished them, so the oils are still a bit shiny but will go matt with time.
There is one small issue with the PJ pilots for those who know the Hawk; they are being very optimistic if they think there’ll be anywhere in the aircraft to put those holdalls!
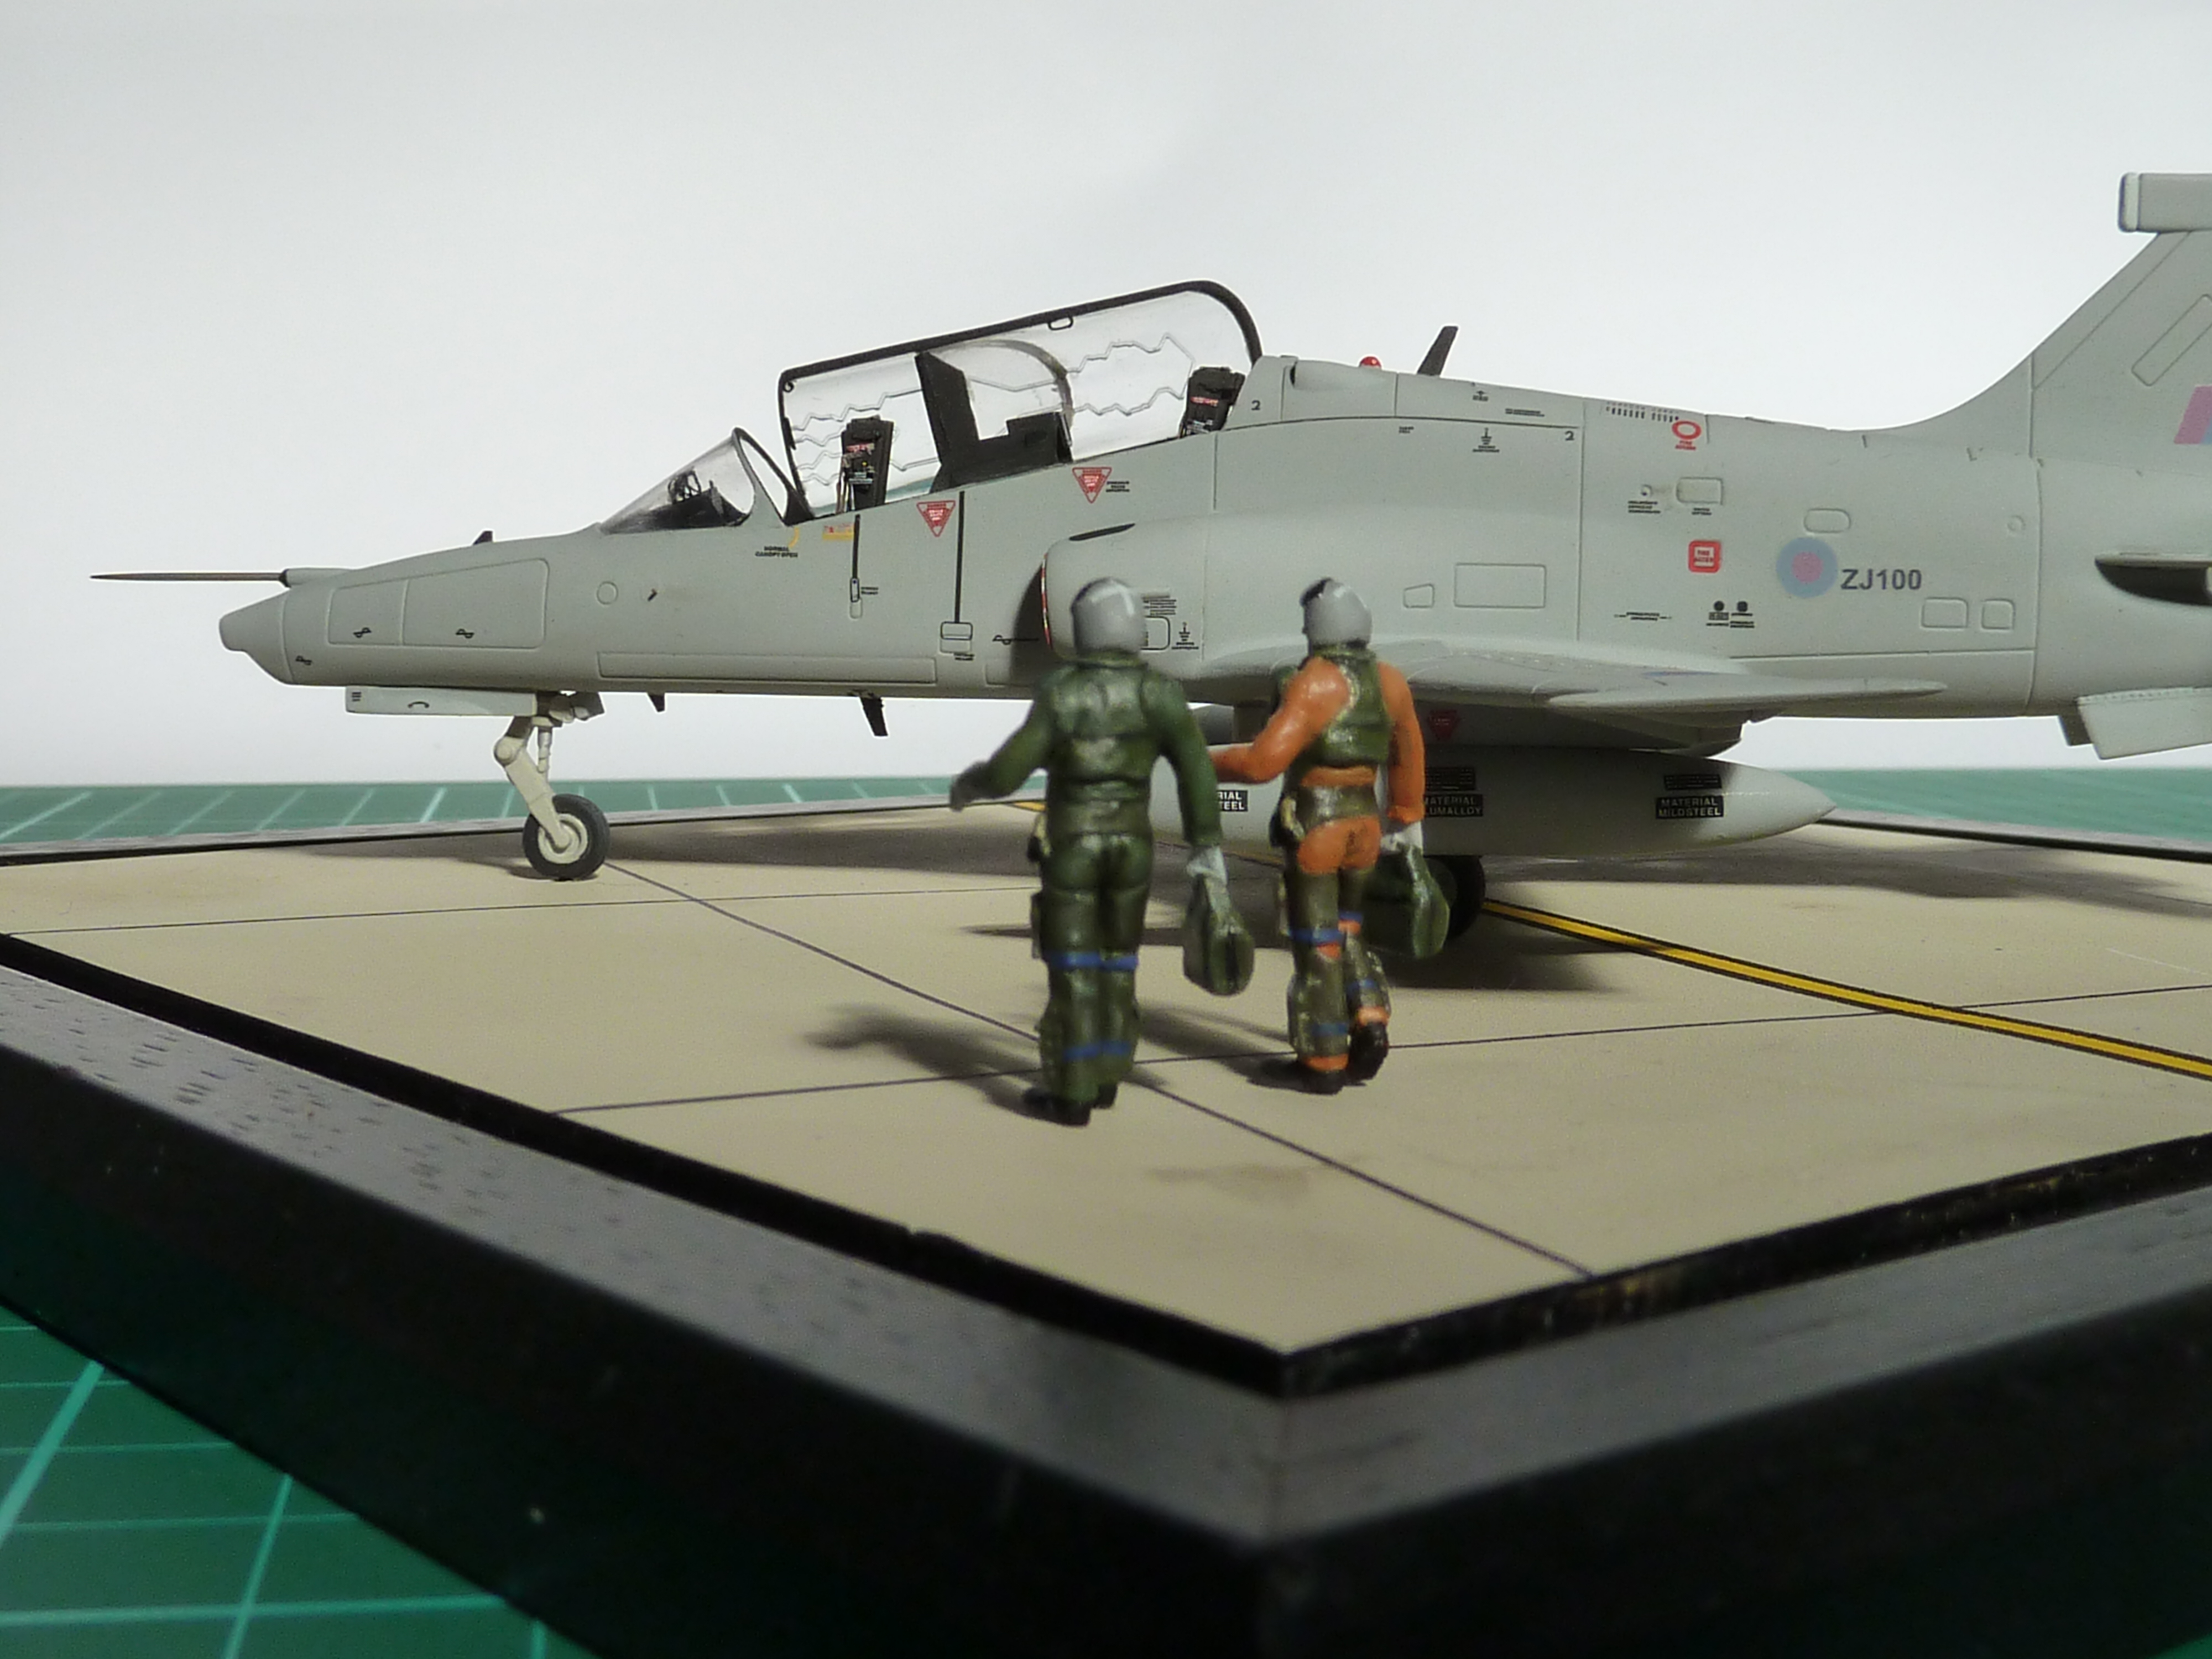
The final thing to do was mount the lot on the base which was achieved with various sized spigots made from brass wire.
That’s it for this entry. Overall the model was very enjoyable to make with no real dramas and I’m happy with the result, and so is CJ, which is the main thing.
Here are a few pics of the finished model.