
The Chris Craft model has languished on the shelf for a bit while I’ve wondered about how to tackle the manufacture of some decent fittings.
There has been sporadic progress on them, but nothing really worth reporting until now. The kit is however, also serving as a test bed for some of the ideas and techniques that I want to use on the Miss Severn model and that has been an impetus for recent progress.
In pursuit of solving the deck fittings problem, and also to advance my in-house abilities, I decided to teach myself how to bright nickel plate.
Teach myself is perhaps a bit grandiose. I bought a plating kit from Gateros Plating and read the instructions actually.
The kit is quite comprehensive, and 5 Litres is a lot for a small model maker like me. In fact I’ve only mixed up 1L as that’s enough for my needs at the moment. The power supply control is a bit Heath Robinson, but works. You do need to provide a 12V dc supply. They suggest a car battery or charger, but I had an old HP printer power supply in the cupboard so used that. The parts I’ll be plating are small enough that I don’t need much current at all. I will however upgrade to a proper bench supply soon as it’s a bit of a guessing game as to what voltage and current I’m plating at, at the moment. Loads of bubbles means way too high!
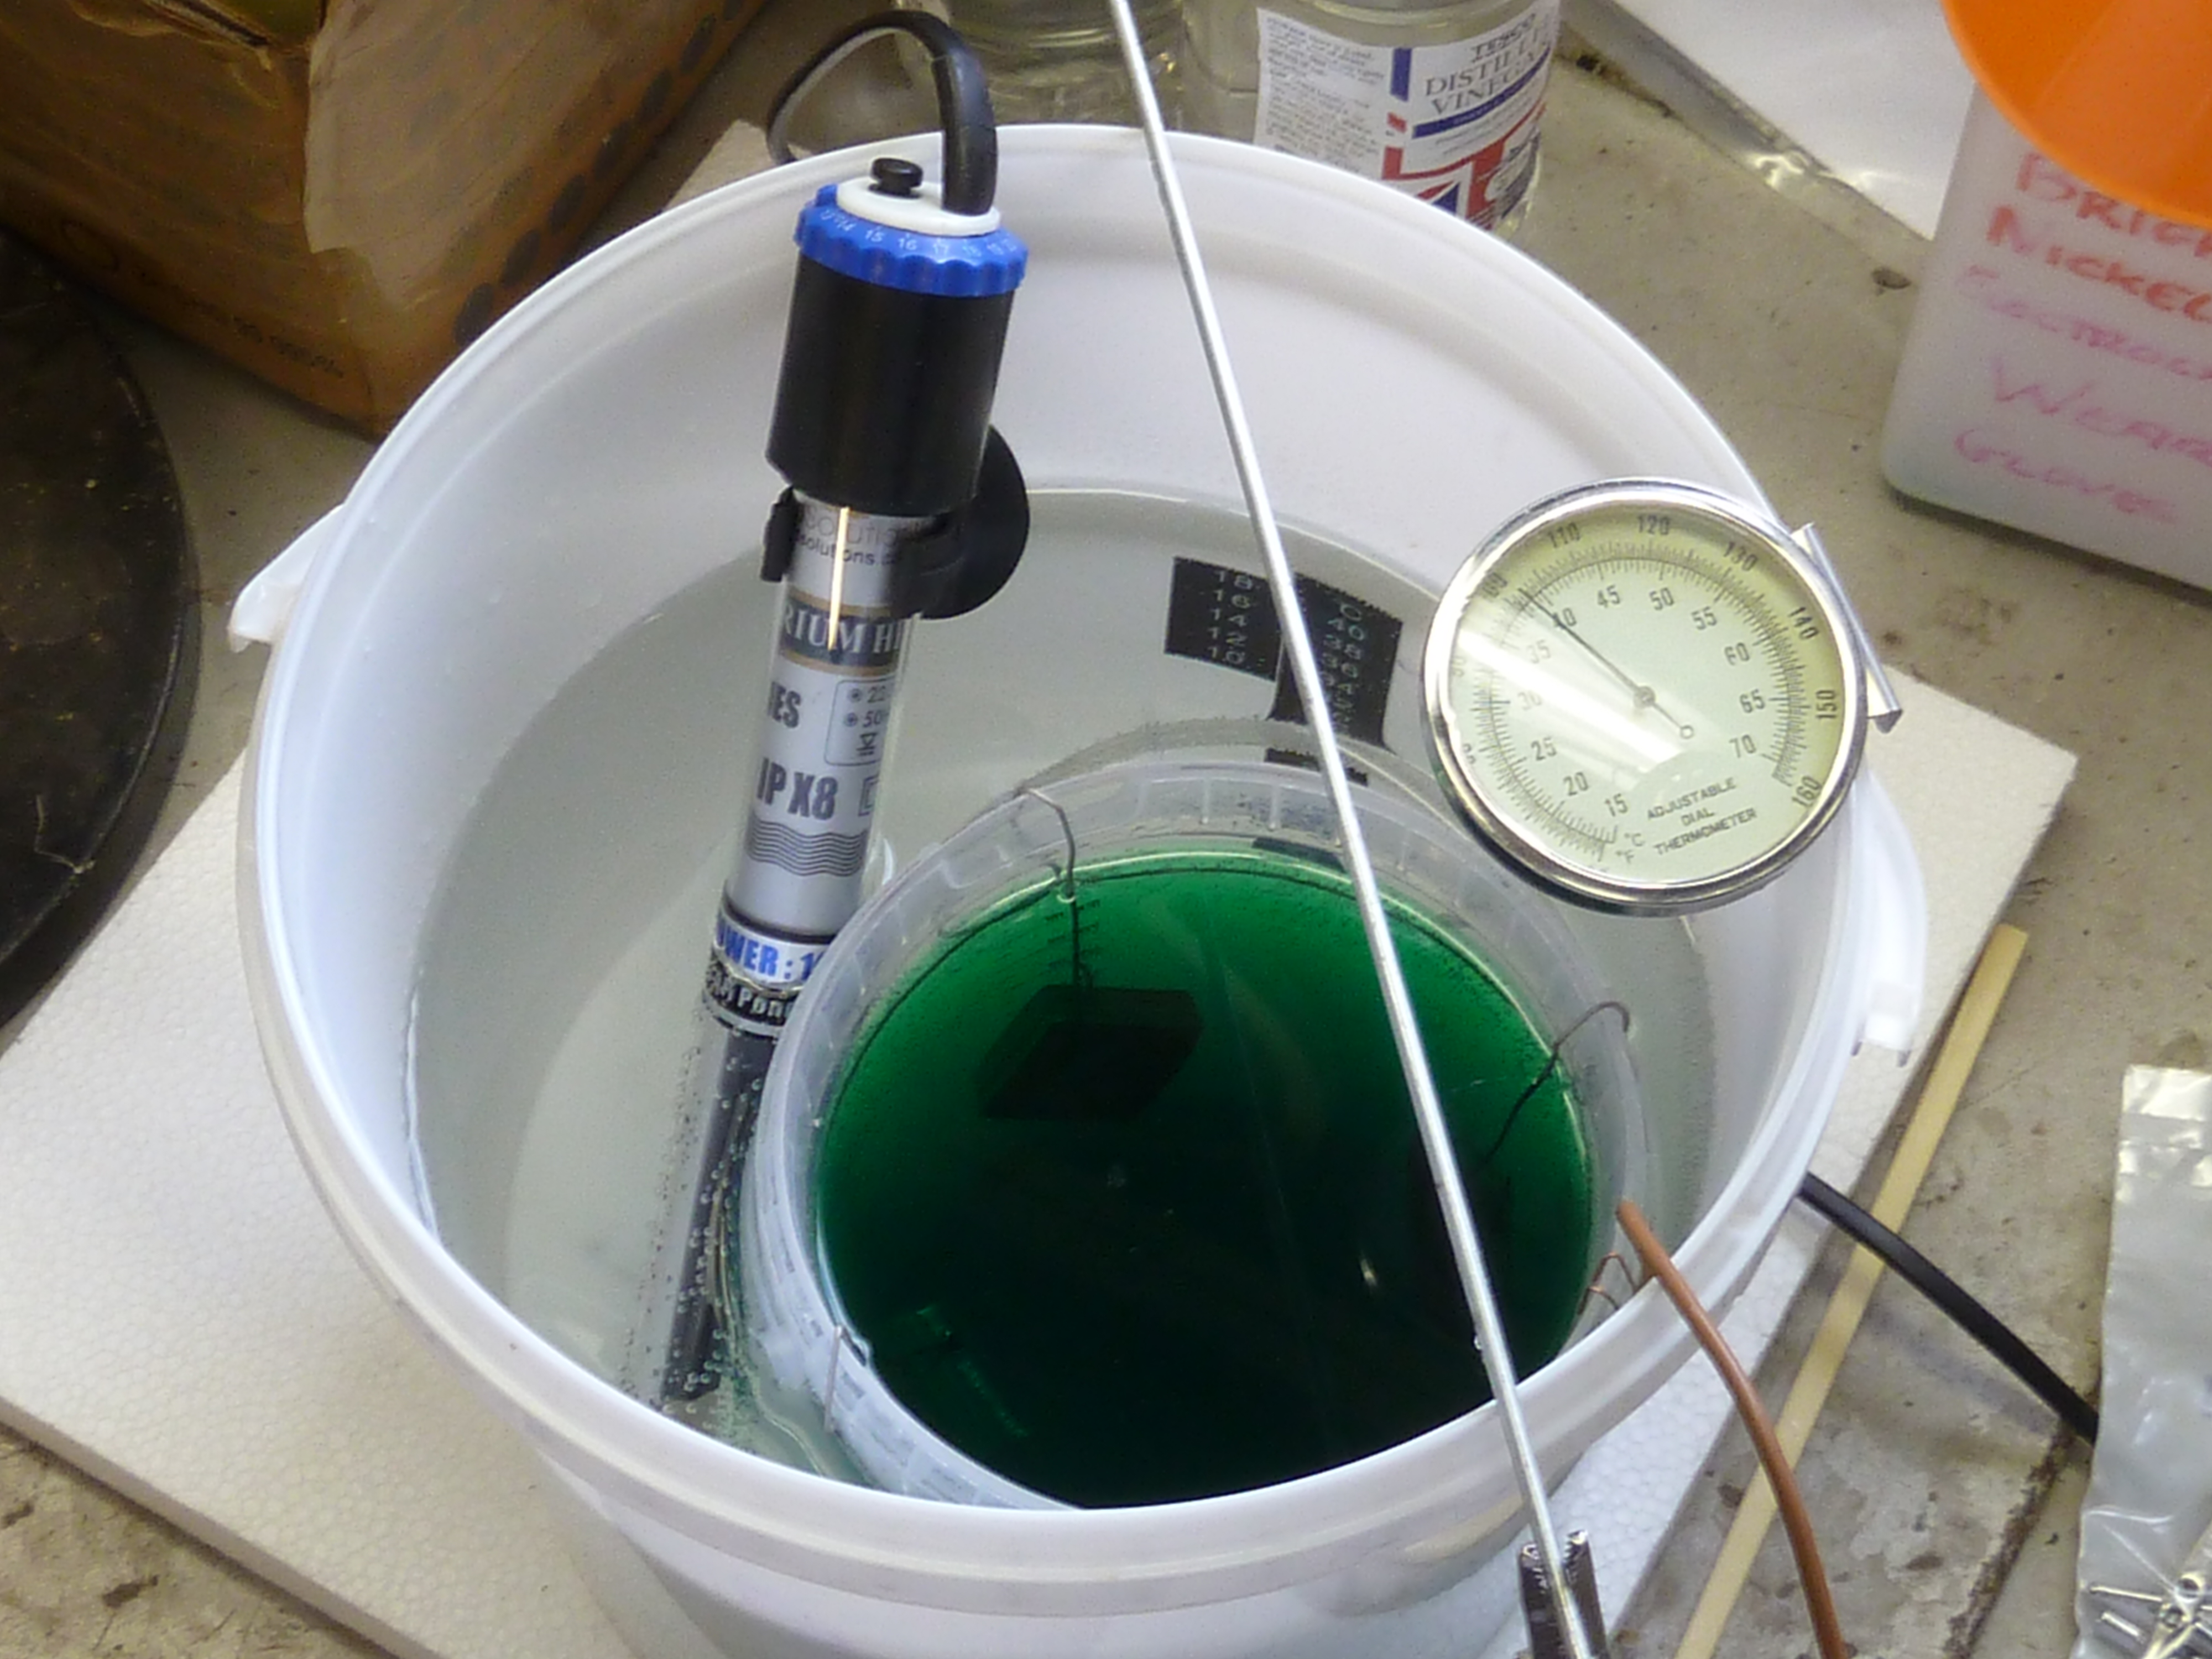
Having mixed up the electrolyte, alkaline cleaning solution and acid etch solution I set to work. As I was only using 1L, I used the Gateros tank (aka bucket) as a water reservoir to provide some thermal inertia for the heater to work against. It also meant I didn’t have to immerse the heater or thermometer in the actual electrolyte.
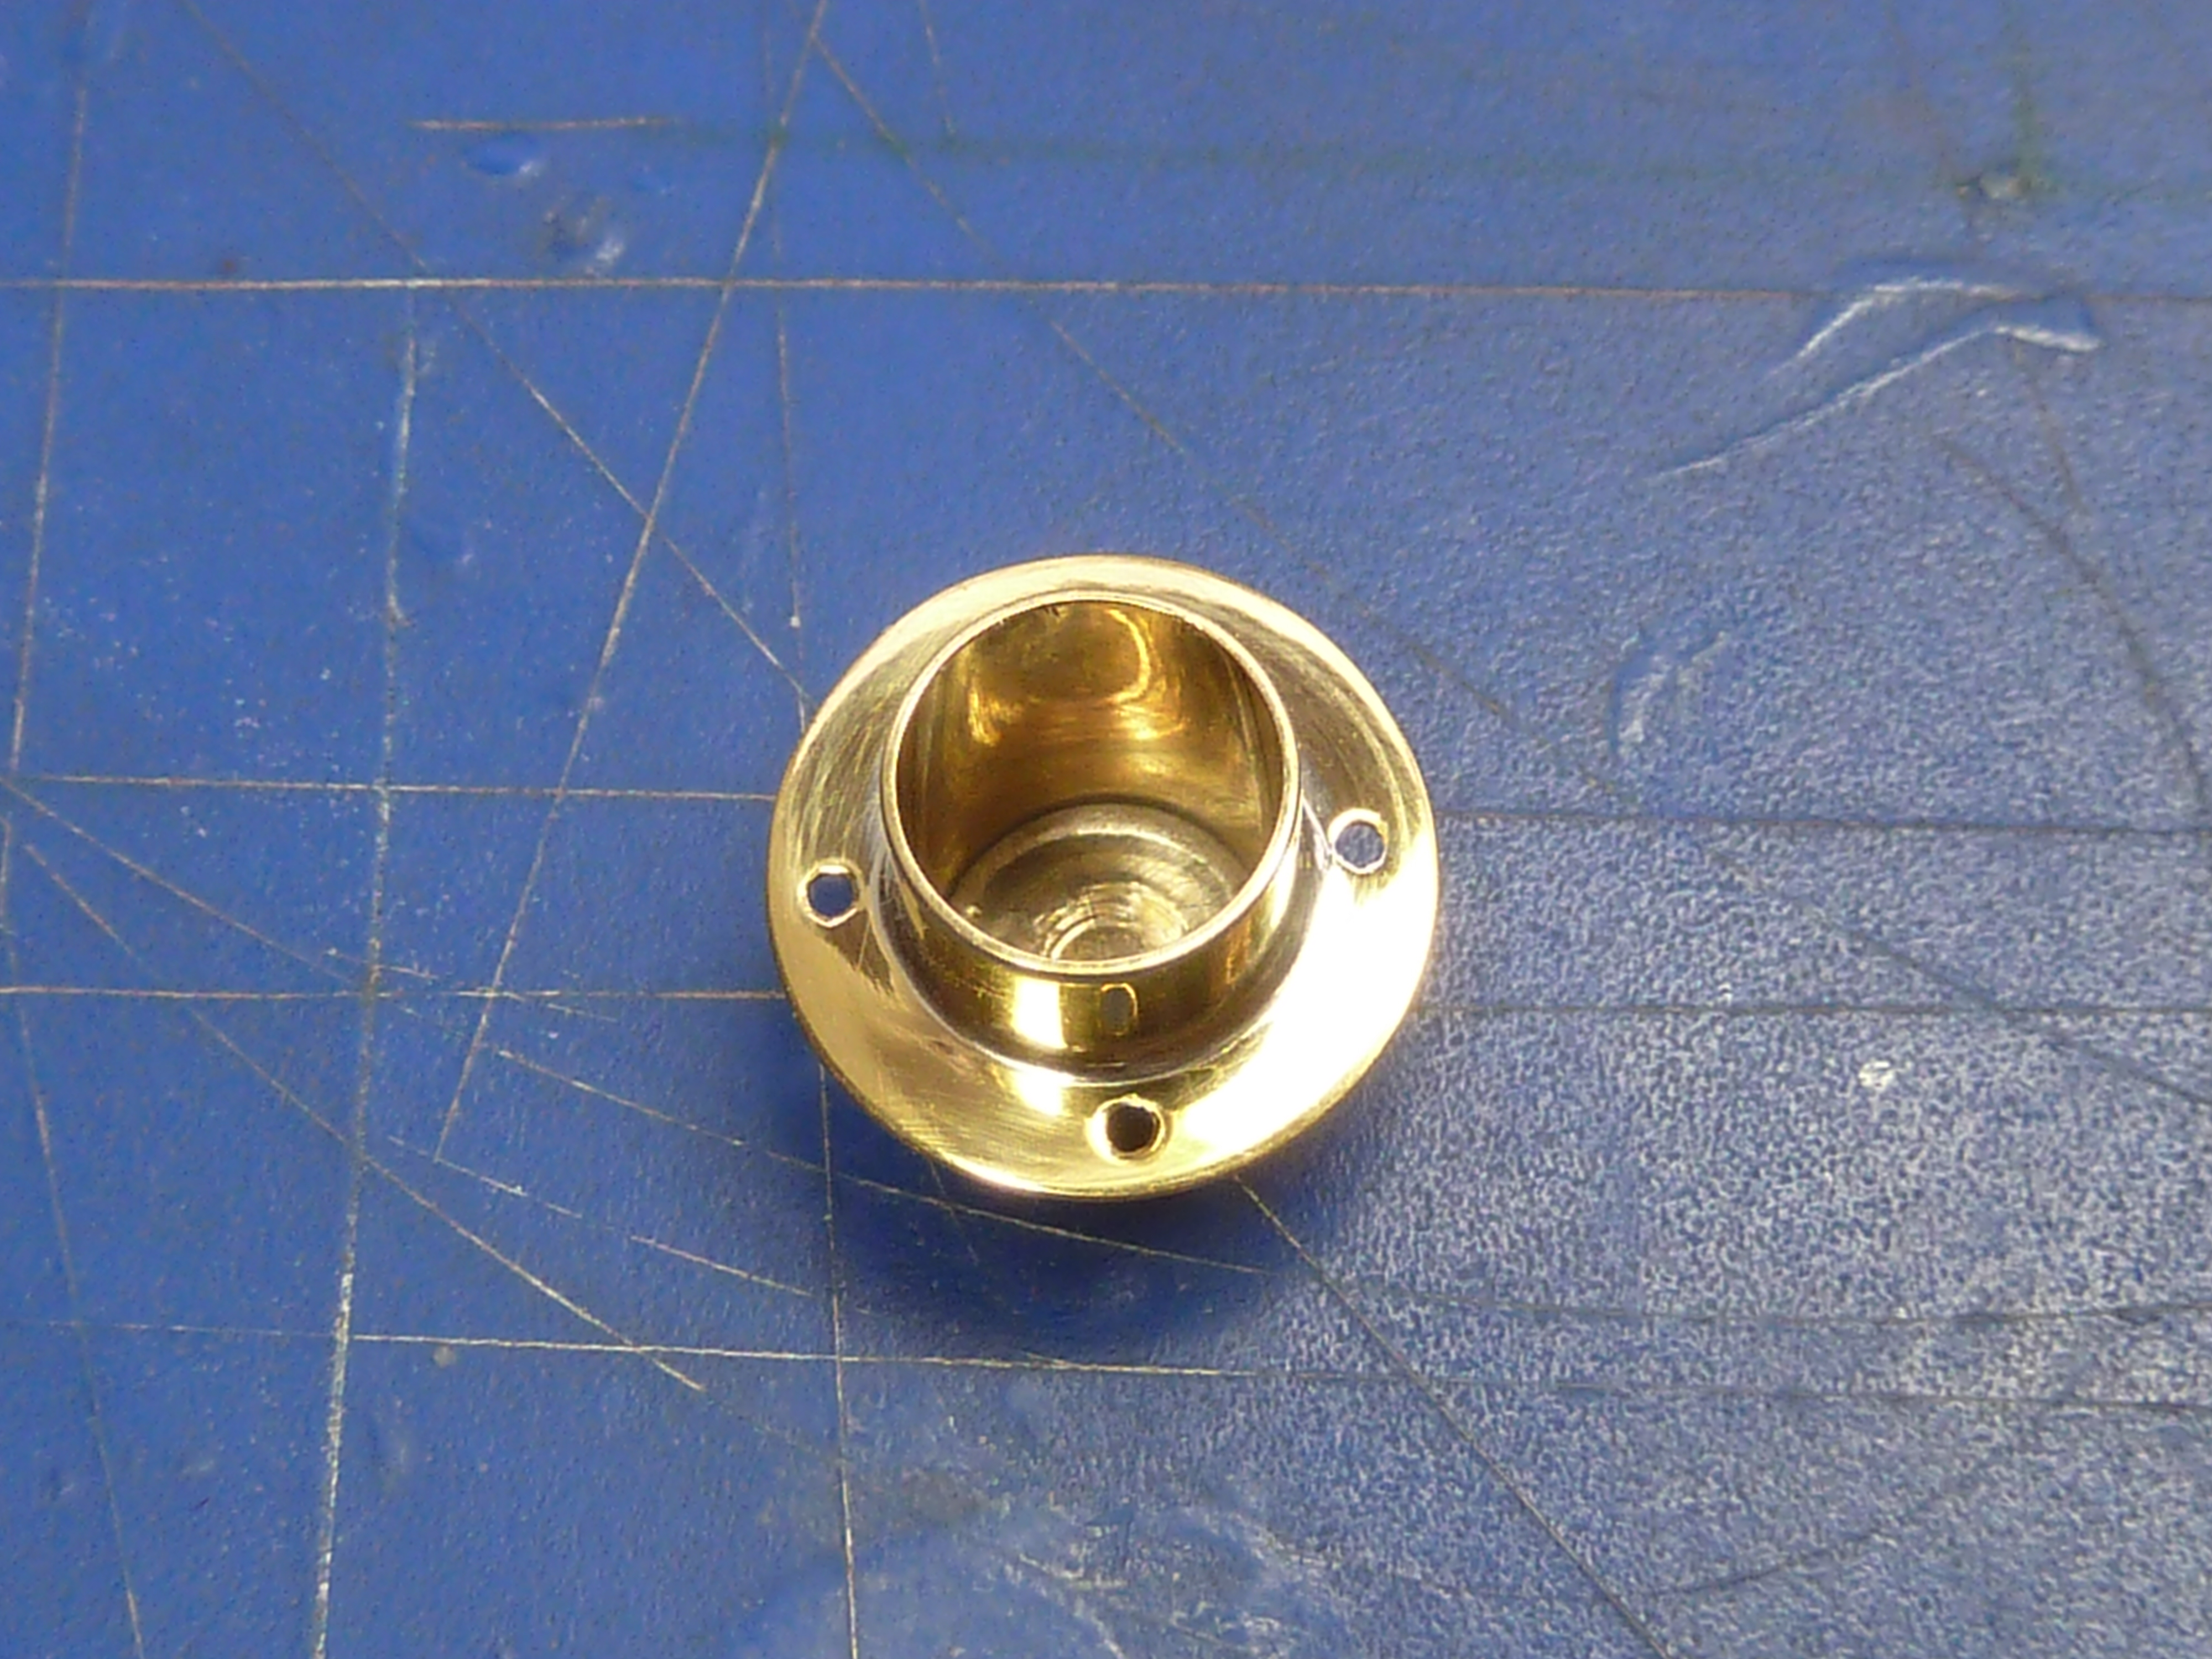
I’d already made some of the deck fittings for the Chris Craft boat in brass with the idea of plating them, or sending them off to be plated.

I also wanted to find out if plating the recently made hinges would make them seize up. That wouldn’t actually be a problem on the Chris Craft where they are just for show and aren’t actually functional. However, they need to remain functional on the Miss Severn model.
The parts to be plated were cleaned and polished. Then throughly wiped down with acetone to remove any residual grease and polish.
The next stage was cathodic cleaning in the alkaline solution. The process releases hydrogen at the metal’s surface, and so lifts off any contaminants. You are however actually ‘plating’ the surface of your item with any positive ions present in the cleaning solution. These are non-adherent apparently, and can be removed with a quick anodic clean at the end.
I’ve certainly noticed a slight tarnish on items at the end of the cathodic cleaning.
Once the parts were throughly clean, signified by water no longer beading on the surface anywhere, they were etched for a few moments in the acid solution to neutralise any alkaline salts left on the surface, and also provide a microscopic key for the plating to adhere to I assume.
It shouldn’t need saying, but the parts were rinsed in distilled water between all of these operations. Going straight from an alkaline cleaning solution to an acid etch is not a good idea methinks.
After a few moments being etched, the parts were rinsed again then popped in the electrolyte and the plating current turned on. The Gateros instructions recommend 2 – 6V for the actual plating. They provide a resistive wire in the plating circuit which you clip your power supply input onto, to vary the Voltage drop depending on the surface area of the parts being plated.
It works, but the size of the items I’m plating means I’m always operating on minimum. I could do with more control and intend to invest in a proper bench top power supply soon.
The plating kit recommends 20 – 50 mins in the electrolyte, but I’ve found that 10 -15 mins with the existing set-up is more than enough, probably because my current is too high.
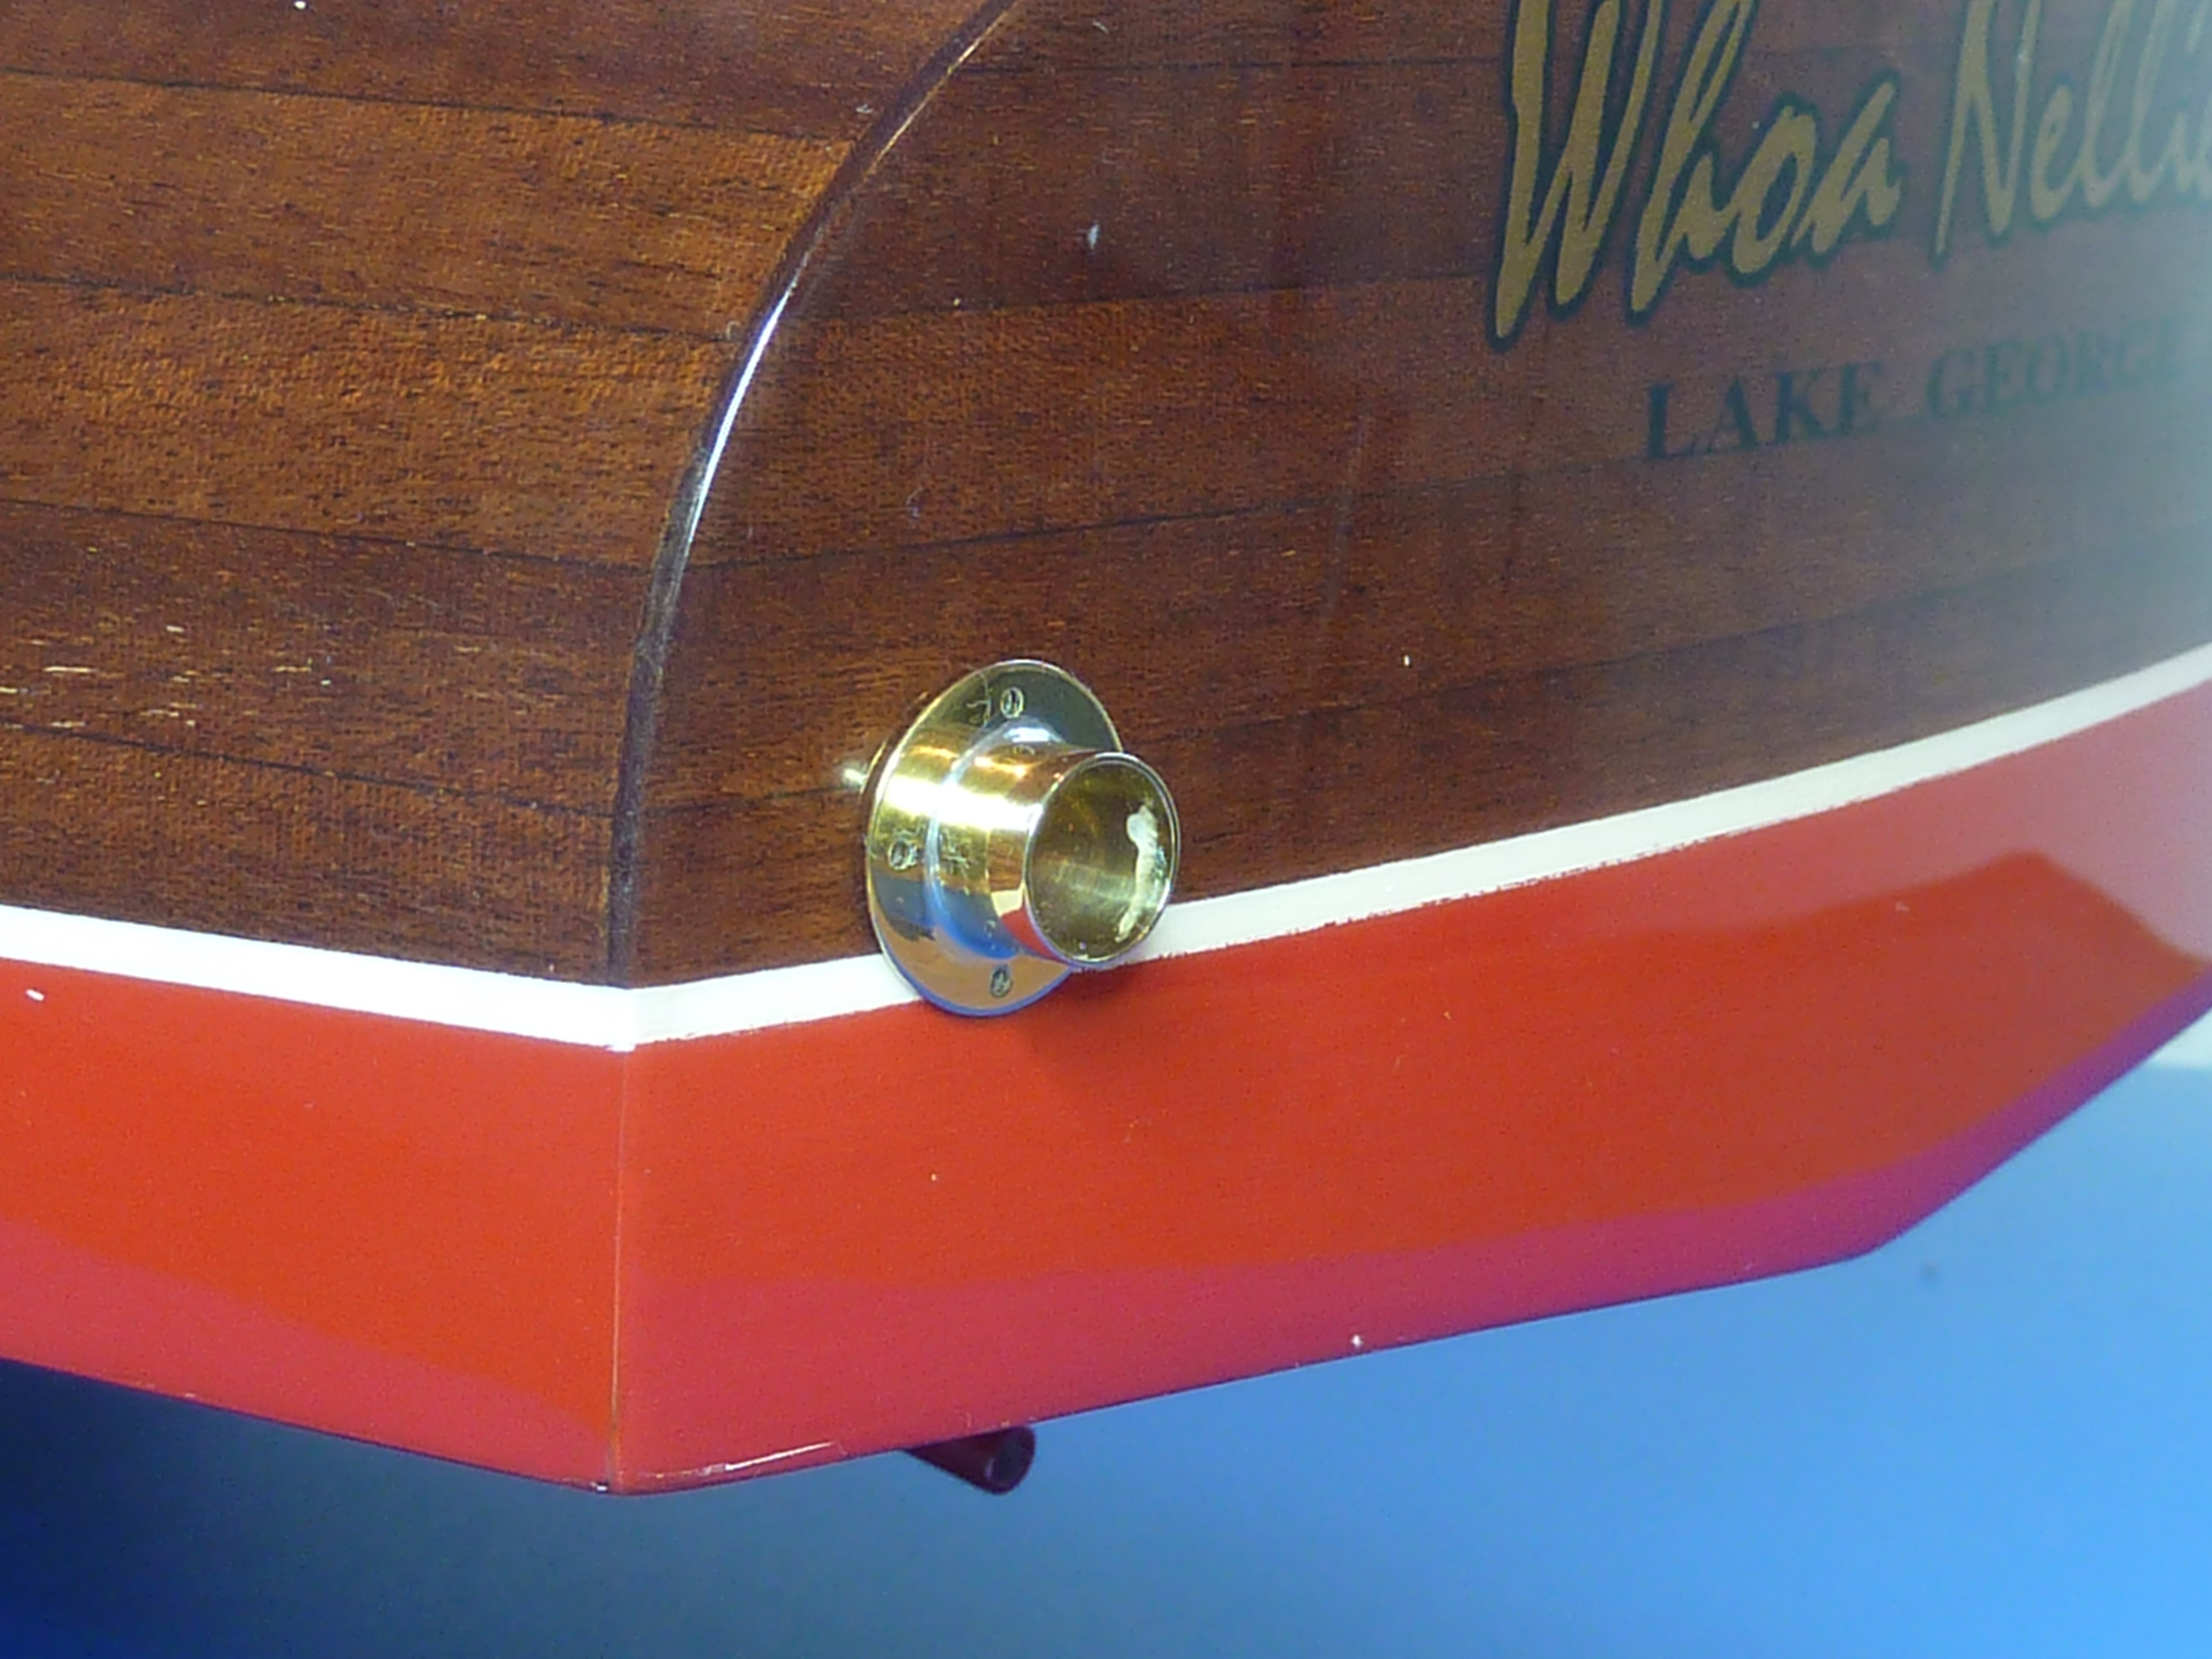
I was pleasantly surprised, in fact delighted, by the finish on the plated parts. I haven’t properly installed them on the model yet, but here are a few pictures of them lashed up in-situ.

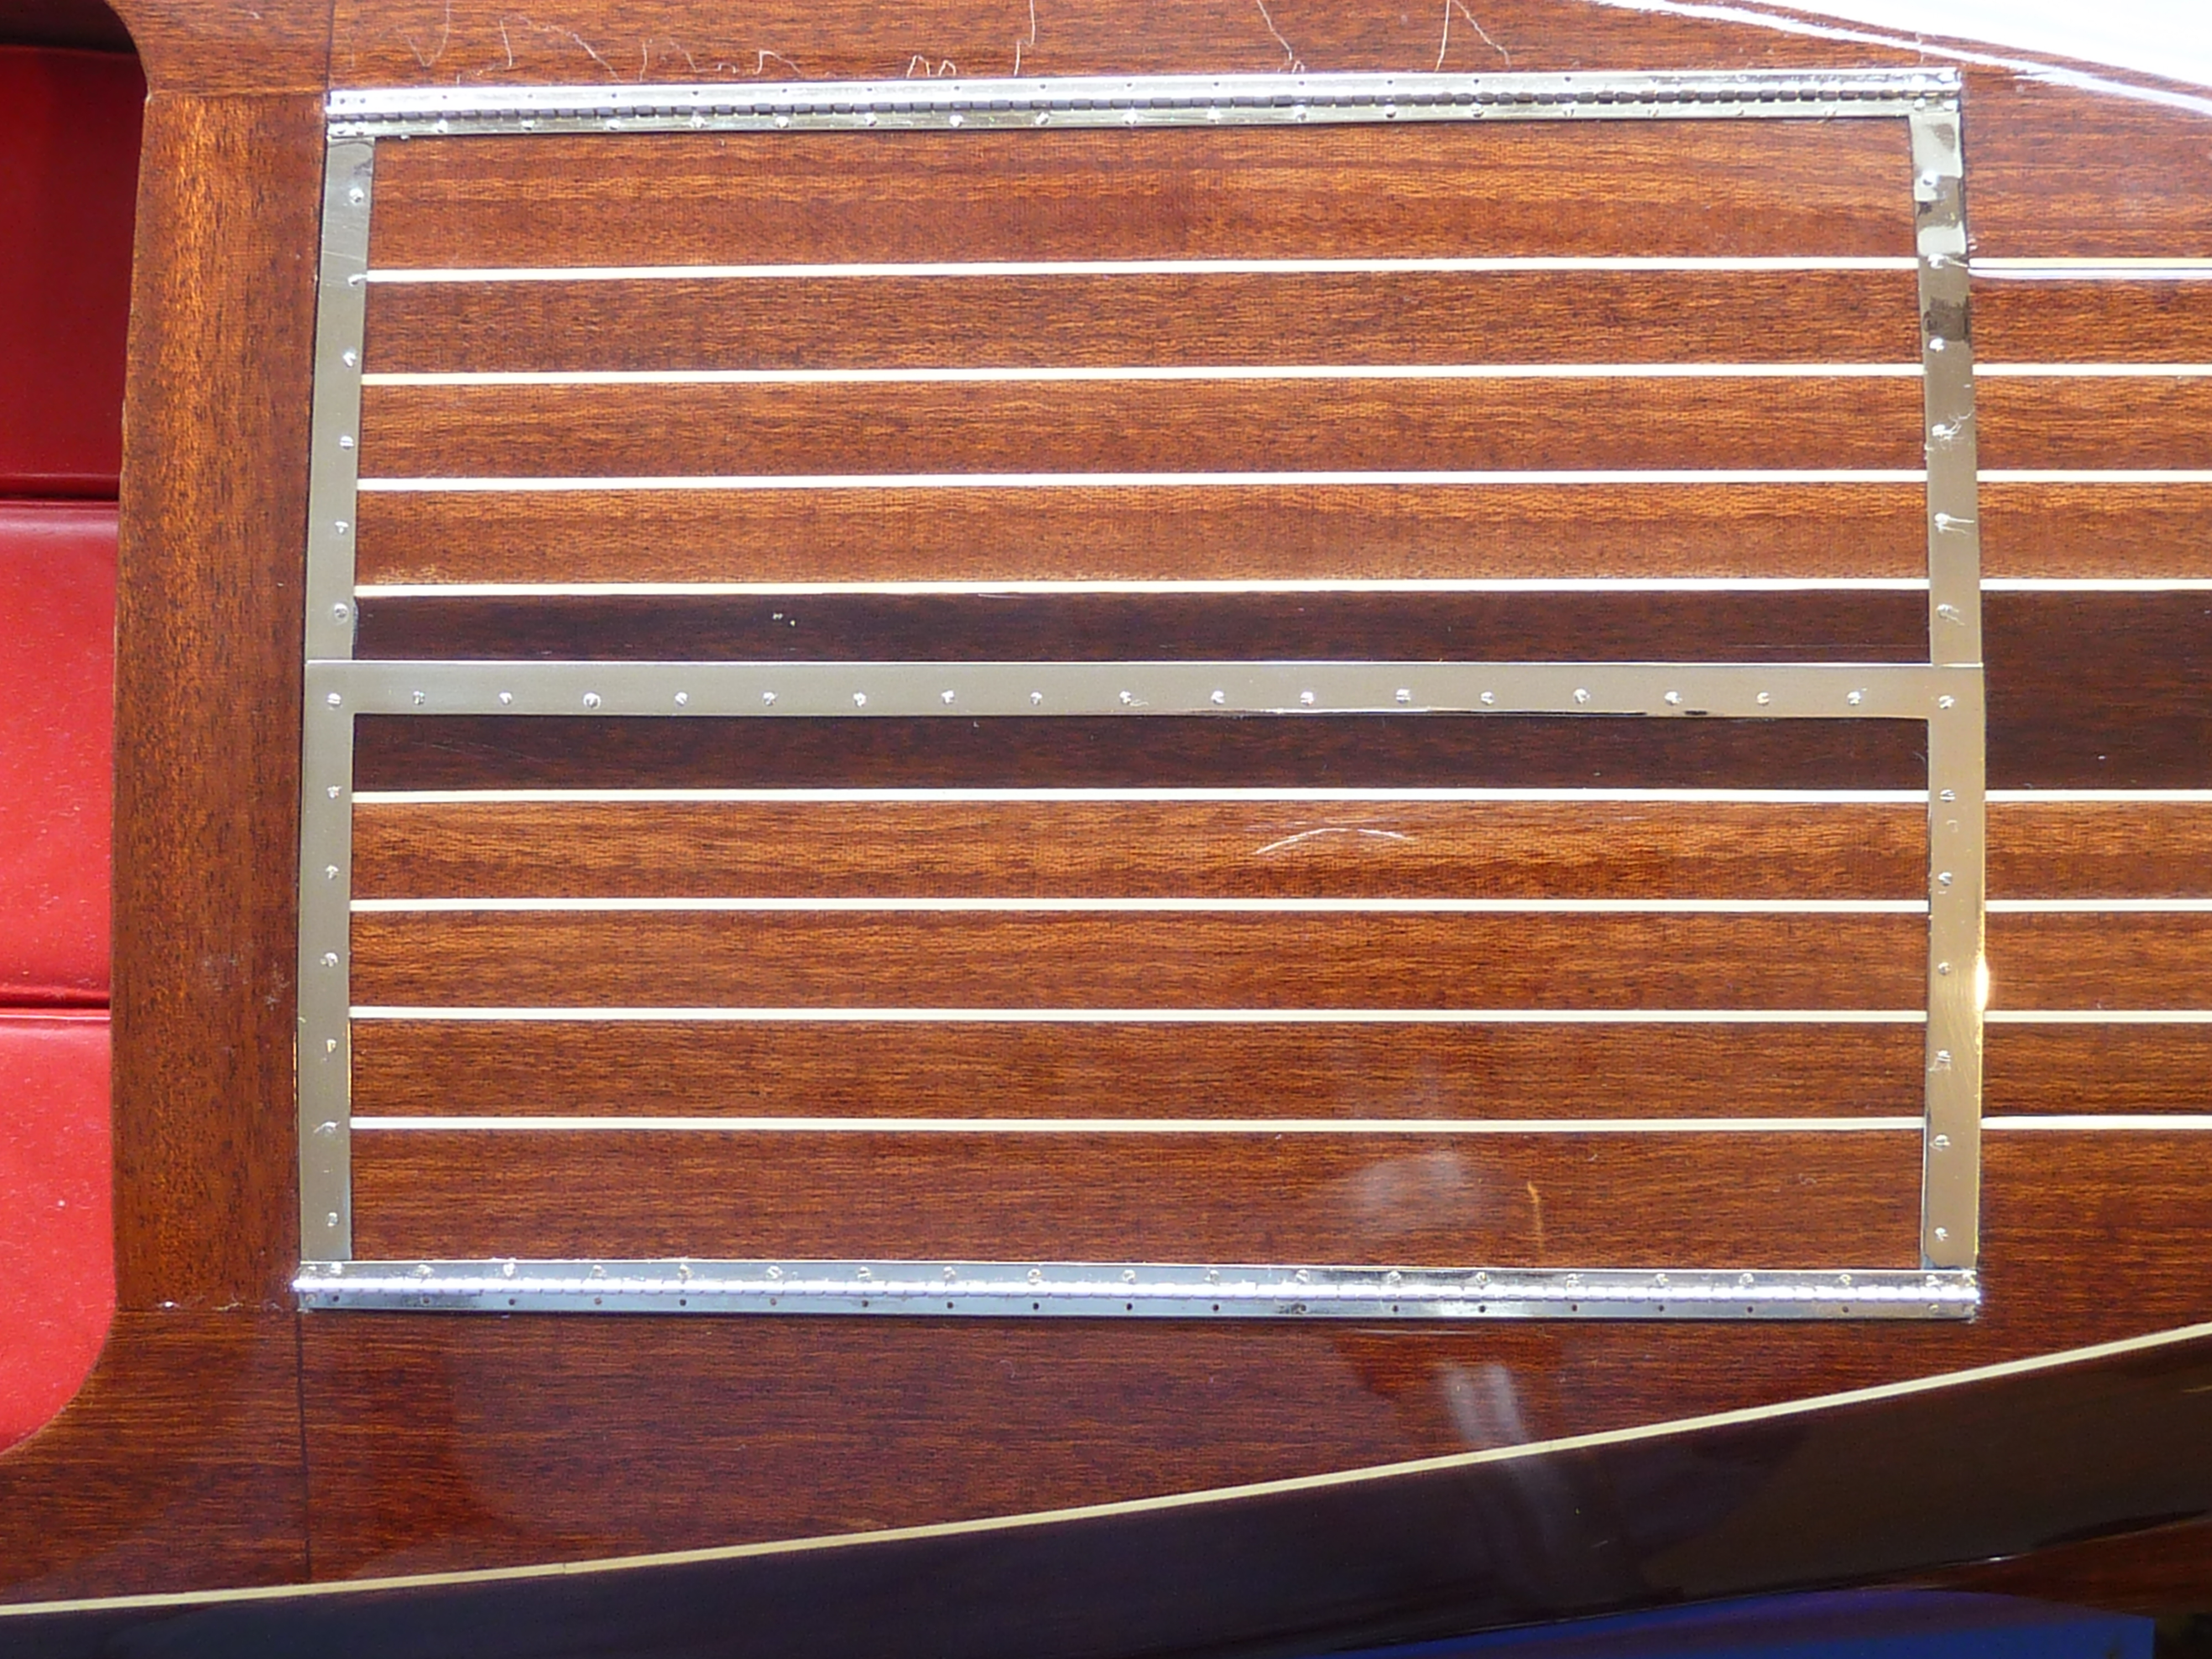


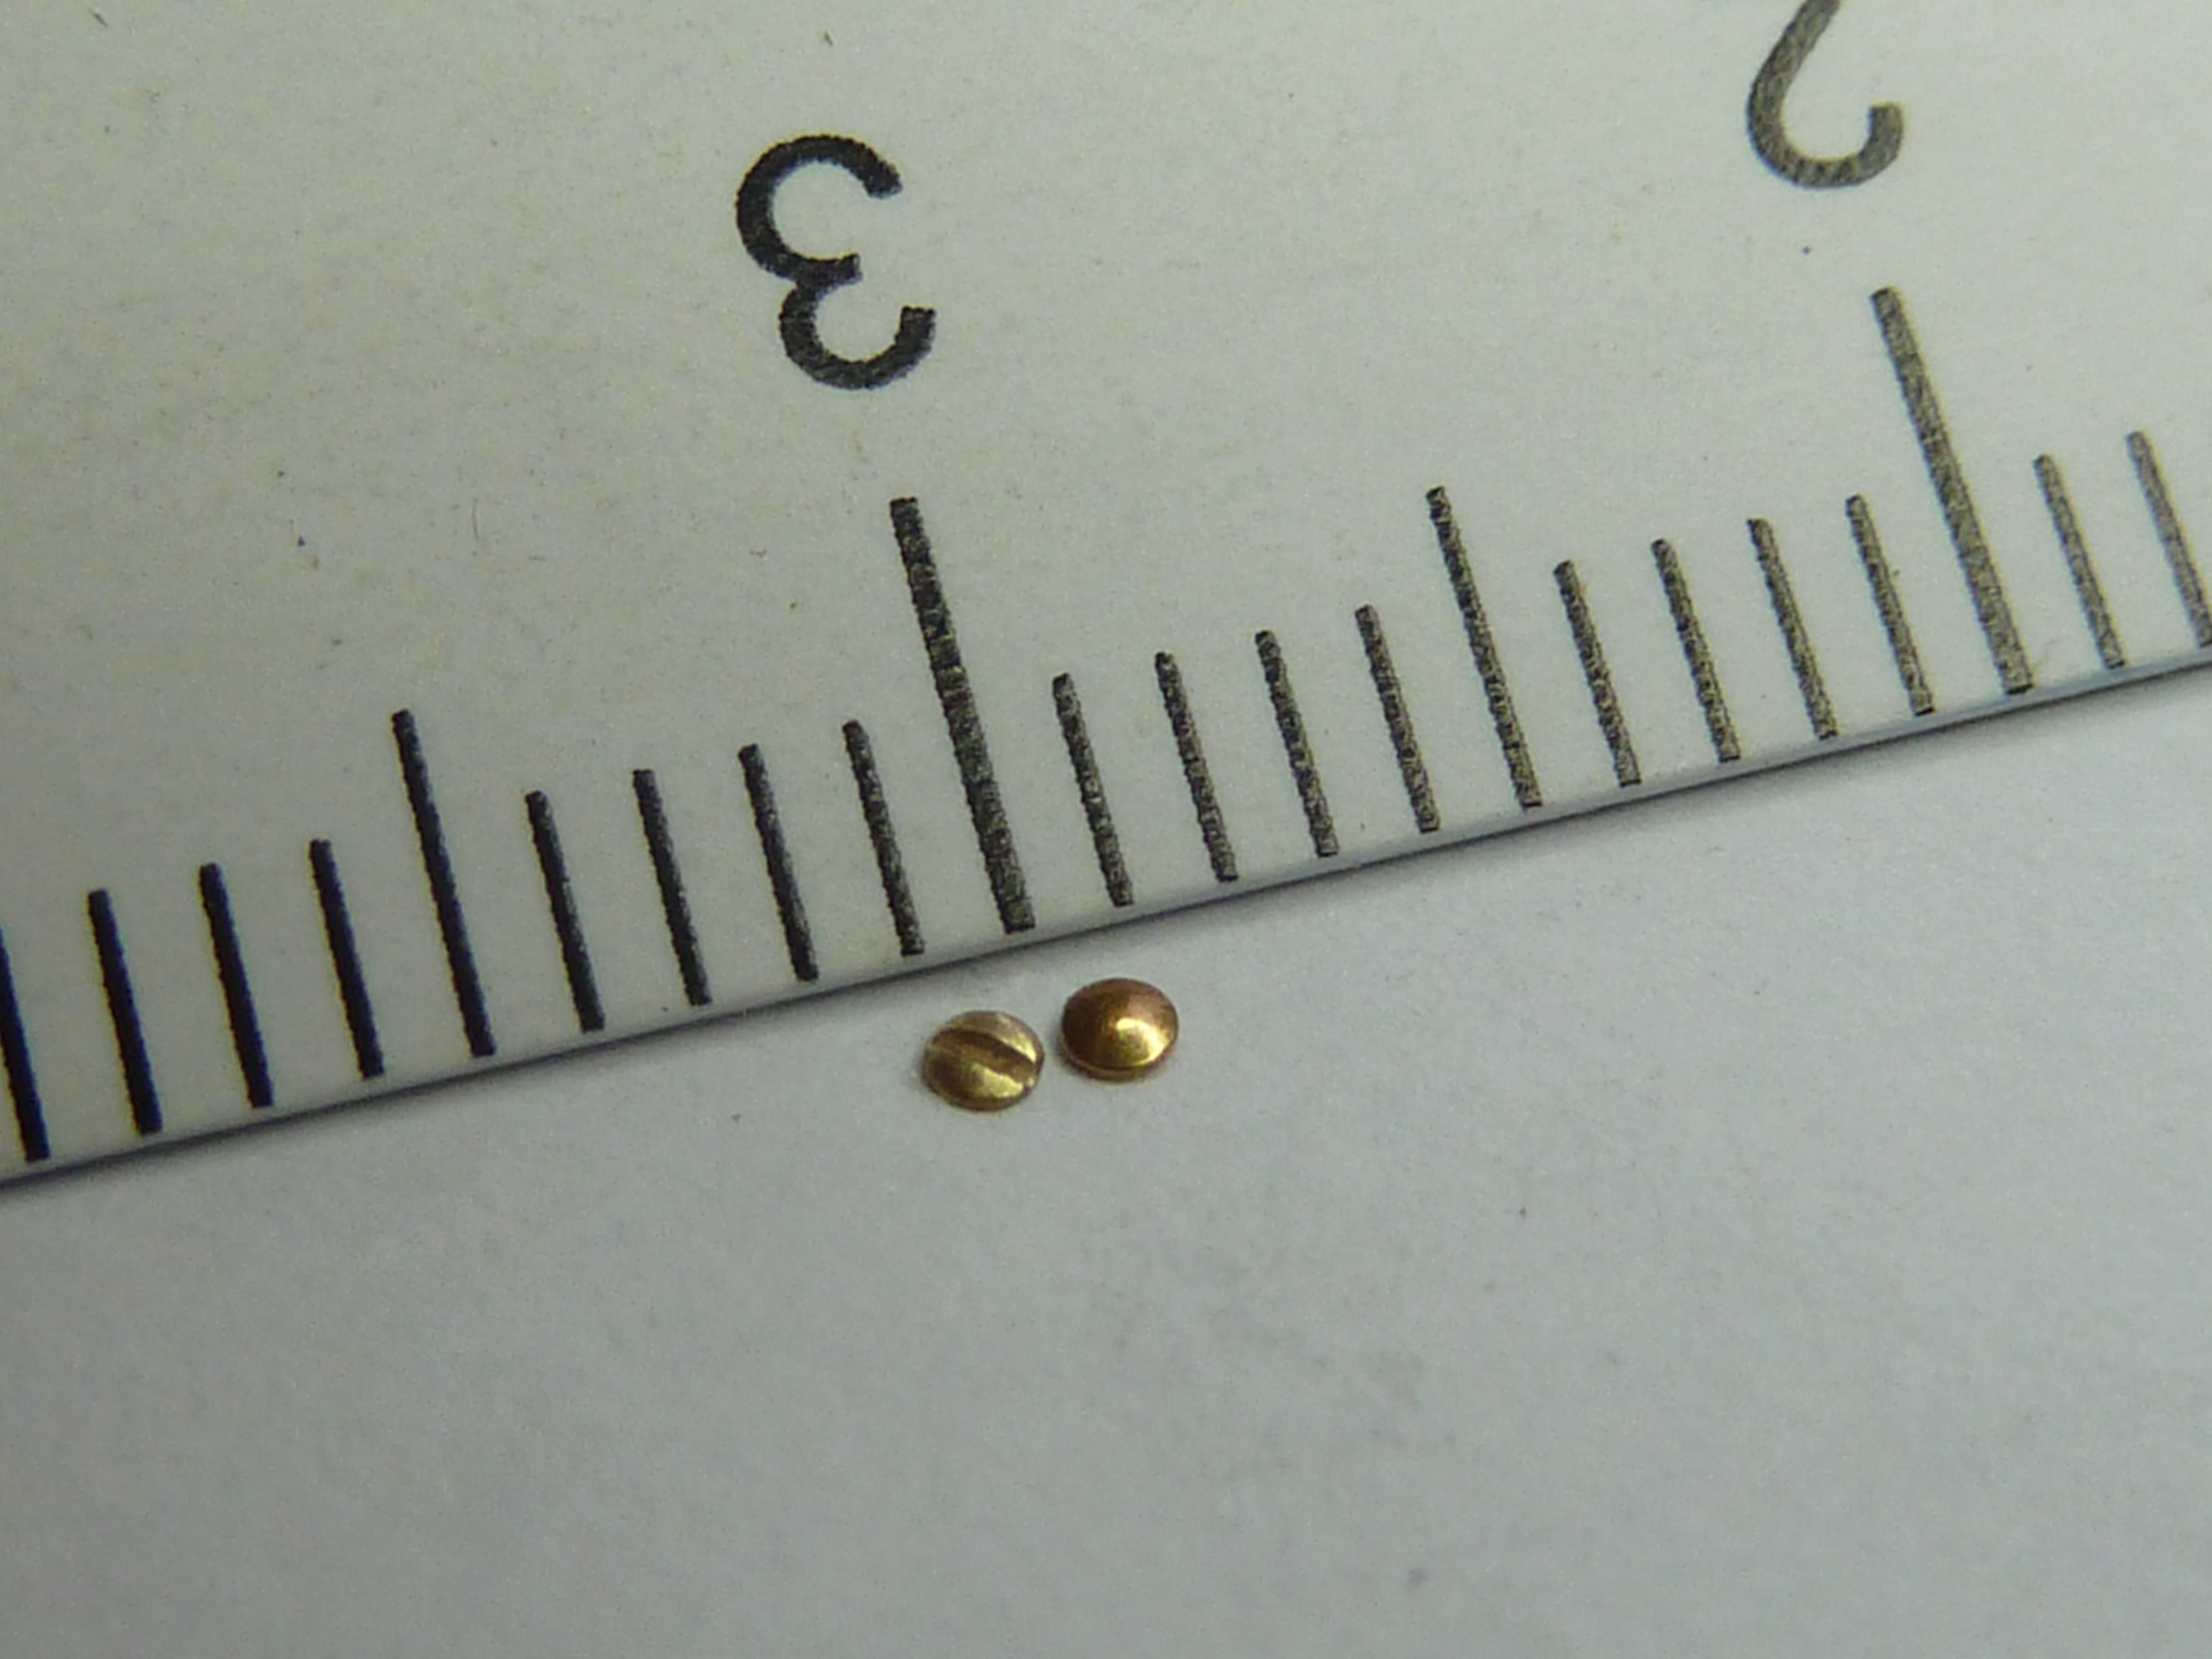
As you will notice, I’ve changed the fixing ‘screws’ from stainless crosshead to plated slotted head.
The crosshead ones I have are lovely, but expensive. About £1 per screw, which quickly becomes over £100 just to populate the engine hatches, let alone the rest of the model. I’ll save them for special locations where they really show.
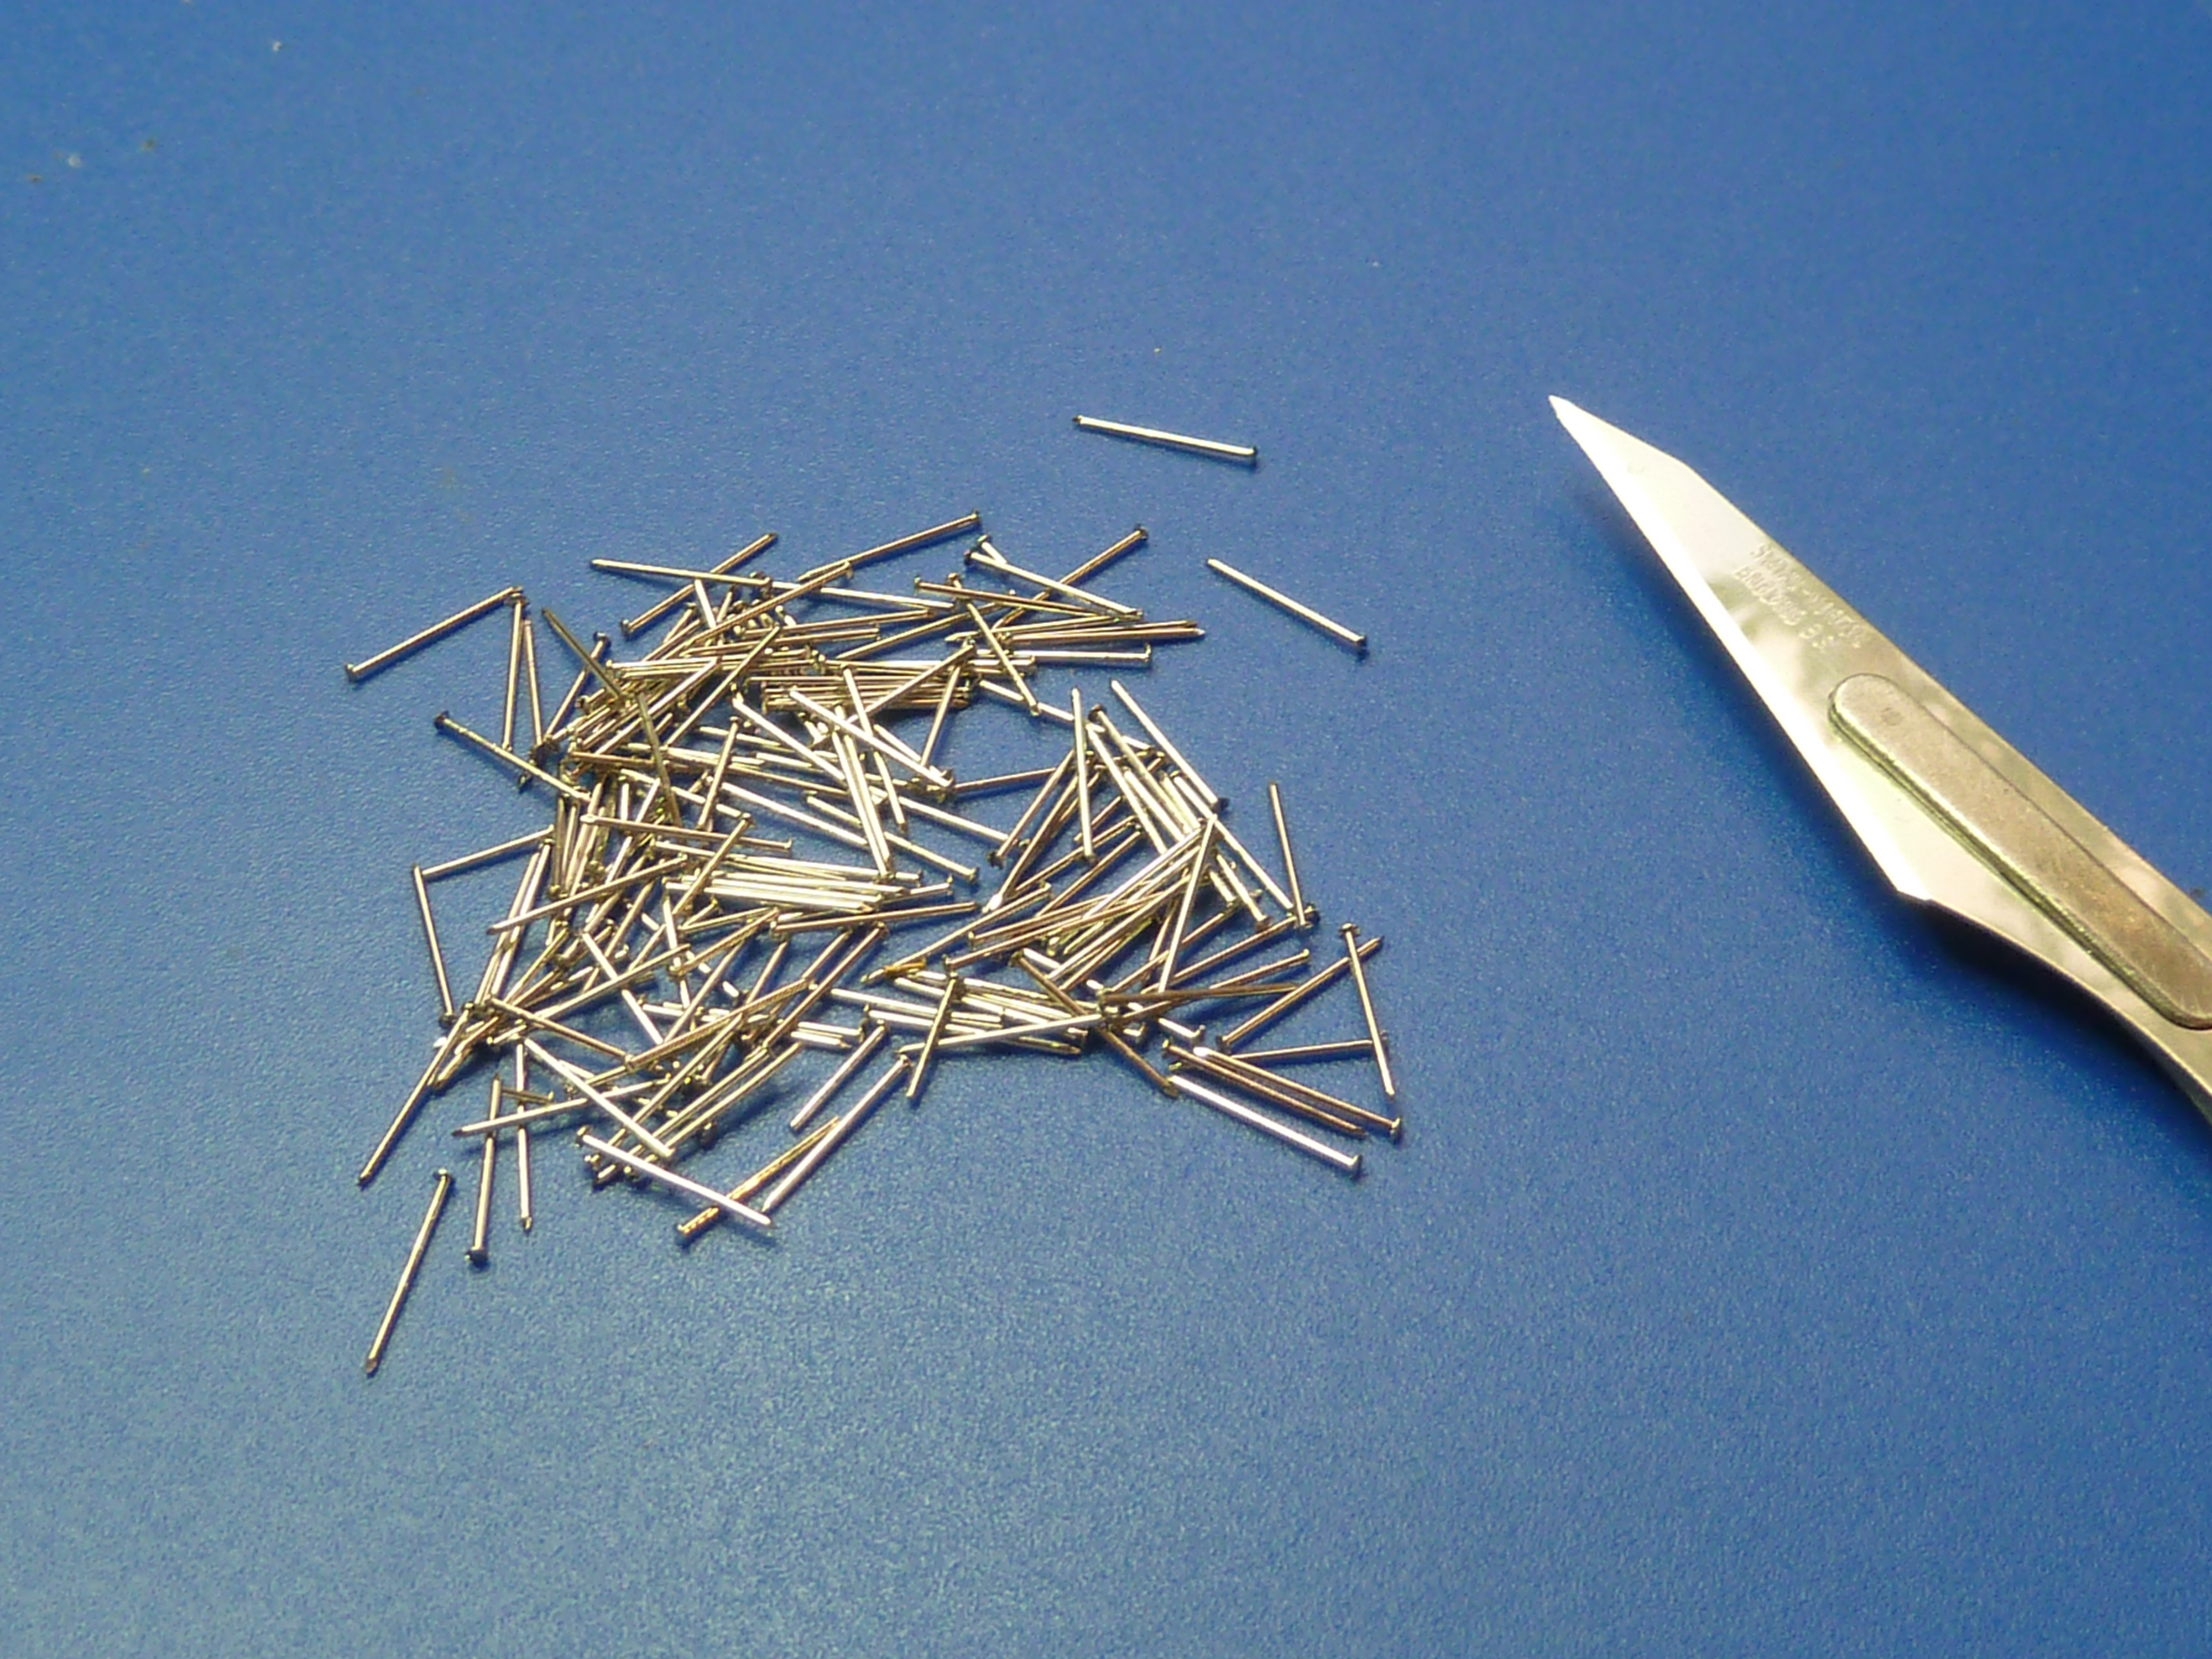
I spent some time trying to locate an alternative and eventually settled on some 0.6mm x 10 brass nails sold by Amati (which appear to have been discontinued by them). They are also readily available from a number of model shops. The two main problems are that they are plain headed, so it is necessary to add the slot, and unplated…
To add the slot I built a small jig to hold them while I delicately put a saw cut in the head with an Xacto Extra Fine saw blade.


You will grow old while you’re putting the slots in each nailhead and cleaning the burrs off, but keep reminding yourself how much cash you are saving.
The slotted nails are obviously too small to plate individually, so I constructed a basket out of copper mesh to hold them. This worked quite well, though nail shanks protruding through the mesh were an irritation. The surface area of the mesh must also be quite considerable as it took longer than normal to get a good covering of nickel.
I agitated the basket of nails periodically during the plating to ensure all the surfaces got covered, and that they didn’t meld into a single amorphous mass during the process.
For the future I’m going to try and use a spray can lid with holes and copper mesh in the bottom for this process. Hopefully there will be less surface area of mesh being plated and not so many nail shanks will protrude through.
The picture below shows the original mesh basket (beautifully plated) and the proposed spray can cap for the future.

The end result was pretty good, though I say so myself.

The final result again, just because…
That’s it for this post. Hopefully I’ll be back on the Miss Severn saga again soon.

So glad you’re feeling well enough to model so wonderfully. Cheers.
LikeLiked by 1 person
How you manage to deal with such tiny pieces and still make such an excellent finish, never fails to amaze me!
LikeLiked by 1 person
I was saying to the other half tonight that, while some may laugh, one of the most important techniques in my modelling is working our how to hold things.
Fix it to something big until the very last moment being the most common.
LikeLiked by 1 person