
It’s been a while since I posted anything new on here, but I’ve been feeling a bit rough. However, that doesn’t mean that progress on the Dr.1 hasn’t been going on in the background. So I’ll try and catch up with a few short updates.
Following the completion of the engine I moved on to a number of other sub-assemblies. The first items being the guns.
These are very simple and straightforward, though care needs to be taken to ensure the parts are aligned accurately. If they are then there is next to no clean up required.
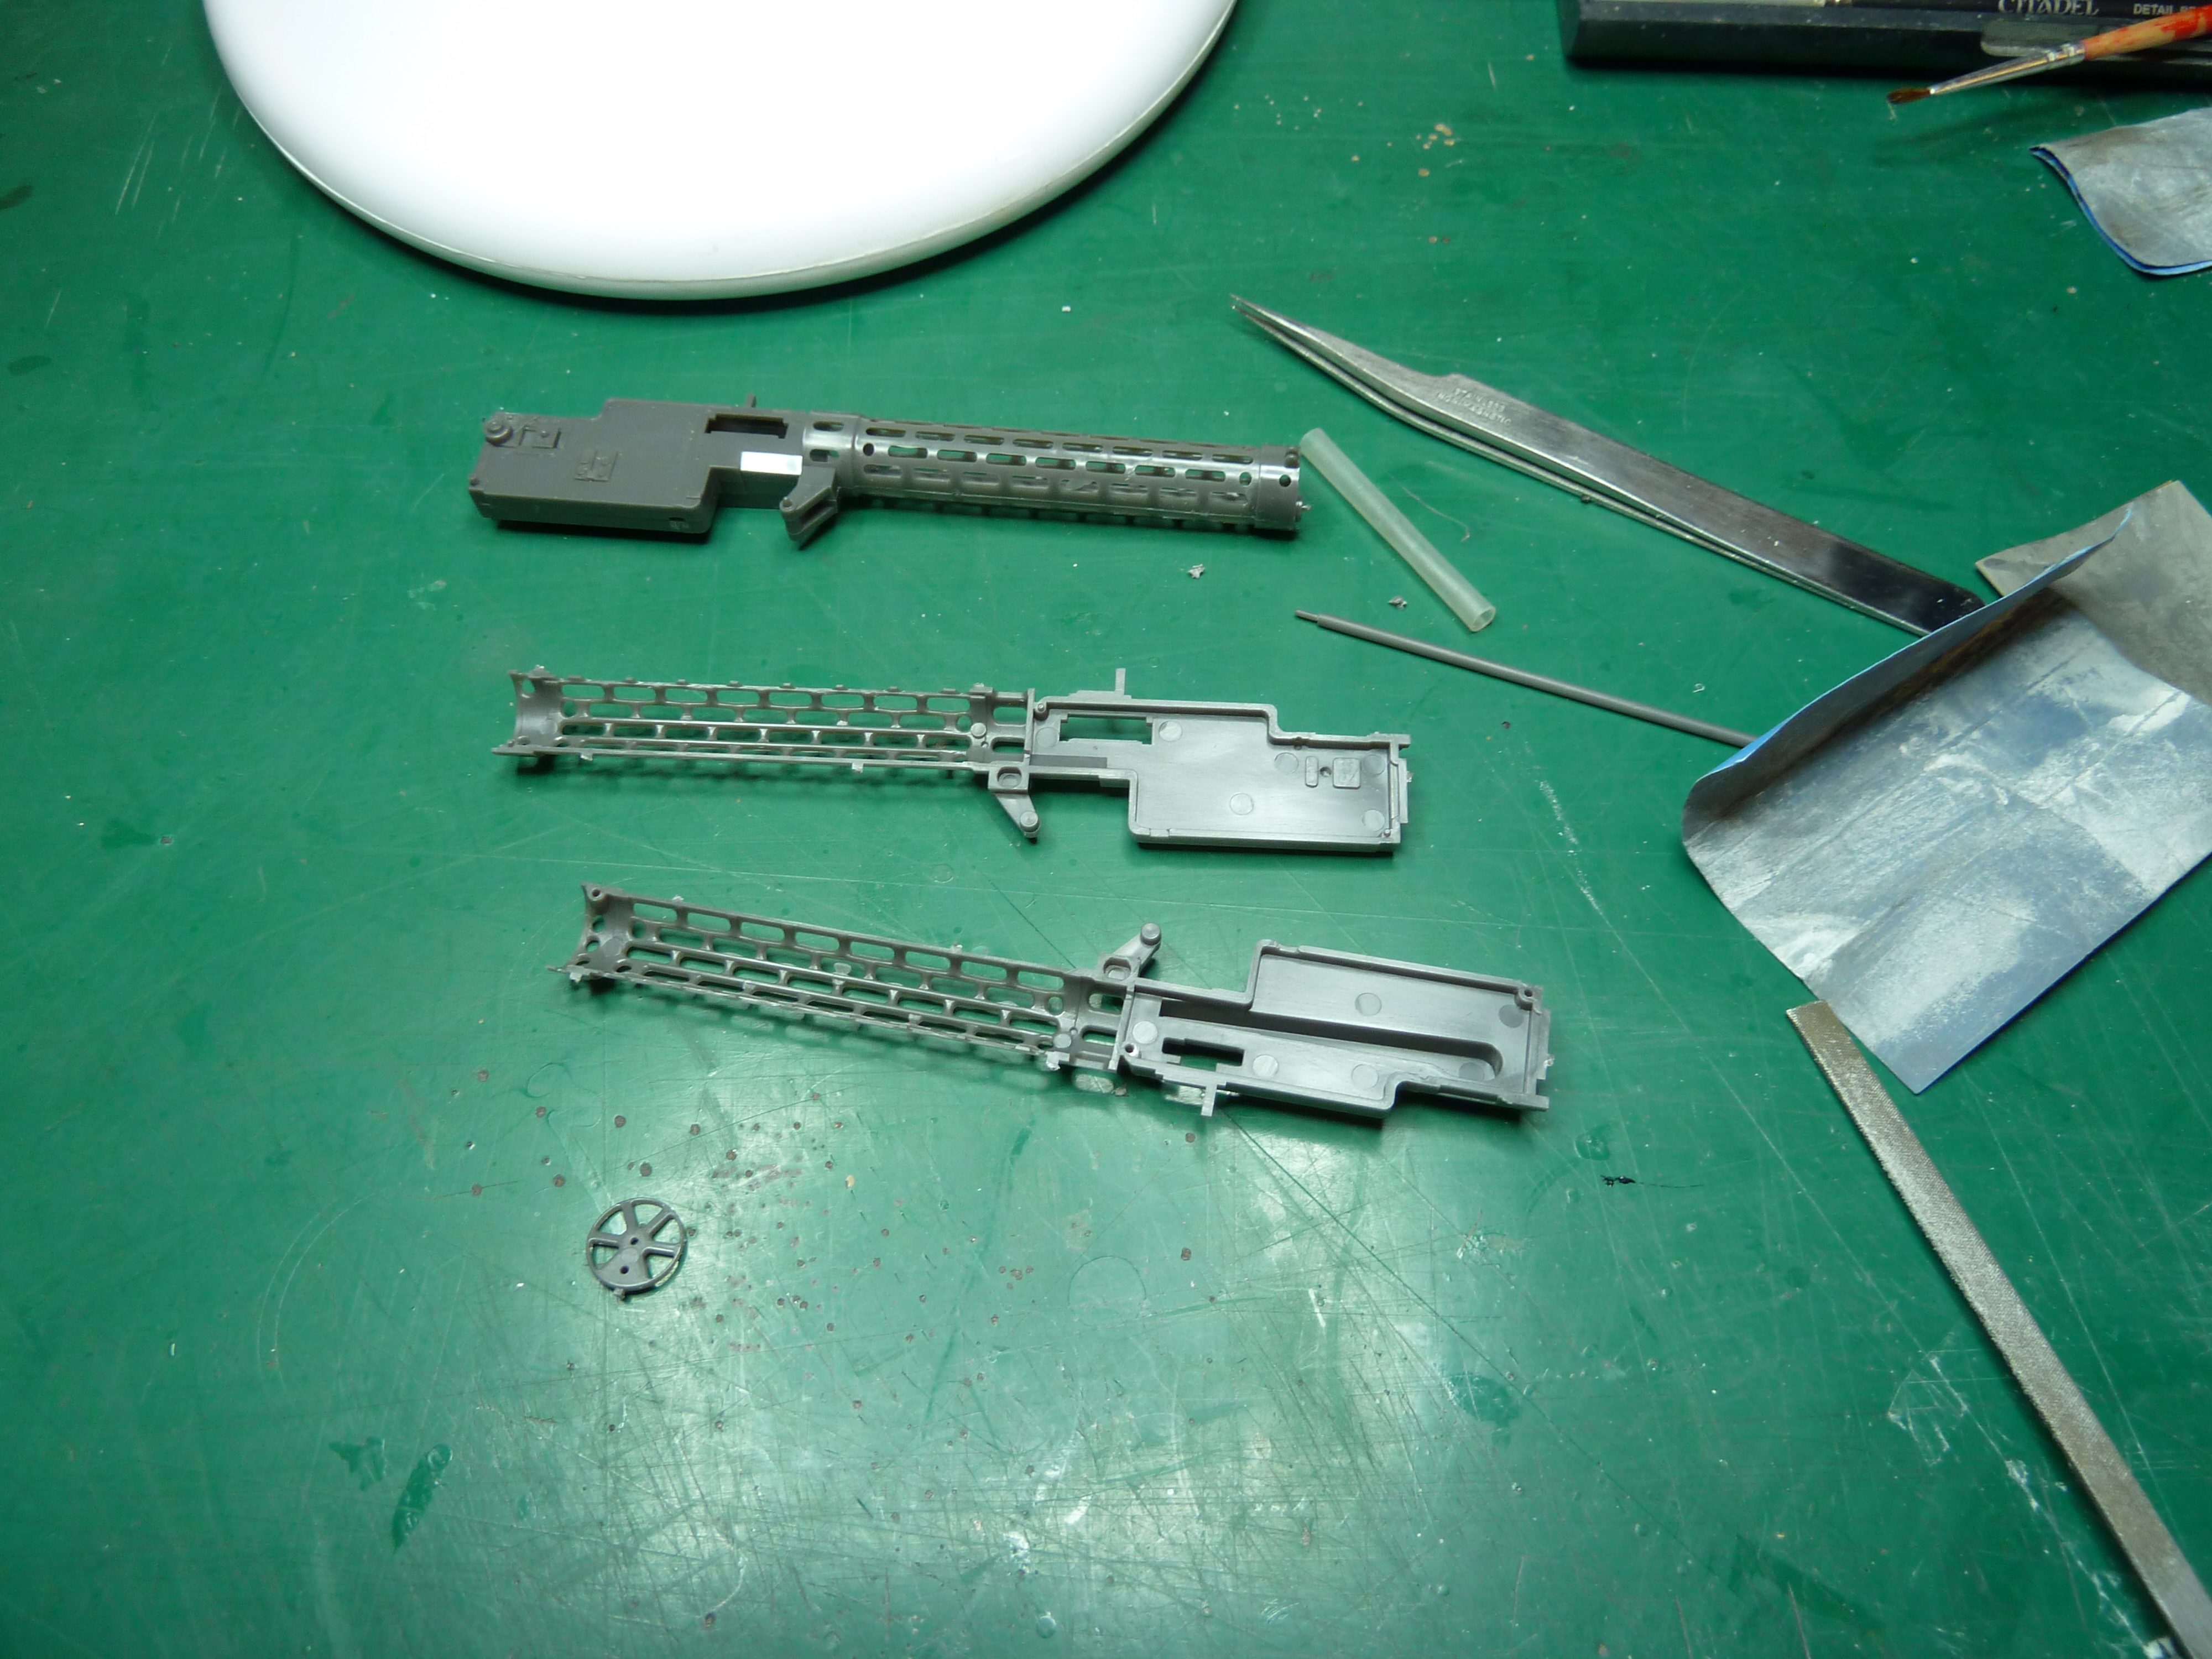
Once the guns were assembled they were given a coat of matt black and brushed over with graphite powder (aka crushed 6B pencil lead) to give them a gunmetal finish.

In the picture above you can compare the pre and post graphite appearance.
The final modification to the guns was to add the interrupter mechanism connection which is omitted from the kit, but quite prominent given the location of the guns in this aircraft. To simulate the link I used some grey automobile wire left over from the build of my kit car.

Note: In the end I changed the grey wire and substituted some wound wire guitar string instead as you can see in the finished photos. The wound wire better replicated the real items to my mind.

The next item was the construction of the ammunition and belt collection boxes. The latter is omitted completely from the kit, and the former bears little relation to the real thing. Fortunately I was able to locate an engineering drawings of the items on the net and from this build a new ones from plasticard.
A comparison of the kit ammunition box and the scratch-built item is shown below.
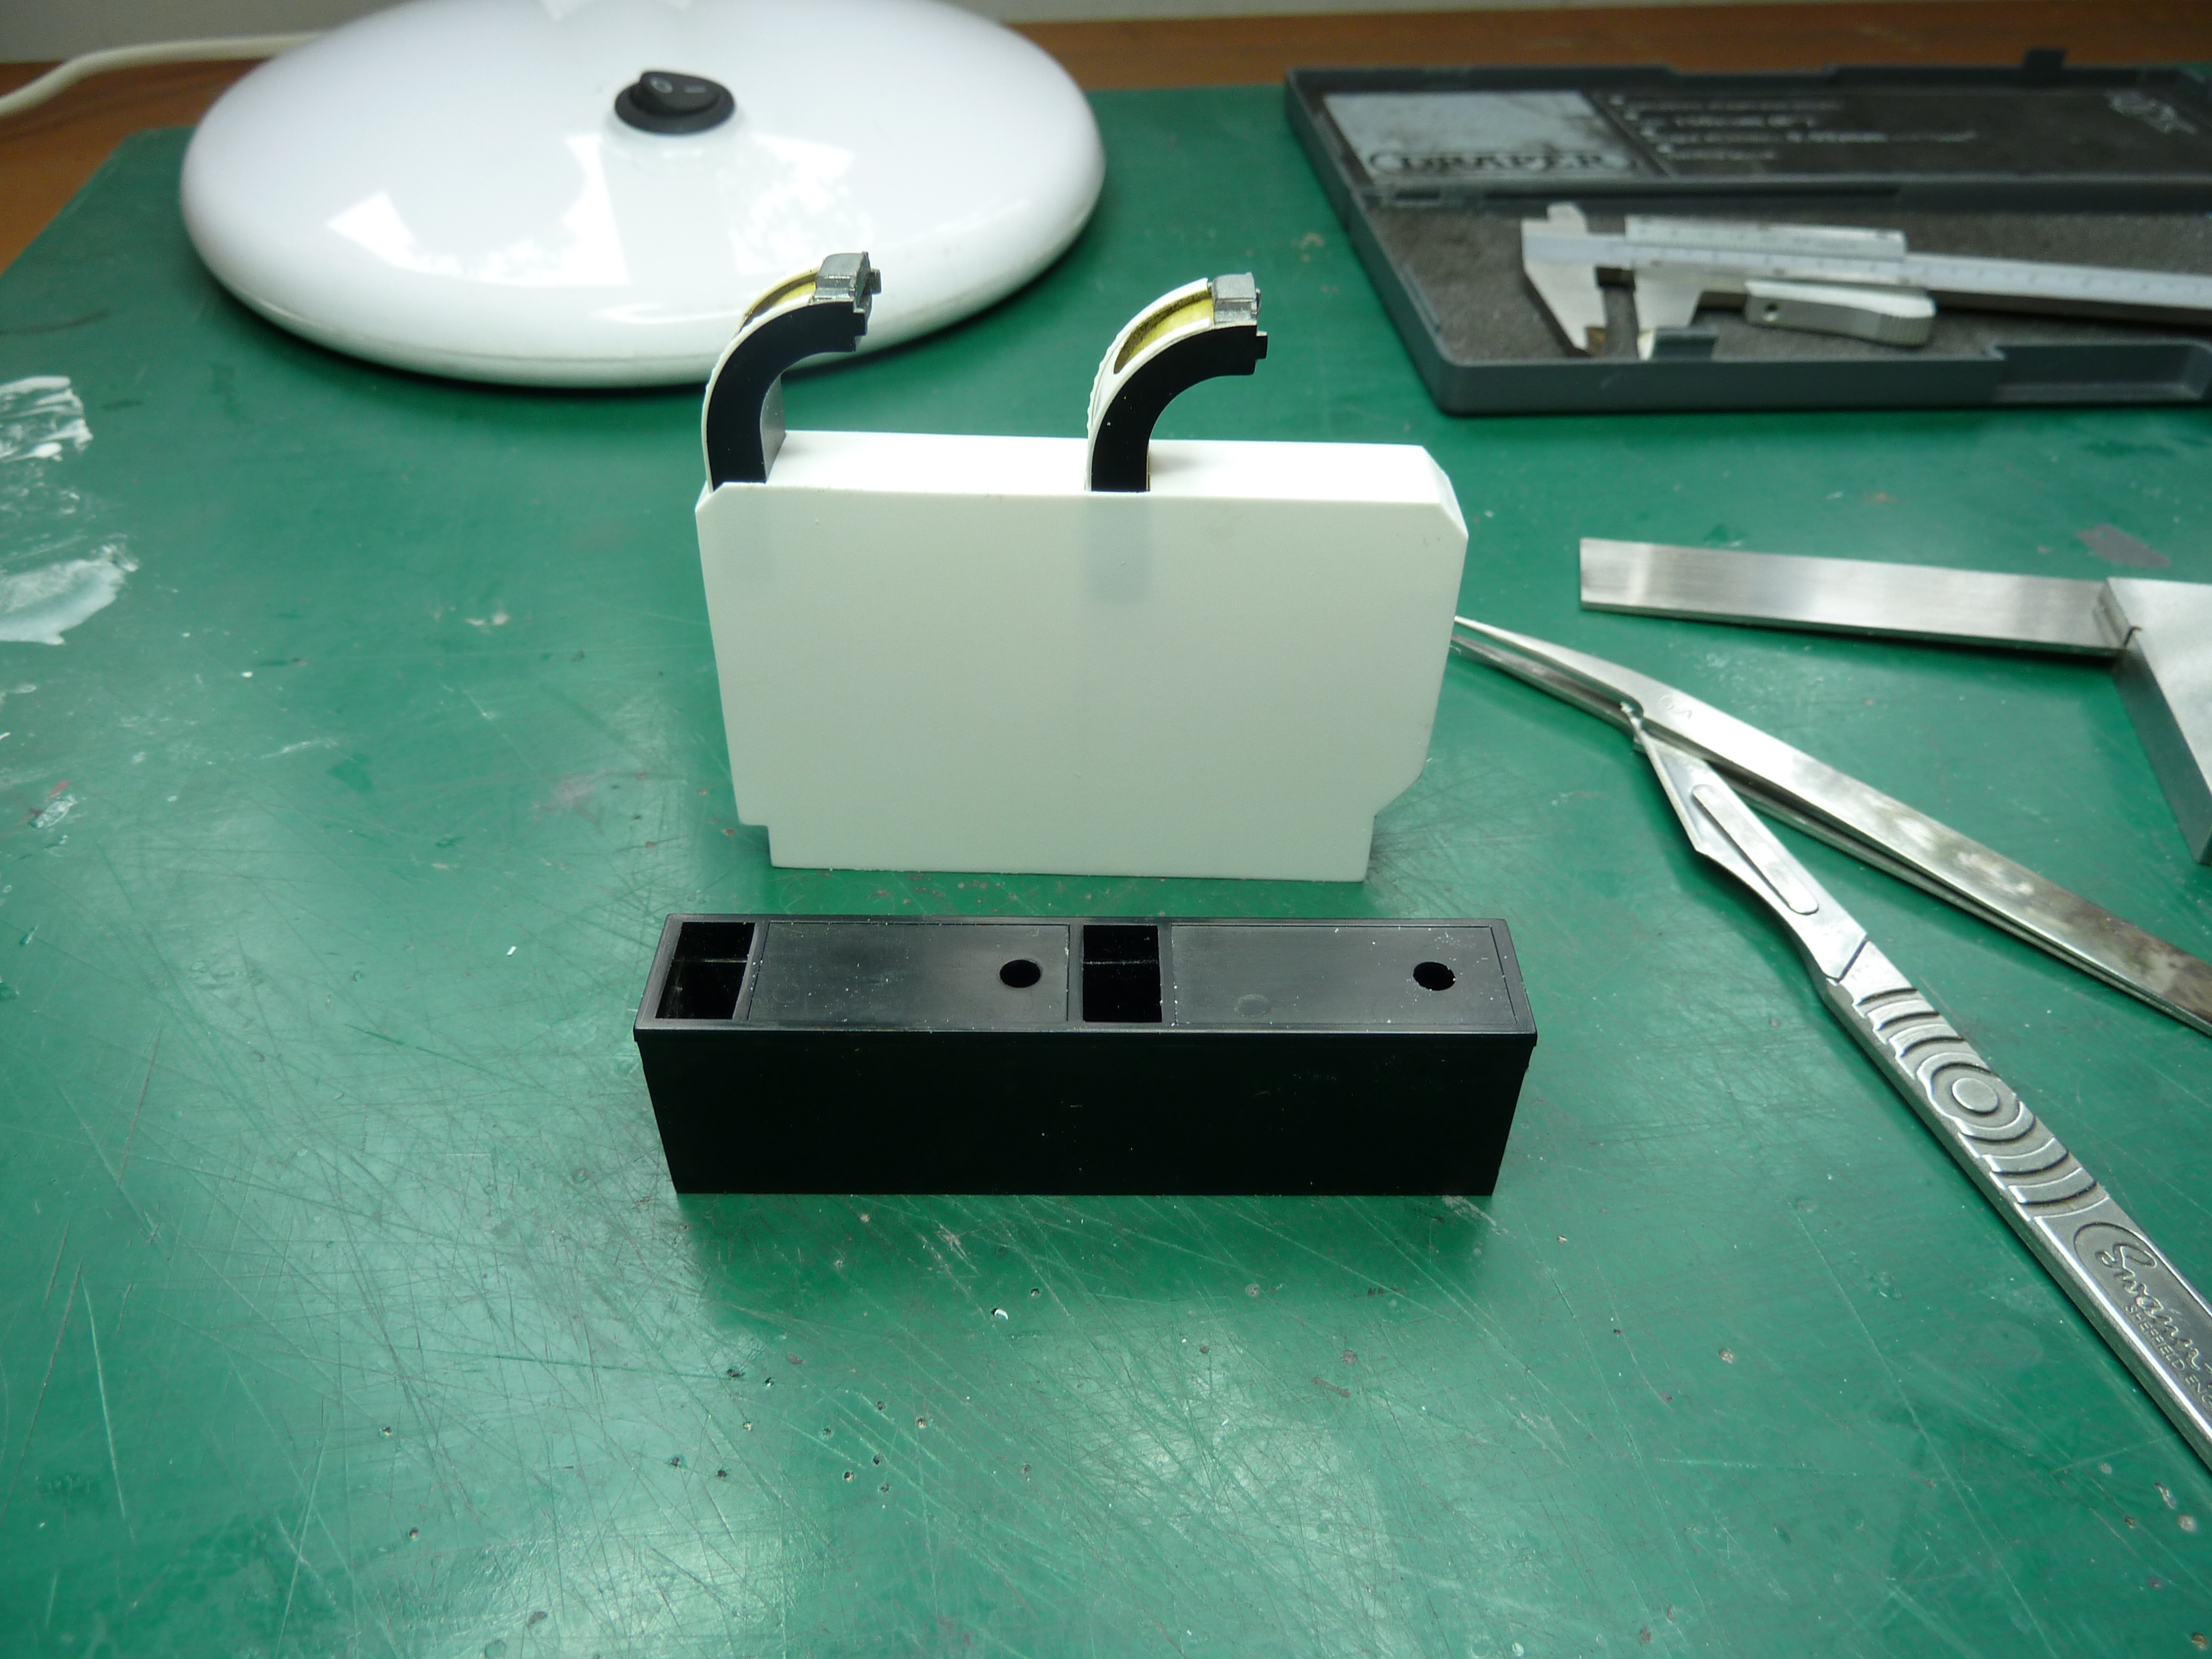
The scratch build isn’t a complete facsimile. The ammunition chutes should flare into the main case, but working in plasticard isn’t a strength of mine, and I wimped out with a slightly simpler version. Sorry…
You can also just see that I have modified the ammunition feed chutes too to partially enclose them as they were on the real machines. Another thing where the kit differs.
Here is another picture where you can see the changes more clearly.
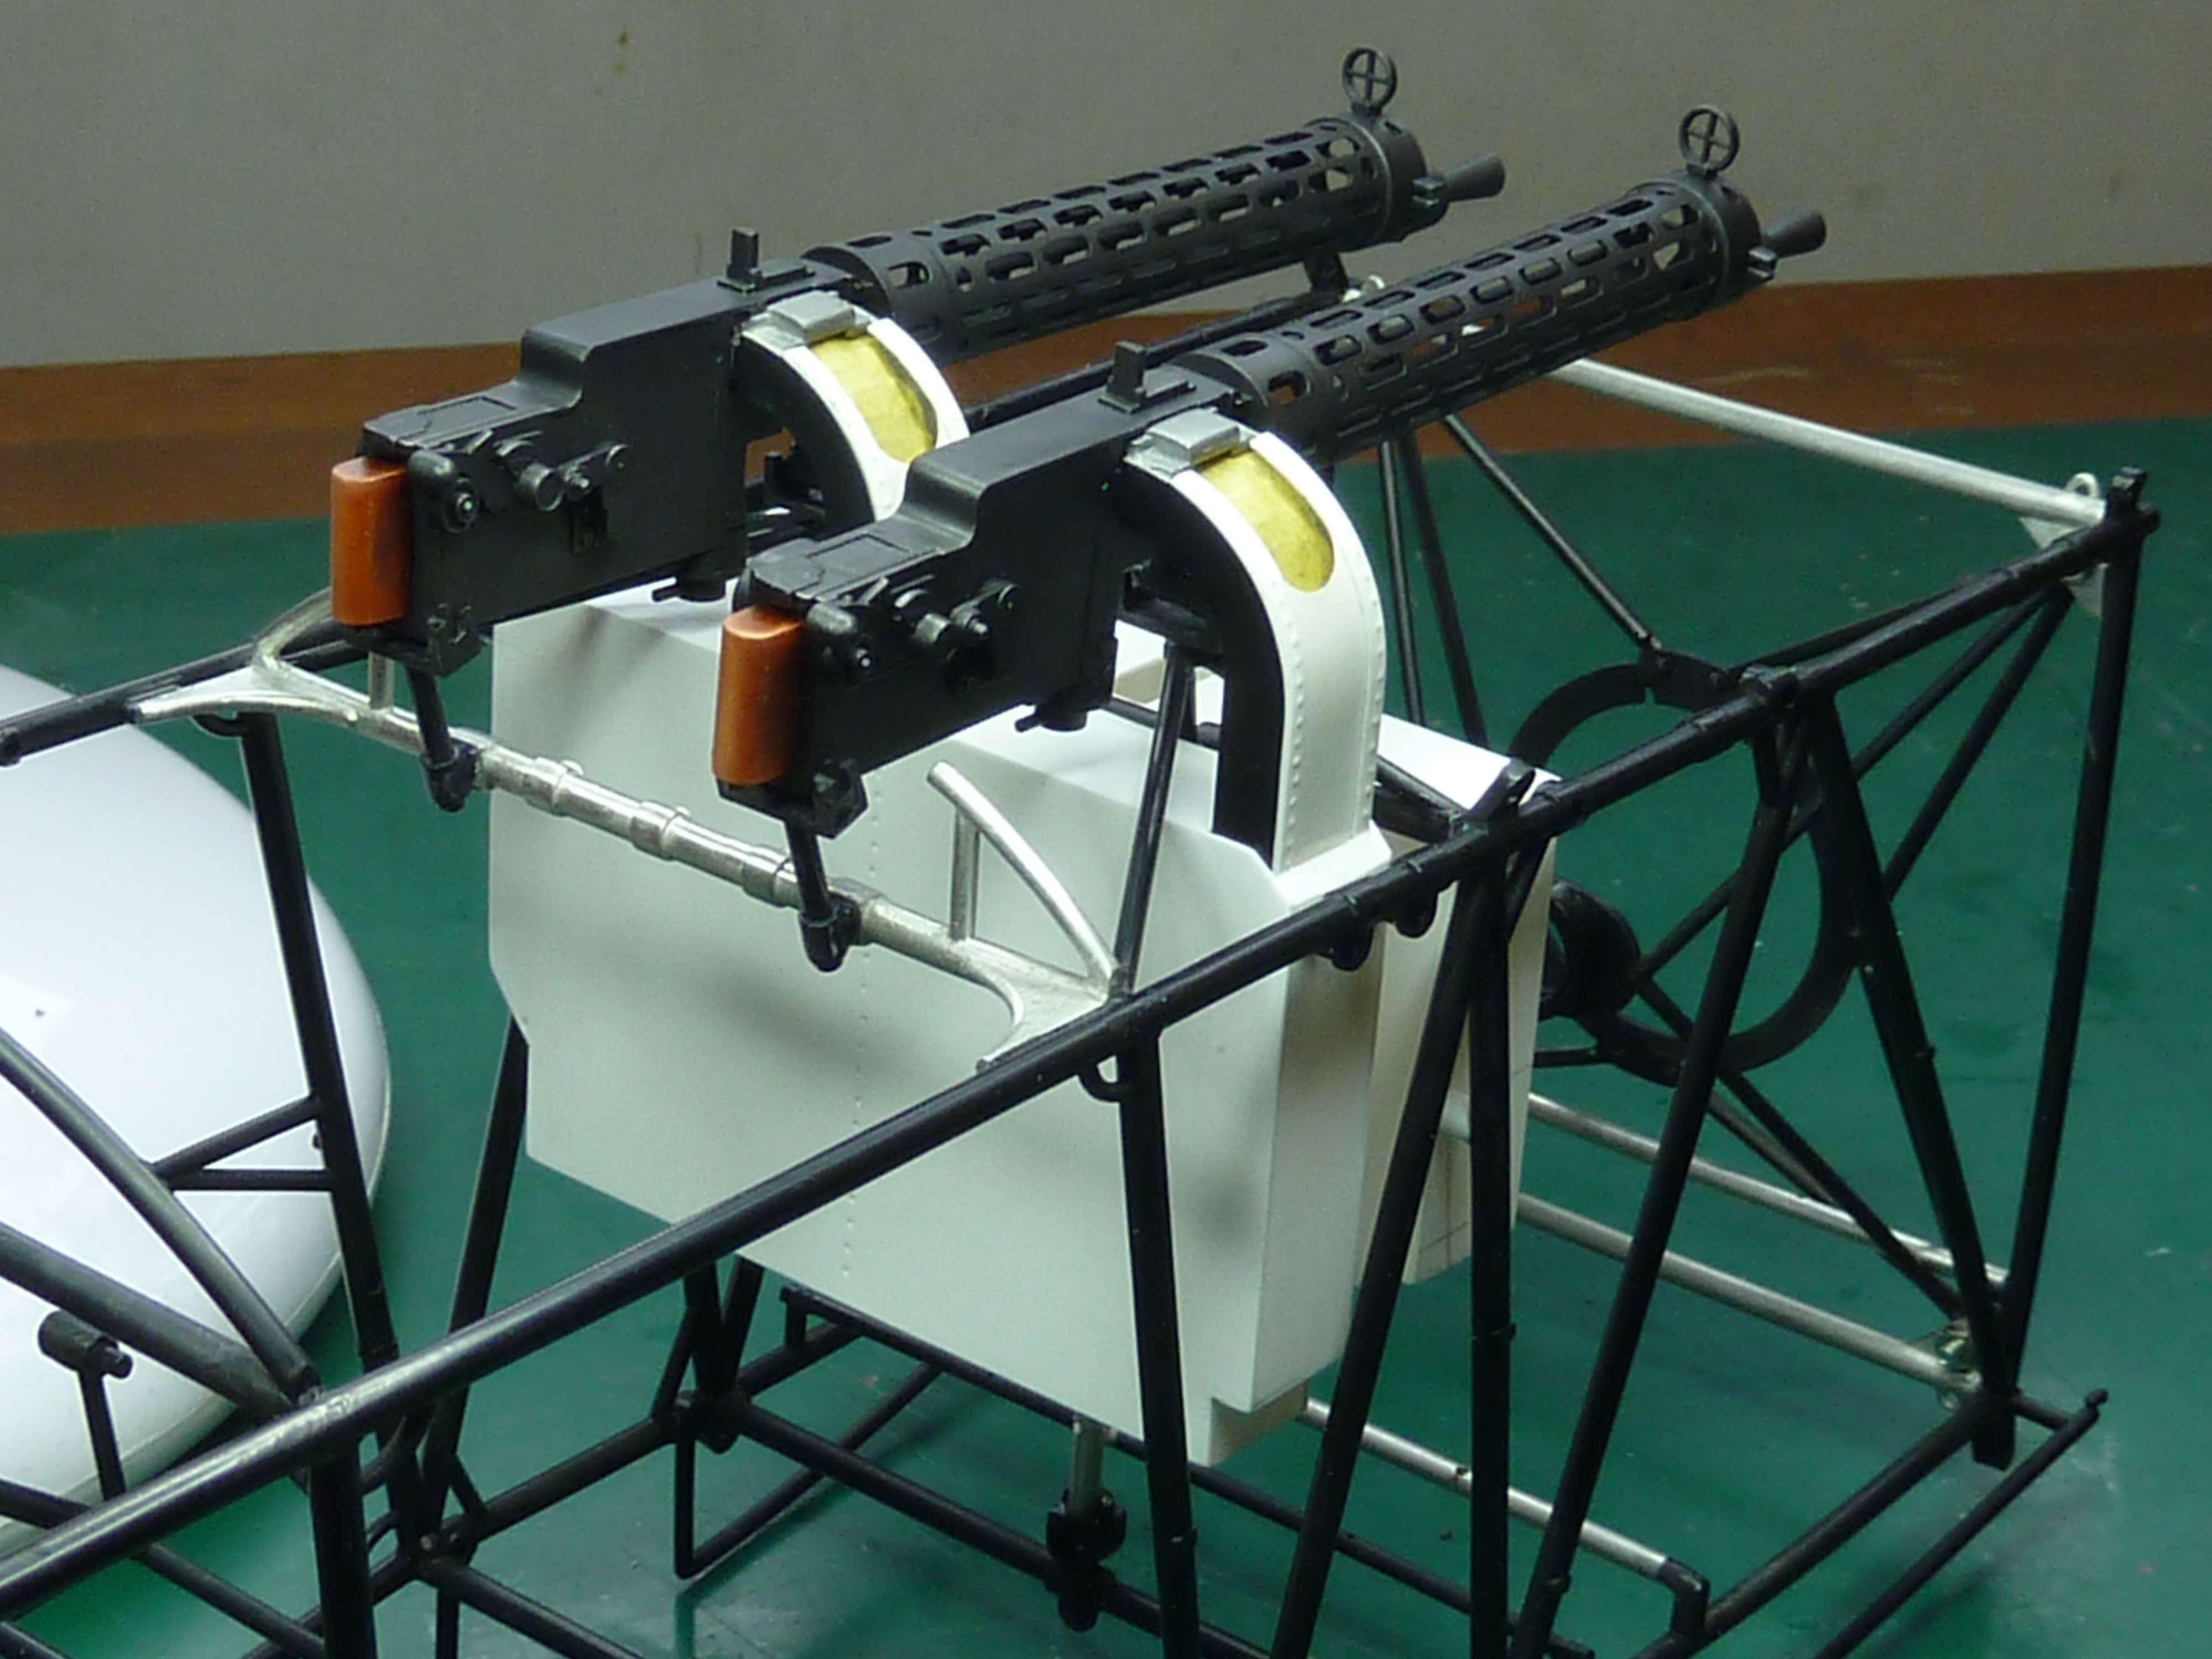
The yellow is Tamiya masking tape covering the bullet belts in readiness for airbrushing. You can just see the belt collection box in front of the ammunition box in the photo too. From the front…

And with the combined fuel and castor oil tank in place.

The tank is almost standard, but for some reason Hasegawa decided to leave off one of the filler caps. The far one in the picture is as per the kit. The foreground one has been scratchbuilt.
Next I’ll move on to the fuselage assembly and the cockpit area.

Looking good so far. Hope you are back to full strength again.
LikeLiked by 1 person
Ditto
LikeLiked by 1 person