
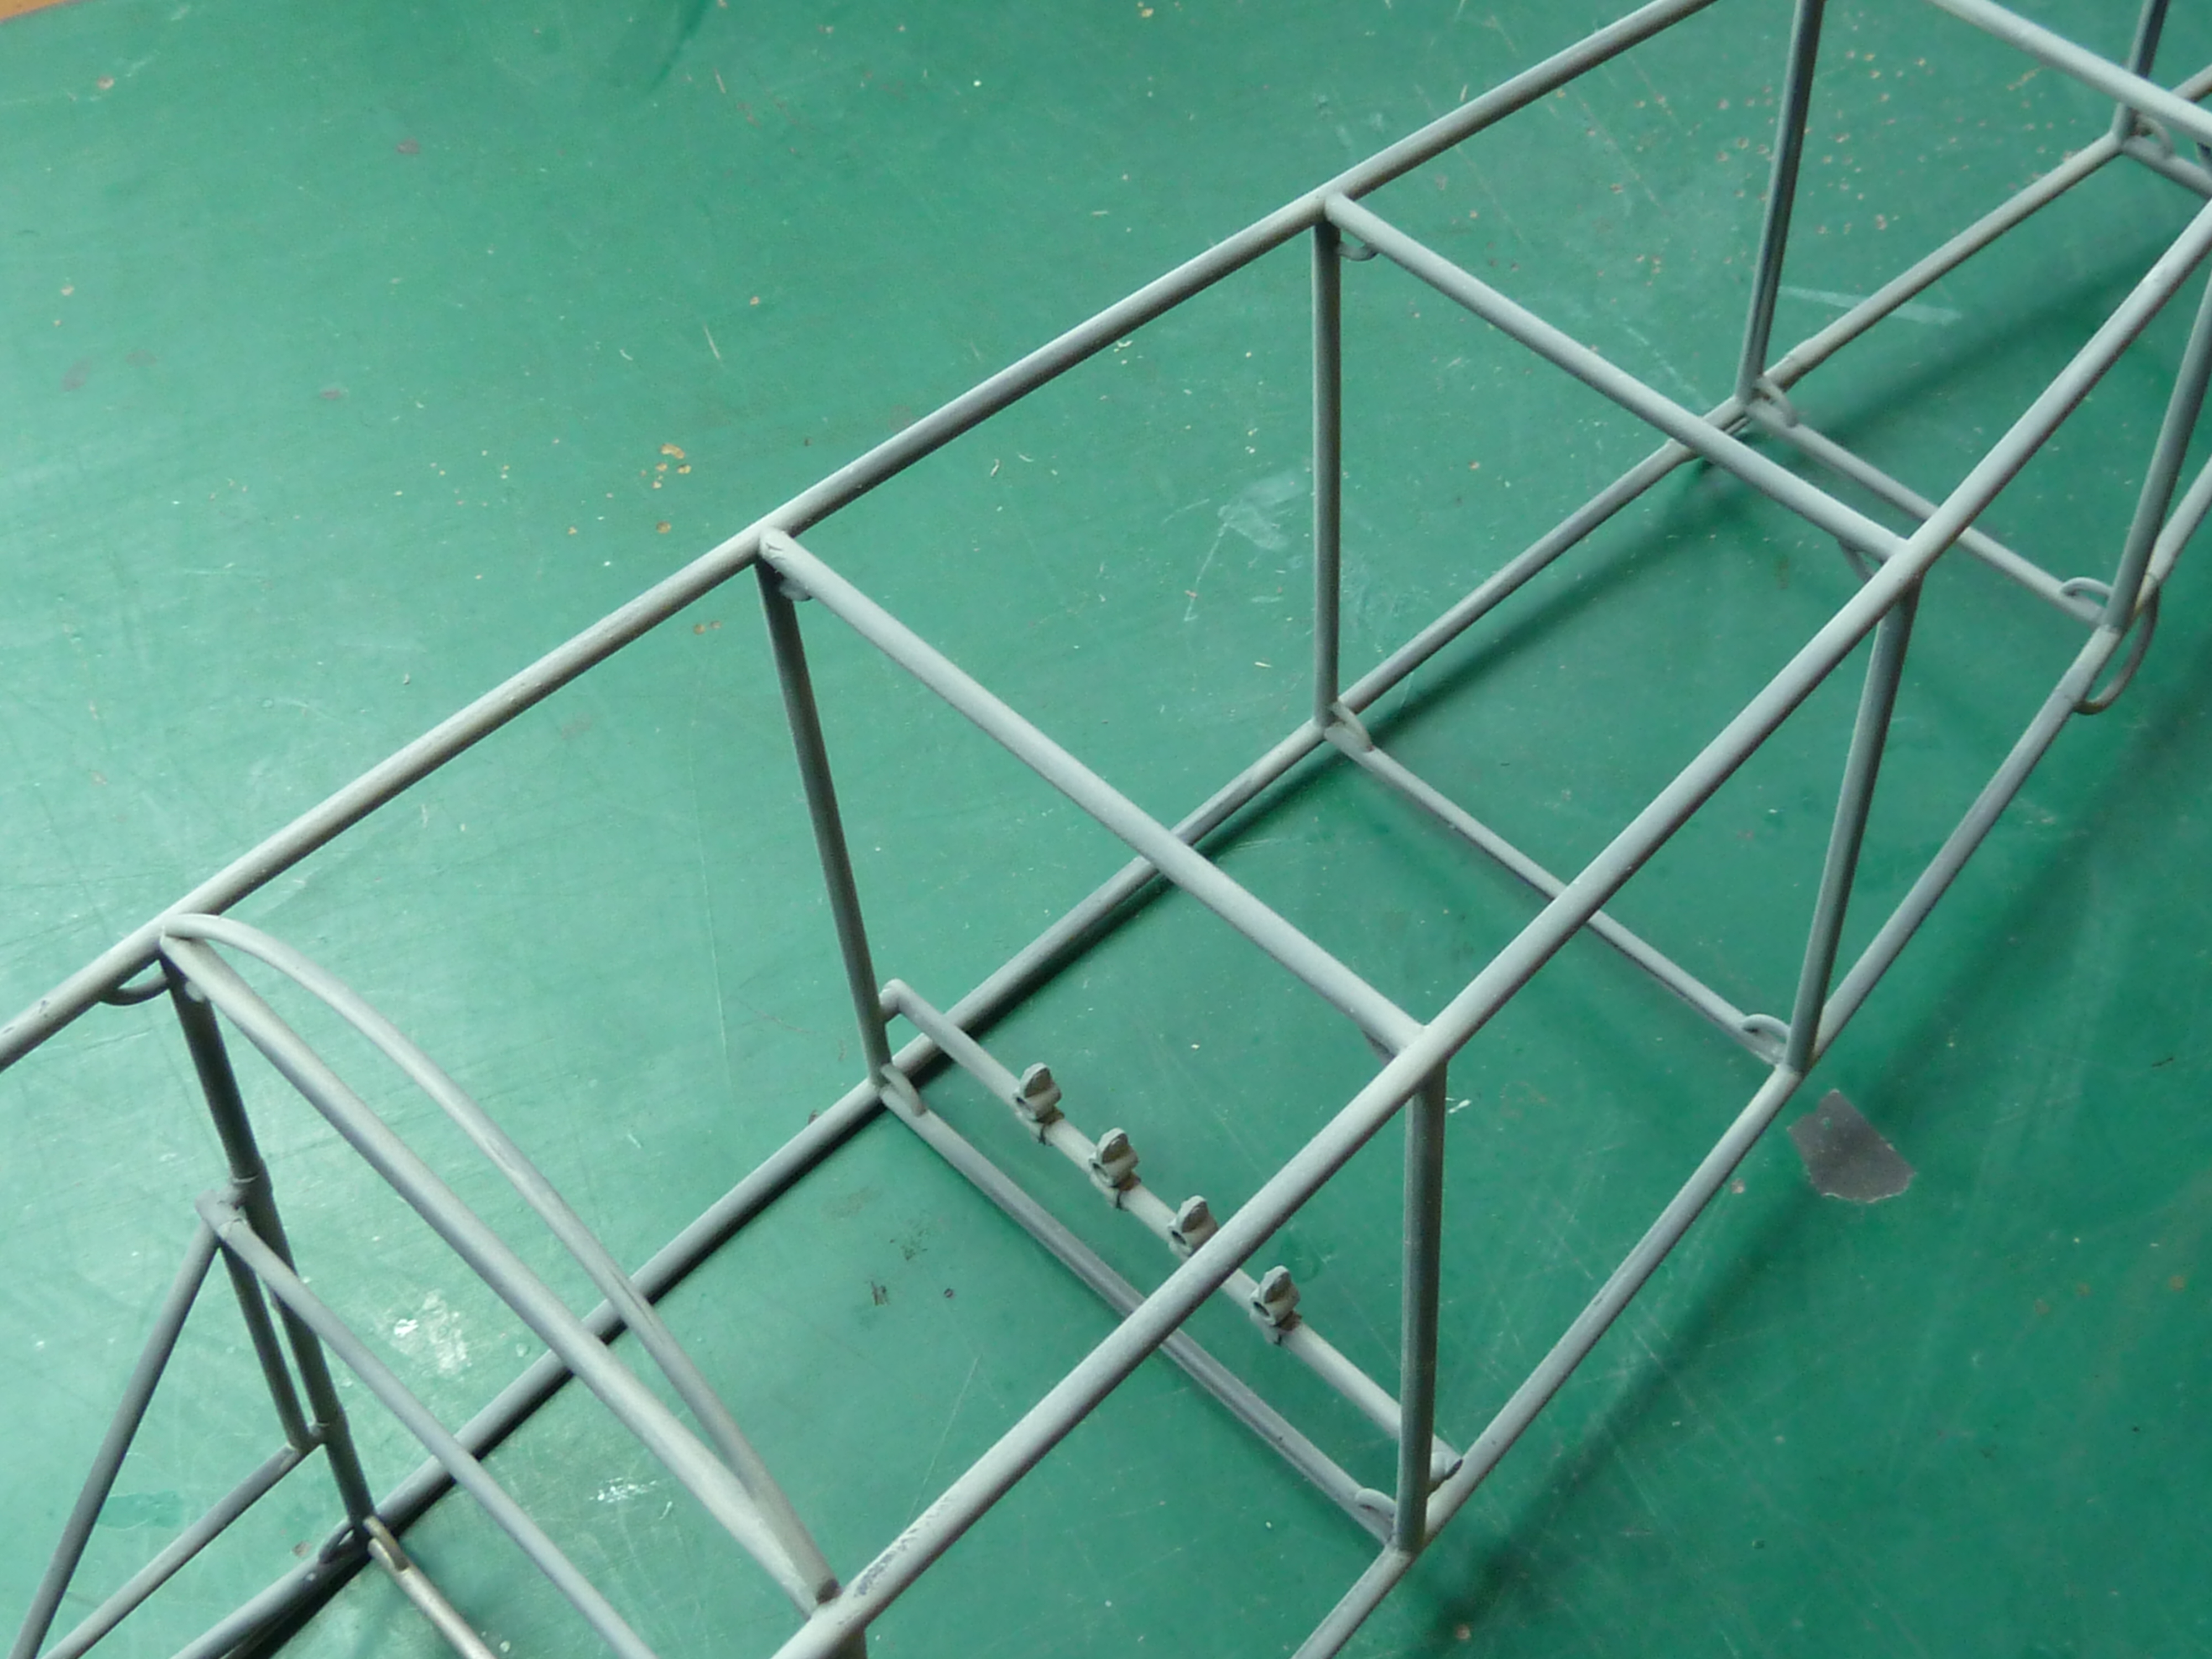
As you have already seen in the previous post I have assembled the main fuselage structure.
This was a pretty straightforward operation though a lot of time was spent cleaning up the mould seam lines left on the parts. It took a couple of evenings’ work to remove them all.
As the frame is made from ABS plastic Hasegawa tell you to use cyanoacrylate glue. I was a little sceptical about how good the joins would be if I’m honest, but in practice they turn out to be stronger than the plastic.
Once the structure was complete it was given a coat of primer which was left to harden while I decided on what colour to paint it. Hasegawa advise ‘steel’. I have seen a number of discussions about what colour the actual frames of the DR.1 were. Some people maintain that they were a light grey, while others believe they were green.
Unfortunately no original Dr.1s exist, but other Fokkers definitely have green frames, and a number of replica Dr.1s have also gone down this route. However, some people believe that this colour was only used on licence build Fokkers such as those produced by Albatross, and that the factory machines had the light grey. As all Dr.1s were produced at the factory it follows that they would have had the latter colour.
In the light of this I decided to dodge the issue and go with ‘steel’.
I initially sprayed the frame with Vallejo’s Model Air ‘Steel’, but once dried it simply seemed too bright and silver, so I mixed some Model Air ‘Gun Grey’ in with the steel to darken it and repainted the structure.
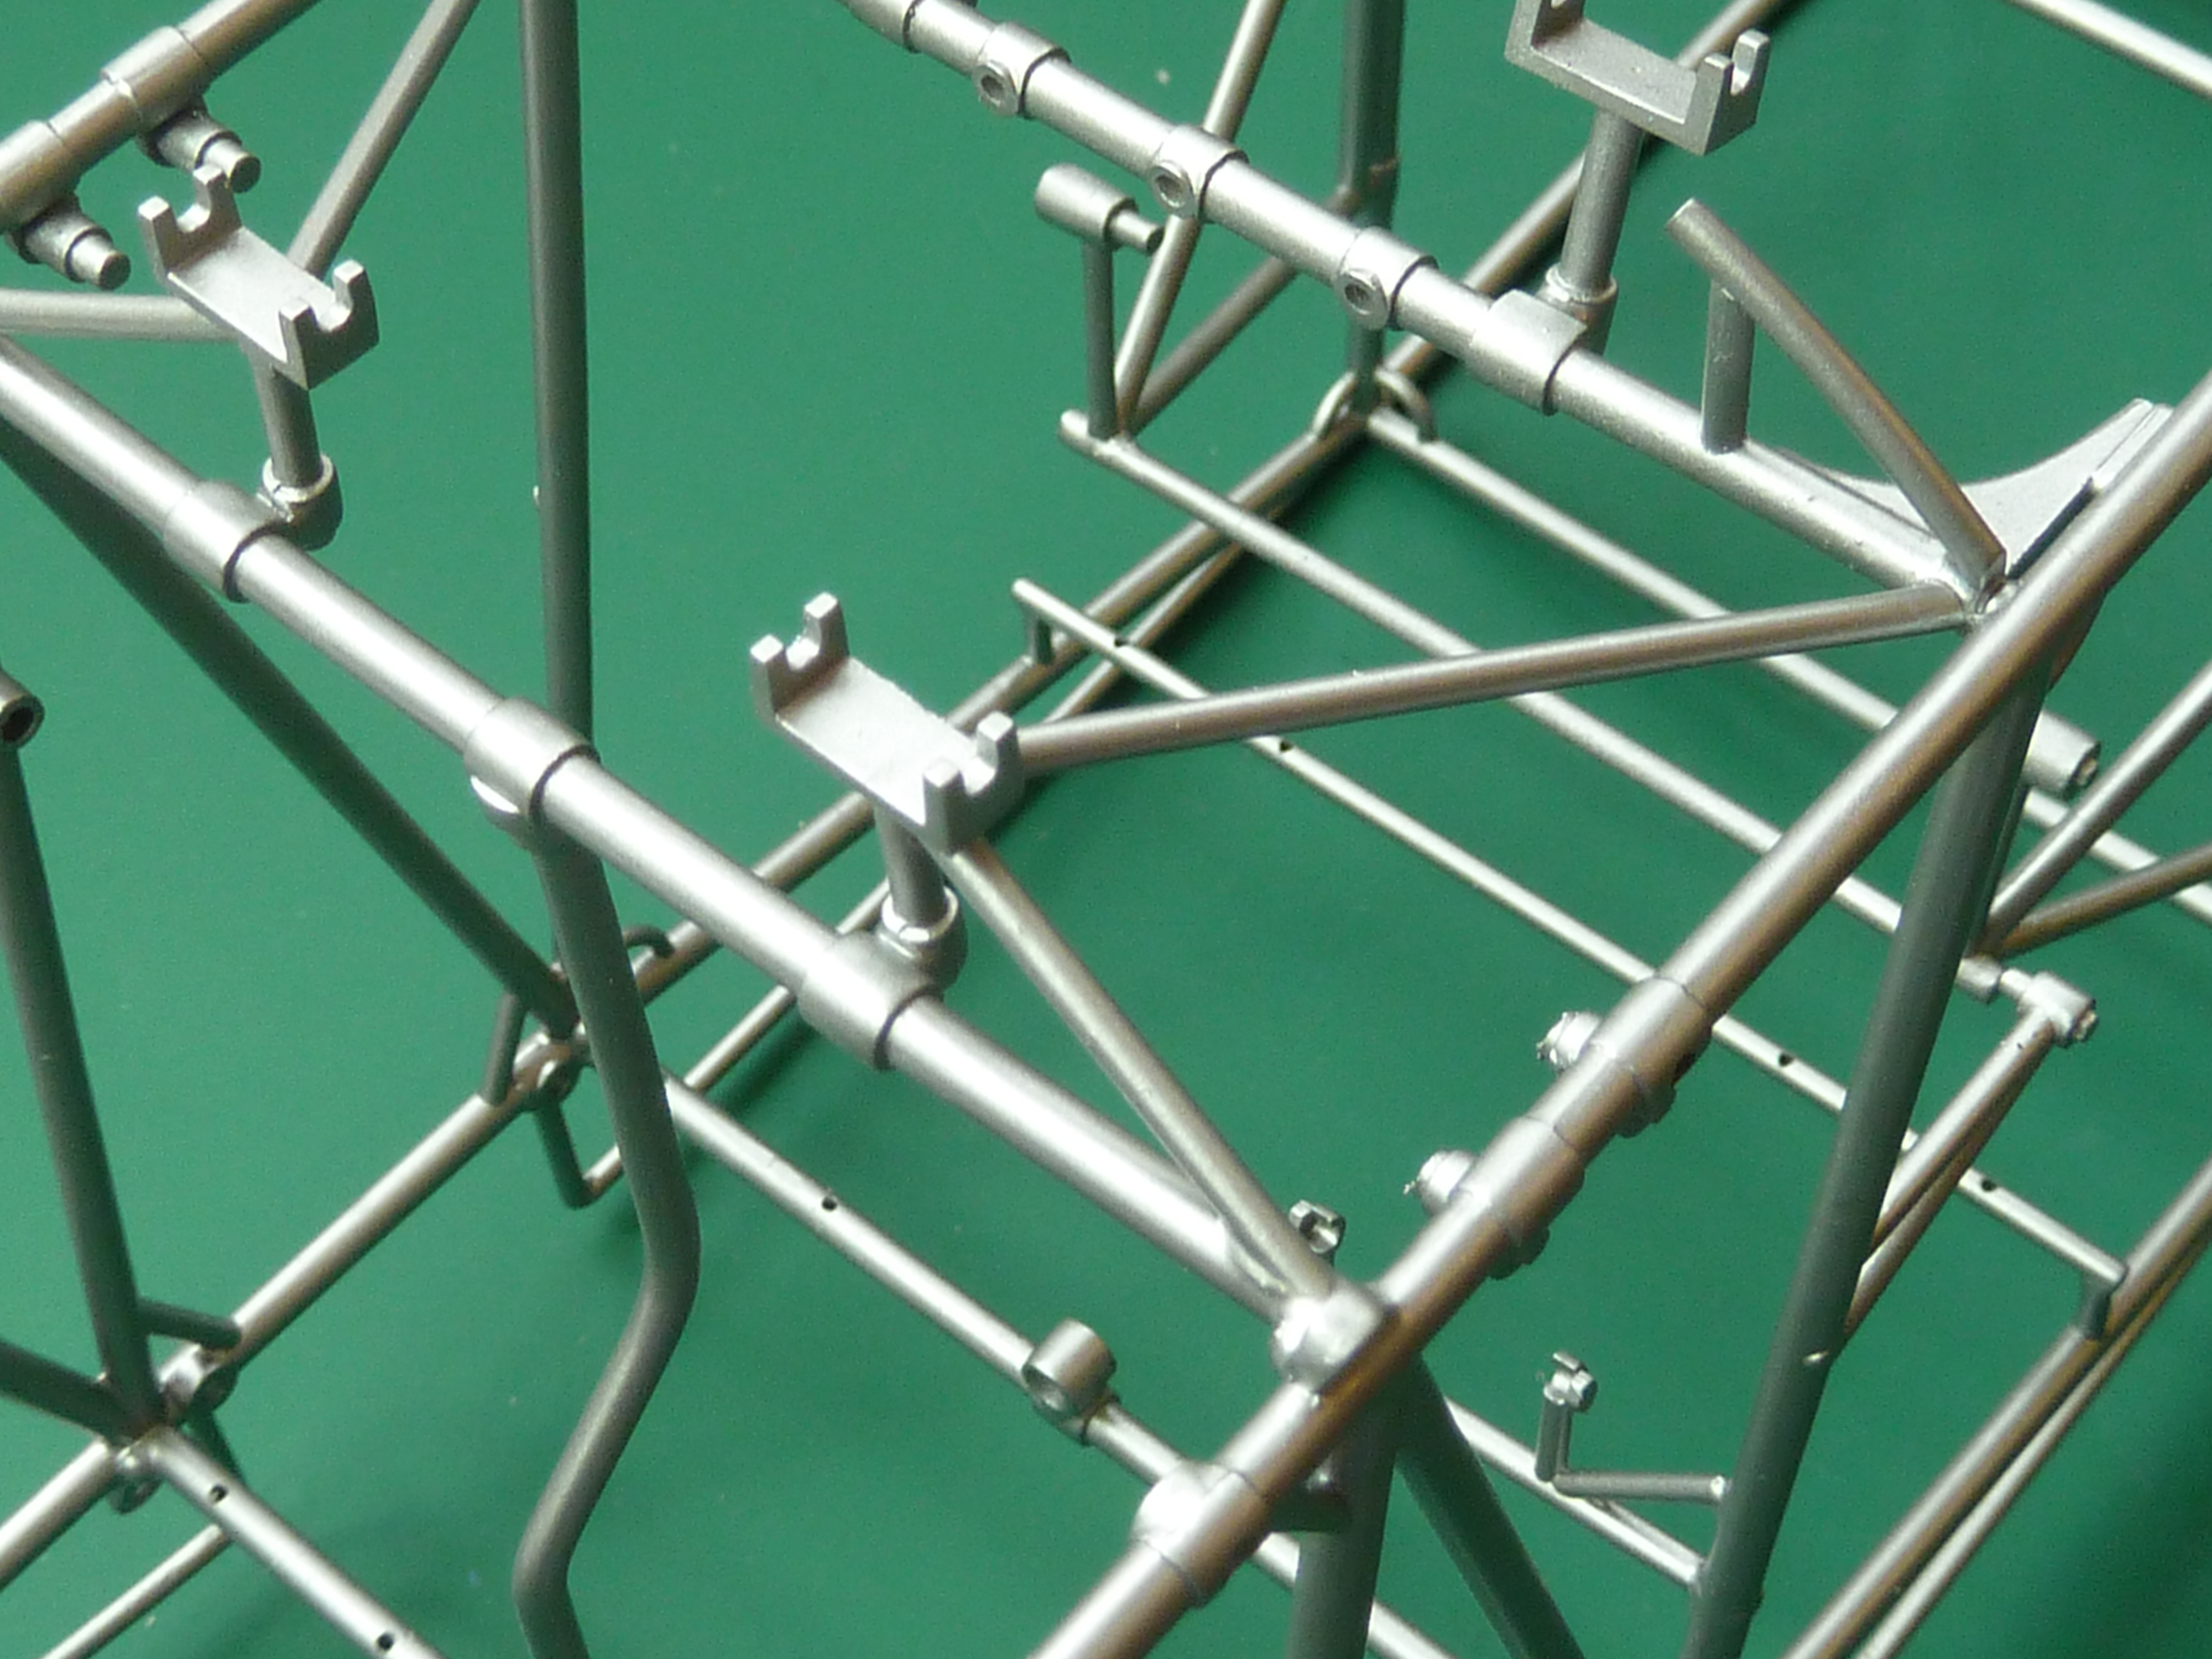
The final result was pretty good and I was happy with it. However, as I progressed on with the kit and started to fit other components the bright steel started to grate. It was just too toy like to my mind, even though I liked it.
In the end I decided that if it was irking me now, it would forevermore so I decided to leap back into the grey vs green quandary. In the end I plumped for green, though I’m not 100% convinced it is right. However, several expensive replicas have gone down this route and I’m hoping that the experts who built them were able to get a more definitive answer than an amateur cruising the web.
So you will notice as the build goes on that the frame suddenly changes from silver to green. That’s why.
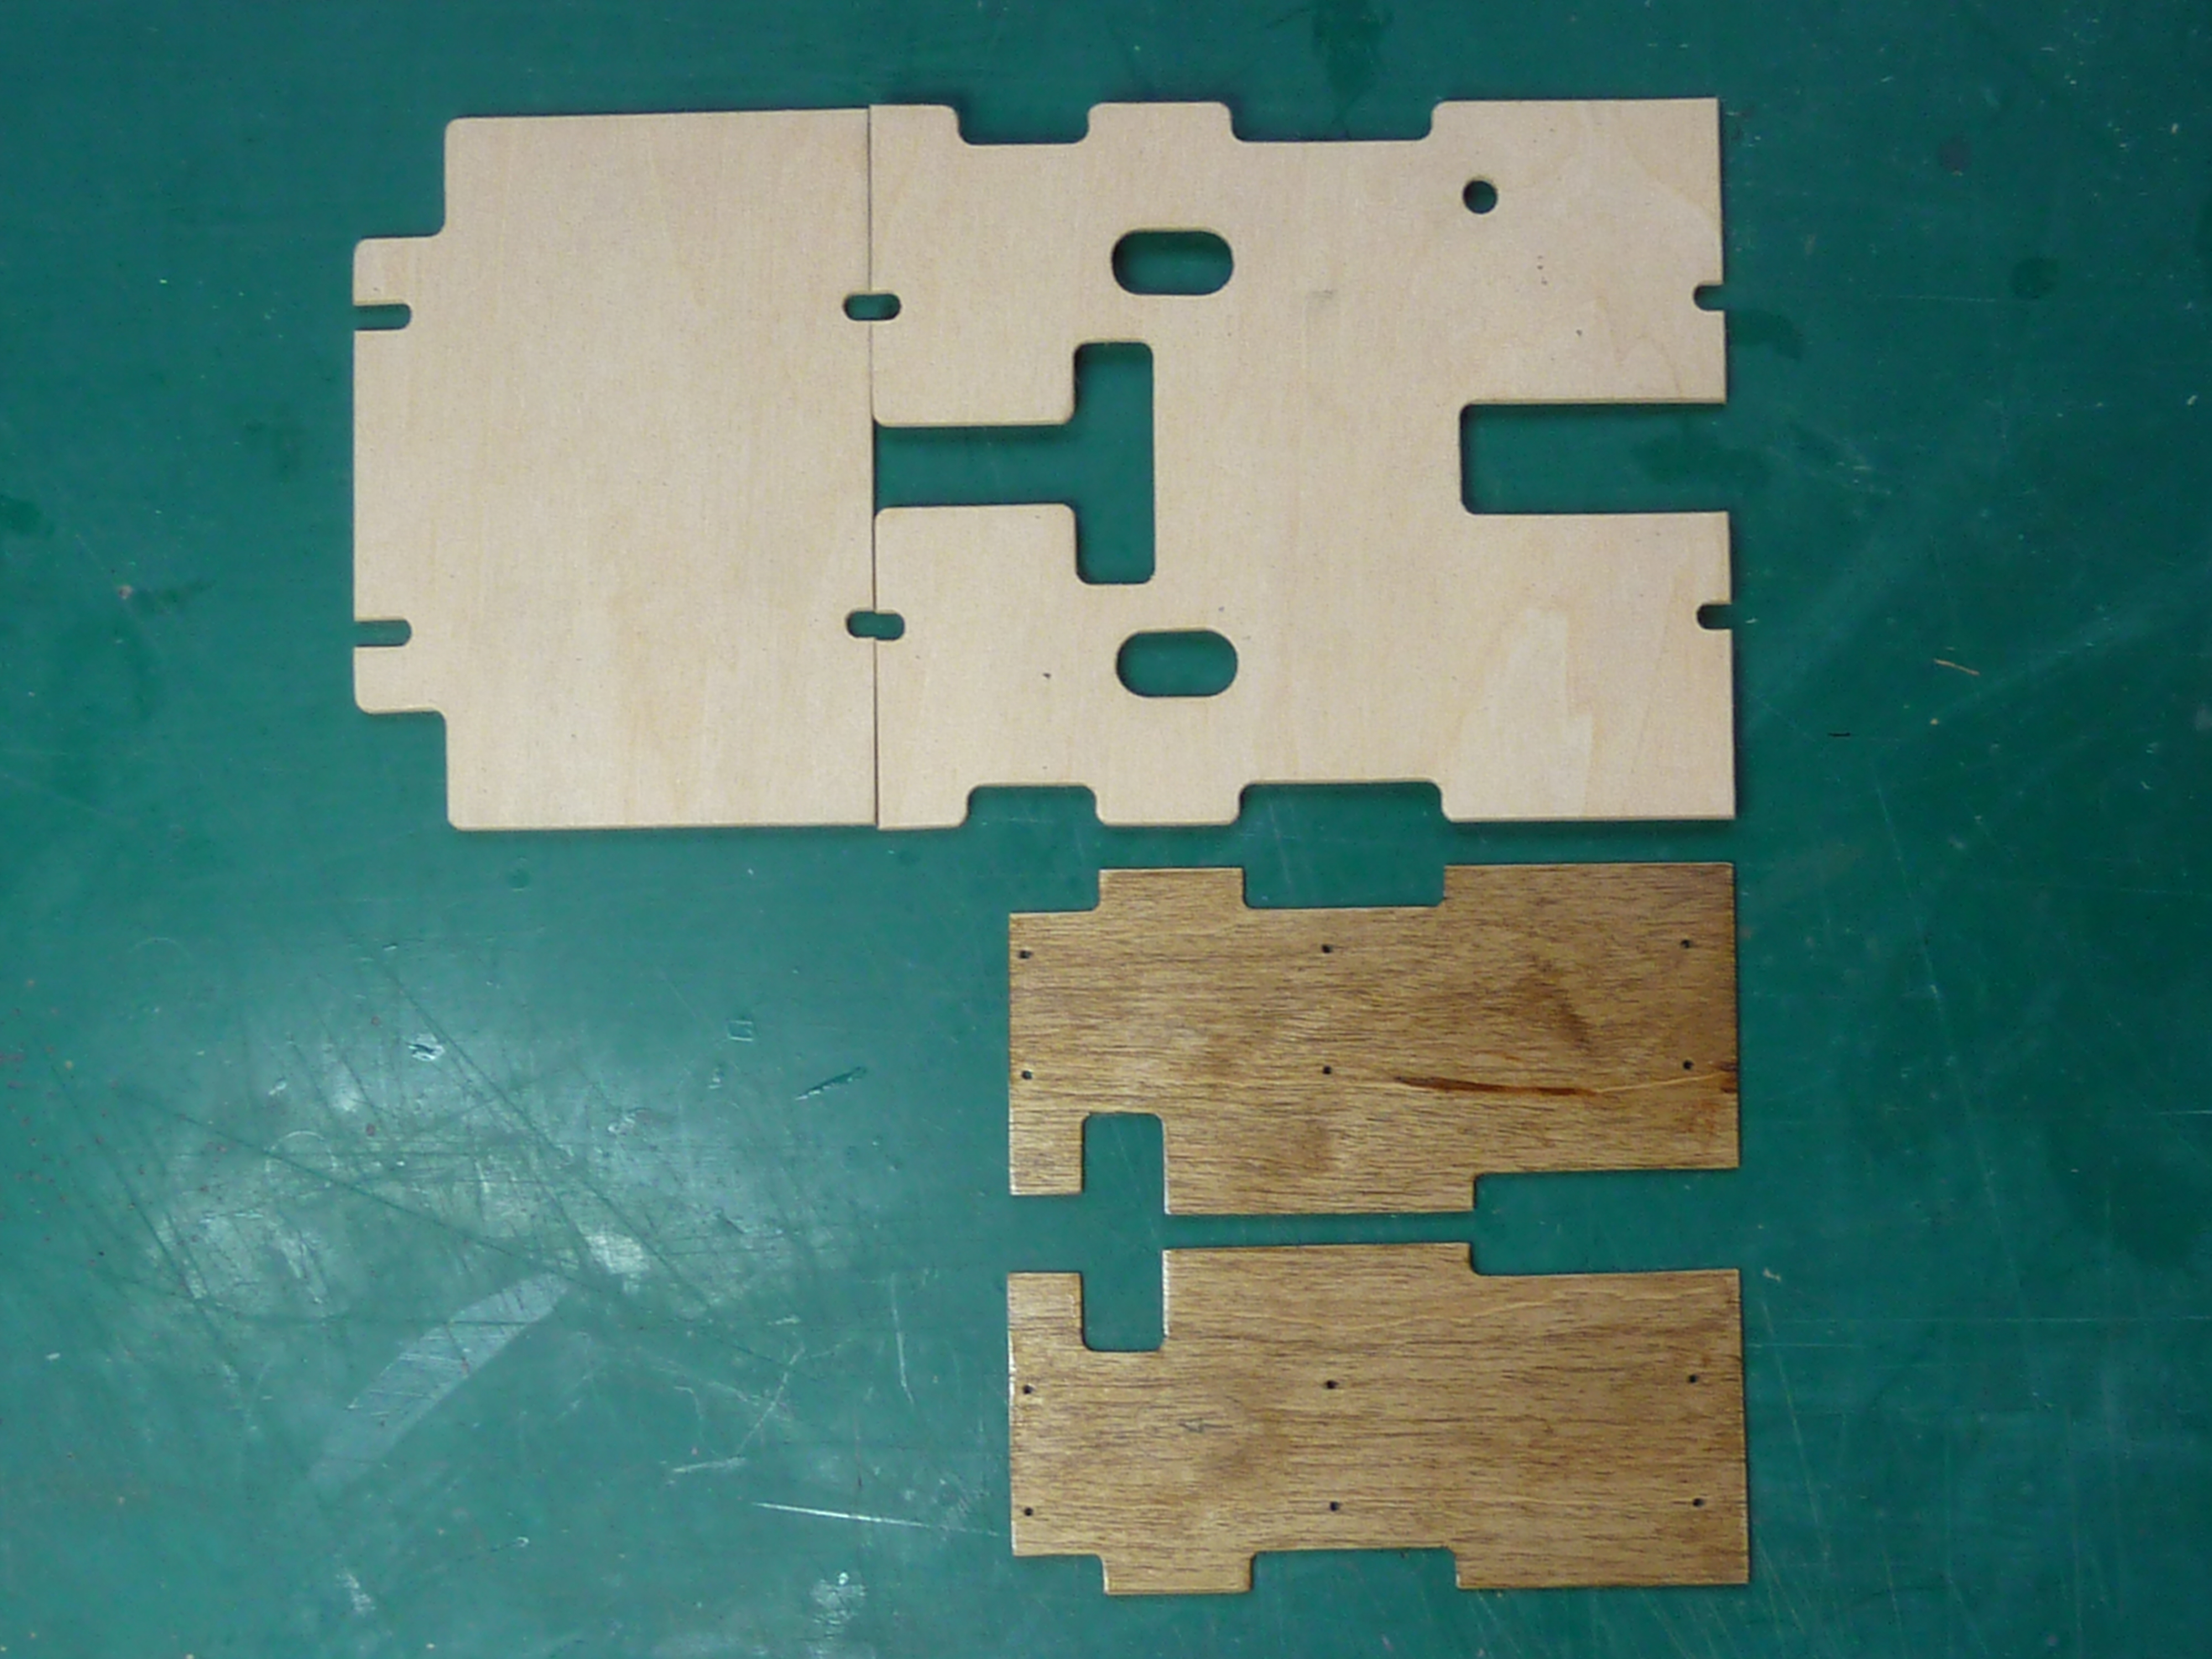
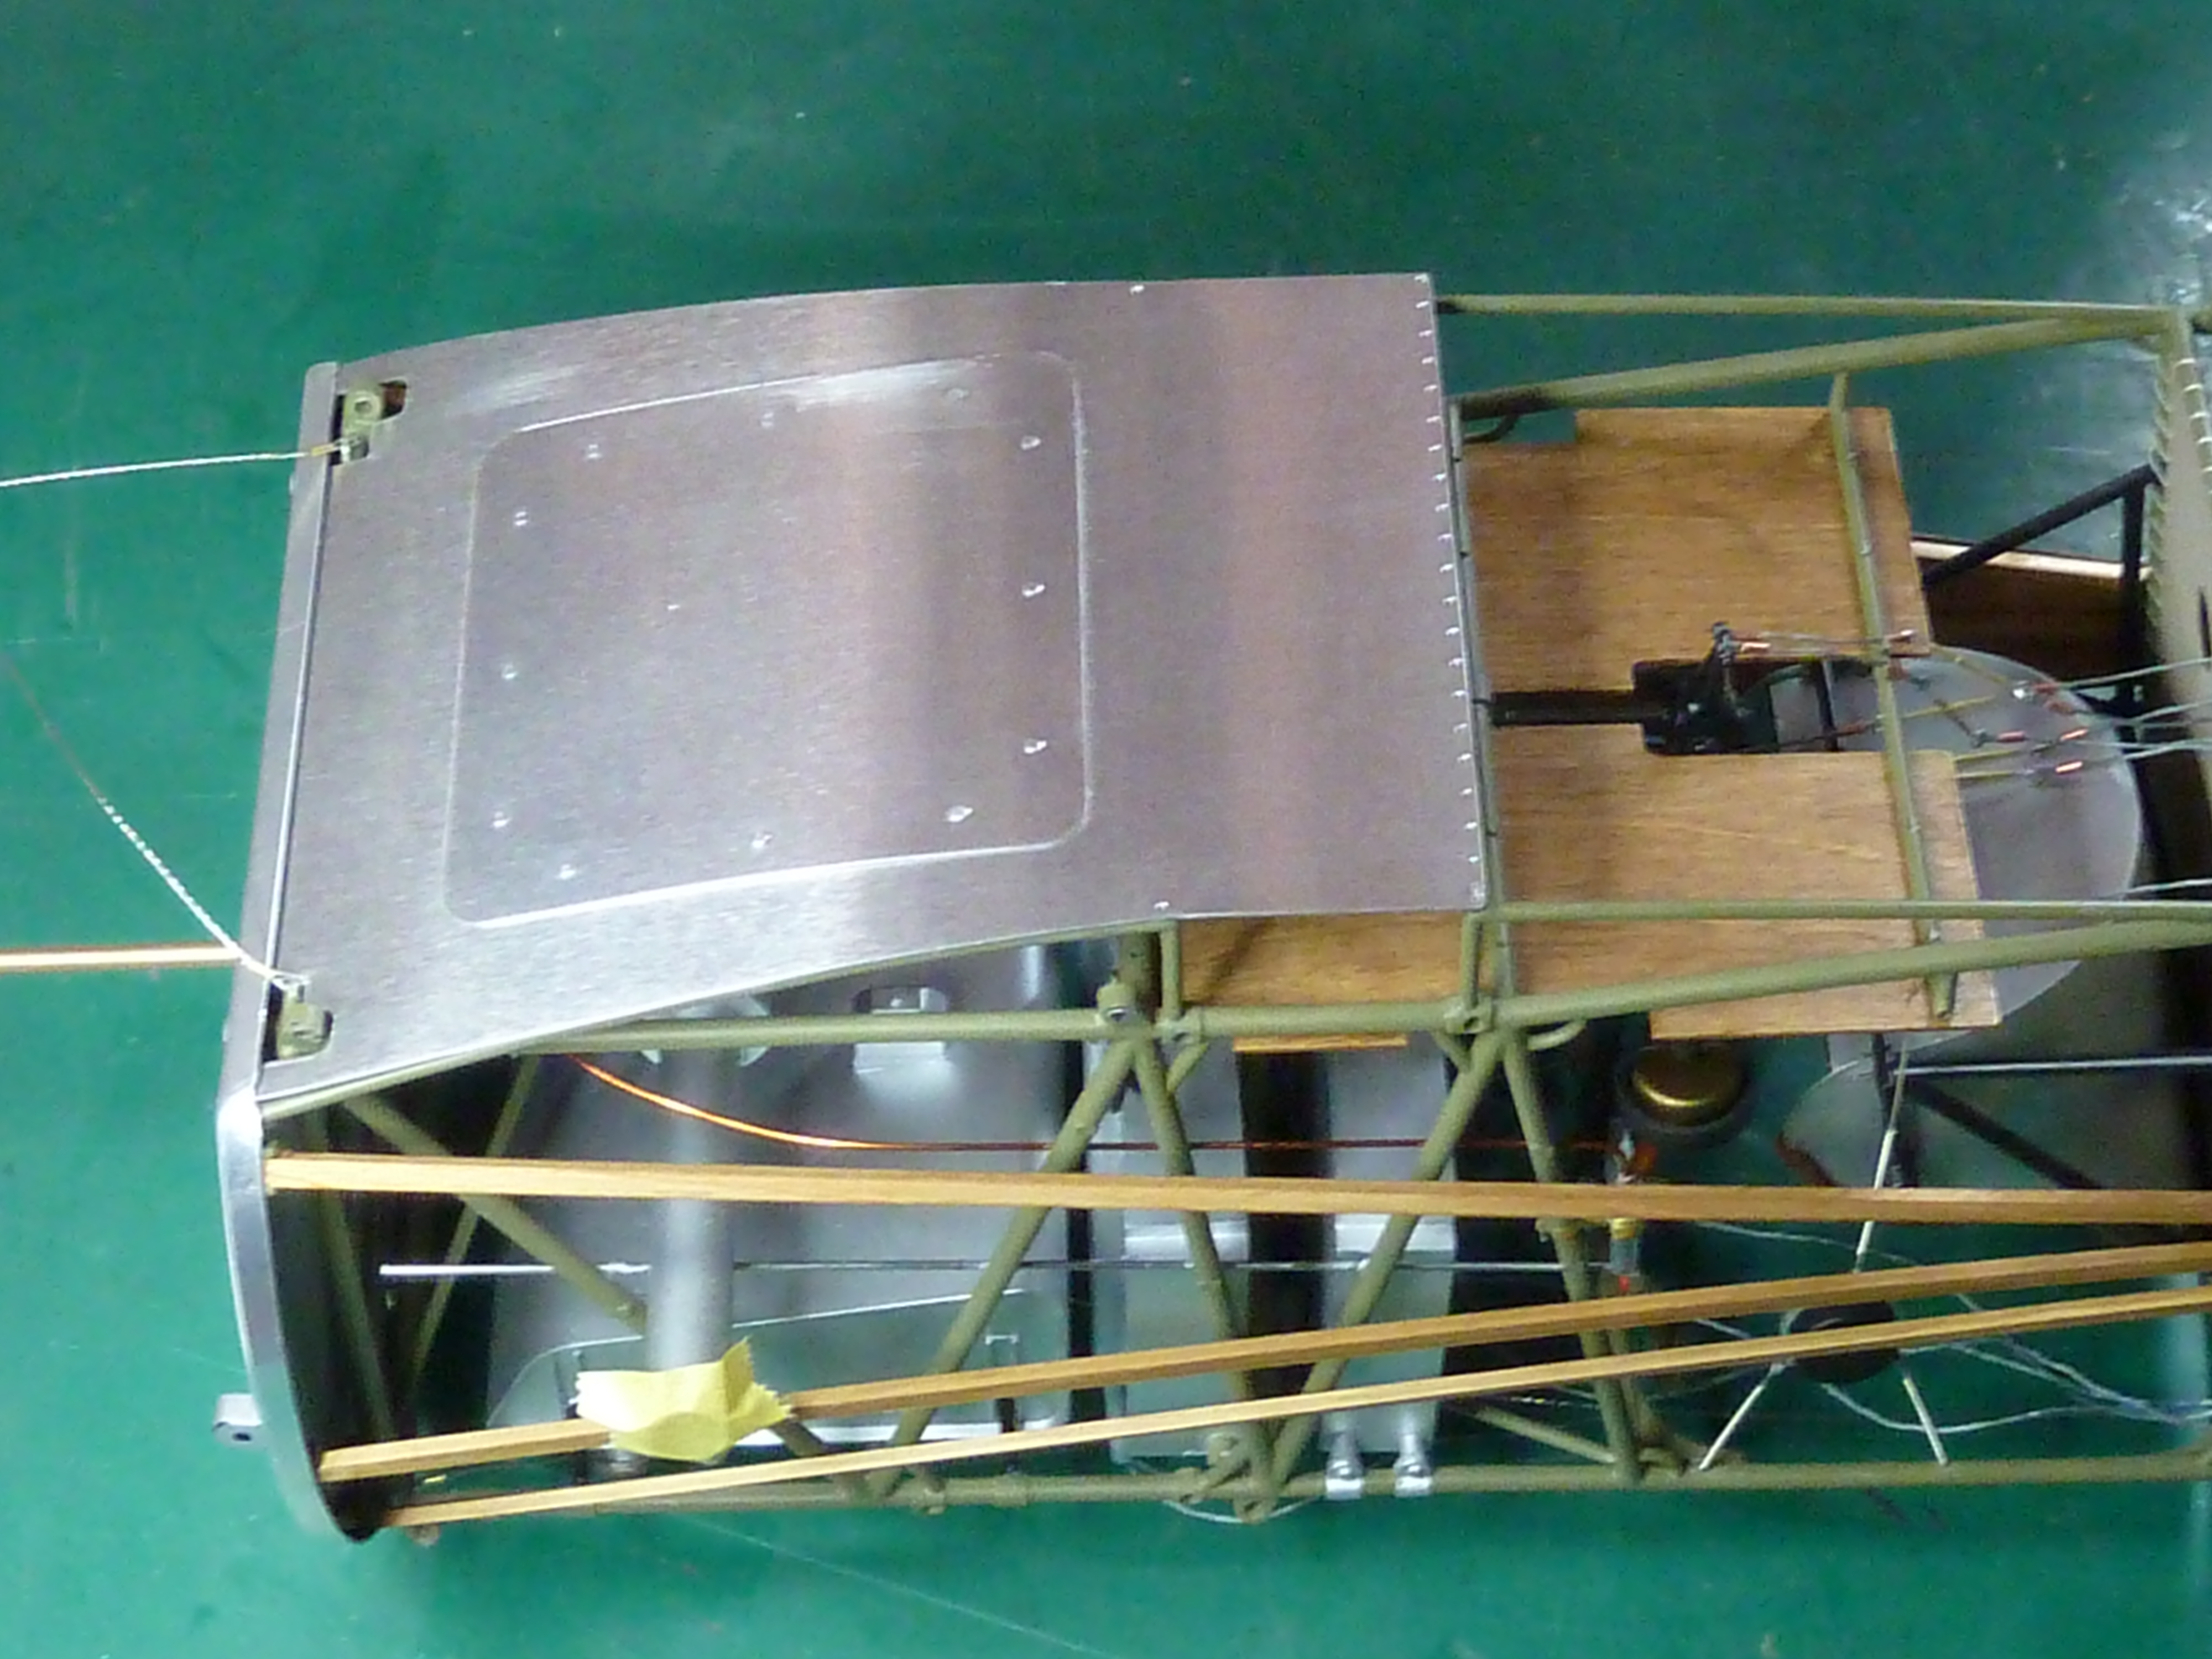
The first part of the cockpit I tackled was the floor. The kit parts comes in 2 pieces which are bolted in place with M2 bolts which are huge at this scale. Further research also revealed that the kit floor was much larger than the original, and higher. In fact the front section of the kit’s cockpit floor shouldn’t be there at all and several additional fuselage cross members had been added to allow it to be fitted. A comparison of the kit’s floor and my scratch built one in the picture below shows the difference. The kit floor is made of 2 mm ply while my replacement it from 1 mm birch ply.

The colour of the floor was another issue. I made a test card of three different tones. Liberon’s ‘Georgian Mahogany’, ‘Antique Pine’ and a combination of the two.
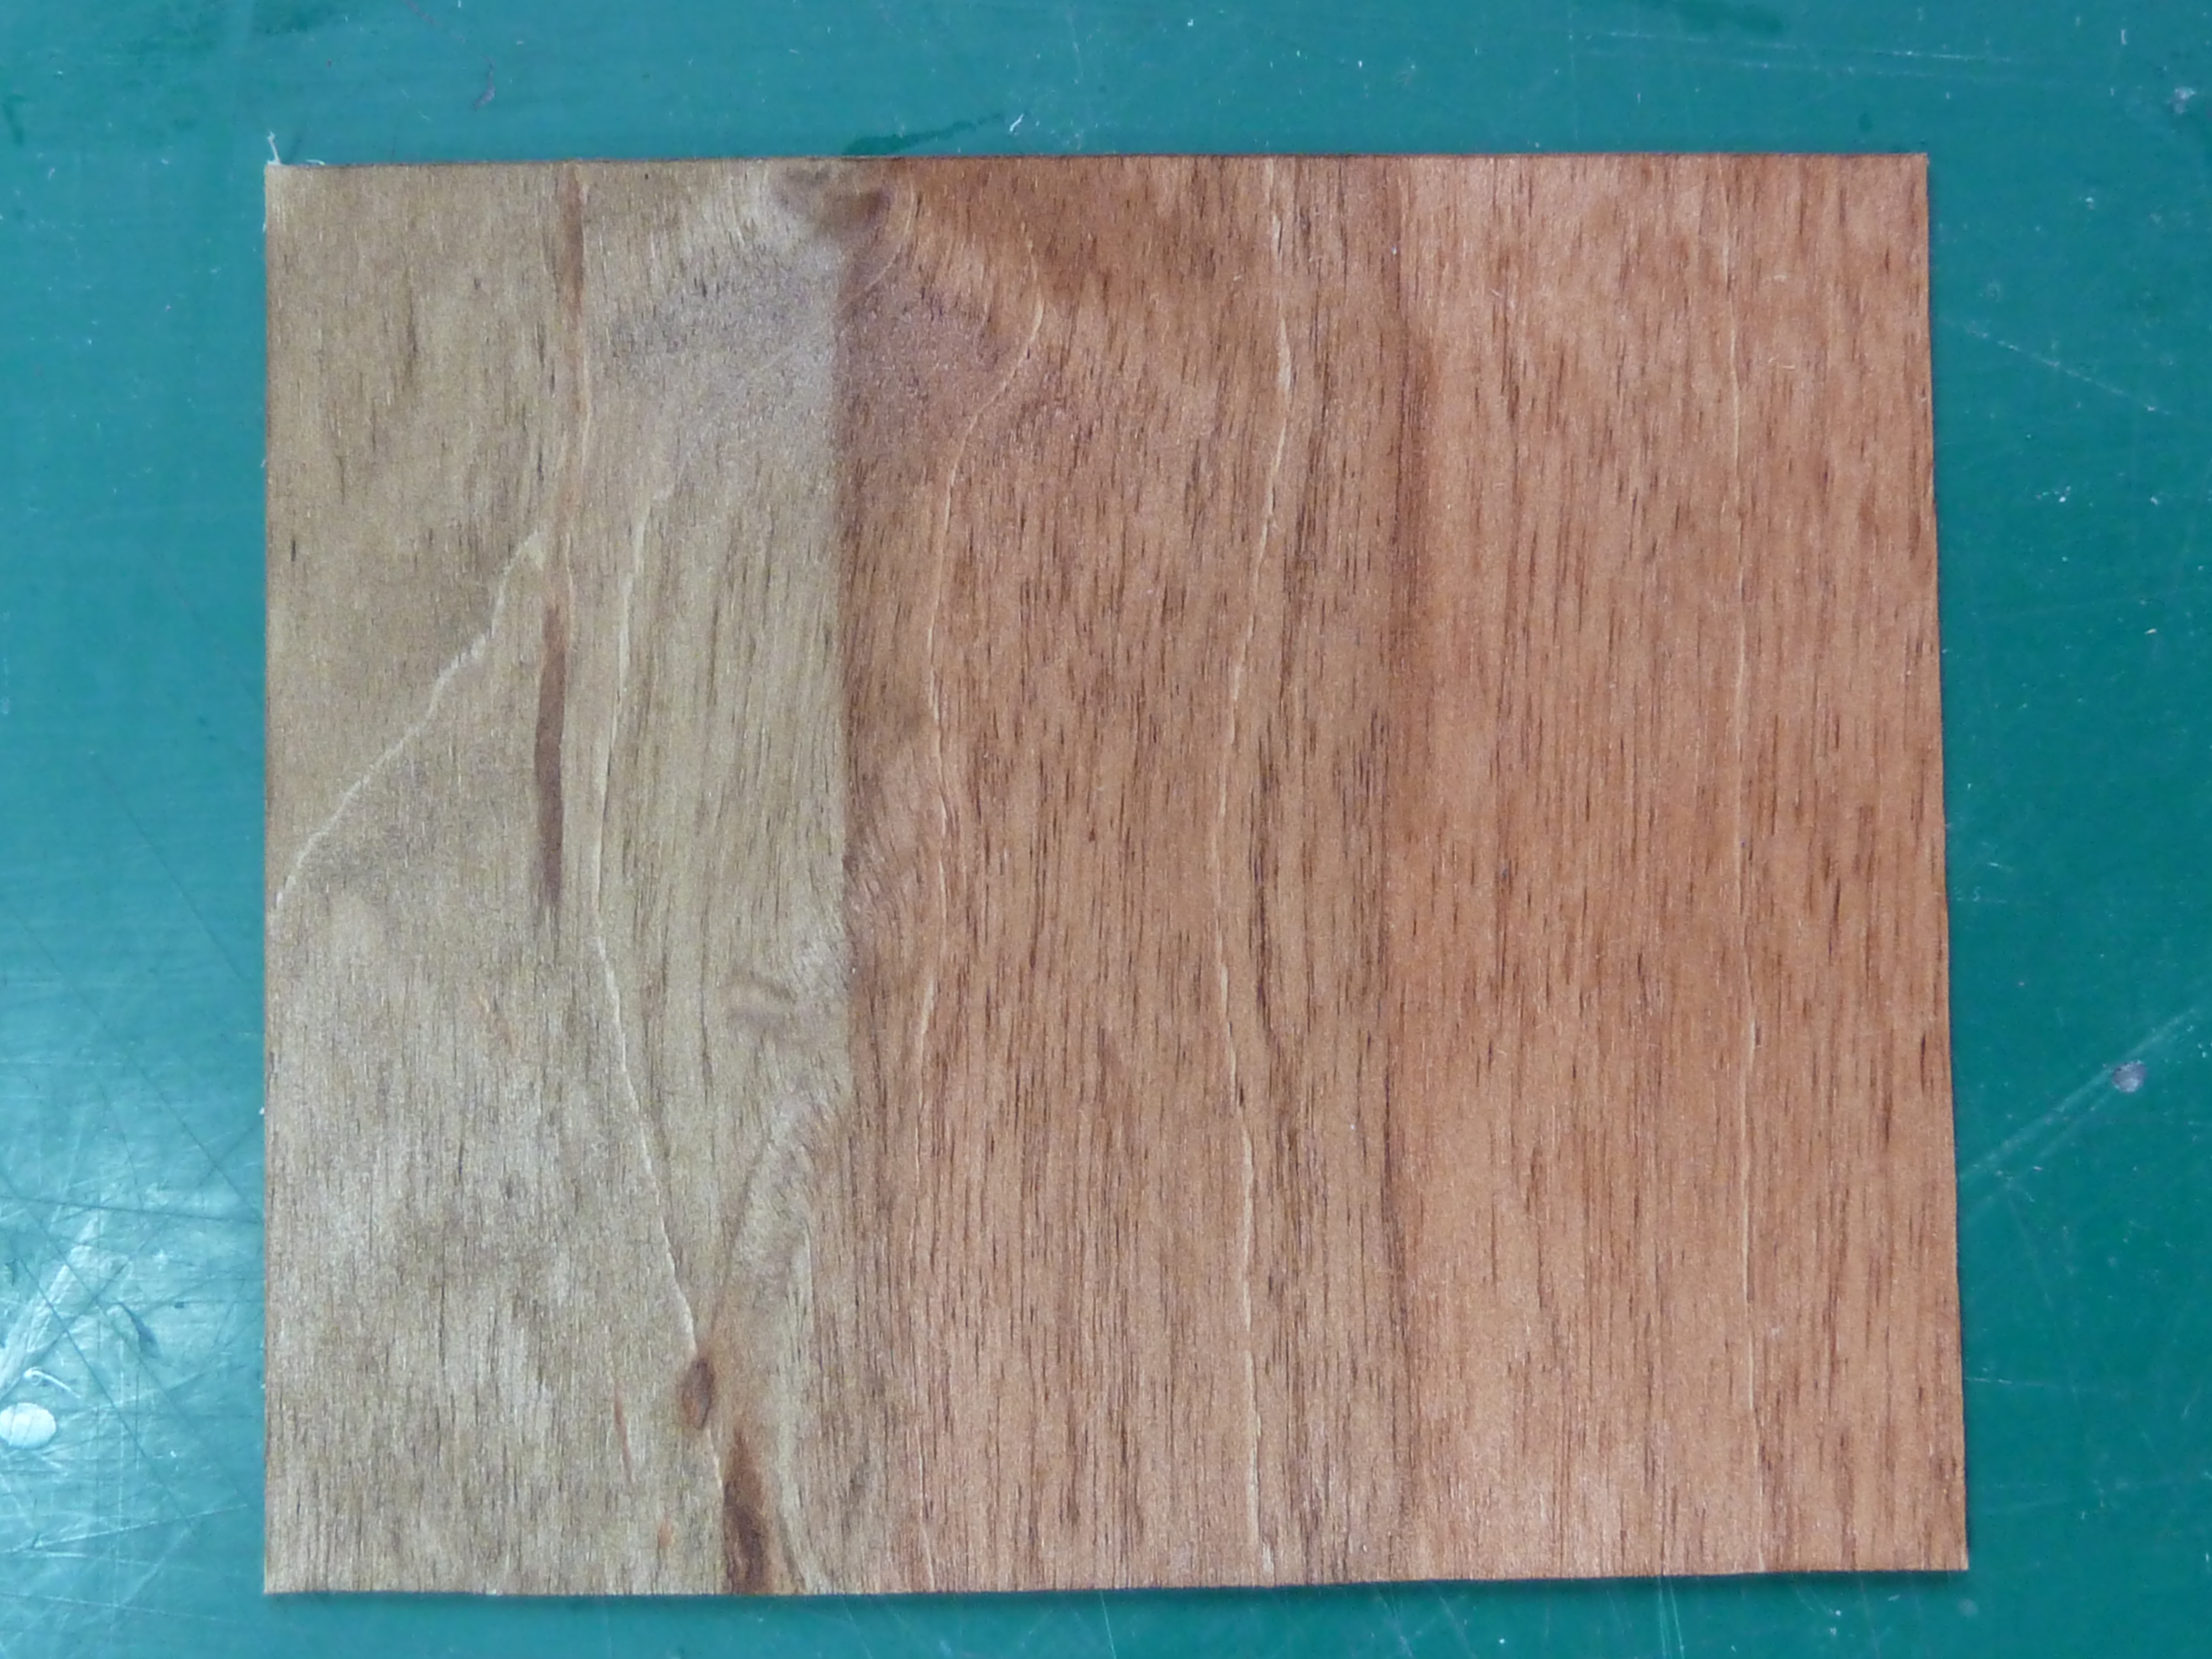
In the end I went with the Antique Pine on the left, simply because I thought it looked more realistic at this scale.
The 2 mm bolts supplied in the kit were also abandoned in favour of 1 x 3.5 mm items which were much closer to the right scale.
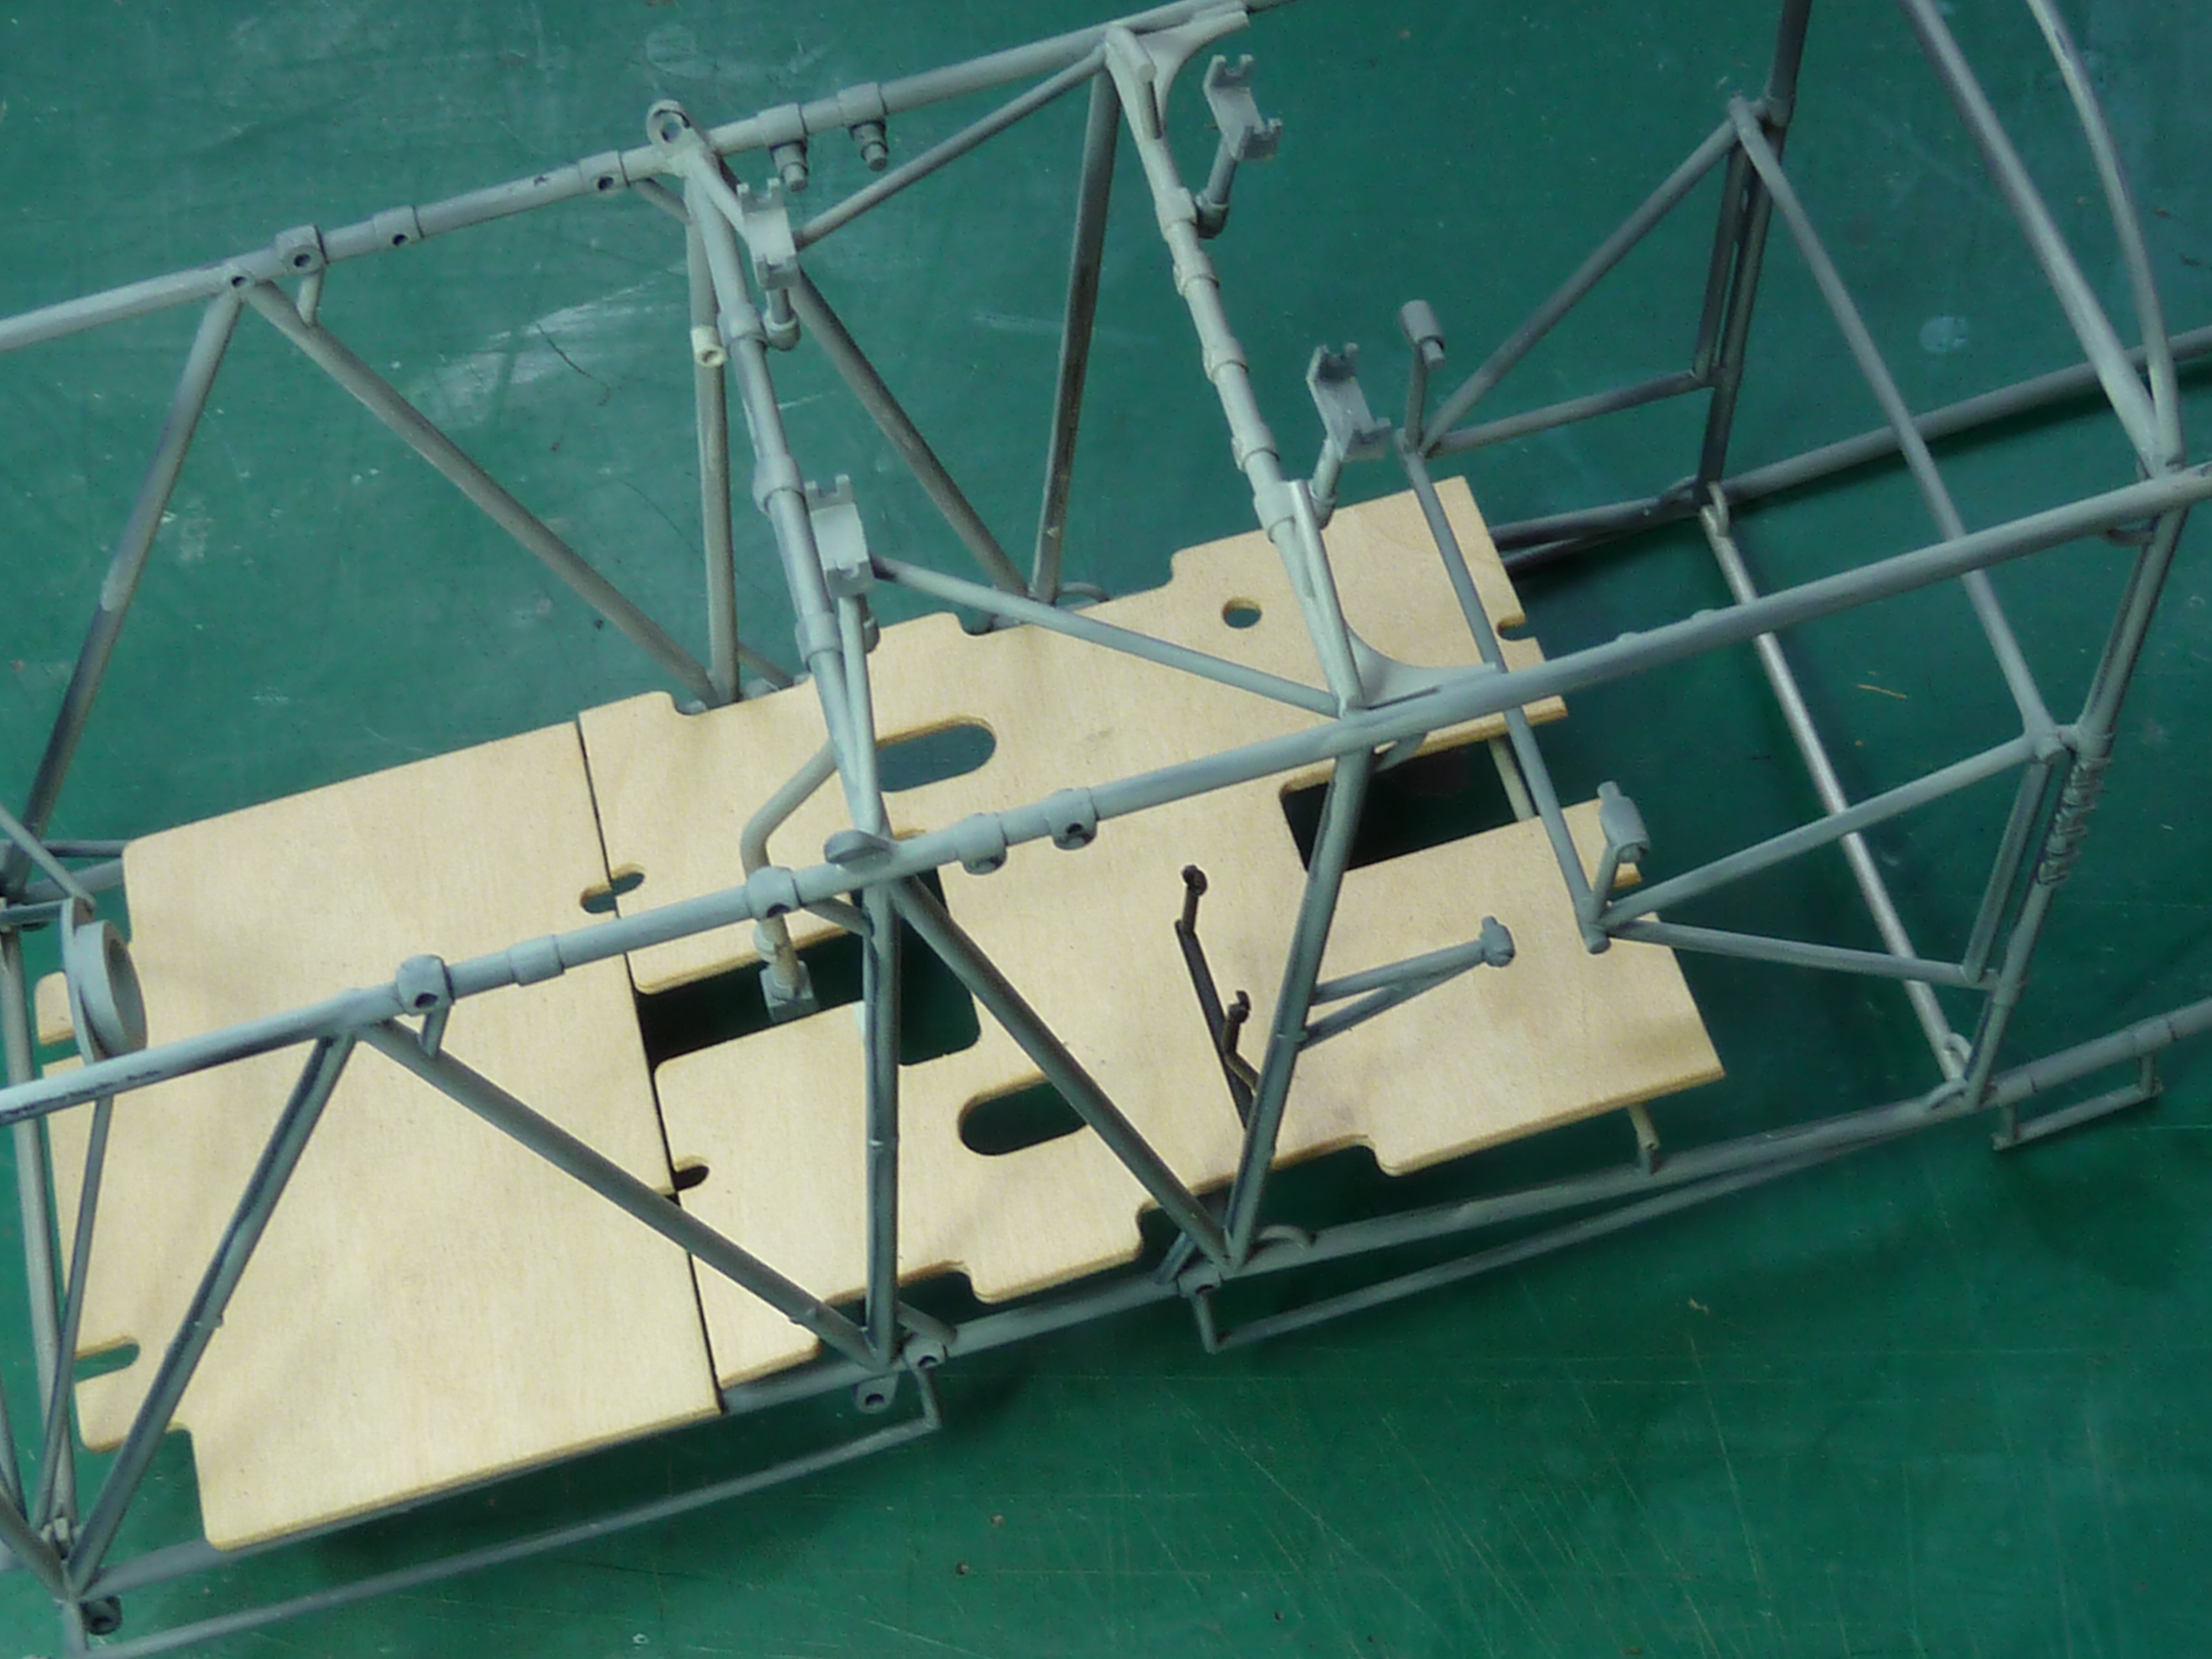
The additional cross members in the kit were removed and the aftmost one dropped in height to match the cross members holding the control column assembly. The latter were used to support the front and centre of the new cockpit floor pieces as per the real aircraft. The final arrangement ending up looking like this, once the heel scratch plates from the kit had been glued in place.

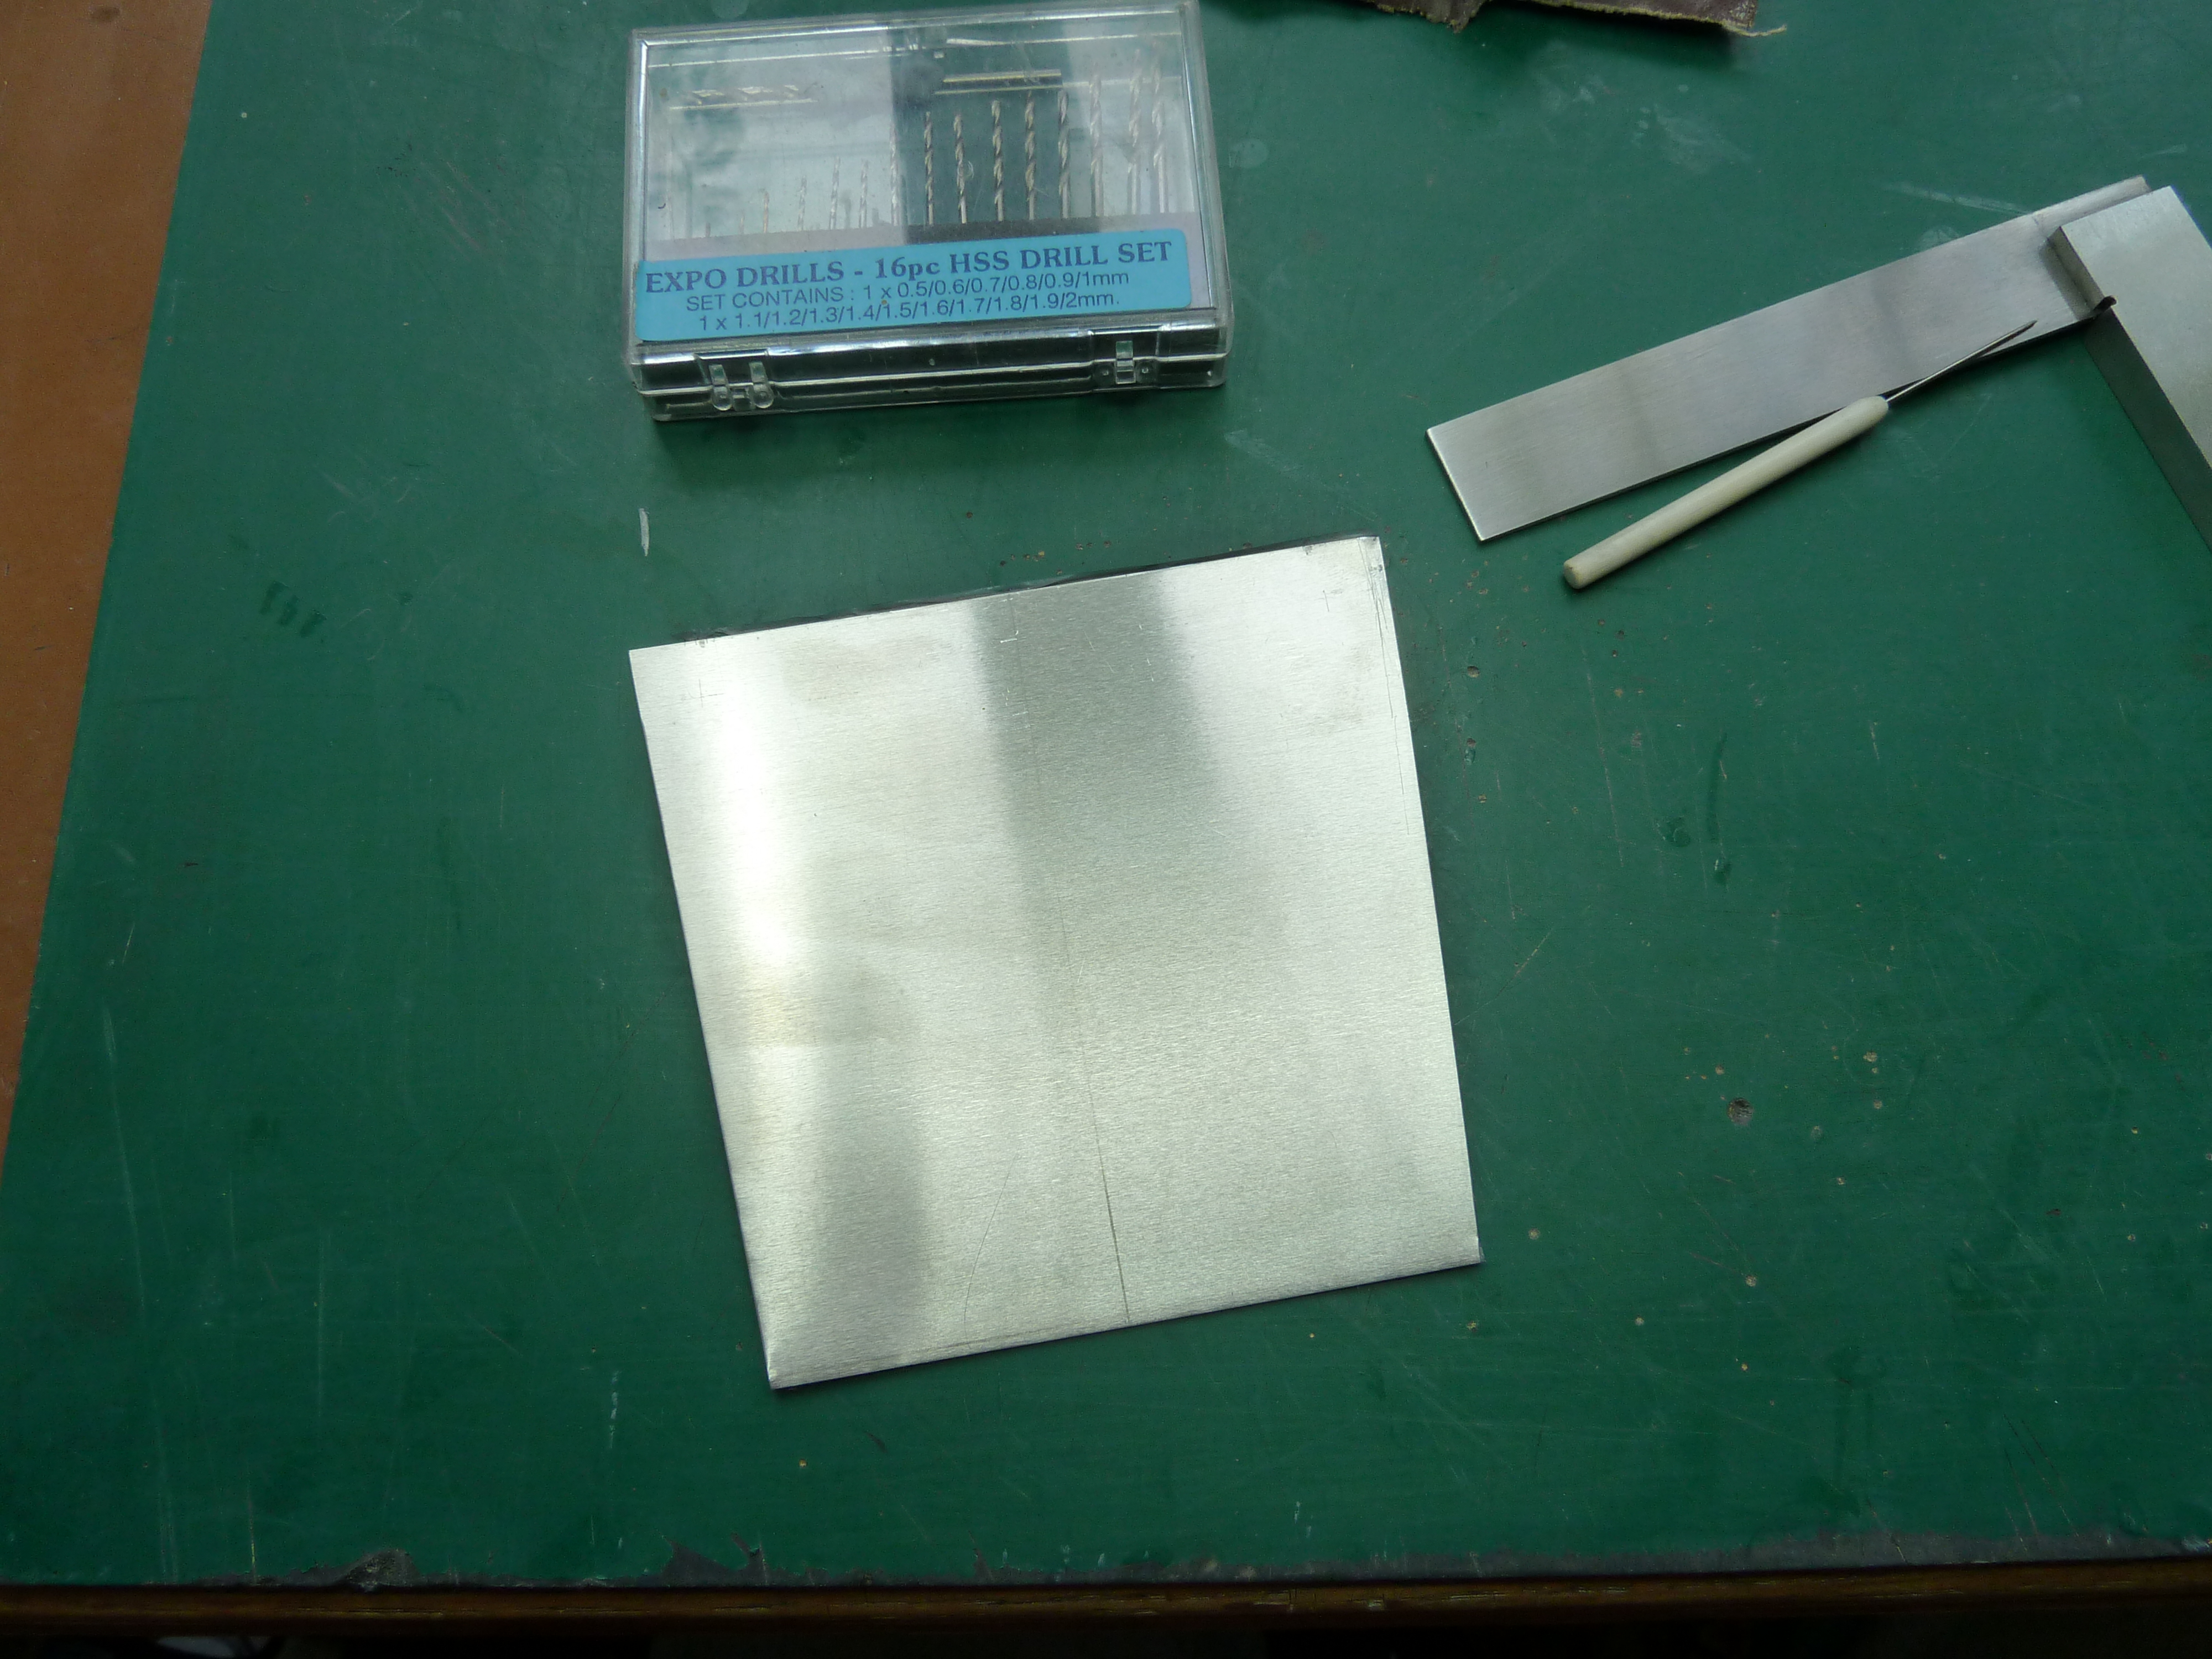
At this point the reason for the spurious front section of the kit floor was discovered. Without it in place there was nothing to stop you looking right up at the underside of the fuel tank. This was because the metal panel on the underside of the fuselage was again missing from the kit.
With reference to a few pictures, a couple of hours work produced the missing panel from 0.5 and 0.3 mm aluminium sheet.
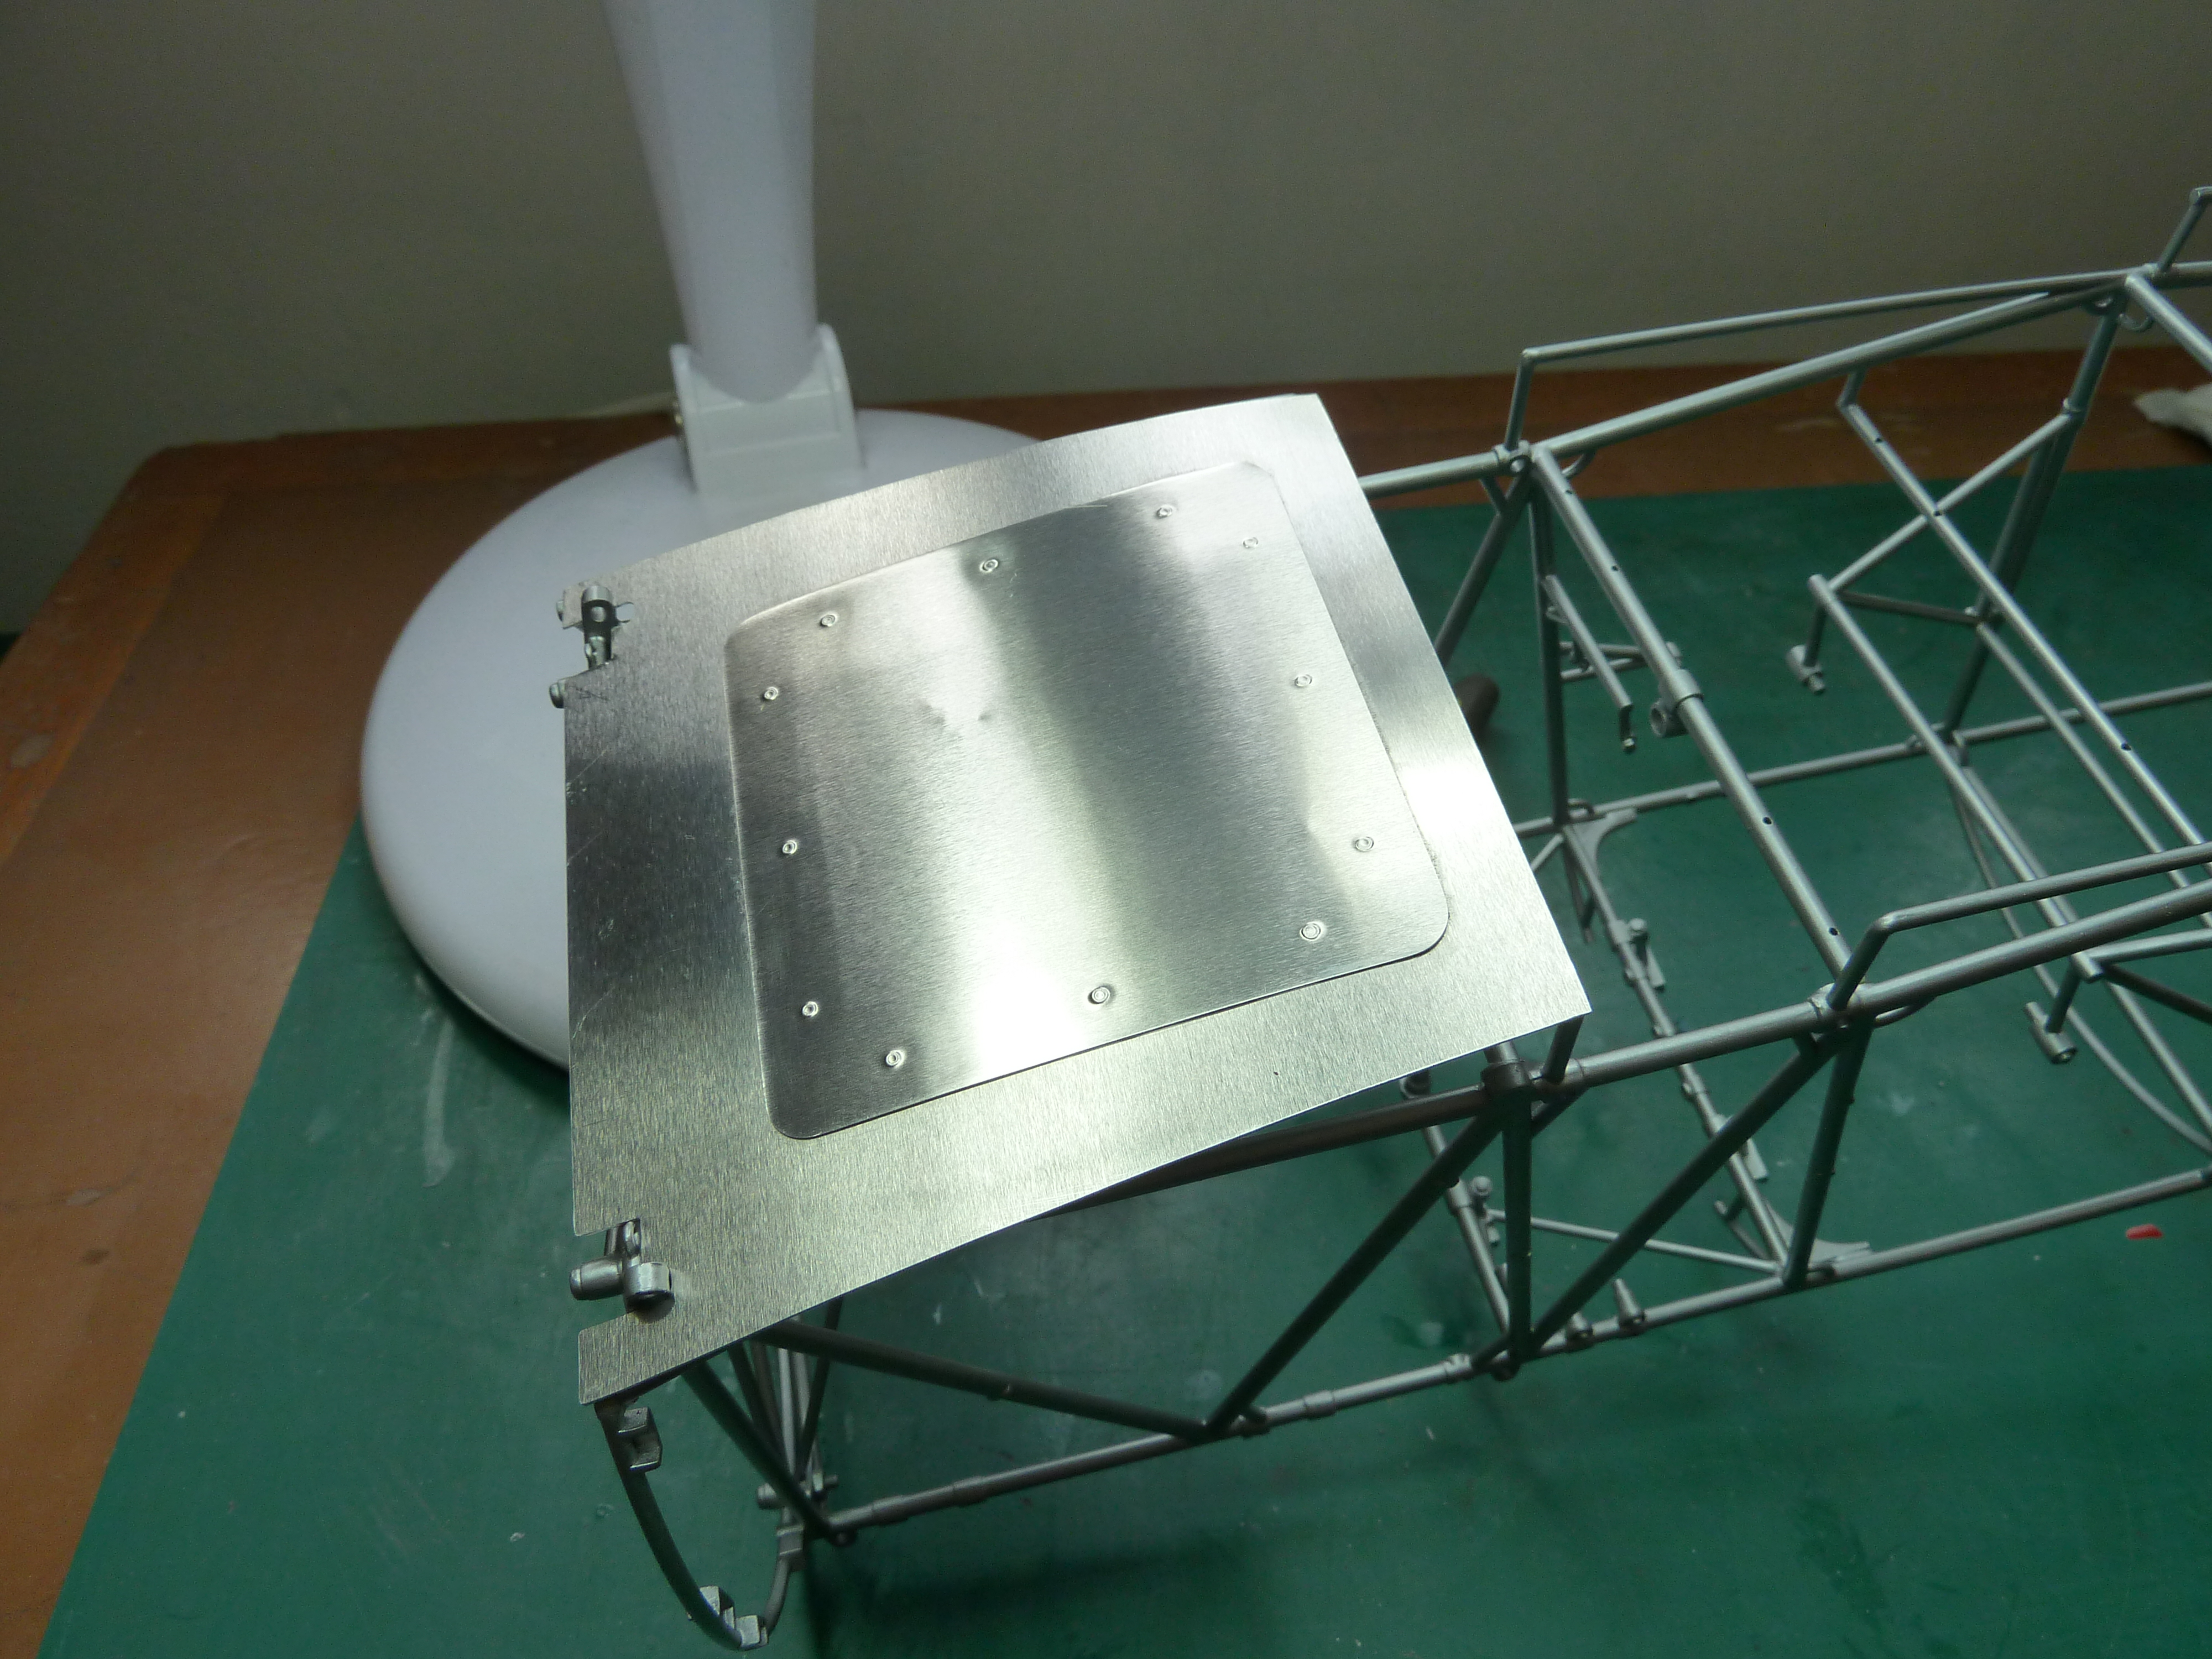
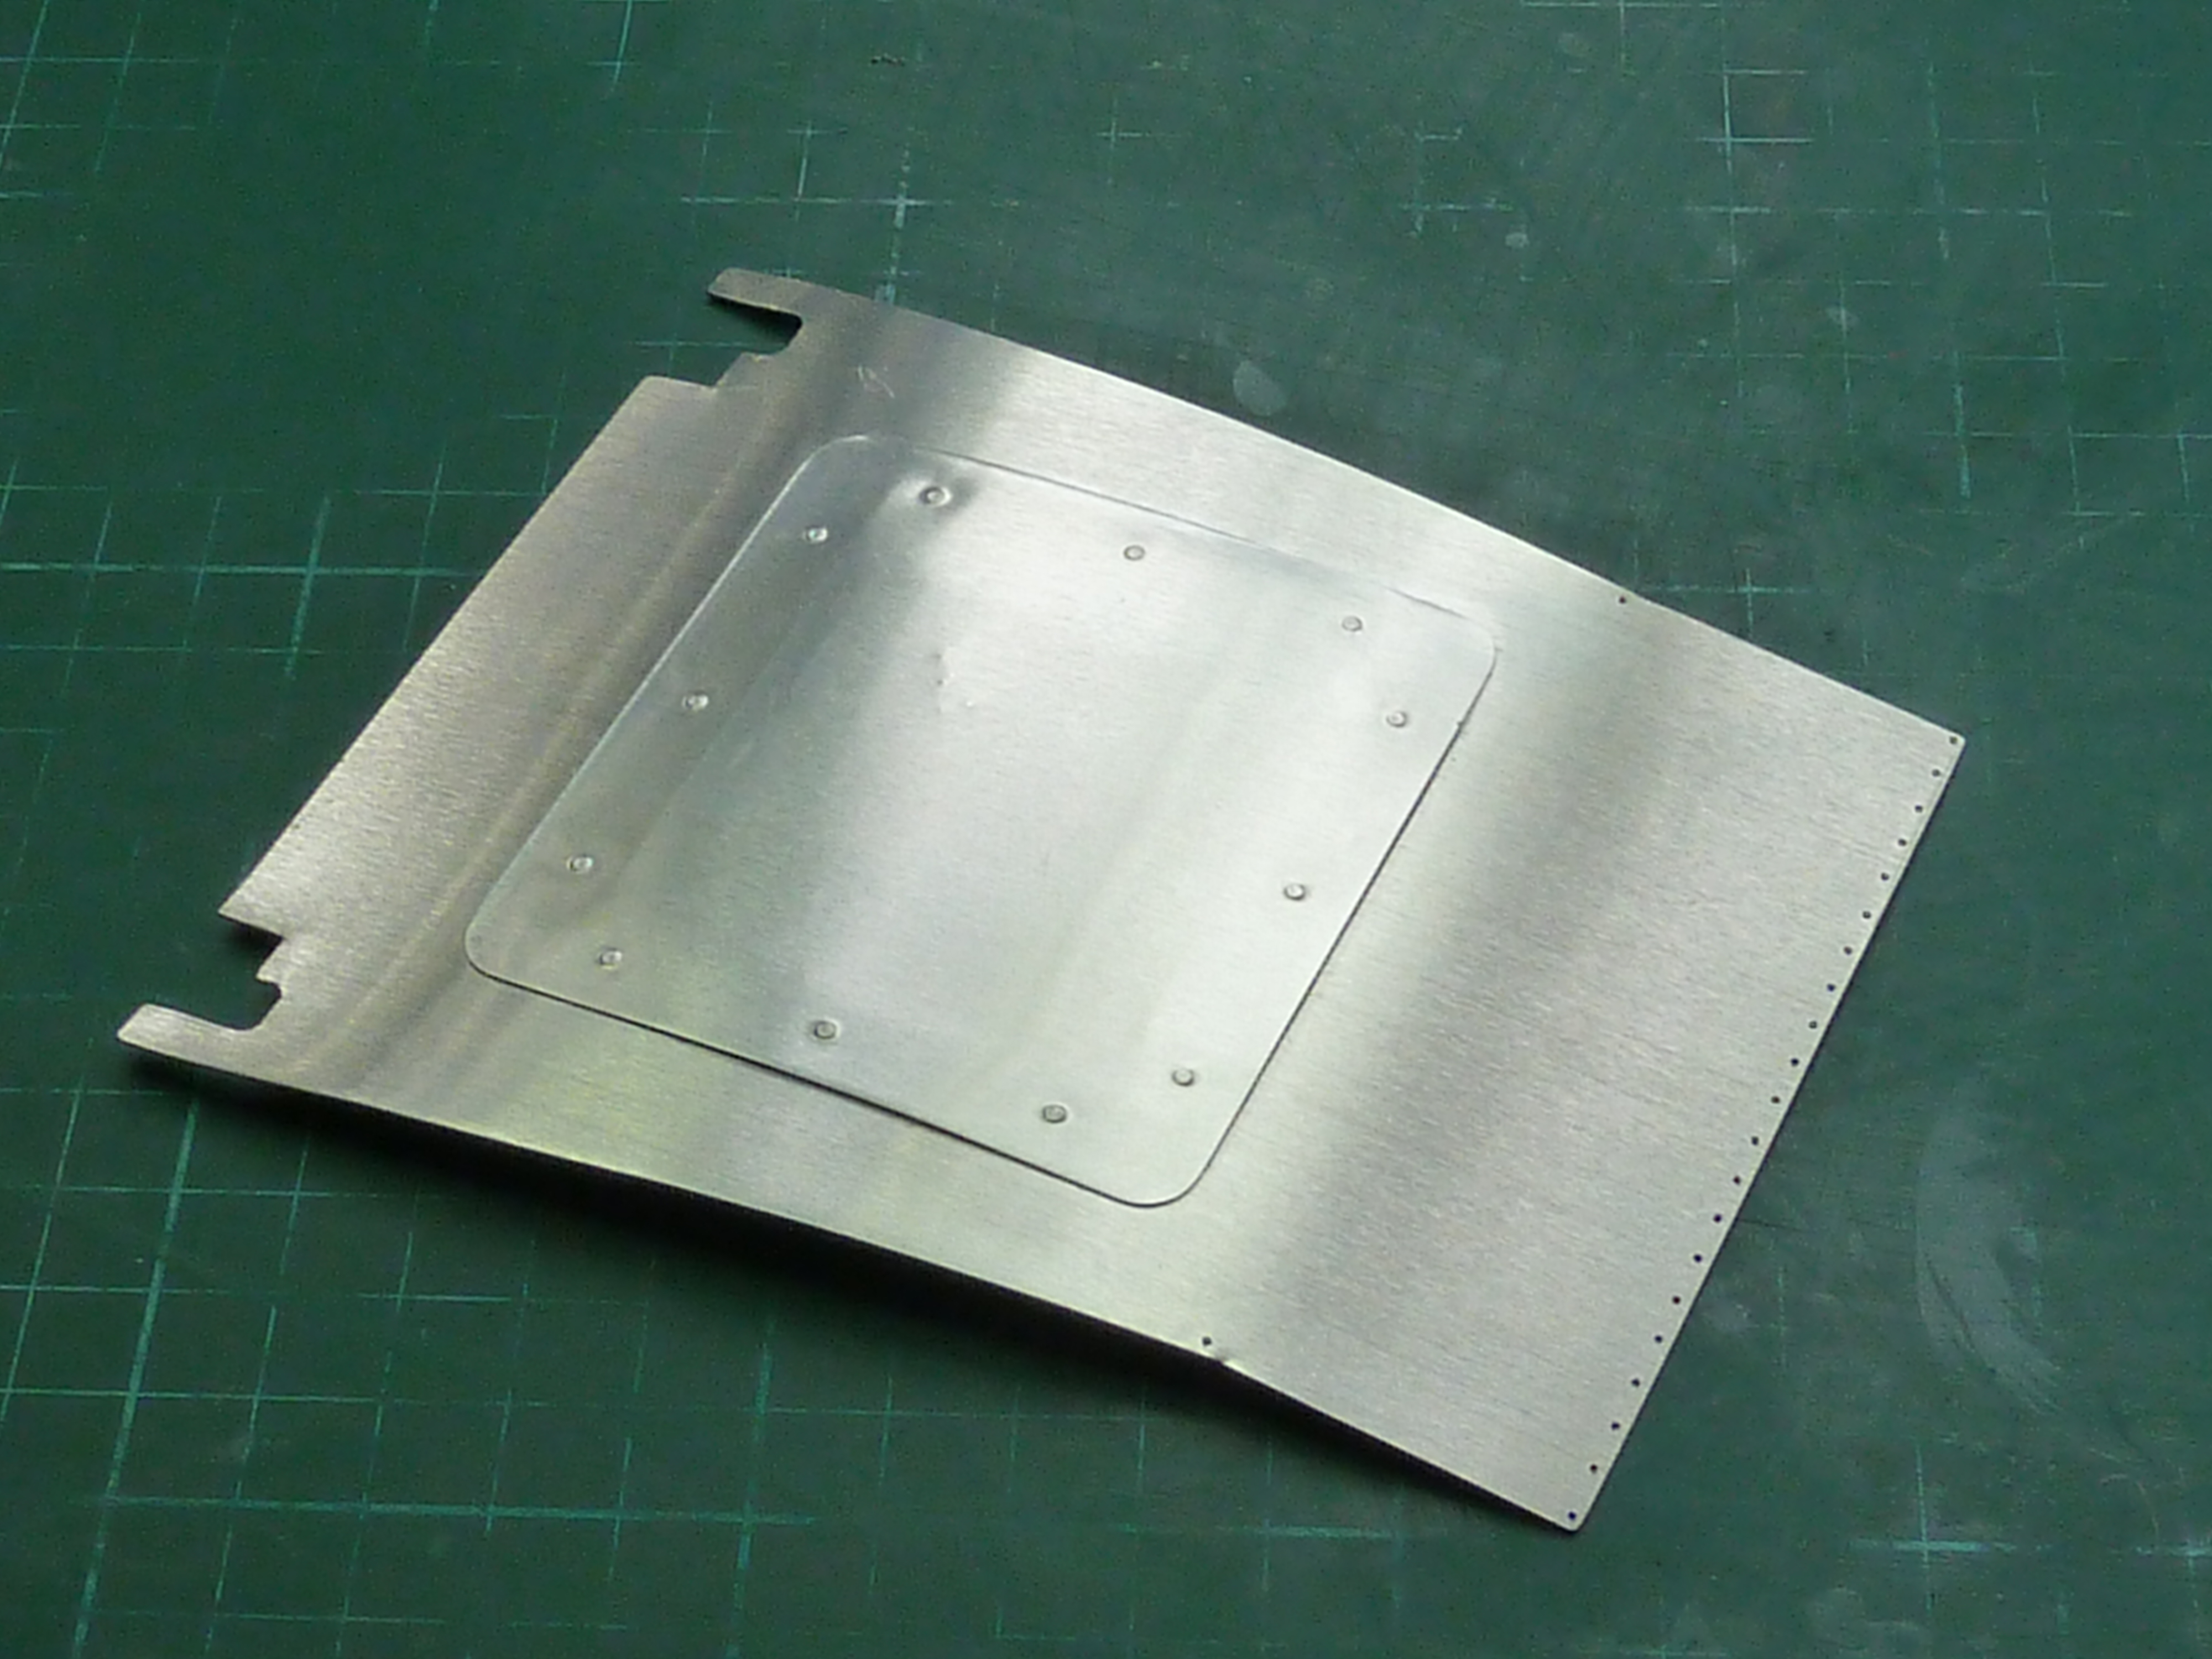
Update: Since writing this I’ve discovered the metal sheet should’ve gone back further than I made it, covering the wing spar in the process. In addition it needed further clearance at the front to allow the fitment of the undercarriage struts plus some holes at the rear to allow the fuselage fabric to be laced onto it.
The net result is I remade the component…
Next the seat and fuselage decking.

Can’t stop being amazed.
LikeLiked by 1 person
Quick question, Could you tell me the green paint type you used? name Brand,lacquer, etc. Thank you for your time,looking foreward to any new posts on your Sopwith 2nd build.
LikeLike
Blimey, I can’t actually recall the exact details as I mixed it myself from some Humbrol matt enamel paints.
The closest off-the-shelf version would be their US Interior green (matt 226) https://www.humbrol.com/us-en/226-interior-green-matt-14ml-enamel-paint.html
A word of caution though. As I said in my blog, I’m by no means certain that green is correct. Light grey may be more accurate. I went for green because a lot of replica builders have and I assumed they’ve done more research than me.
In choosing the colour to mix I attempted to emulate the frame colour of this surviving Fokker DVII in the Munich Museum.
http://s256.photobucket.com/user/Miguel1_035/media/Fokker%20DVII%20-%20Fok/Cockpit/FokkerDVIIInDetailFTSMunichMuseu-2.jpg.html
LikeLike
Achim Engels in Germany – who has built several replicas – advises me “Hello Bob,
this is Achim Engels in order to answer your questions:
Eraly Foker planes used a light greyish colour for the fuselage frames. The regulations asked for clear varnish, but Fokker disregarded that and continued to paint steel parts. At the time of the Fokker Triplane, the D.VI, D.VII and D.VIII it was a olive green paint close to RAL 6003. All items that are not part of the welded structure and are attached by clambs have ben painted black. However there were exeptions. The original foot step of 425/17 which is helt in Australia is attached to a clear painted steel tube, but it is not positive this is the original triplane steel tube bottom longeron.”
LikeLiked by 1 person
Oh, excellent. That explains the green vs grey question. I chose my colour based on a photo of an old WW1 Fokker.
LikeLike
Achim Engels, you may be aware, is the co-author of ‘Fokker V5/Dr.1’ with Wolfgang Schuster which was published by Schiffer. He has built several 1:1 Fokker Dr.1s for commission, one of which is in the Technik Museum Speyer, and he is the founder of Fokker Team Schorndorf ( http://www.fokker-team.de/ ), so he would be as authoritative a reference as any, I would think. 🙂
LikeLiked by 1 person
I have to admit I don’t know him, but I must have come across his name a number of times whilst surfing the net.
The information on the frame colour is definitely welcome as it was an issue I never managed to clear up. A number of forums had posts stating that only licence built machines had green paint, and Fokker itself used light grey. However, the vast majority of surviving Fokkers were green and most of the replicas too, so I went with the majority and I’m glad I did.
LikeLike
I like how you researched different color options for the frame.
LikeLike