
I’d promised an update on the completion of the cockpit detailing, but as I haven’t finished that yet I thought I’d put in a quick post about the tailskid.
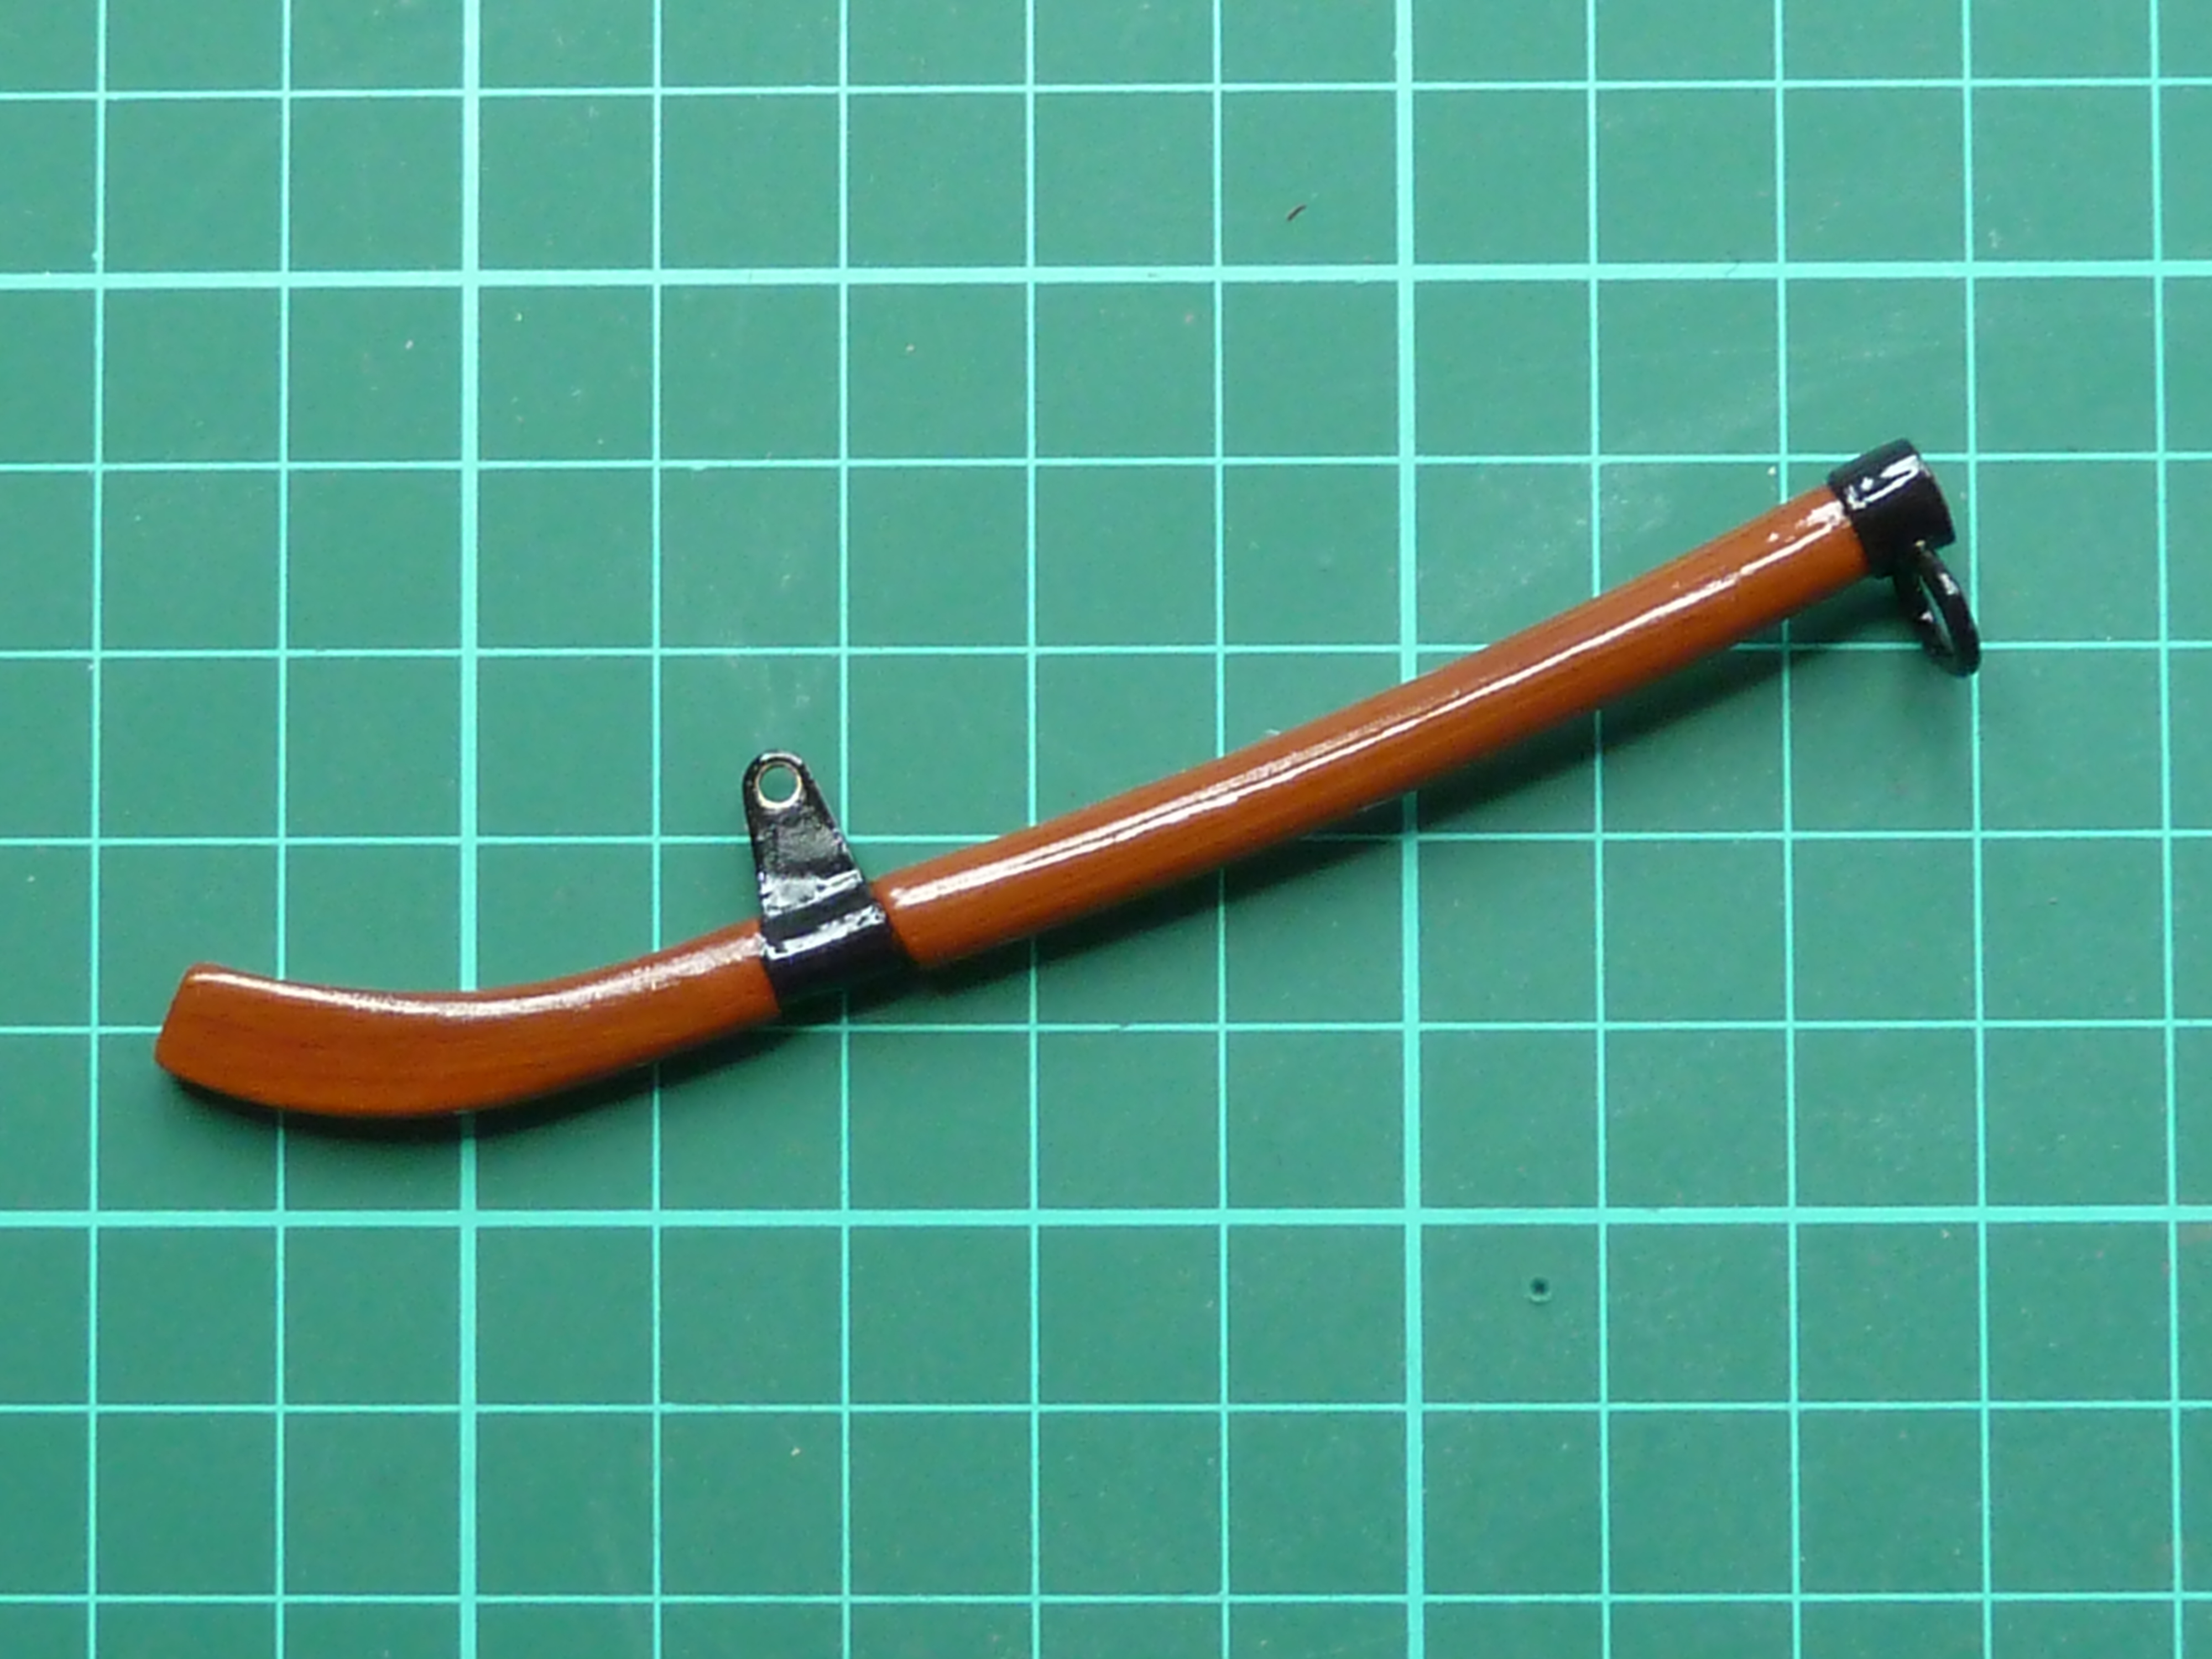
Unlike the Camel’s tailskid, which was real wood, the DR.1’s is injection moulded in black plastic and so needs to be painted to appear like the real item.
Prior to painting I attached the brass mounting bracket and the white metal casting to which the shock absorbing bungee cords fasten. The bracket is supplied ready cutout in flat brass sheet and needs to be bent around the plastic skid in a recess provided for it. I annealed the brass so that this would be easier to bend and to get a tight fit. To hold it in place I soldered the ends of the bracket together and dribbled so thin super glue between the plastic and the brass.
Unfortunately I didn’t think to take any pictures at this stage as, having offered the finished item up to the fuselage to check the fit, I realised I’d made a mistake. The ends of the bracket which I’d soldered together should’ve been left open as they were meant to go either side of the mounting point. So now it wouldn’t fit.
I contemplated scrapping the bracket and making a new one, but in the end decided to modify the mounting bracket to take what I’d made. I simply cut a slot in the mounting point to accept the soldered tab centrally, rather than around the outside. The finished article is shown below.

Painting started with an overall coat of primer followed by a base coat of mid brown on the ‘woodwork’. This was then followed by Burnt Sienna oil paint. Whilst this was still wet I used a stiff brush with coarse bristles to draw on simulated grain. You can vary the subtlety of this depending on the pressure used. I used a fairly light one to obtain a relatively fine effect.
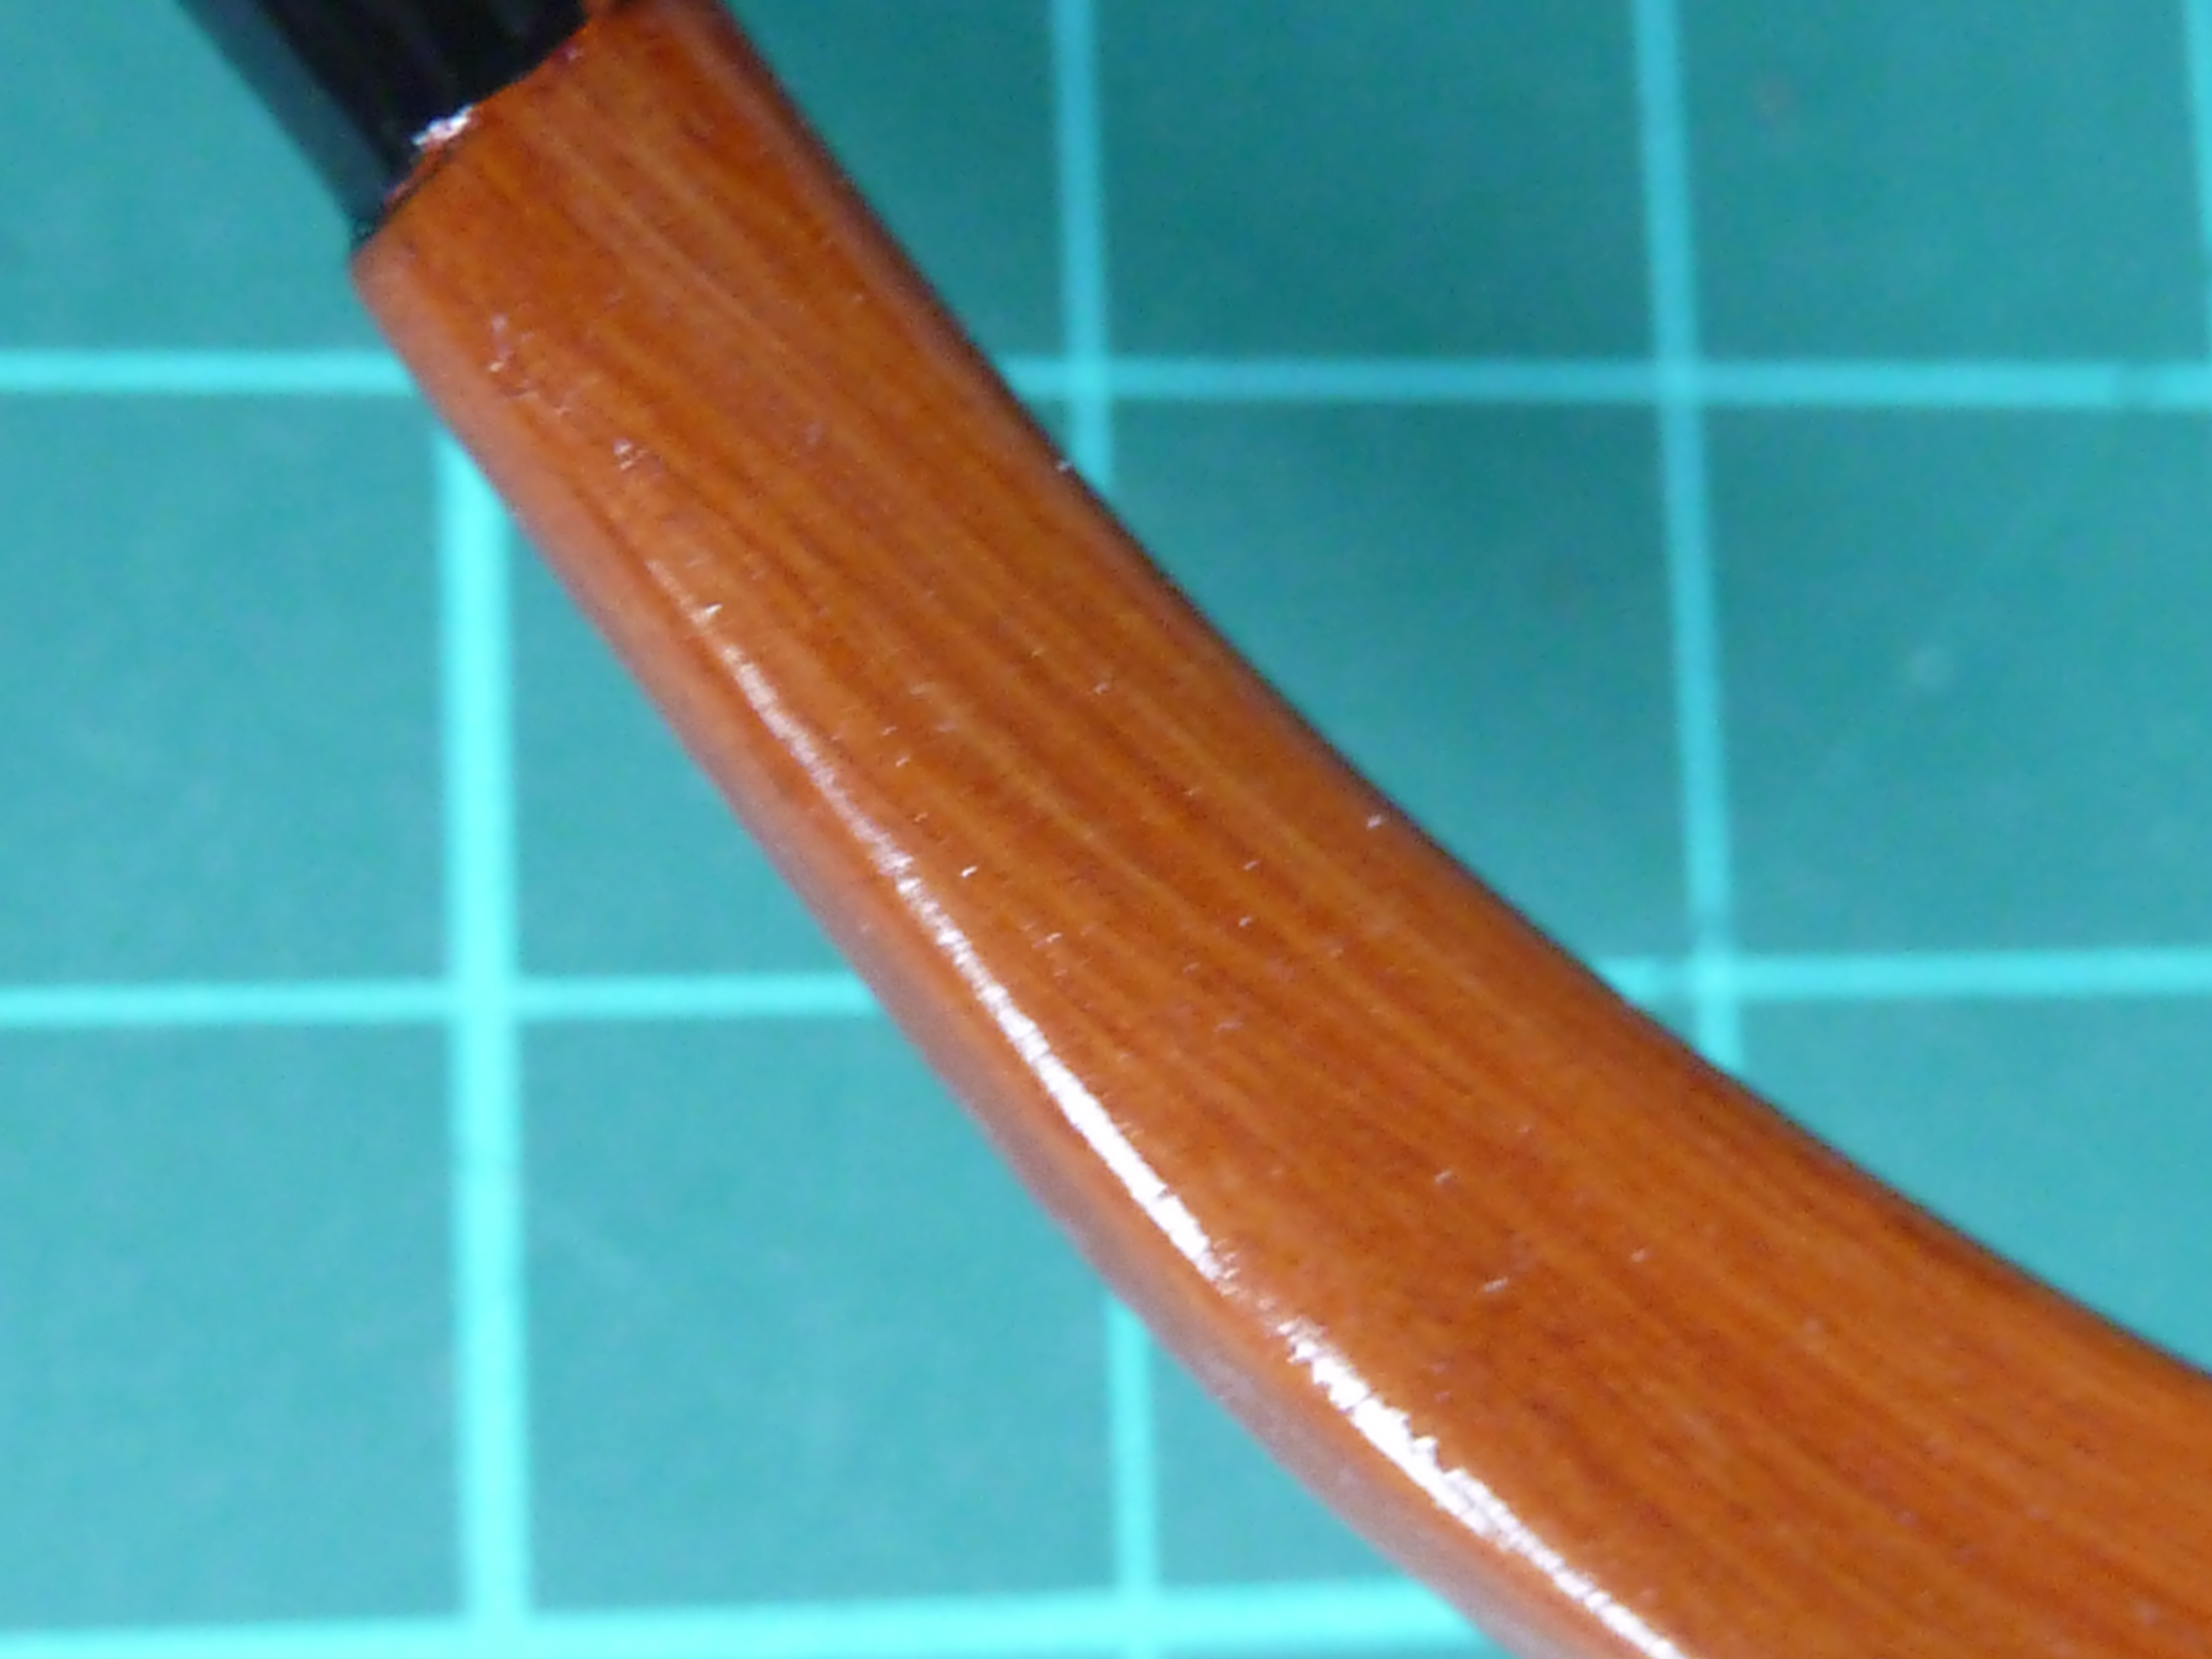

Once the oils had had a few days on the radiator to dry I painted the metal work gloss black, then finished the whole affair with yacht varnish.
The glossy look is a bit bold at the moment, but it’ll soften with time.
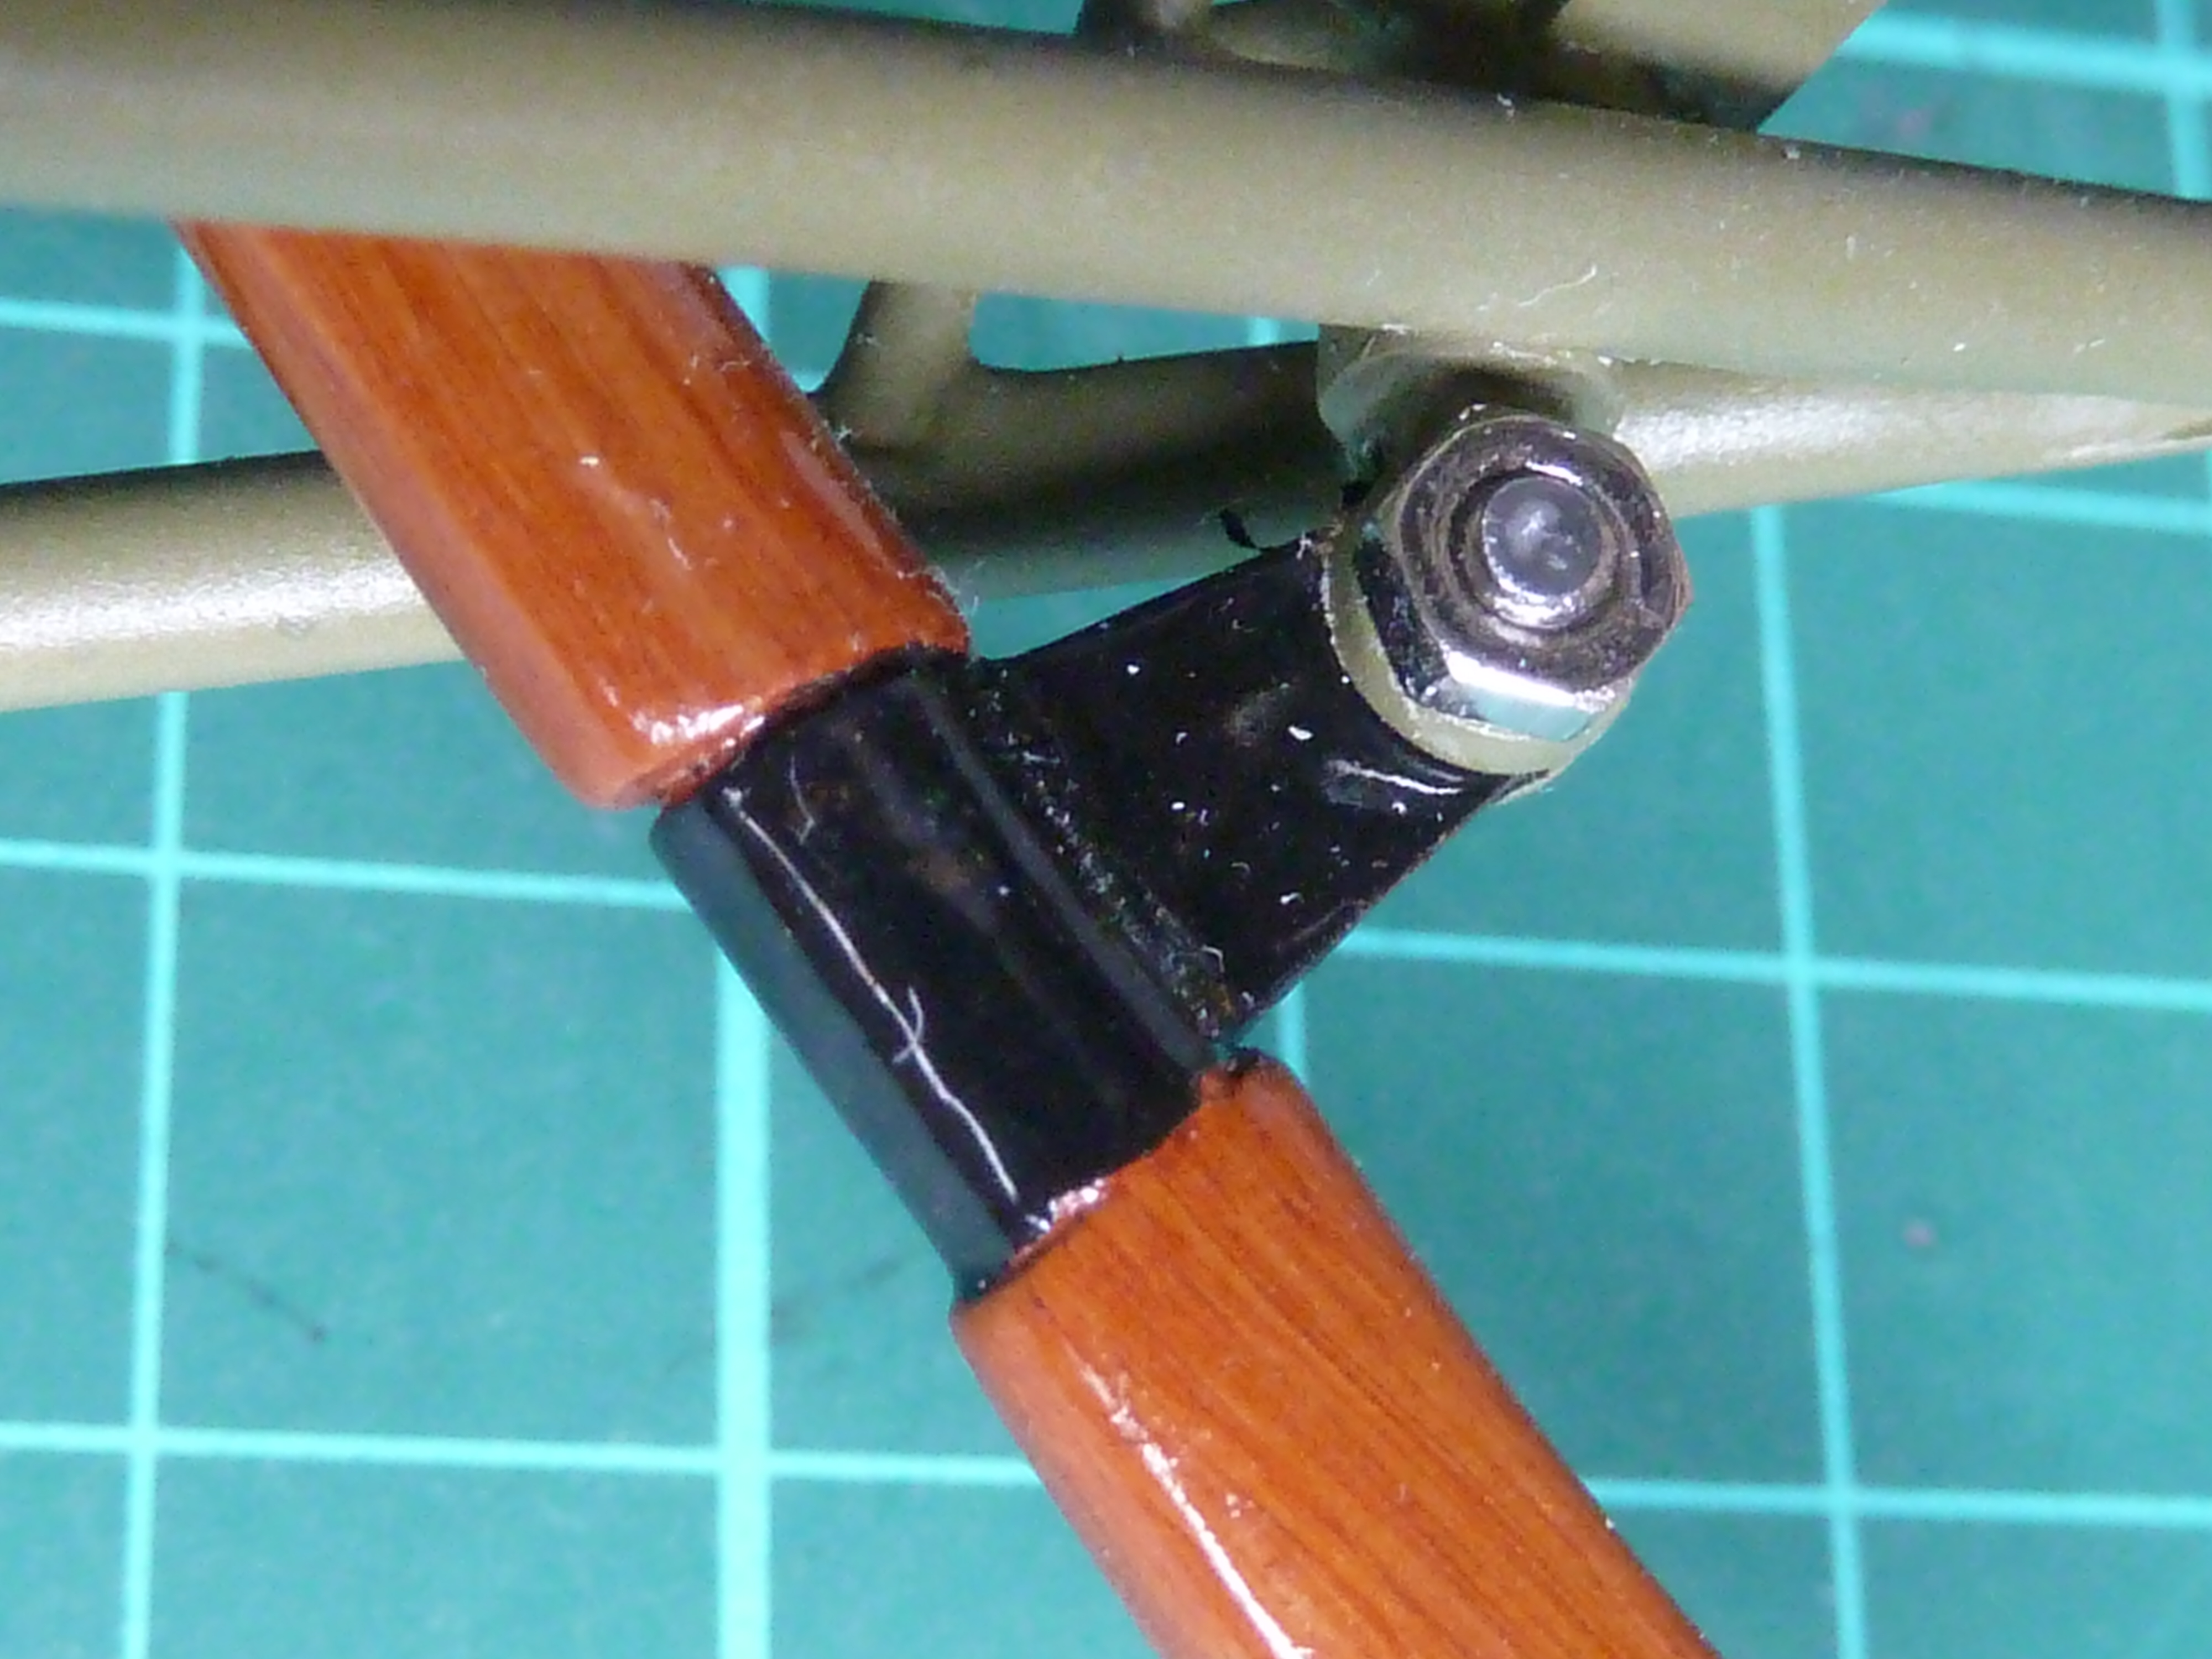
The finished skid was then installed in the fuselage frame and the bungee cords attached at the top.

I’m a bit annoyed that I fixed the bungees with a half twist in them, but I’m concerned that I barely have enough elastic left to do the undercarriage so I’ll leave them for now. If there’s enough spare after I’ve done that, I’ll have a look at correcting the tailskid. The bungees are actually quite stiff at this scale. Trying to deflect the skid against them had me concerned that it might break.
That was it for the tailskid though.

I subsequently learnt that the real aircraft had a small metal plate attached at the contact point, though this quickly wore out apparently, so I’ll have a look at fashioning something to go on there. I’ll do that later though as I suspect it would quickly get knocked off during handling if I put it on now.

You are my source for inspiration when I get into trouble…
LikeLike
I’m not sure about that. Does that include with the other half and the Police?
LikeLike
It looks so realistic! It’s amazing how you manage to do that!
LikeLike
If you make models just try it. It’s just knowing what to do. The ‘how’ is actually quite easy.
The initial look is a bit harsh, but the oil paints bleed a bit before they dry. So what looks harsh naturally becomes softer and natural.
LikeLike