
It’s past time for another post about the Chris Craft build. This activity was always intended as one to learn the new techniques required for marine models on. Because of that, it is effectively pacing the Miss Severn build, and only getting attention when I need to practise or prototype something for that primary project.
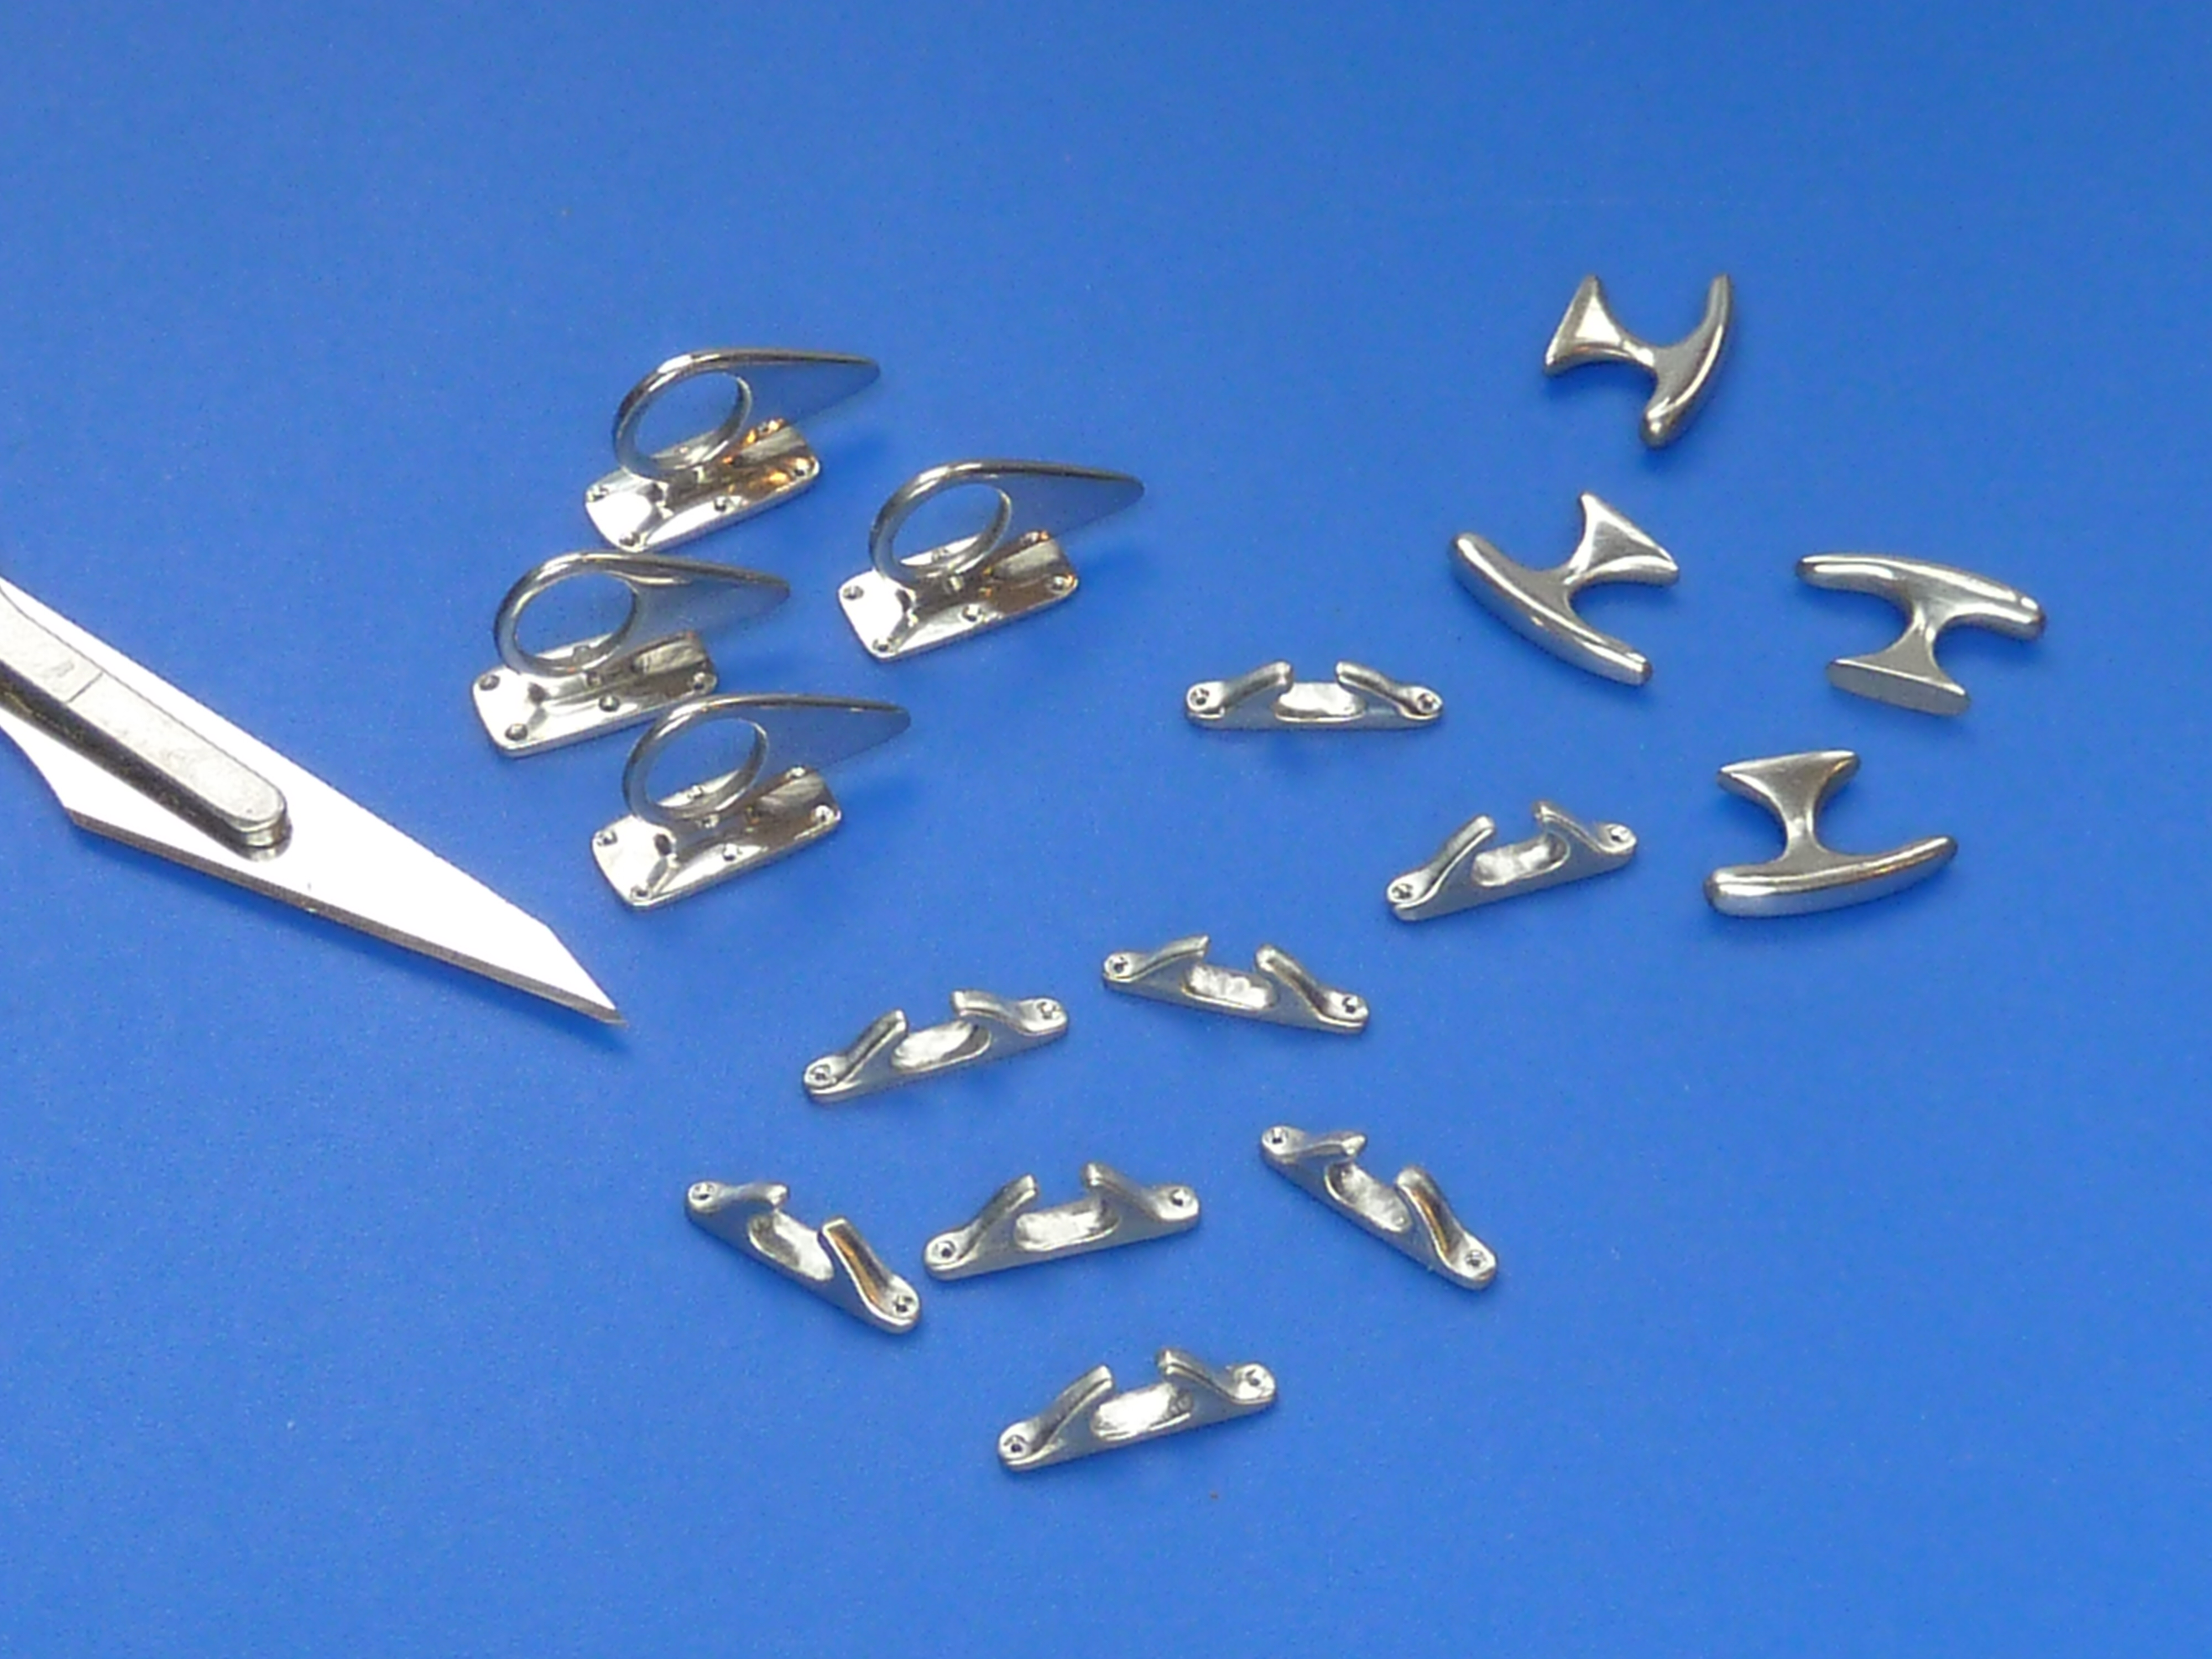
The most recent activity has been around the deck fittings. Dumas insist on having them plated before they have been polished, so even though they are chromed the surface is very granular whereas it should be highly polished. Those that come with the Miss Severn kit are the same. Having tried to resurrect a number of them, I’ve come to the conclusion that it actually easier to make my own from scratch.
I’ve alread written about casting the bow fairlead and light in an earlier post. The fairlead is still awaiting plating, but I have got around to plating the bow light casting and fitting the lenses. Unlike the Miss Severn bow light, this one one isn’t functional but the lenses were made in exactly the same way. CAD model – 3D print – RTV mould – cast clear resin.
No ‘Chris Craft’ flag yet. I’m undecided on whether to use the kit’s or not. It isn’t very convincing, but I’m not sure I can do better.

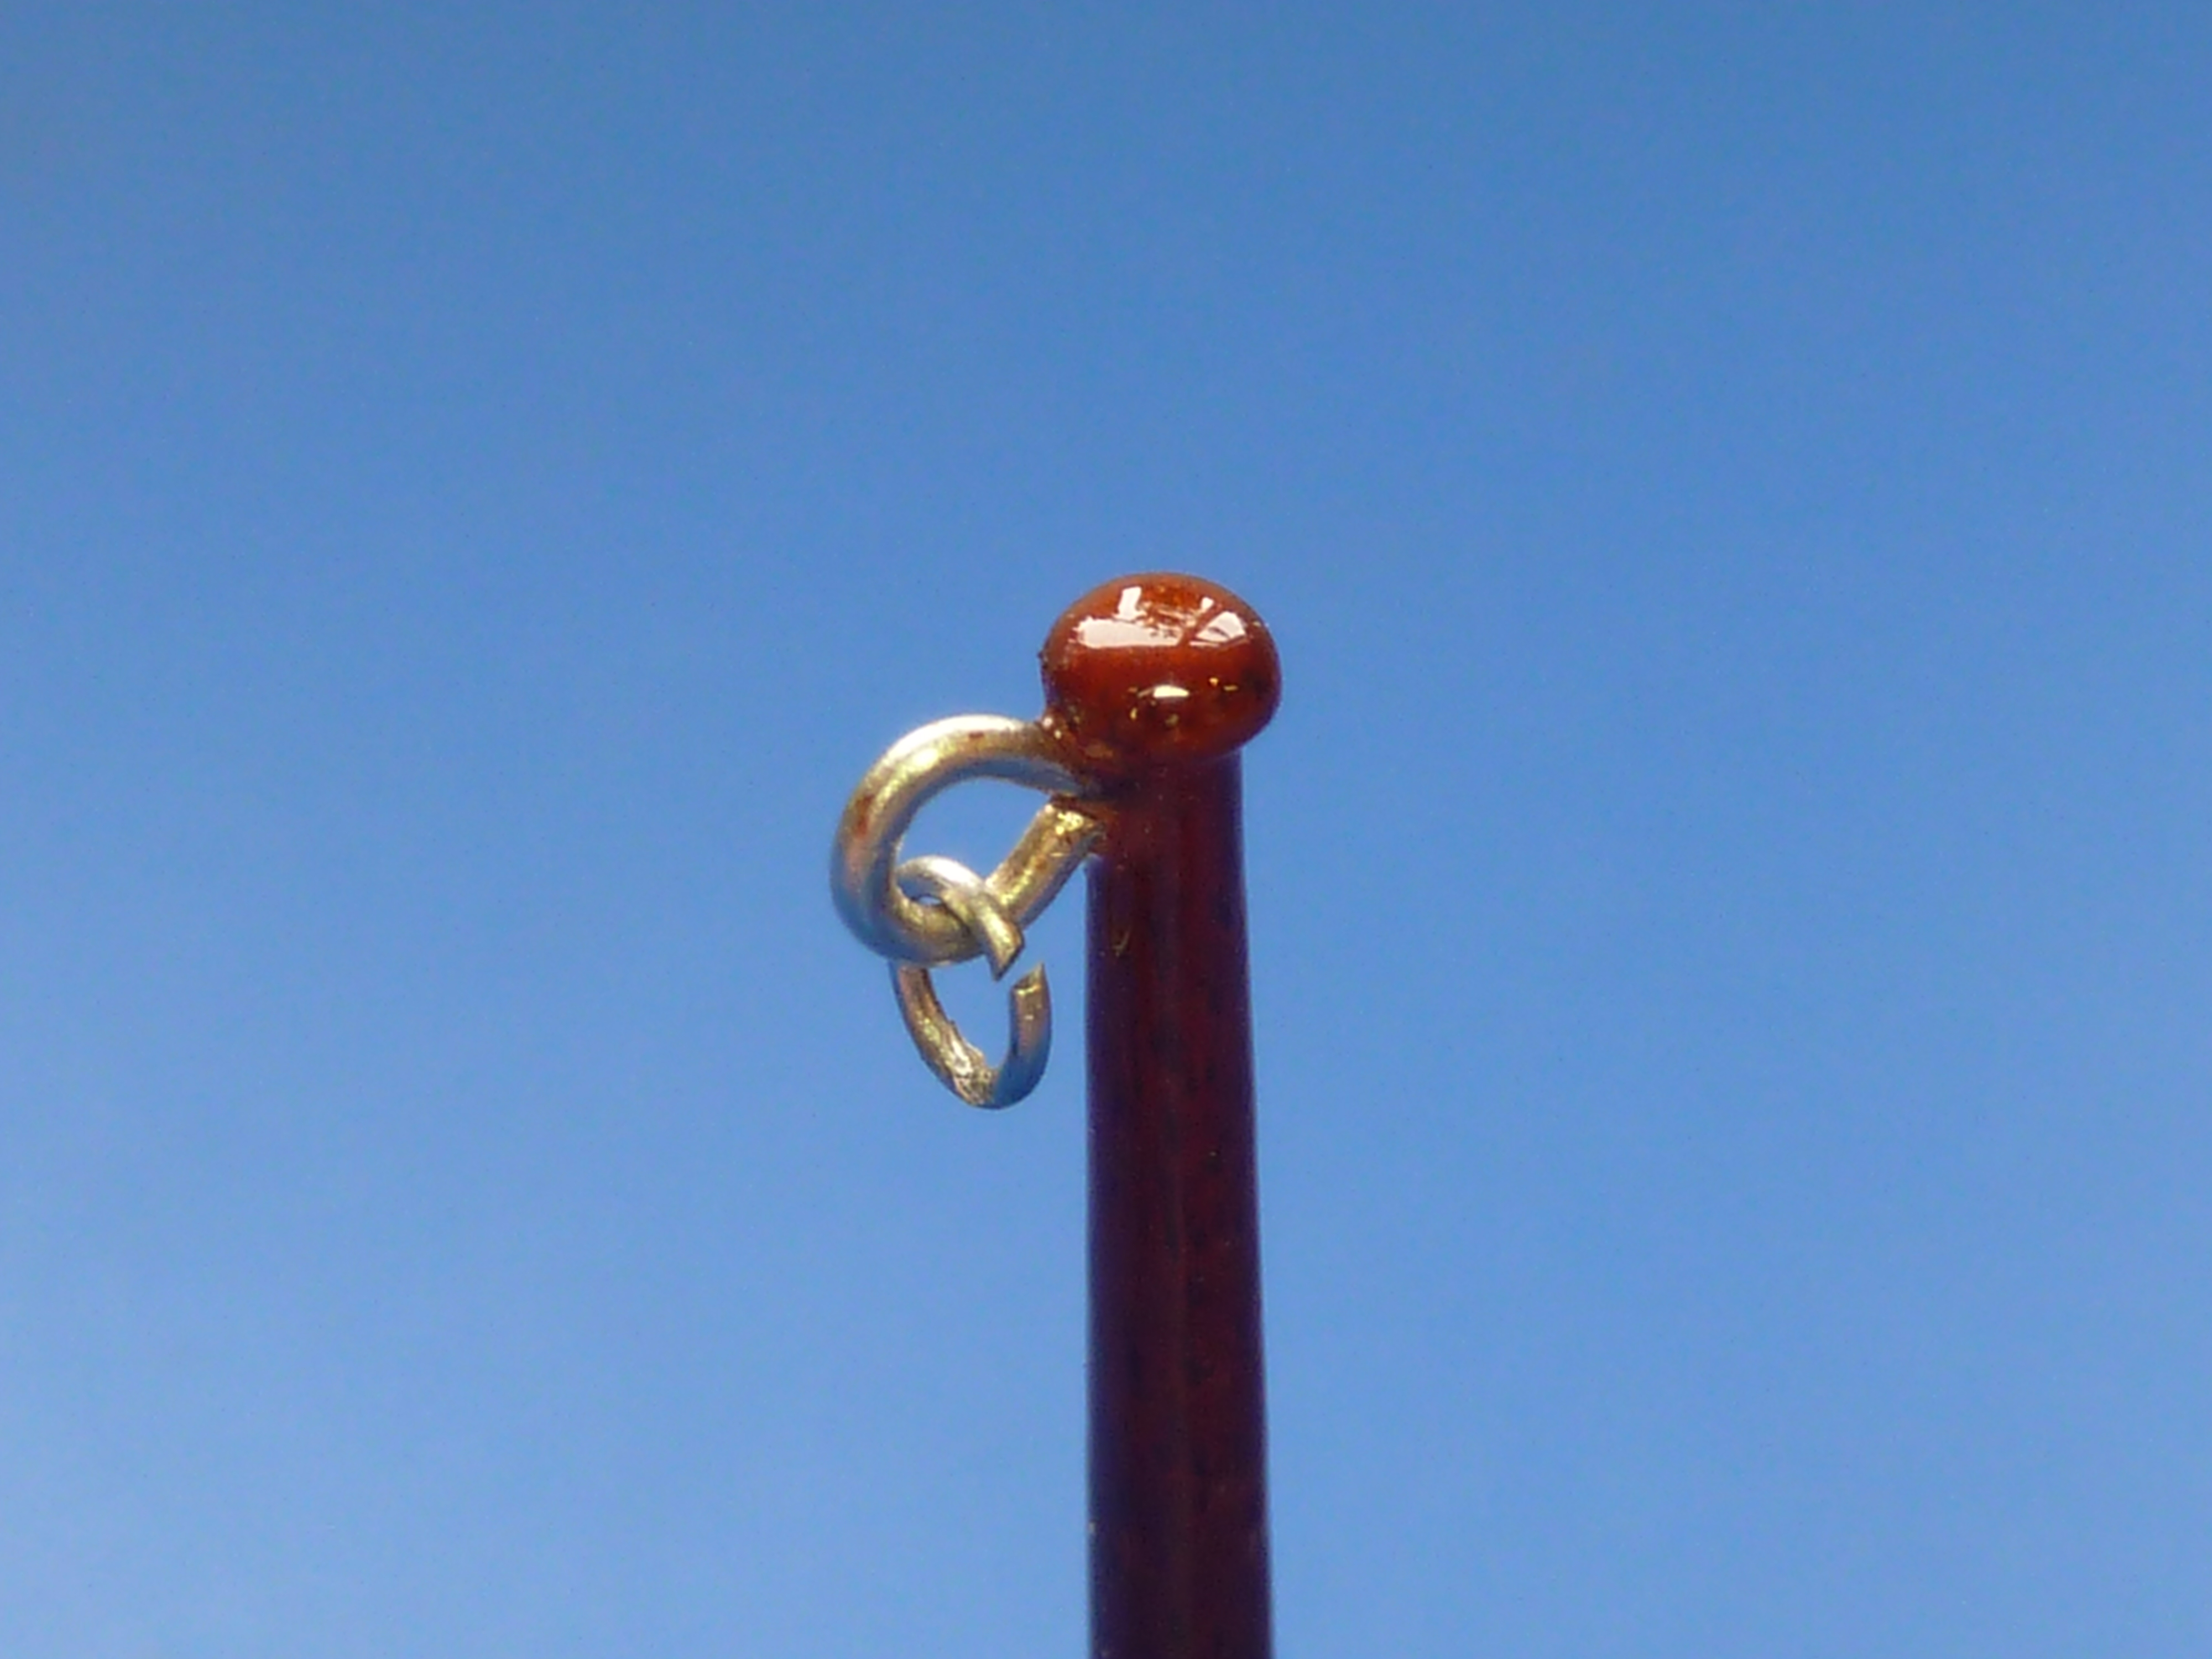
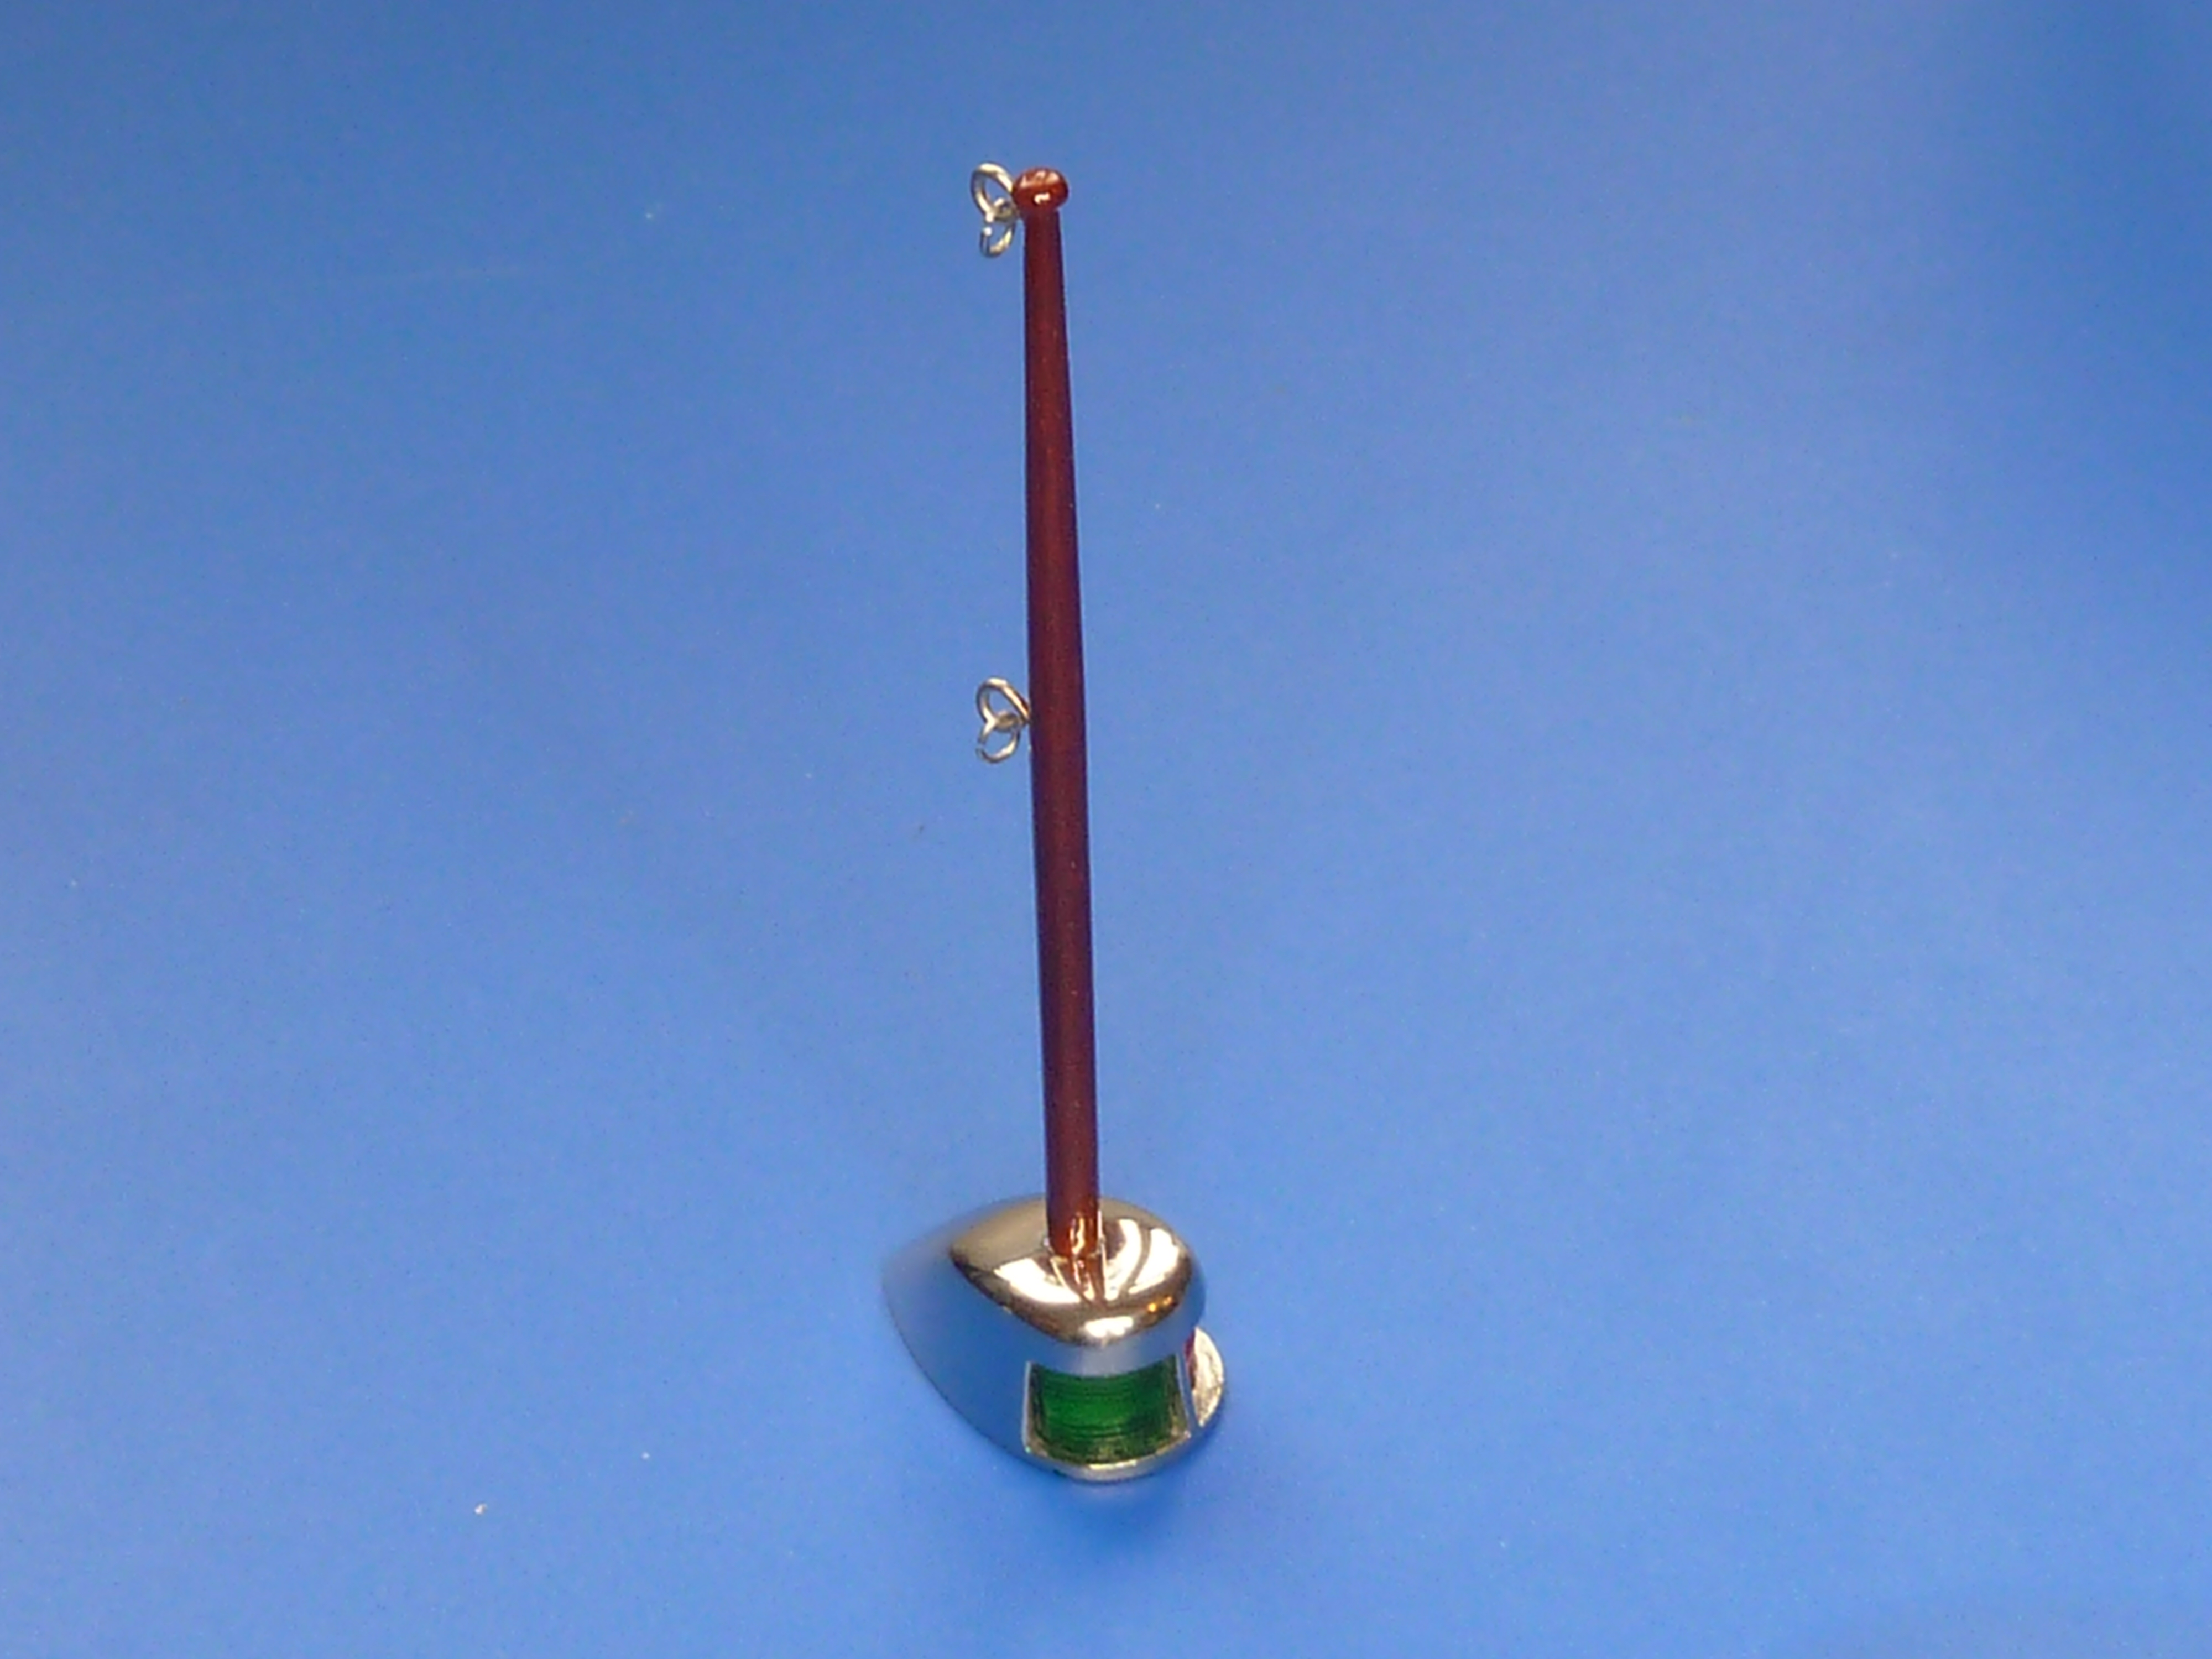
The rear flagstaff and mounting base have also been completed in the same way. As well as recasting the mounting base, I also drilled out the reaward facing holes, as I think this functions as an engine bay vent too.

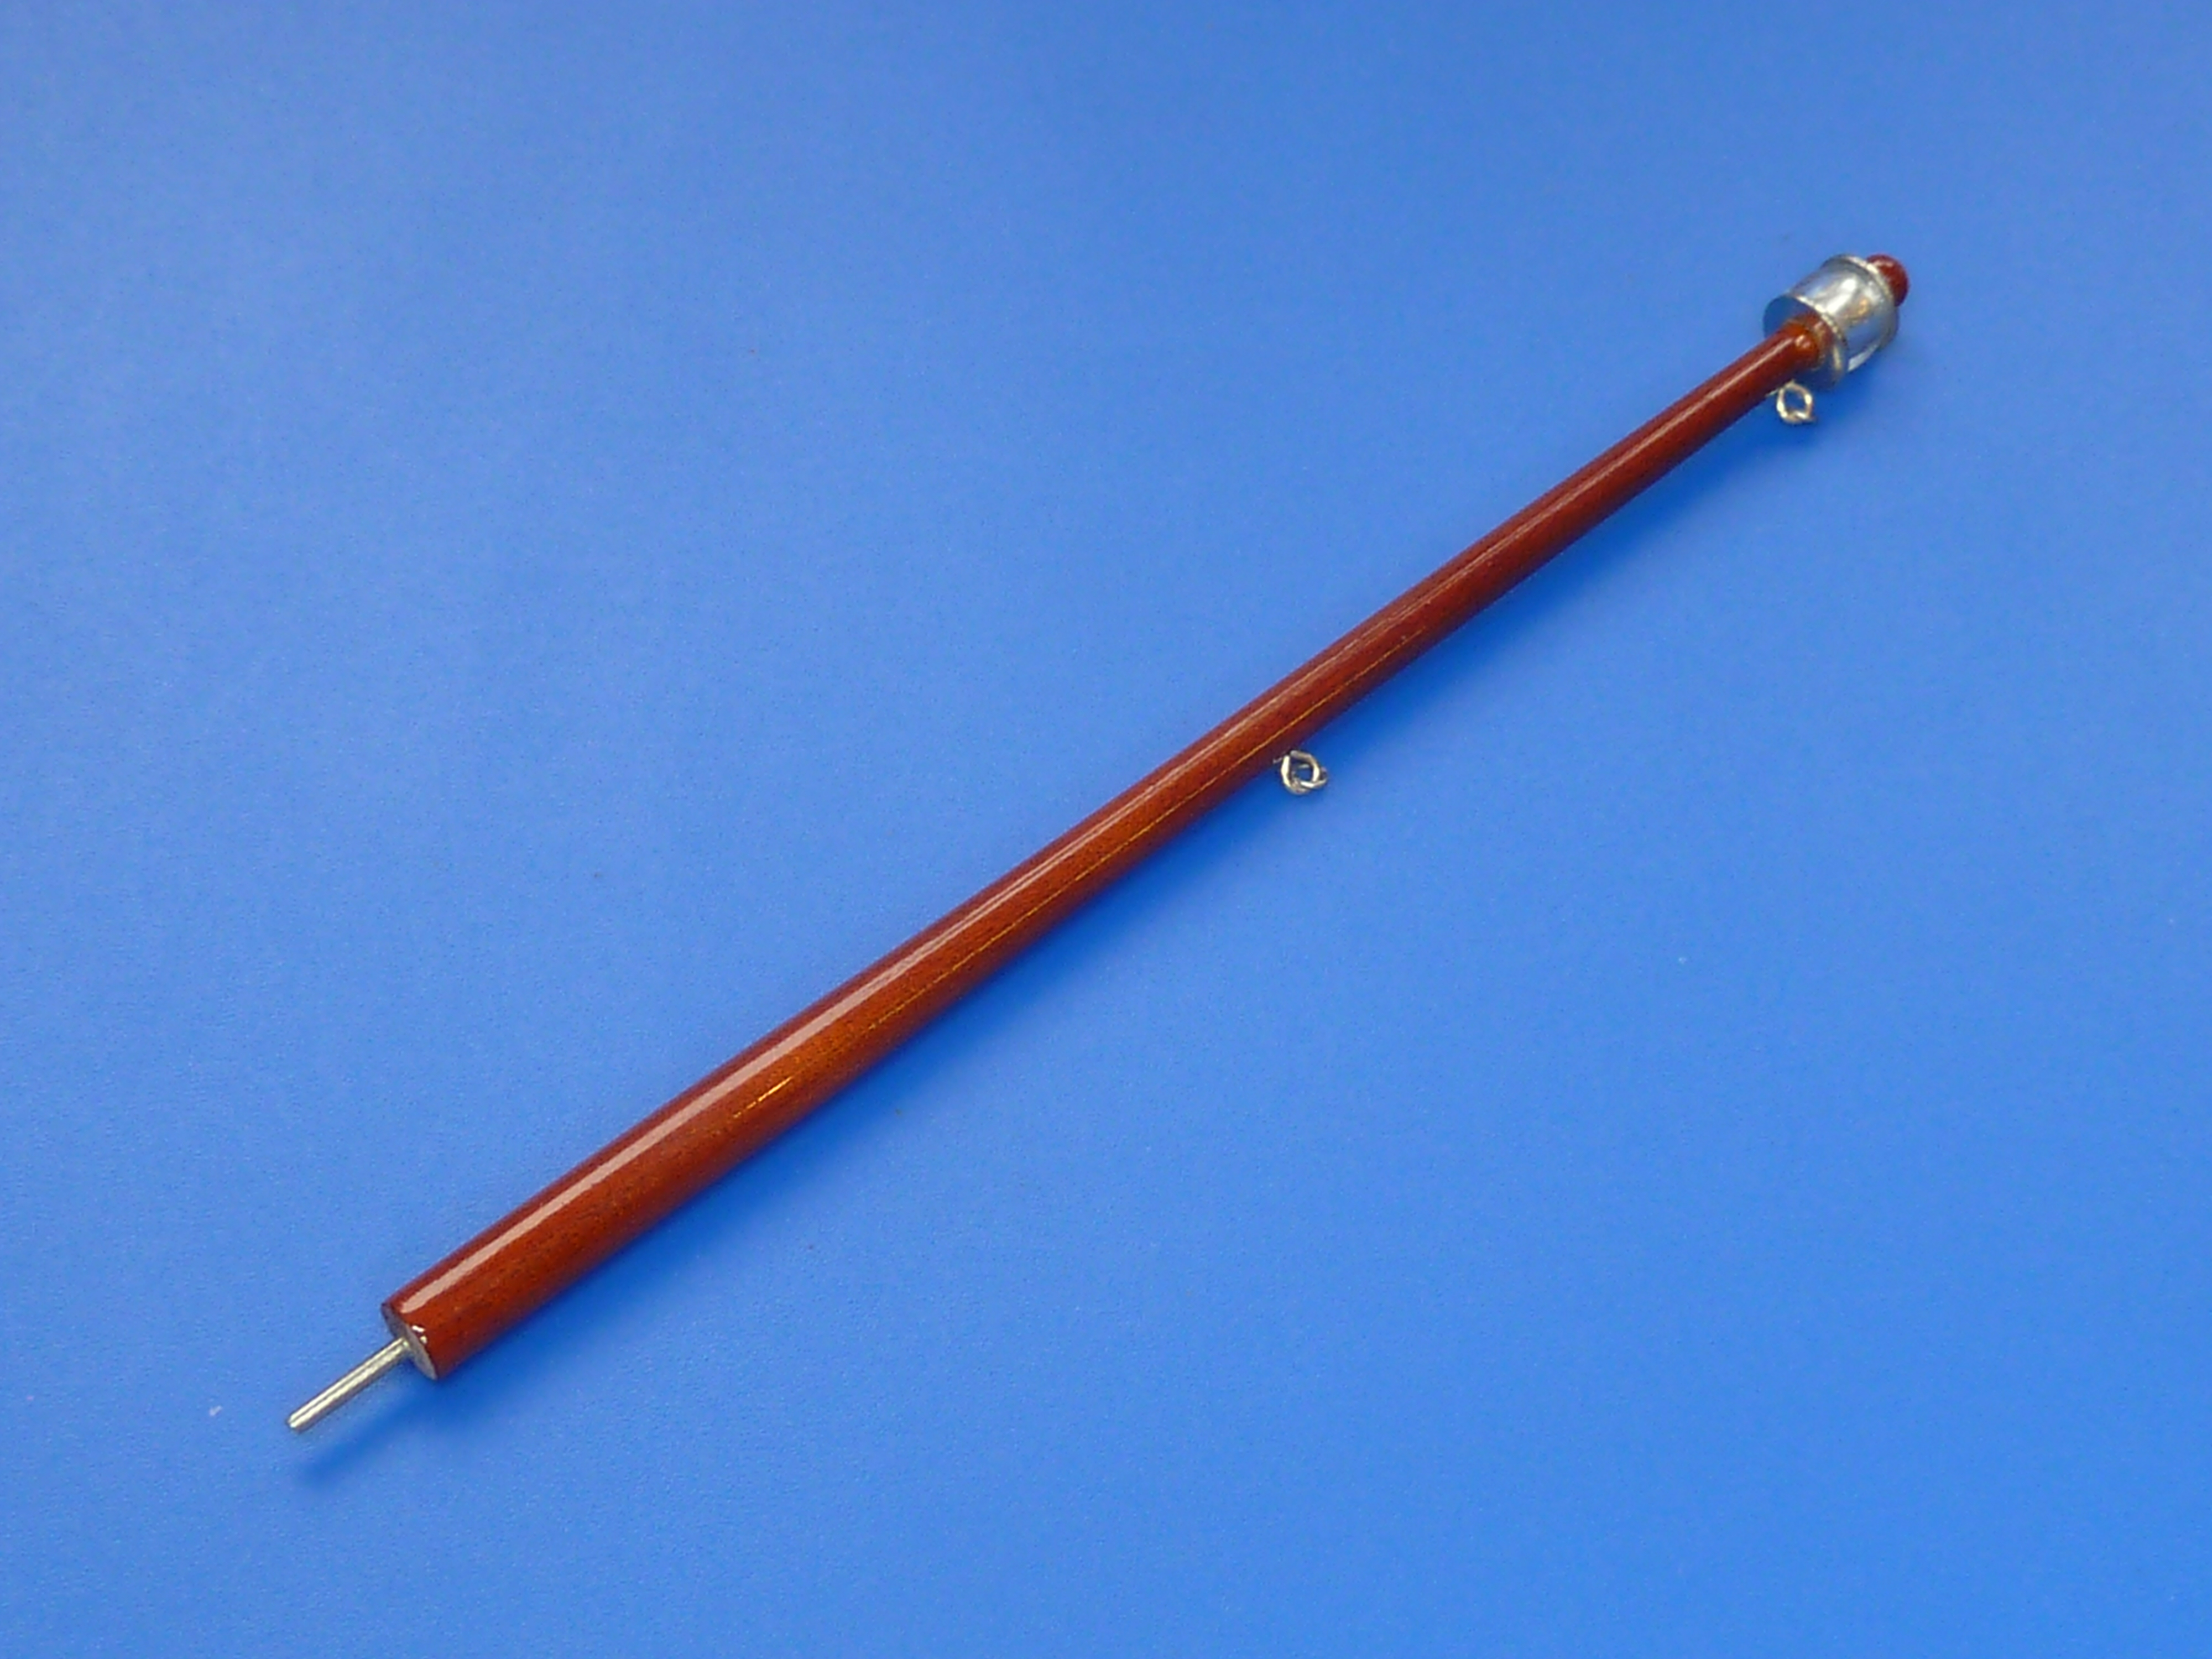


The rear flagstaff base is fitted to the engine cover by a 1mm brass peg glued into the base.
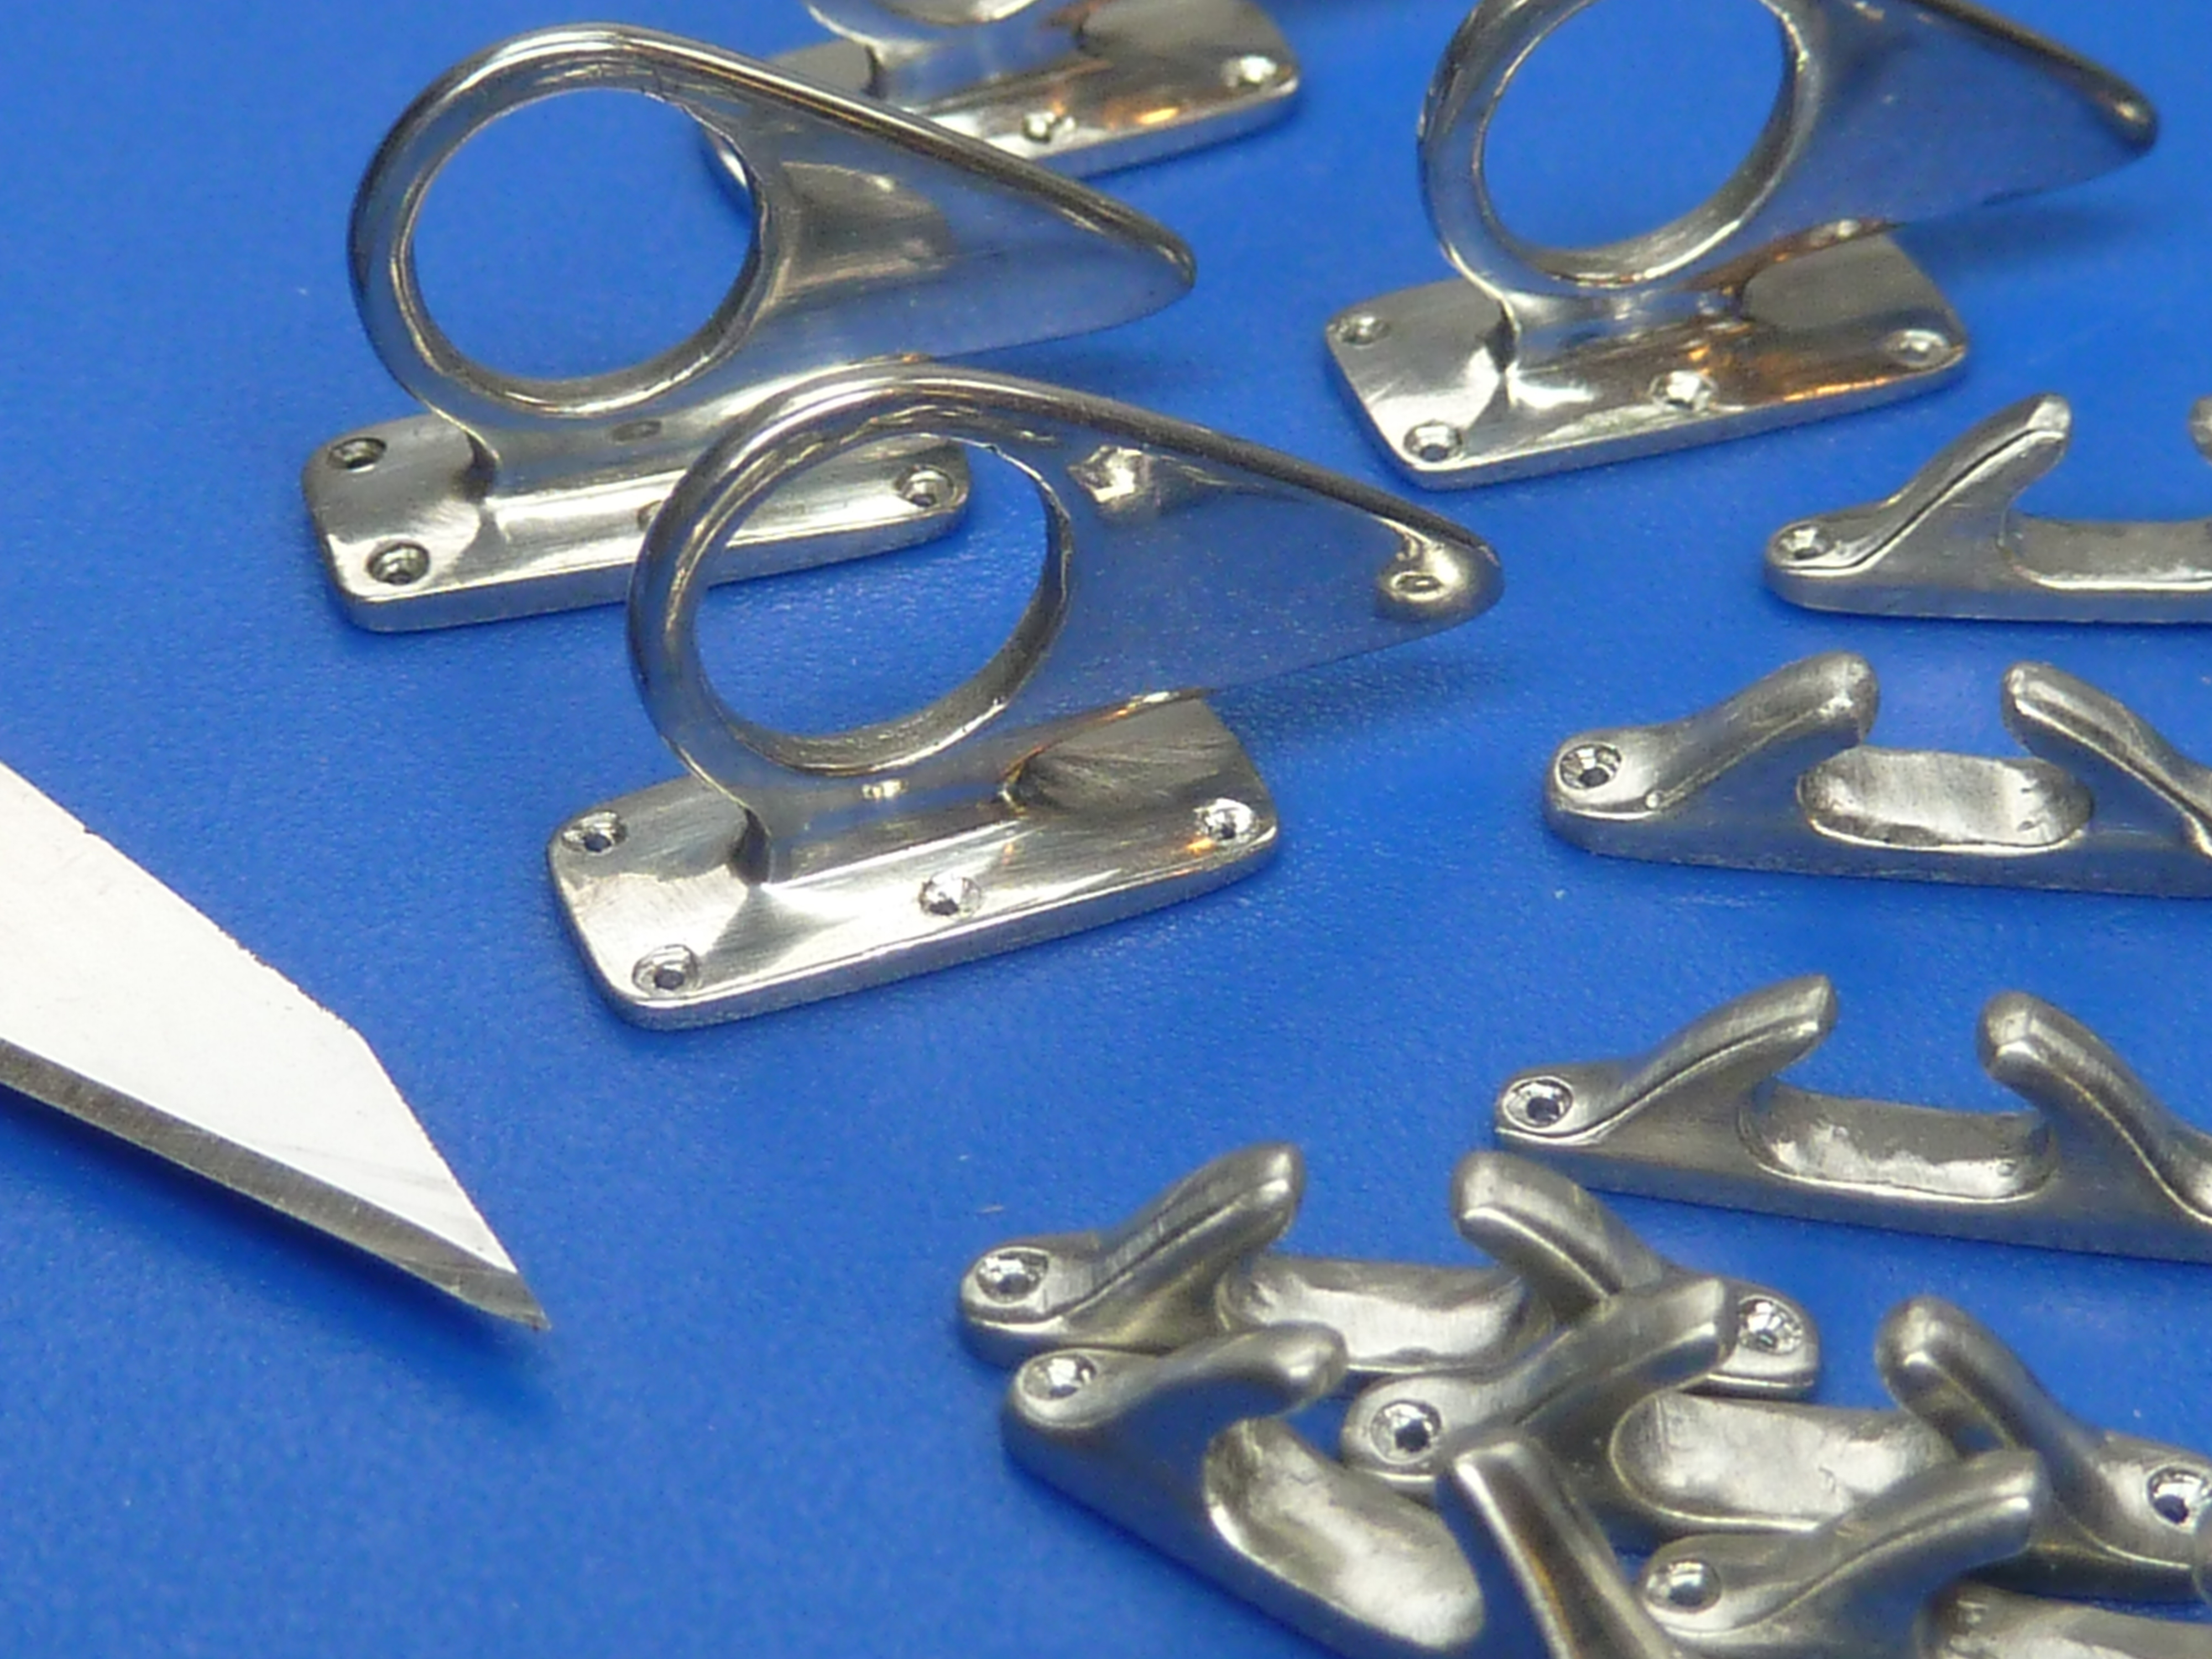
Other items to come in for attention recently are the lifting eyes. These have been made, polished, but not yet plated. As mentioned before I did try modifying the kit’s items but gave it best in the end, not least because I found they were subtly the wrong shape. The photo below shows the various stages from wooden mould, through rough casting, to finished and polished fitting awaiting plating. The half improved kit item is behind for reference.


The next item on the list is the horn. This is more complex and beyond both my carving capabilities and that of my 3D printer.

The kit’s horn is shown above. Some real examples are shown below.


My CAD model of the horn. The trumpet is based on a simple 1/X curve for those interested. The 1:8 model is about 30mm (1 1/4″) long in real life.

As my printer isn’t good enough to handle an object like this so I exported the design as an .STL file and sent it off to some professional guys to get it printed for me. I did two versions, not being sure which would be the best method to adopt for casting. One is a complete assembly and one in three parts.
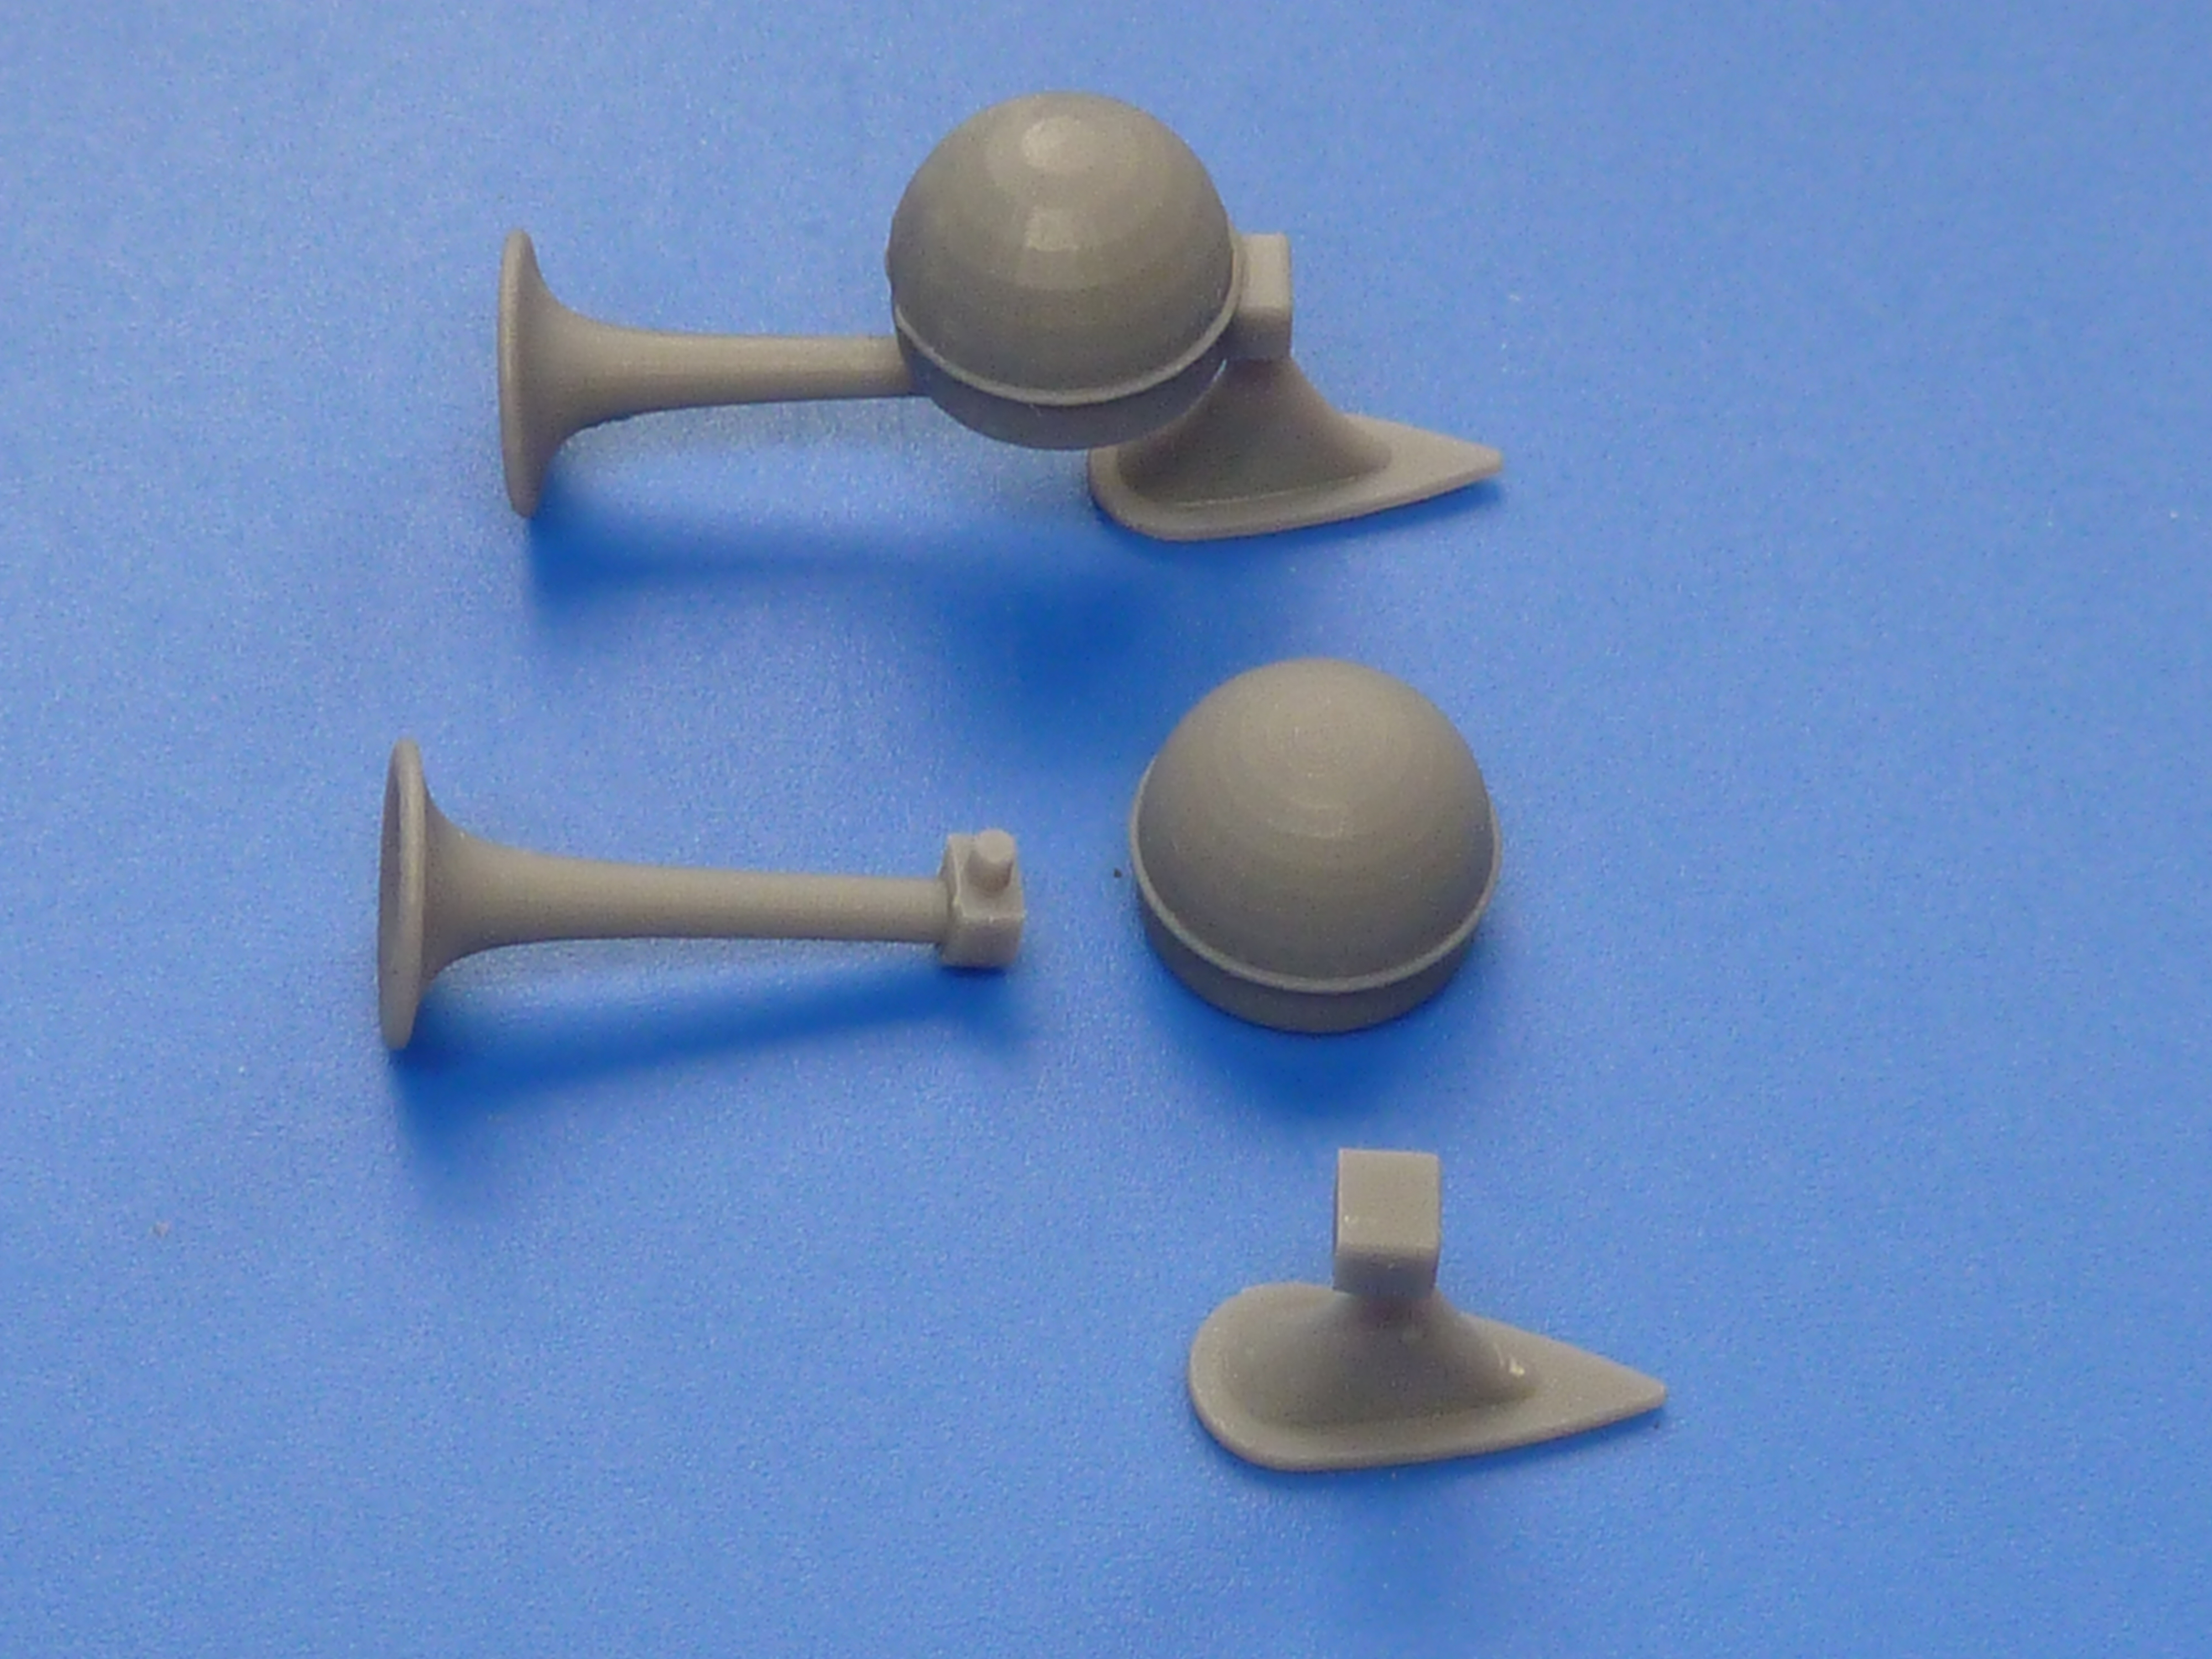
The separate items are being used to make moulds as I type. The assembled model is awaiting a second print as the first had a flaw in the rim of the dome. You can see the problem below.

Hence, I’m awaiting new parts to continue…
The process of getting 3D parts professionally printed is something I want to get sorted and understood well. I’m intending to use the same idea to produce a scratch built engine for the Miss Severn model, and a few others I have in mind for the future.

Just the best, buddy!
LikeLike
Wow again. Have you posted your casting techniques yet? Metal, sources, heating, pouring? It’s really clean and impressive. Your postsd are a balm to us all these difficult days–Thanks!
LikeLike
Yeah, I have. Back in Chris Chris Craft No.4.
I’ve learned a lot since then though. One of the key things being how important the dusting with French chalk is to ensure the metal flows everywhere you want. I’ve also increased the gas escape routes in my moulds.
Most of my casting materials come from Tiranti.
https://tiranti.co.uk/product-category/casting/white-metal-tin-alloys/
LikeLike
Ah Tiranti! What a great place. I have visited when in London from the US last summer, and in year’s past. Very fond of that place! Thanks.
LikeLike
You’re ahead of me then. I’m strictly mail order.
On the subject of casting temps, all I can say is don’t go too hot. If the surface of the liquid is going yellow it’s more than you need.
I tend to let it just melt, then give it a bit more for luck! I did invest in an infrared temp gun, but have learned that they don’t do well on mirrors…
I also make sure that I scrape the surface clean on the melt before pouring to remove slag. In fact making sure the melt is clear of inclusions is important I think. Handily they seem to readily stick together if you sweep an aluminium spatula through the liquid.
LikeLike
Considering the size of these parts, the detail is just incredible. It’s going to look stunning when finished.
LikeLiked by 1 person
Your skills are an inspiration! I’ve been building my own Chris Craft Barrel Back over the last year and it’s nearing completion. Must admit I’ve incorporated a number of your ideas into my build. Examples are the cockpit dashboard, seats and rear hatch assembly. With retirement boat building has become a major hobby for me. I enjoy your blog and am inspired by your creativity and problem solving skills. Thank you!
LikeLiked by 1 person
It’s really nice to here that this blog inspires them to have a go. It’s not something I expected from it at all when I started it.
LikeLike
Fascinating to be here and follow your trajectory on the Barrelback.
Like you, I am about a year into mine and have encountered, and had to deal with, many of the kit’s ‘quirks’.
I should preface my comments by complimenting you on your skills, resourcefulness, attention to detail and ingenuity, etc.
The results of your efforts speak volumes.
My reaction upon receiving the kit were mixed. Clearly the fixture castings were disappointing. Now I’m close to the point where they must be dealt with.
There was too much plastic which was something I eventually accepted since it would be covered over. With the exception of the deck accent inserts. These I replaced with linden deck strips left over from my Mayflower build last year.
I also bought a strip of Wenge which was bandsawed into strips for dark sheerline and deck accents.
I also noted that the kit hatch extended back to the transom which was not an original feature. Now I have two hatches: the main engine hatch in two sections which open up and out on miniature piano hinges I made from brass tubing and strip. I would have had these chrome plated but live in an area bereft of sources where this could be done. I am using a chrome film applied in a similar fashion to gold leaf.
The other hatch, behind, is necessary to provide access to the rudder servo compartment.
Another tweak was to install a two circuit LED lighting system. One for the dash instruments, the other for running/navigation lights. I found a two circuit connector which attaches to a single switch channel on the RX. Simply toggling the switch results in a selection of lighting effects;
In terms of finishing, I have used the West System epoxy/2 oz glass method, always laying the glass on a bias for better adhesion to compound curvature and chines. Test results were satisfactory with glass, three coats of resin followed by five or six coats of automotive clear coat lacquer wet and dried down to a 2000 grit with a final rubbing compound and wax application.
Sorry, I had intended to be brief.
Best regards.
LikeLiked by 1 person
On the issue of chroming:
That was a problem I was facing. Getting things like that done is awkward for me as I’m housebound and unable to use the phone. Also many of the parts I want plating are tiny, such as 0.6mm brass pins.
Hence, I sent off for a bright nickel plating kit which has given me excellent results.
I covered it briefly in one of my posts earlier.
The finish is as good as your preparation allows. I use the Gateros kit mentioned in the post, but I’m sure others must be available.
I have added a proper regulated power supply which I have found pretty essential to get good results. I’ve also taken to putting a copper strike plating on anything except brass as it dramatically improves the adhesion.
LikeLike
Starting to build the barrel back Christ Craft from Dumas and looking for additional information, I found you and I must say it is a great pleasure! I first wanted to close the box and say it’s not for me, considering the skill you put and the amazing result, but after a while, as I paid it, I said let’s go. I reach the point where I mount the inside parts, seats, side panels, expecting to quickly start the planking which seems exciting (and a bit frightening…). I have a question: It will be a standing model w/o elec motor but I would like to find a model of 6/12 cylinders engine to put under the hatch. Do you have an idea where could I find something like that, not necessarily very accurate but at scale.
Once more all my congratulation for your wonderful work and I’m excited to see how will be the final result of your jewels, the Barrel Back and the Miss Severn!
Yves
LikeLike
I don’t know of anything immediately, especially of the 6 or 12 cyl kind. Everything seems to be V8s.
I’d Google 1:8 scale model engines because the boat model is nominally 1:8 scale. Try 1:10 scale too, as a lot of the radio control car/truck brigade work in that scale and you might get away with it.
Otherwise the only 1:8 scale engines I know of are specialist standalone kits or produced for use in Poacher model car kits. Neither are cheap options by any means.
LikeLike
Your modeling skills are way beyond mine. I have tried cleaning up the kit’s deck fittings and nickel plating them after removing the chrome plating and polishing them with mixed results. Yours are far better than what I have been able to achieve. And the windscreens pose a real challenge. I have achieved a decent looking hull and interior and hate to spoil the look with the kit’s metal fittings. I fear that casting new ones are way beyond my capabilities. Any chance that I could buy a set from you? Dick
LikeLike
I don’t think I can. When I get around to it, I will make the windscreens from brass sheet, rod and C channel. Then plate them. I won’t cast them. So they will be one offs fitted to the curve of my deck. I don’t know if it’s just the way my deck has come out, but the curve on the kits windscreens is nothing like my deck.
Making them from brass won’t be a quick job either. There will be a lot filing to do because the bottom section needs to be quite thick.
I’m also focussed solely on Miss Severn at the moment. I really want to get that done and finished. It’s taken too long already.
LikeLike